A comet can look fast and friendly at the same time. In this easy drawing tutorial, you will build a cute comet head, add a flowing tail, and finish with sparkly stars. Take your time and keep your lines light as you go.
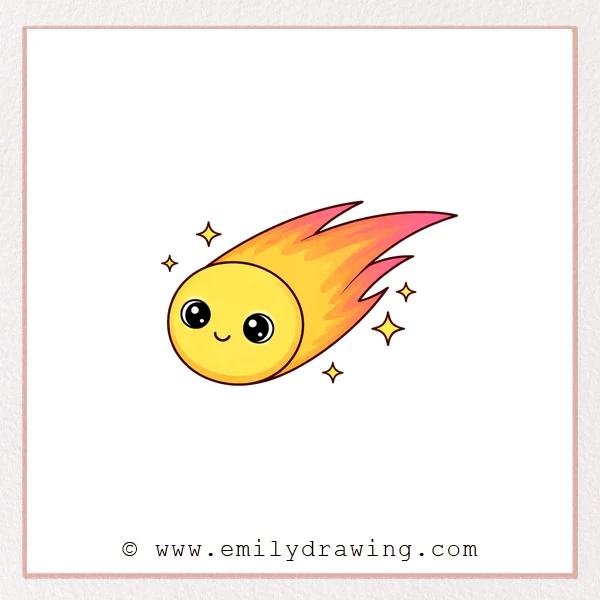
What You Will Need
- Pencil
- Eraser
- Black marker or pen (optional for final lines)
- Paper
- Colored pencils or markers (optional)
Here are my RECOMMENDED Art Supplies!
- Crayola Coloring Set (140 Pieces – Mega Value!)
- 24 Colored Crayon Set
- A4 Printer Paper
- Crayola Coloring Pencils
- HP Home Printer with Instant Ink!
Time needed:
25 minutes.
Step-by-Step Drawing Guide
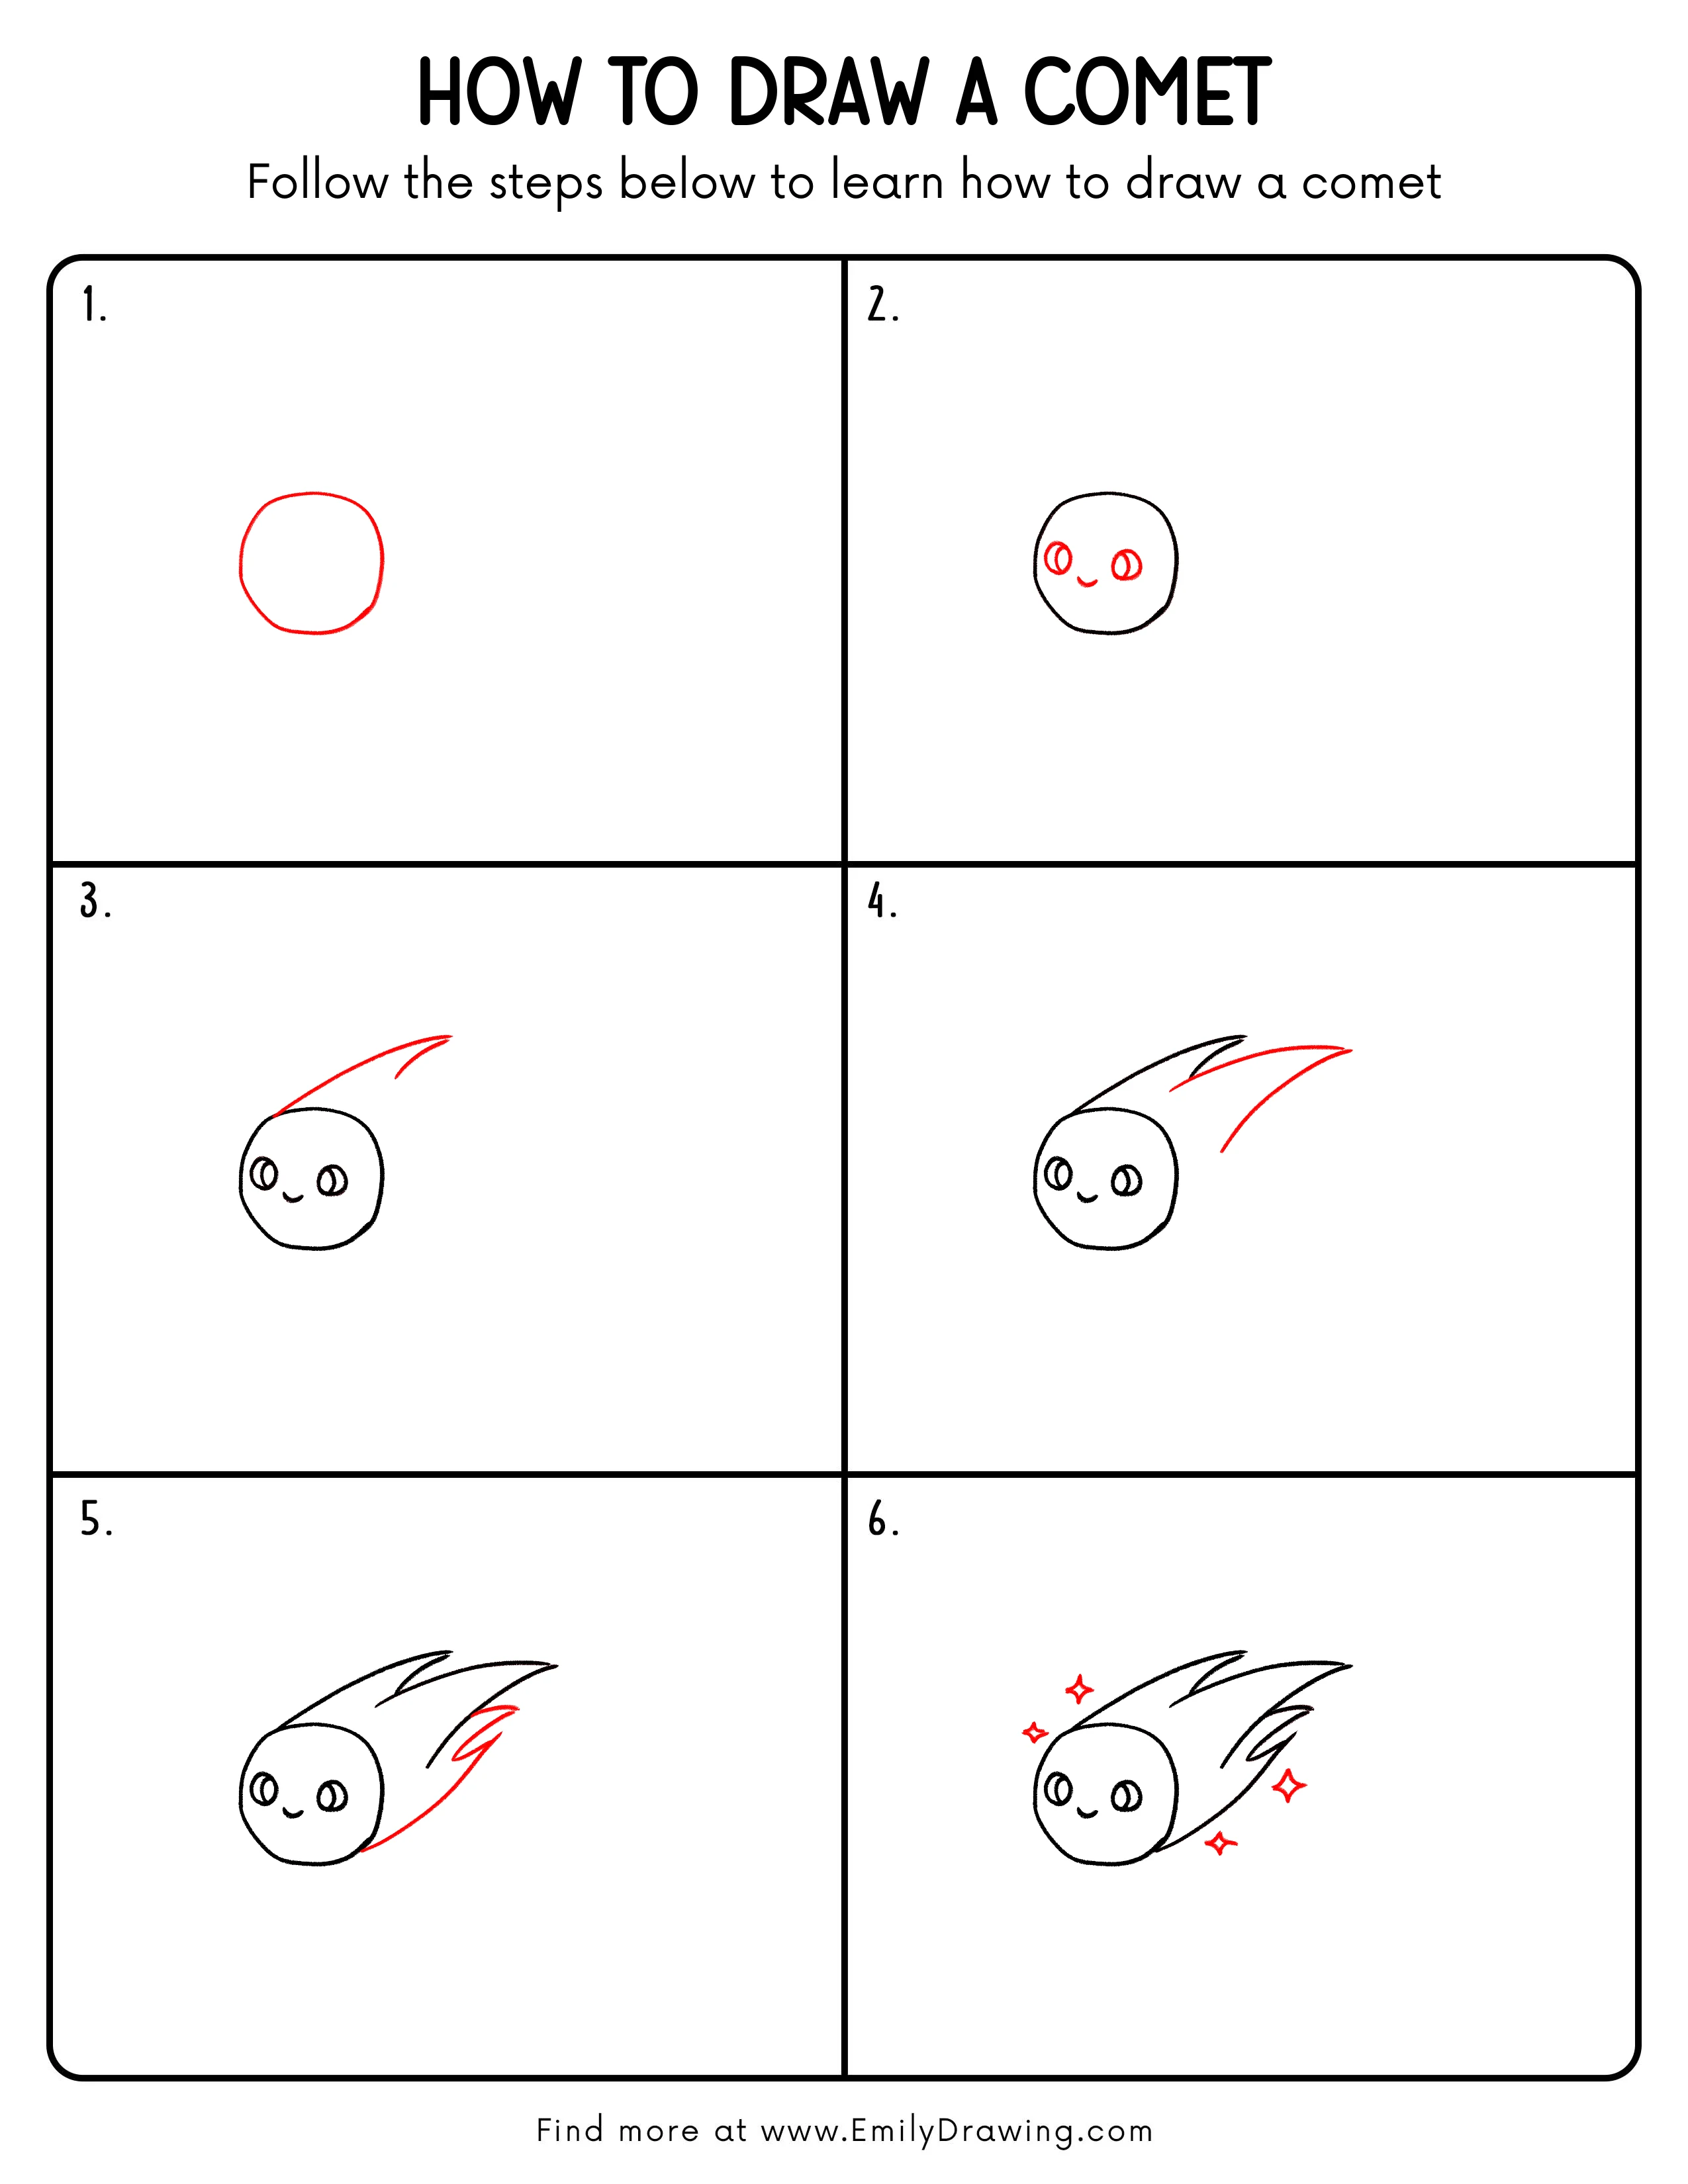
Step 1: Draw the Comet’s Main Circle
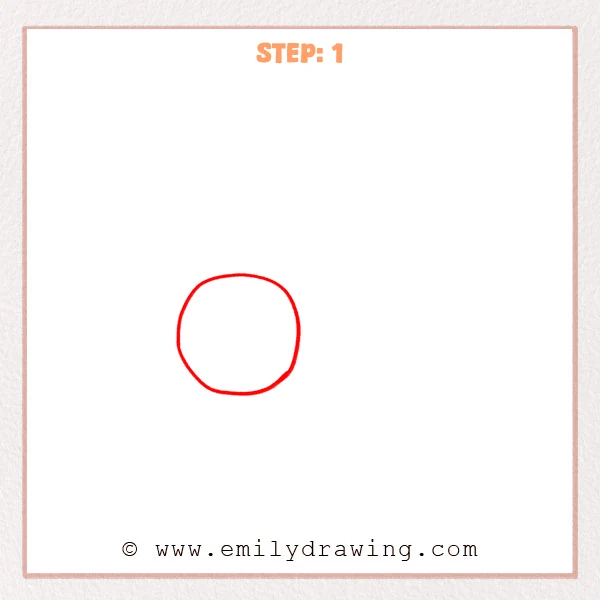
Start with a slightly uneven circle for the comet’s head. Keep the outline loose and smooth, not perfectly round. This soft shape helps your comet feel friendly.
Pro Tip: Draw lightly so you can refine the circle without heavy lines.
Step 2: Add a Cute Face
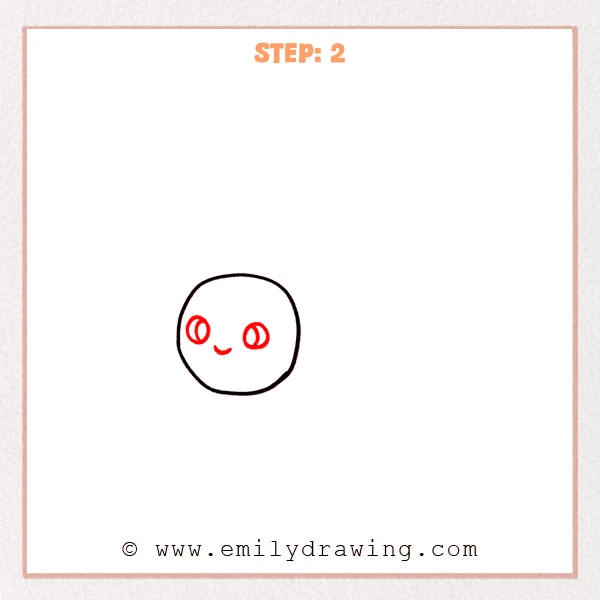
Add two oval eyes inside the circle, placed in the upper middle area. Then draw a small curved smile below and between the eyes. Keep the expression simple and cheerful.
Pro Tip: Match the eyes in size and height for a balanced, cute look.
Step 3: Draw the Comet’s Tail Curves
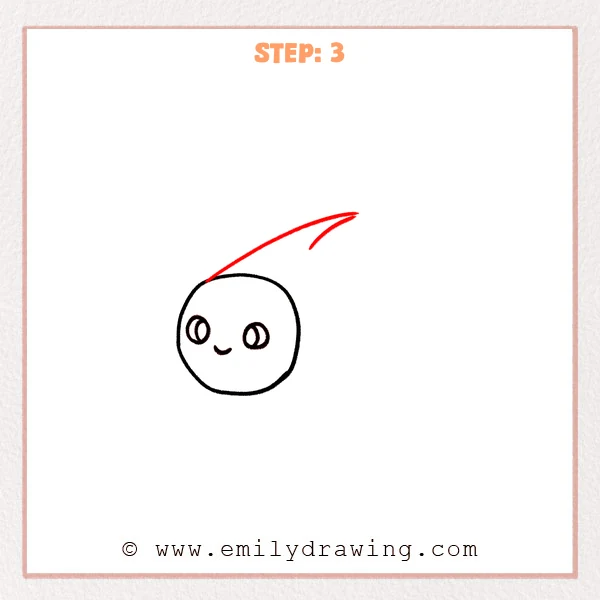
From the upper edge of the head, draw a long curved line sweeping up to the right. Add a shorter inner curve to suggest thickness and direction. Let the curves flow smoothly to show motion.
Pro Tip: Let the tail taper thinner as it goes outward to feel like speed.
Step 4: Thicken the Tail With a Second Flame Layer
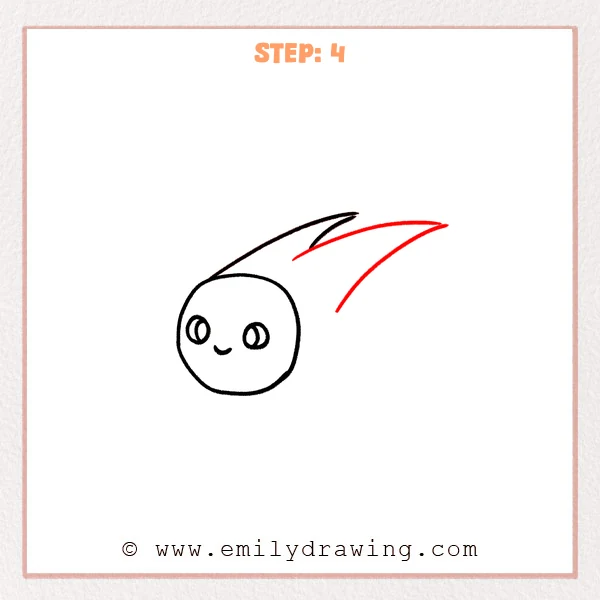
Draw another longer curve above the first tail, meeting at a sharp tip. Add a short separating curve between the two long curves. This creates a layered flame look in the tail.
Pro Tip: Start the two long curves close to the head, but not from the exact same point.
Step 5: Add the Lower Tail Edge and Flame Flicks
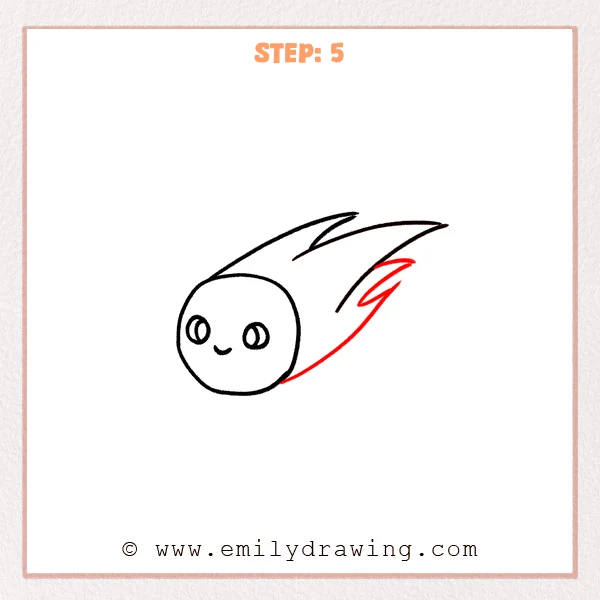
Draw a long curved line from the lower right side of the head to the tail tip, forming the tail’s bottom edge. Near the end, add a couple of small sharp flame curves. These little flicks make the tail feel energetic.
Pro Tip: Keep the bottom curve smooth so the flame tips look crisp.
Step 6: Add Sparkly Stars Around the Comet
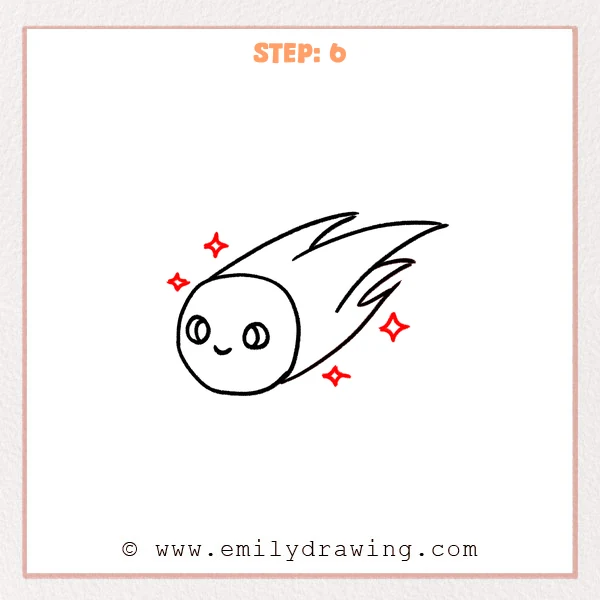
Draw a few small four-point stars around the comet using slightly curved lines. Change the sizes and place them near the head and tail. Spreading them out makes the scene feel like space.
Pro Tip: Stagger the stars instead of putting them in a straight line.
Step 7: Color in your drawing!
Fun Facts
- Comets are often called “dirty snowballs” because they contain ice, dust, and rock.
- When a comet gets close to the Sun, heat can create a glowing coma and a long tail.
- A comet’s tail points away from the Sun, pushed by solar wind.
Pin it now, Draw later!
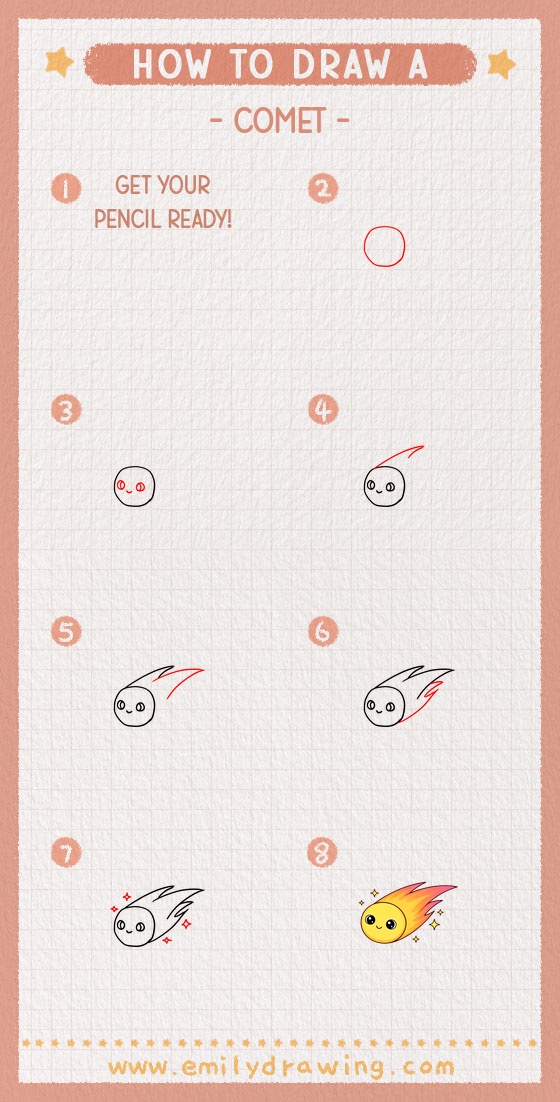
Trace your favorite lines with a pen if you want a cleaner finish. You can add color by making the tail brighter than the head, or by giving the stars a bold glow. Now you know how to draw a comet step by step—try drawing a whole sky full of them!
Get the FREE Printable Drawing Guide
FREE Download Printable Comet Drawing Tutorial
Frequently Asked Questions
1) How do I make my comet look faster?
Make the tail longer, thinner at the tip, and keep the curves smooth and sweeping.
2) What if my circle is not perfect?
That is fine—slightly uneven circles can look more lively and cute.
3) How can I add more details without clutter?
Add only a few extra stars or small flame flicks, and leave plenty of empty space.