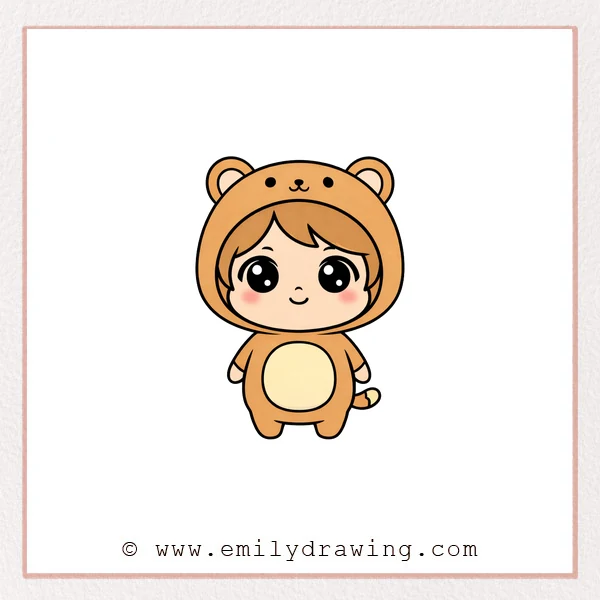
This easy drawing tutorial shows how to draw a chibi character wearing a bear hood.
You will build the shapes in simple steps and then refine the cute details.
Take your time, and keep your lines light until the end.
What You Will Need
- Pencil or mechanical pencil
- Eraser
- Black fineliner or marker (optional)
- Paper or a drawing tablet
- Colored pencils or markers (optional)
Here are my RECOMMENDED Art Supplies!
- Crayola Coloring Set (140 Pieces – Mega Value!)
- 24 Colored Crayon Set
- A4 Printer Paper
- Crayola Coloring Pencils
- HP Home Printer with Instant Ink!
Time needed:
23 minutes.
Step-by-Step Drawing Guide
Step 1: Sketch the Rounded Head and Ears
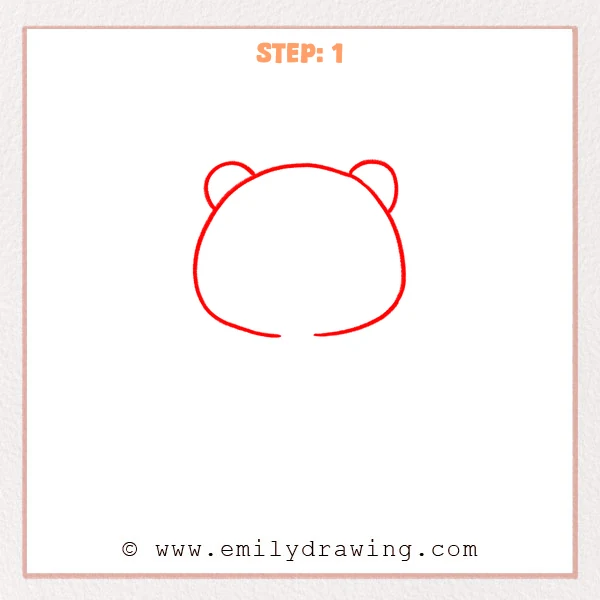
Start with a big rounded head outline, leaving a small gap at the bottom center.
Add one half-circle ear on each top side, slightly overlapping the head edge.
Pro Tip: Keep both ears the same size and height for a cuter, balanced look.
Step 2: Add the Hood Opening and Bangs
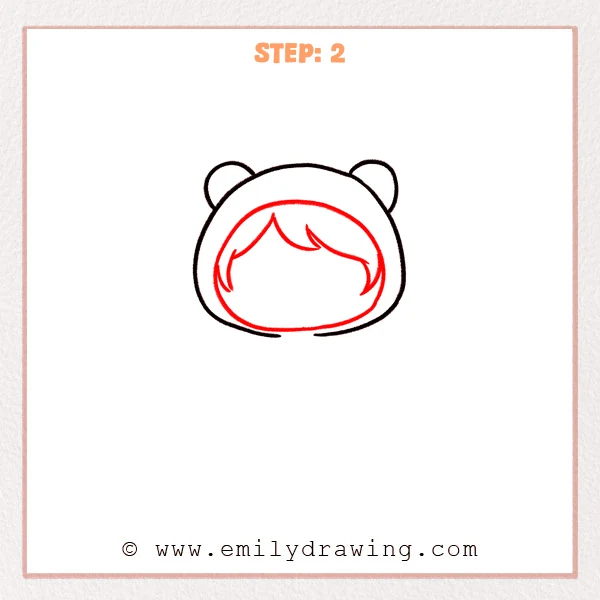
Draw a larger outline around the head to form the outer bear-hood shape.
Add an inner oval opening for the face, then sketch a few curved bangs at the top.
Pro Tip: Center the inner oval and keep its bottom near the gap for a fuller, cuter face.
Step 3: Draw the Facial Features
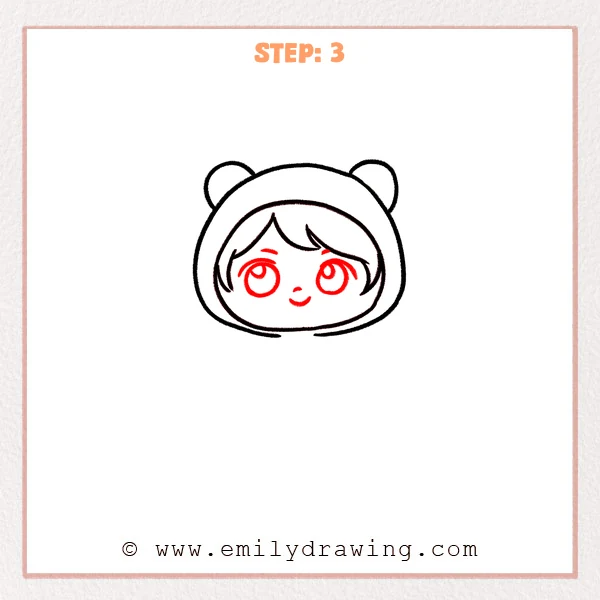
Add two big round eyes inside the face opening, then place small highlight circles and curved lines to make them sparkle.
Draw short eyebrows above, a tiny nose in the center, and a small smiling mouth below.
Pro Tip: Leave about one eye-width between the eyes for a classic chibi look.
Step 4: Add the Tiny Body and Limbs
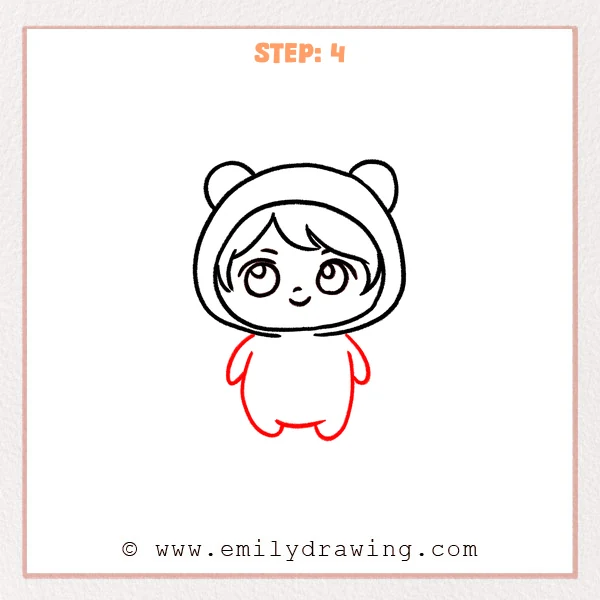
Draw a rounded bean-shaped body under the head, slightly smaller in width.
Add short curved arms on both sides, then split the bottom into two small feet.
Pro Tip: Make the body about the same height as the face opening for a classic big-head chibi ratio.
Step 5: Add the Belly Patch
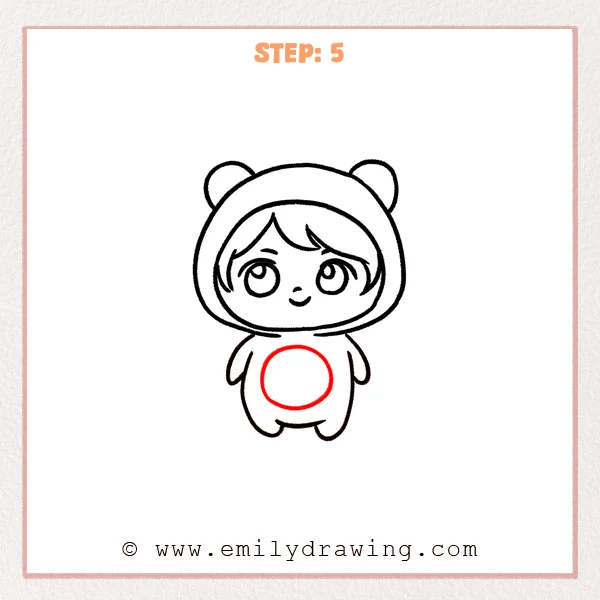
Draw a large circle centered on the torso to create a cute belly patch.
Keep a small gap on both sides so the circle doesn’t touch the arms.
Pro Tip: Align the circle to the body’s centerline for a neat, extra-cute look.
Step 6: Add the Little Tail
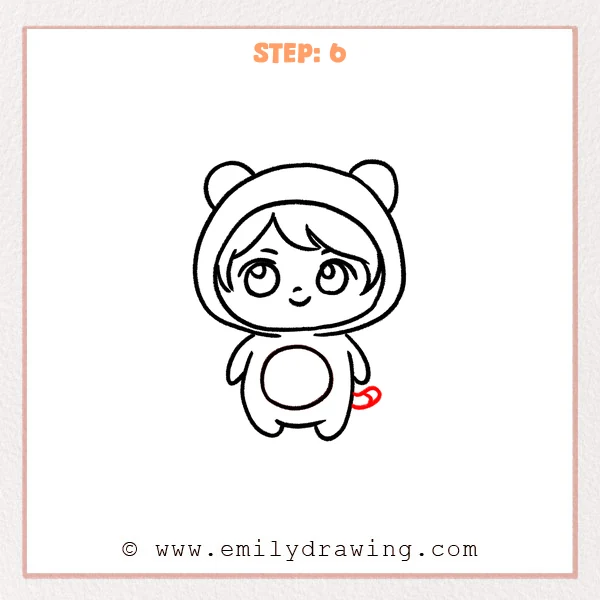
Draw a small curved tail on the lower right side of the body, like a rounded leaf shape.
Attach the base to the body edge, and let the tip curve upward slightly.
Pro Tip: Keep the tail shorter than the arm length to match a chibi onesie style.
Step 7: Color in your drawing!
Fun Facts
- Chibi style uses a large head and tiny body to make characters look extra cute.
- Round shapes feel softer and friendlier than sharp angles in character design.
- Animal-hood outfits are popular because they add a simple, recognizable theme.
Pin it now, Draw later!
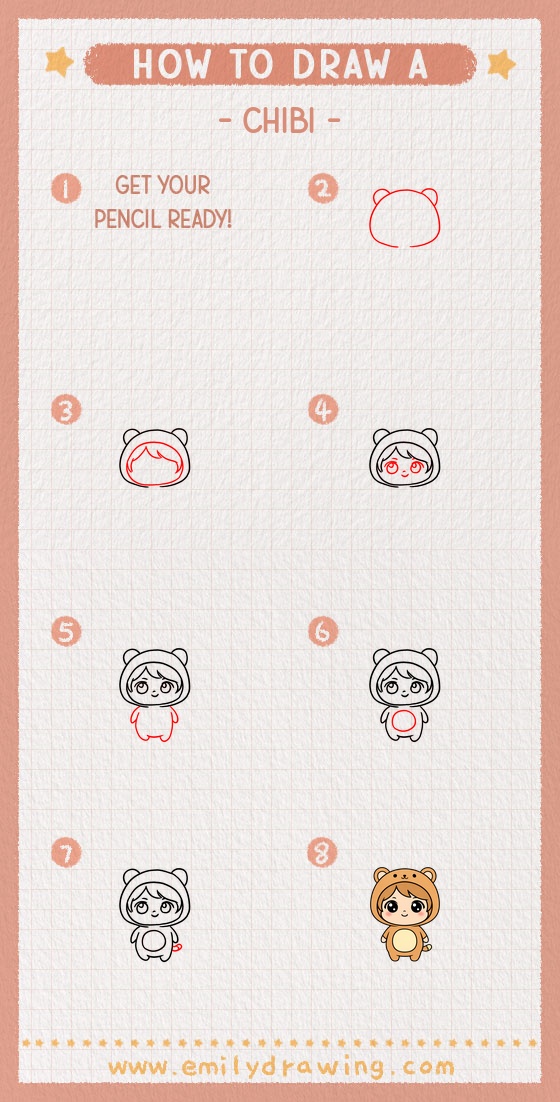
Go over your final lines with a clean pen, then erase the sketch marks gently.
You can color the hood like a bear, and make the belly patch a lighter shade.
Now you know how to draw a chibi bear-hood character—try drawing different faces and outfits next!
Get the FREE Printable Drawing Guide
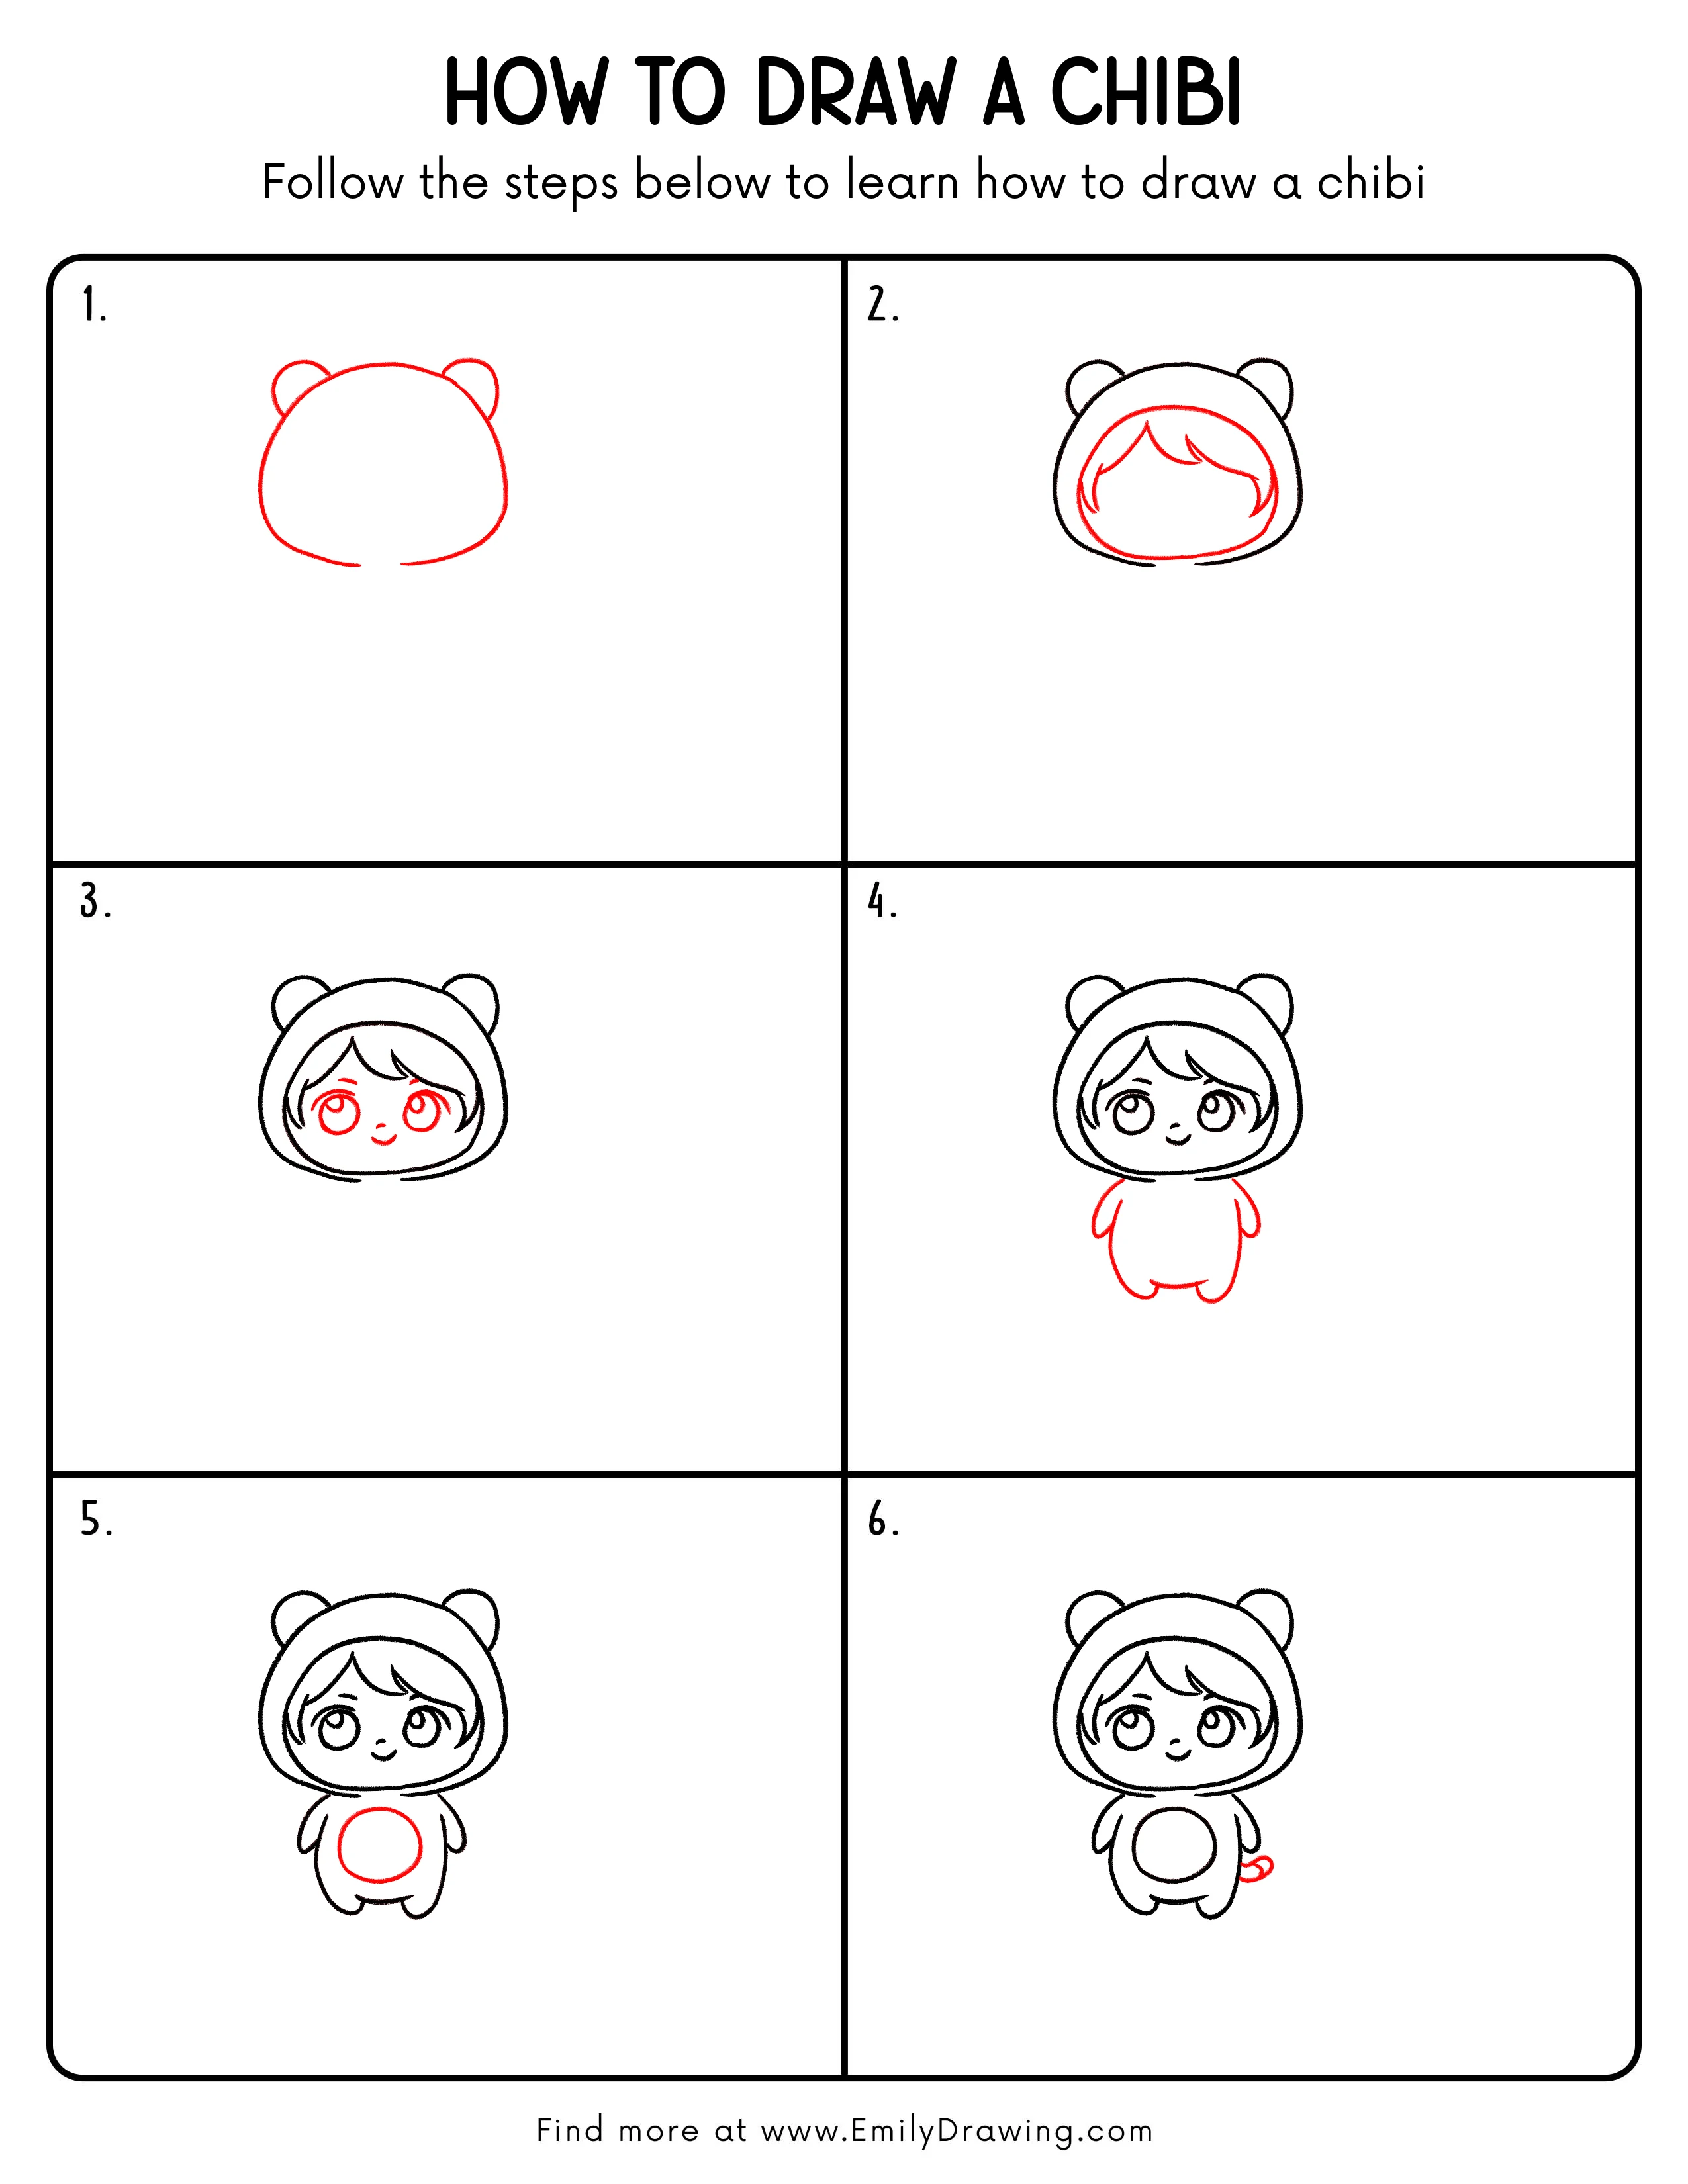
FREE Download Printable Chibi Drawing Tutorial
Frequently Asked Questions
How do I make the character look more chibi?
Make the head bigger, keep the body shorter, and use simple rounded shapes.
What if my eyes look uneven?
Lightly mark a horizontal guide line first, then place both eyes on that line.
Can I change the animal hood?
Yes—swap the ear shapes and add small details like cat triangles or bunny ears.