
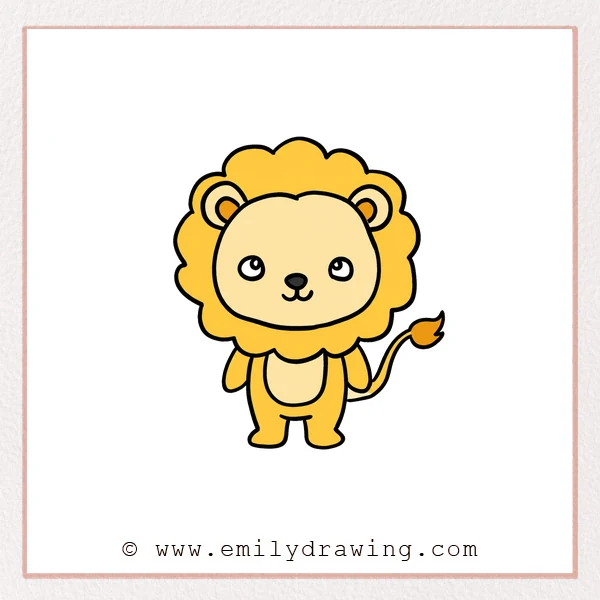
Learn how to draw cartoon lion with a calm, beginner-friendly sequence. This easy drawing tutorial breaks the subject into simple curves and shapes that are easy to follow.
What You Will Need
- Drawing paper
- Pencil and eraser
- Black fineliner or marker
- Colored pencils or crayons
Here are my RECOMMENDED Art Supplies!
- Crayola Coloring Set (140 Pieces – Mega Value!)
- 24 Colored Crayon Set
- A4 Printer Paper
- Crayola Coloring Pencils
- HP Home Printer with Instant Ink!
Time needed:
11 minutes.
Step-by-Step Drawing Guide
Step 1: Draw the Ears
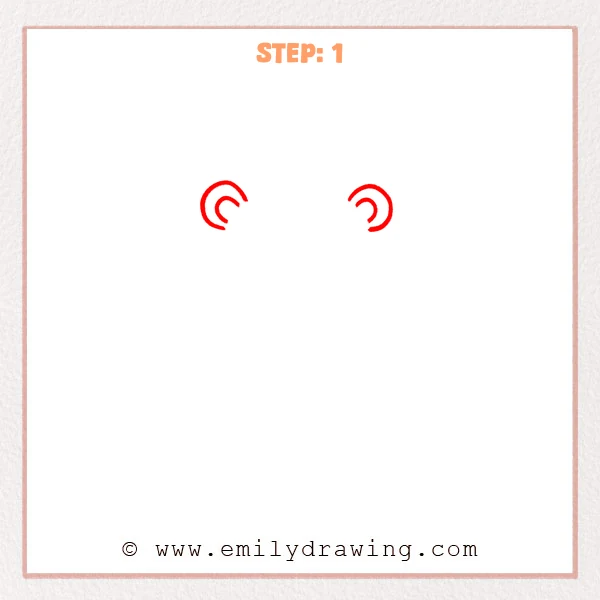
Sketch two small round ears with inner curves. Keep these new lines light and connect them smoothly to the existing drawing.
Pro Tip: Compare this addition with the nearby shapes before darkening your lines.
Step 2: Build the Head
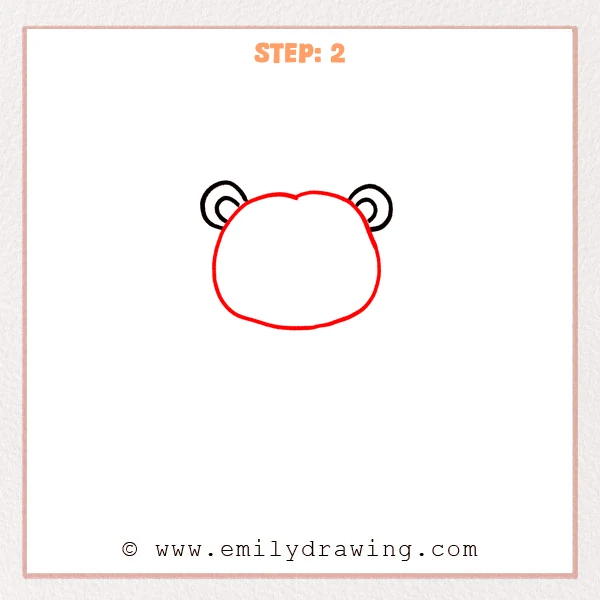
Draw a broad rounded face beneath the ears. Keep these new lines light and connect them smoothly to the existing drawing.
Pro Tip: Compare this addition with the nearby shapes before darkening your lines.
Step 3: Add the Face
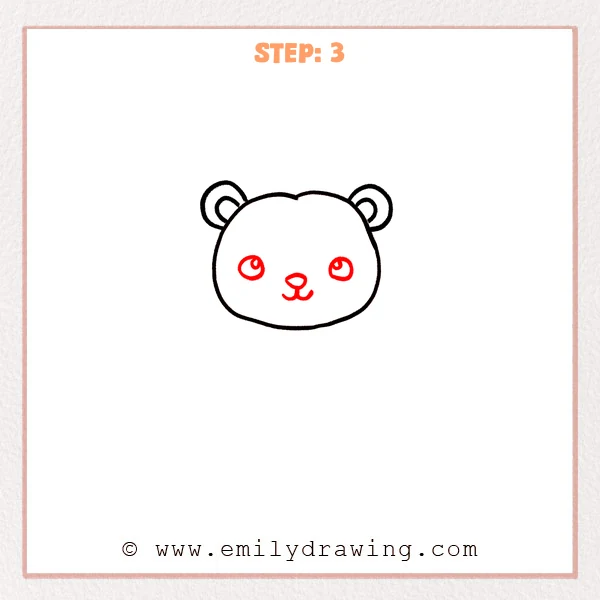
Place two bright eyes, a tiny nose, and a curved mouth. Keep these new lines light and connect them smoothly to the existing drawing.
Pro Tip: Compare this addition with the nearby shapes before darkening your lines.
Step 4: Draw the Mane
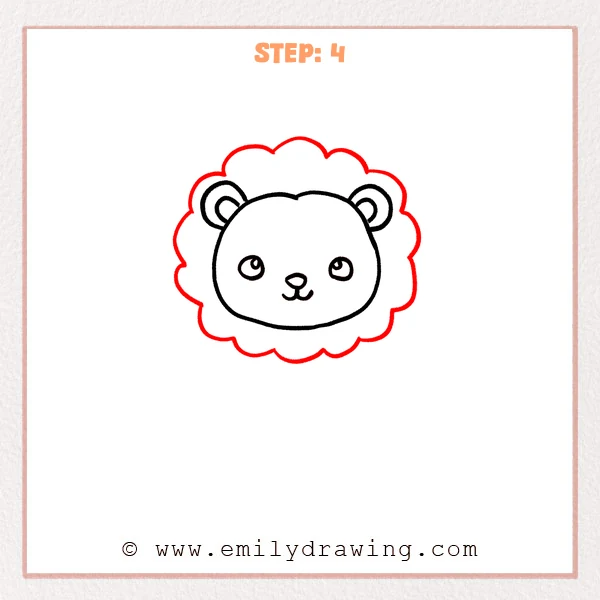
Wrap a large scalloped mane evenly around the head. Keep these new lines light and connect them smoothly to the existing drawing.
Pro Tip: Compare this addition with the nearby shapes before darkening your lines.
Step 5: Add the Body
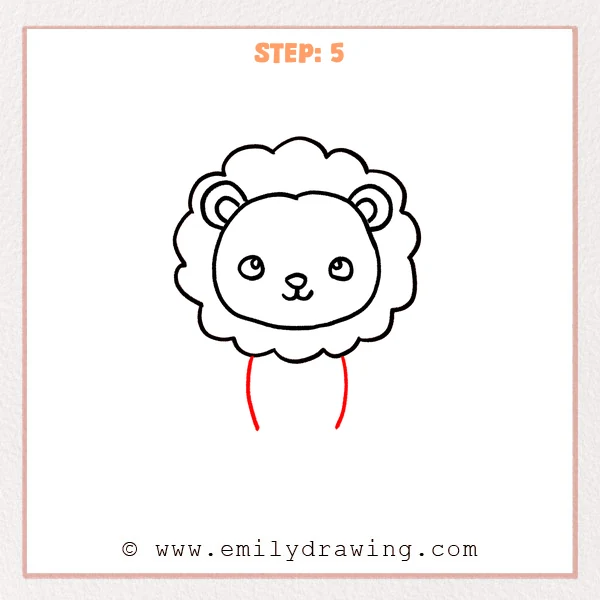
Extend two short torso curves below the mane. Keep these new lines light and connect them smoothly to the existing drawing.
Pro Tip: Compare this addition with the nearby shapes before darkening your lines.
Step 6: Draw the Legs
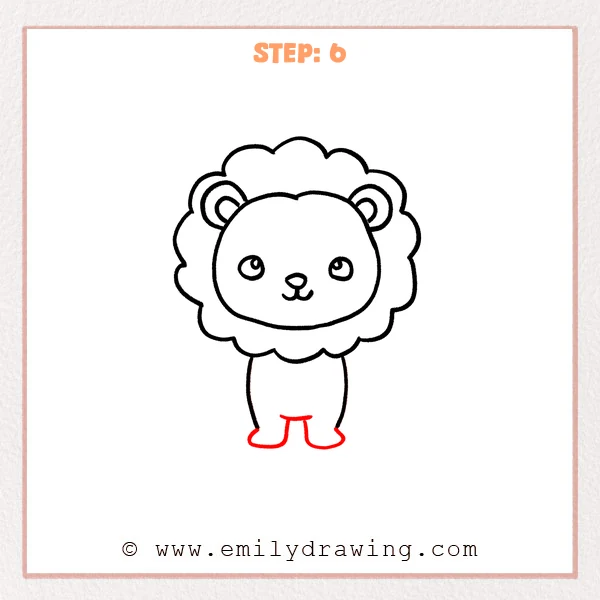
Add two short front legs with rounded feet. Keep these new lines light and connect them smoothly to the existing drawing.
Pro Tip: Compare this addition with the nearby shapes before darkening your lines.
Step 7: Add the Belly Patch
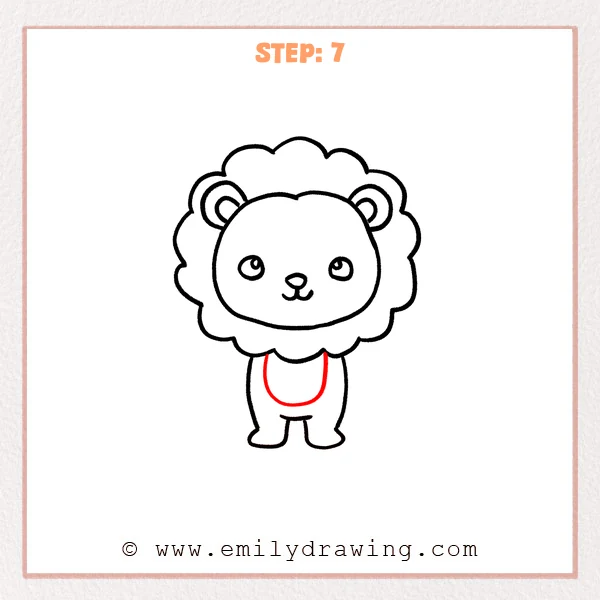
Draw a large U-shaped patch down the center of the torso. Keep these new lines light and connect them smoothly to the existing drawing.
Pro Tip: Compare this addition with the nearby shapes before darkening your lines.
Step 8: Draw the Arms
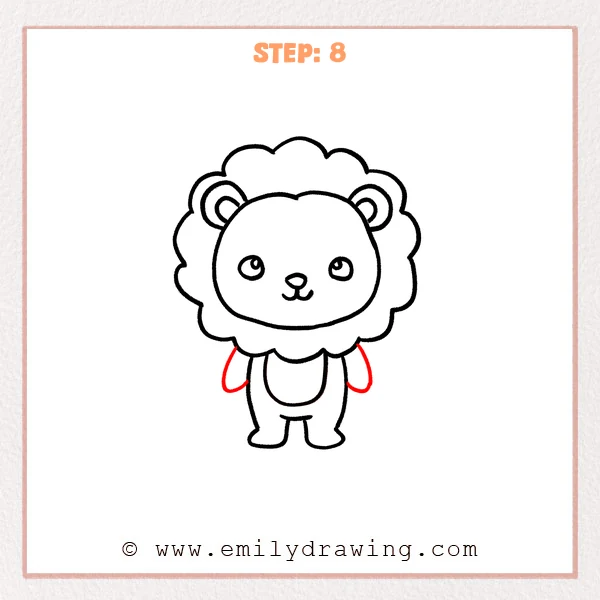
Add one small curved arm on each side of the belly. Keep these new lines light and connect them smoothly to the existing drawing.
Pro Tip: Compare this addition with the nearby shapes before darkening your lines.
Step 9: Finish with the Tail
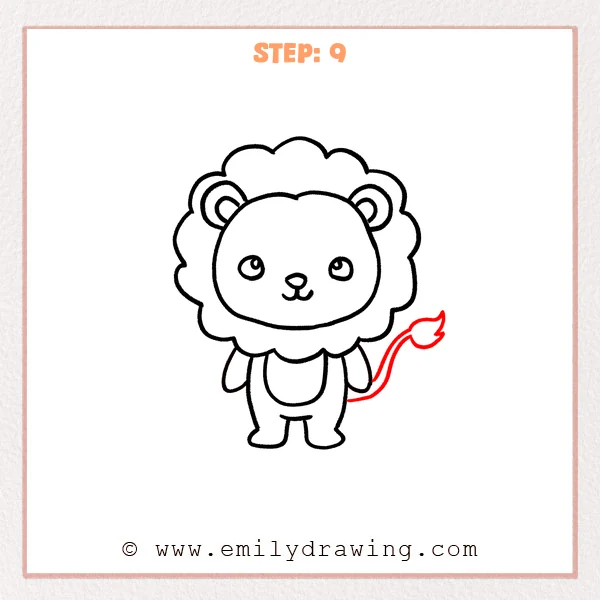
Draw a long rising tail with a pointed tuft. Keep these new lines light and connect them smoothly to the existing drawing.
Pro Tip: Compare this addition with the nearby shapes before darkening your lines.
Step 10: Color in your drawing!
Fun Facts
- The mix of rounded and angular shapes gives this cartoon lion a clear cartoon silhouette.
- Building the cartoon lion one part at a time makes its proportions easier for beginners to compare.
Pin it now, Draw later!
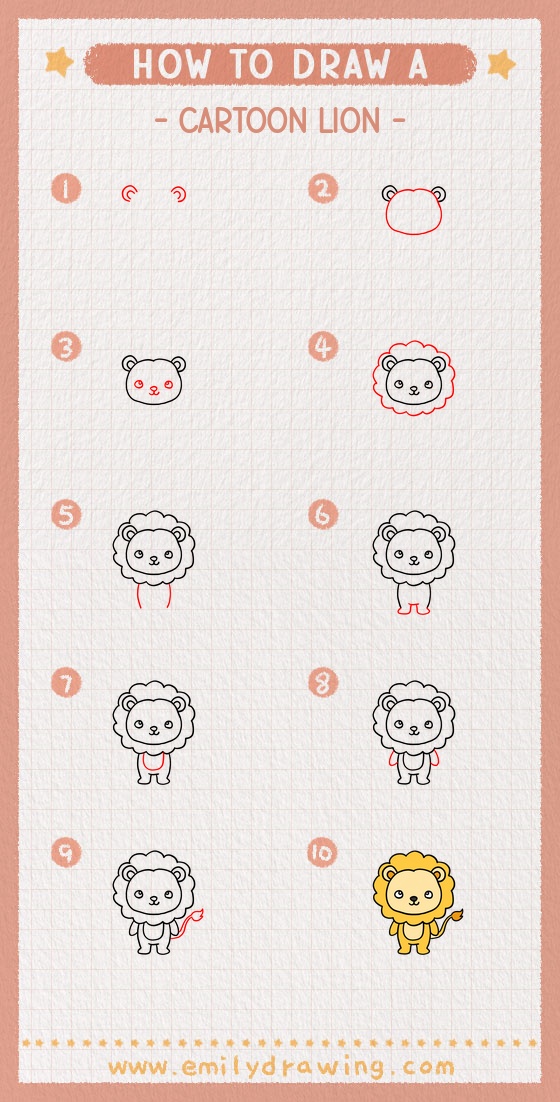
Check the outline, erase any unwanted pencil marks, and add color if you like. Your cartoon lion step by step drawing is complete, so try it again and make the next version your own.
Get the FREE Printable Drawing Guide
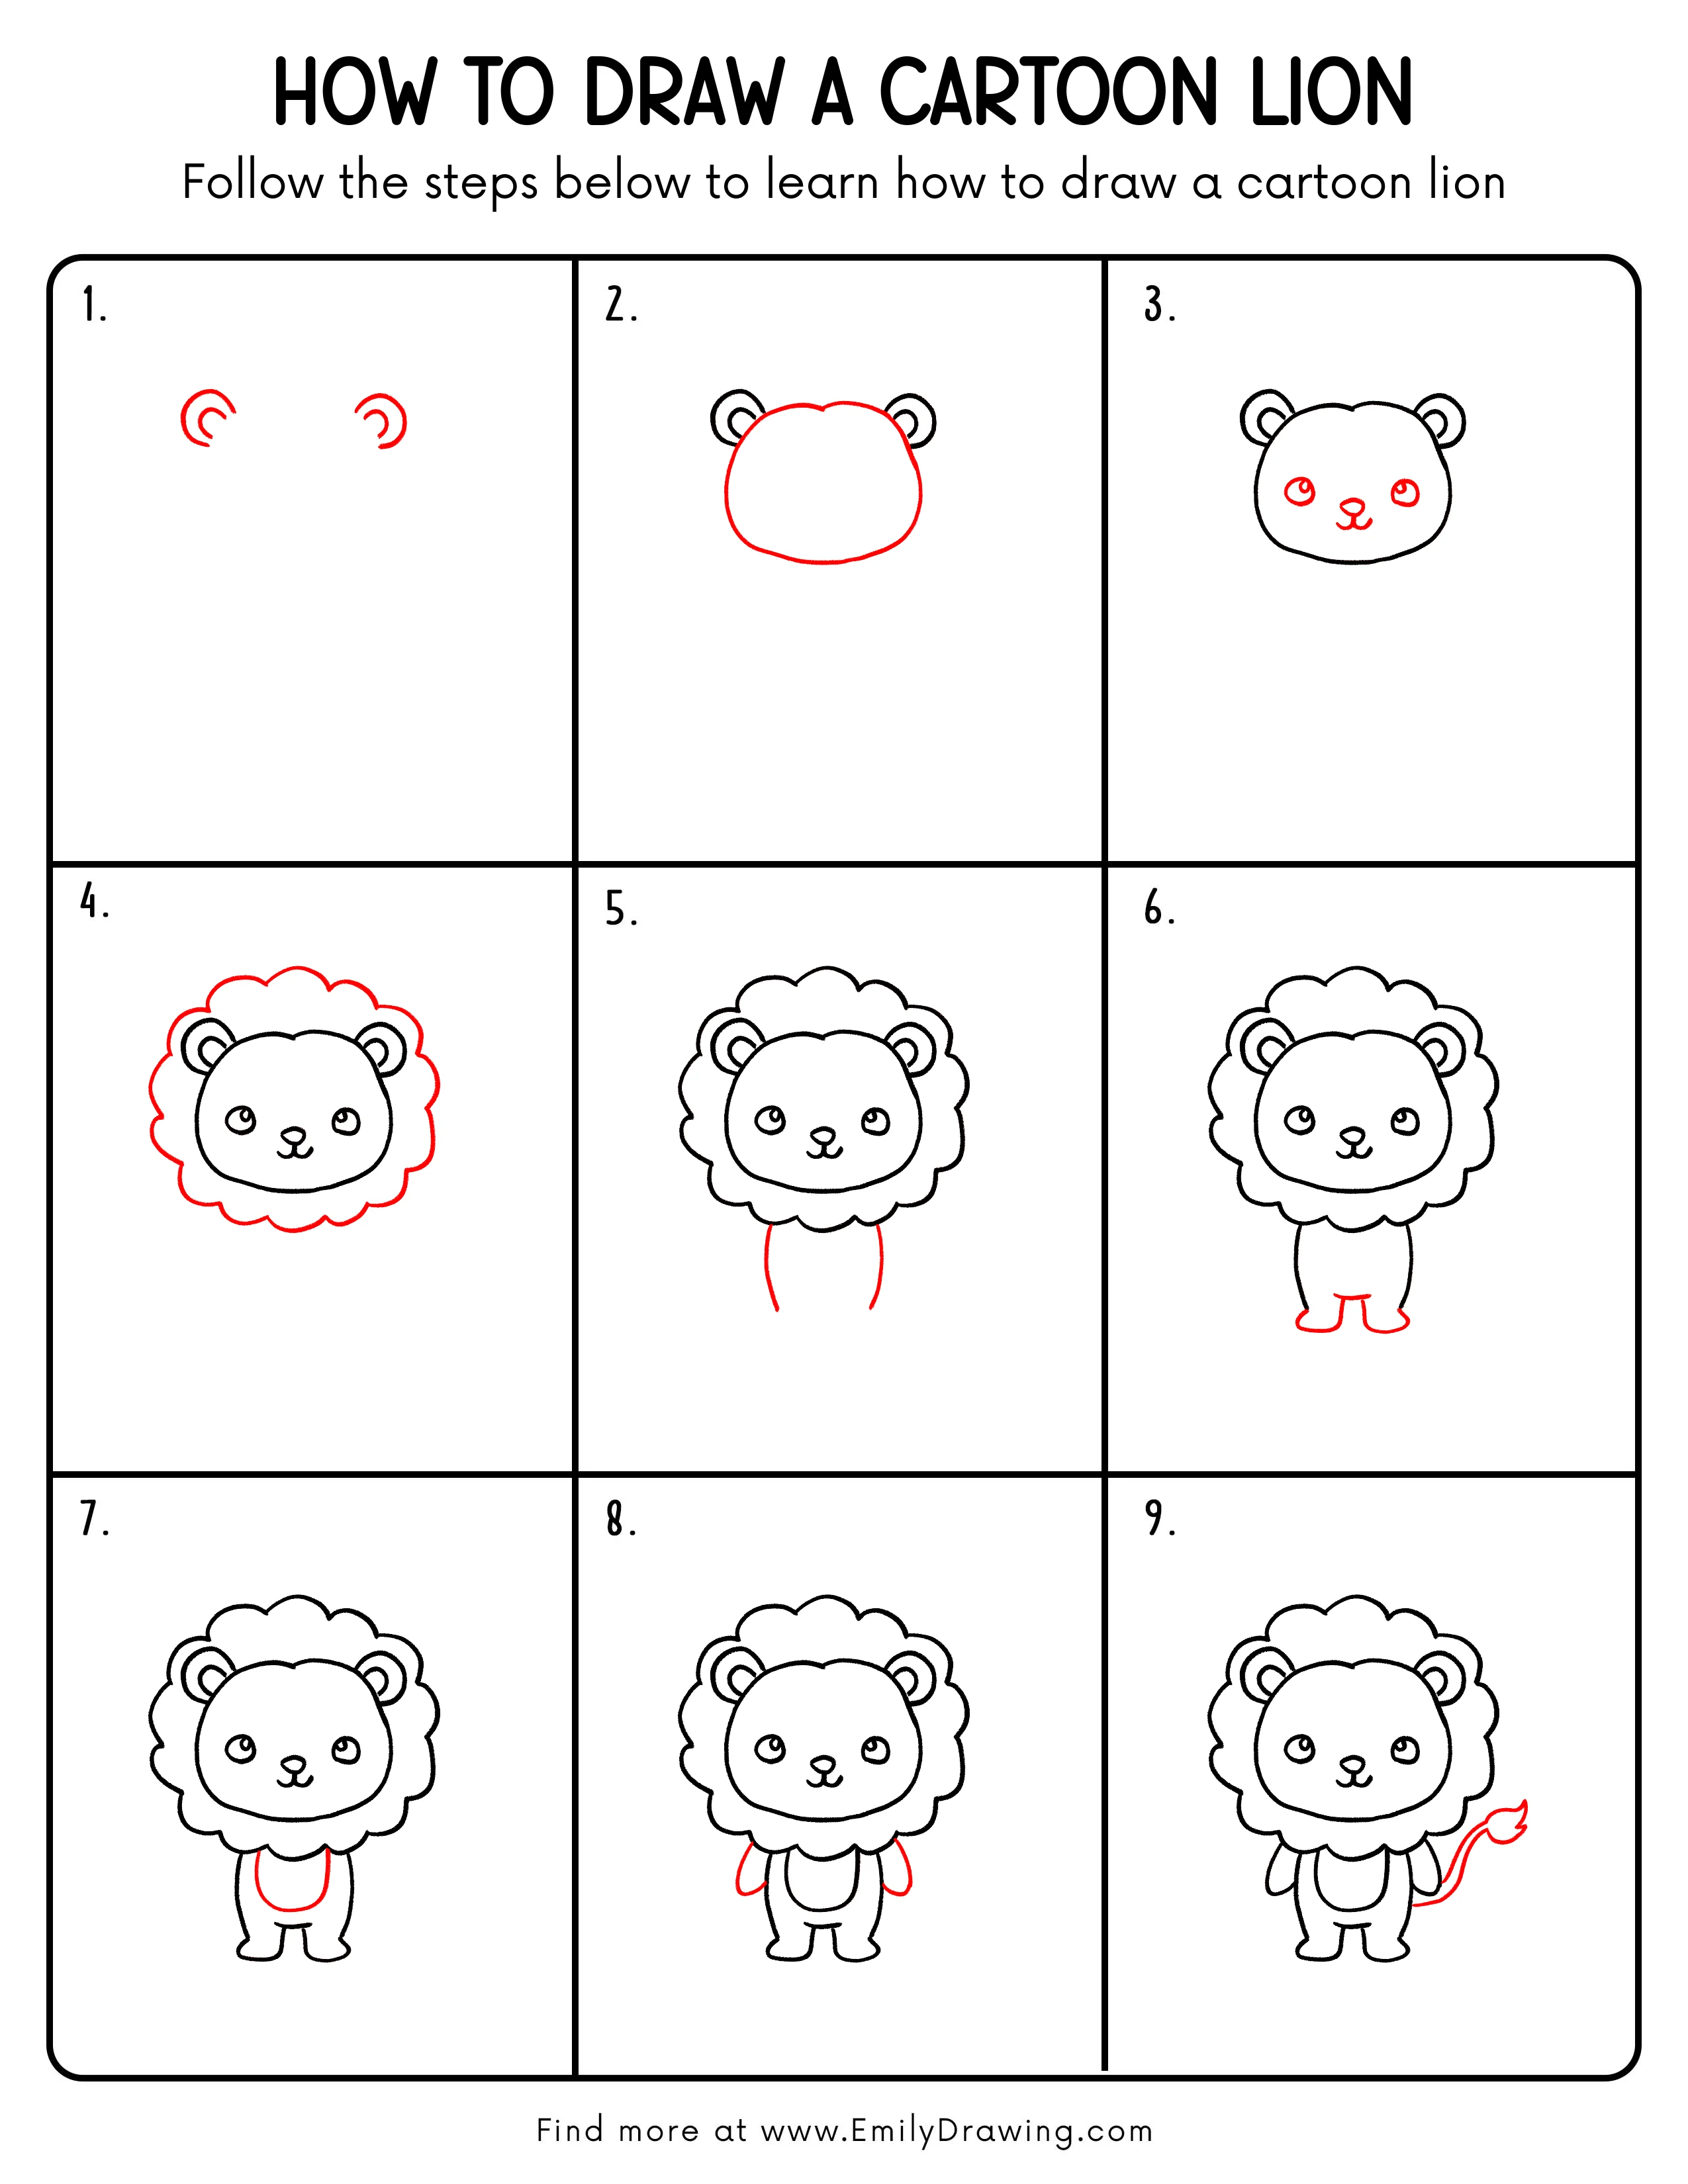
FREE Download Printable Cartoon Lion Drawing Tutorial
Frequently Asked Questions
How can I keep my cartoon lion drawing in proportion?
Compare each new shape with the parts already drawn, and make small corrections before adding darker lines.
Can I color the finished cartoon lion?
Yes. Choose any colors you enjoy, and keep a few lighter areas to make the cartoon drawing feel lively.



