
This easy drawing tutorial will help you draw a cute cartoon knife.
We will build the shapes slowly, then add friendly details at the end.
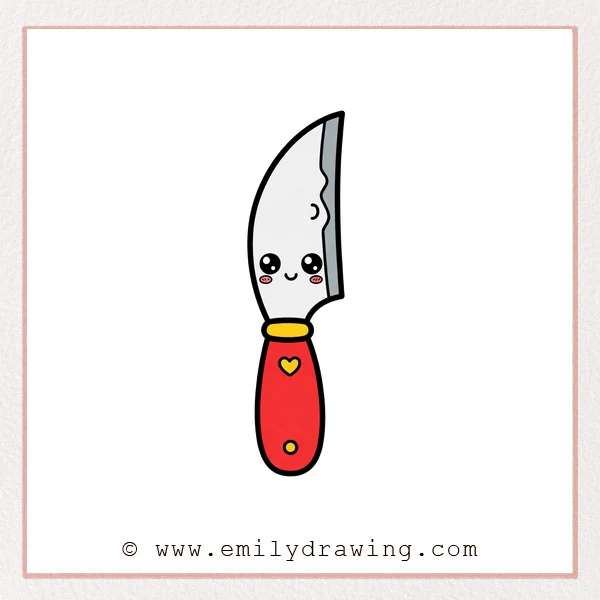
What You Will Need
- Pencil
- Eraser
- Black marker or pen
- Paper
- Optional: colored pencils or markers
Here are my RECOMMENDED Art Supplies!
- Crayola Coloring Set (140 Pieces – Mega Value!)
- 24 Colored Crayon Set
- A4 Printer Paper
- Crayola Coloring Pencils
- HP Home Printer with Instant Ink!
Time needed:
16 minutes.
Step-by-Step Drawing Guide
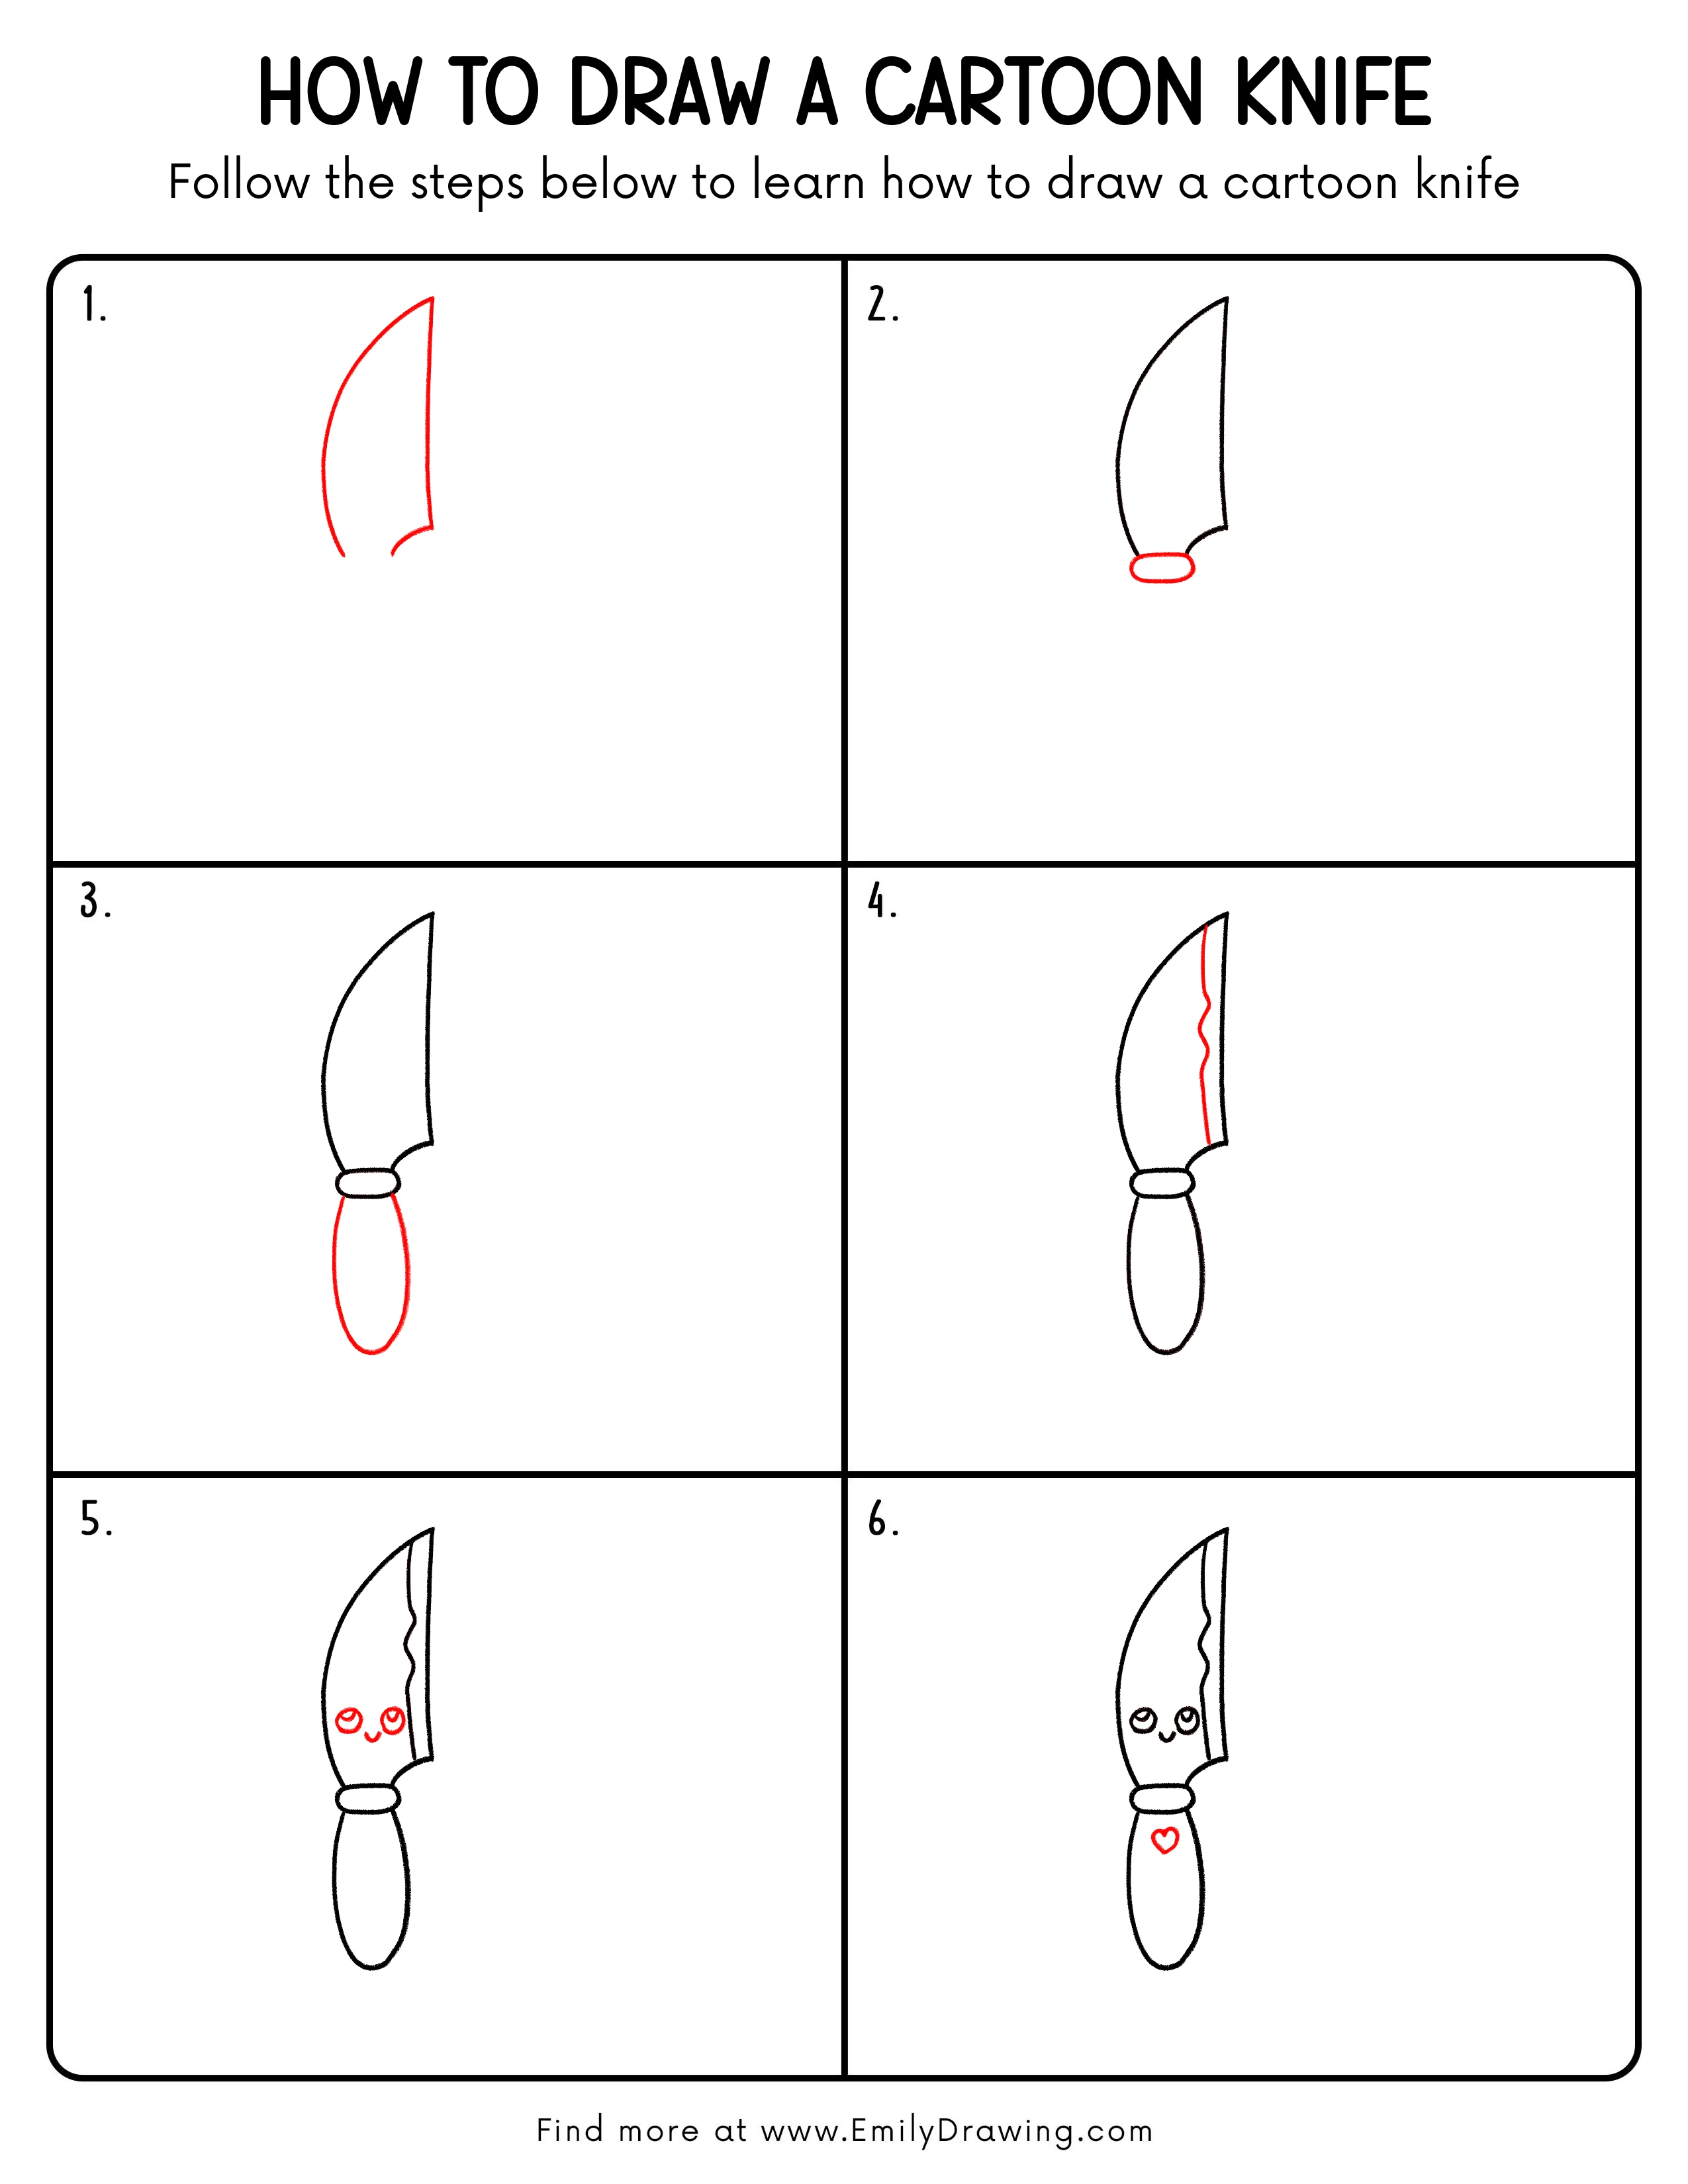
Step 1: Block In the Blade Shape
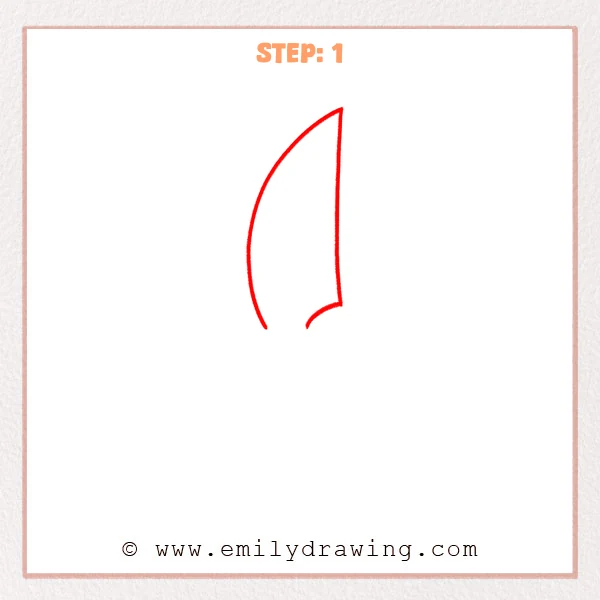
Start with one long curved line to form the outer edge of the blade, sweeping up to a sharp tip.
Add a mostly straight inner edge on the right, and include a small inward curve near the bottom to hint where the handle will attach.
Pro Tip: Let the tip lean slightly toward the inner edge so the blade feels sharp and believable.
Step 2: Add a Small Guard Oval
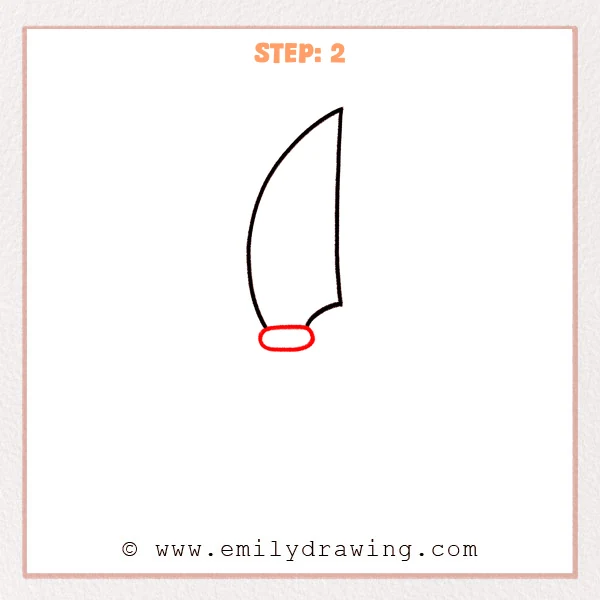
Draw a wide, rounded oval at the base of the blade to form a simple guard.
Keep it snug against the blade bottom, with a tiny overhang on both sides for a cute cartoon look.
Pro Tip: Keep the guard fairly short and flat so it doesn’t overpower the blade.
Step 3: Draw the Long Handle Oval
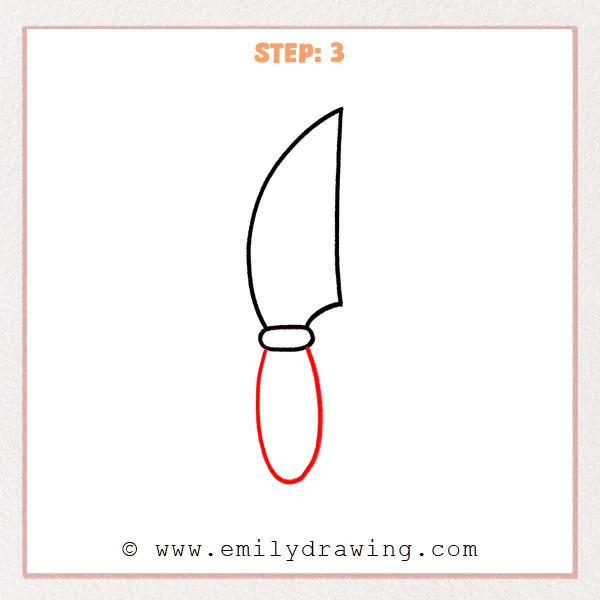
Below the guard, draw a tall, narrow vertical oval to block in the handle shape.
Make the top slightly slimmer where it meets the guard, and keep the bottom nicely rounded.
Pro Tip: Make the handle about 3–4 times taller than the guard so it feels easy to hold.
Step 4: Add an Inner Blade Detail Line
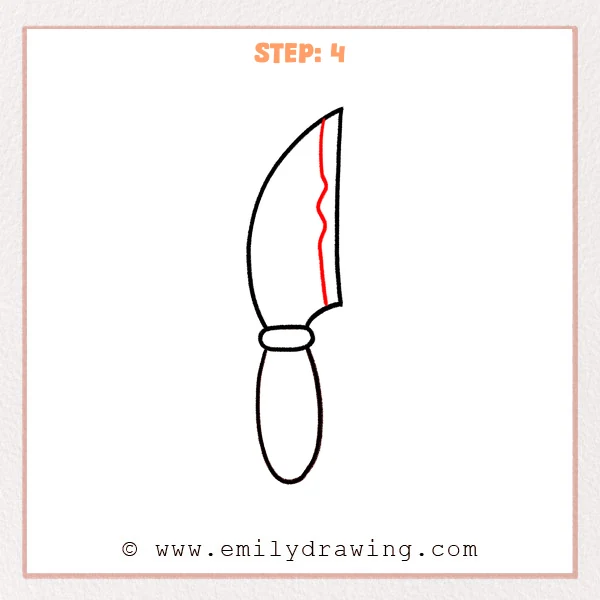
Draw a thin vertical line inside the blade, close to the right edge, running downward.
Add a few gentle wavy bumps along the middle so it feels like a fun cartoon blade detail.
Pro Tip: Keep the waves subtle and spaced out so the line still reads mostly straight.
Step 5: Add a Cute Face on the Blade
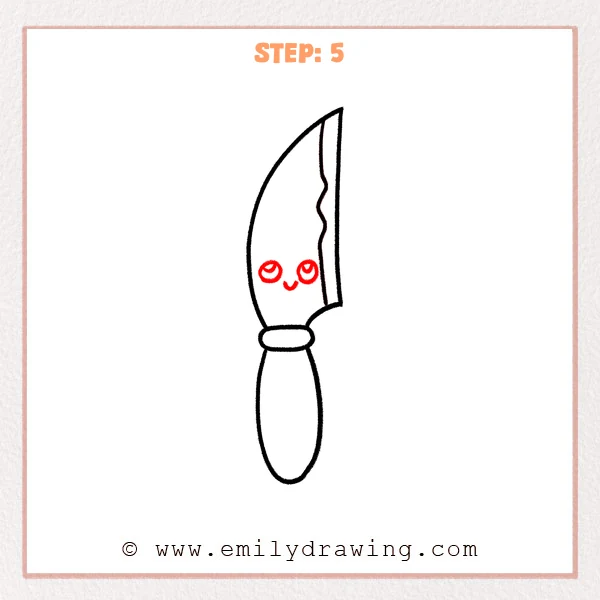
Draw two small circles on the lower-middle blade area for the eyes, evenly spaced.
Add a tiny curved highlight inside each eye, then draw a small curved smile between them for a friendly cartoon look.
Pro Tip: Place the face in the wider part of the blade so it feels balanced and clear.
Step 6: Add a Heart Decoration on the Handle
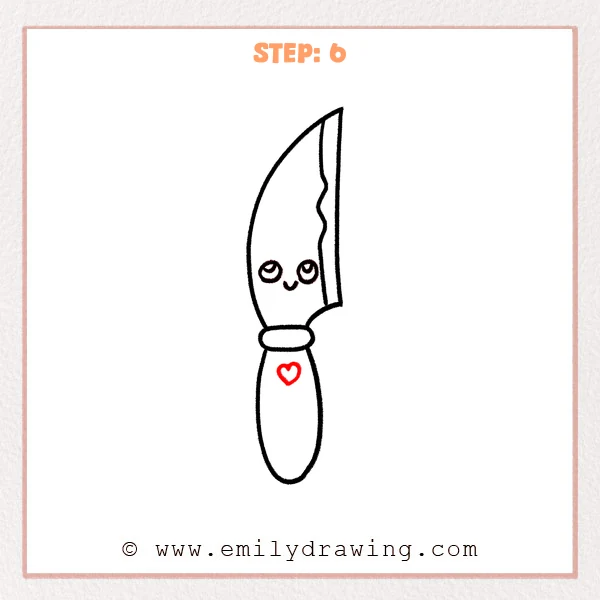
Draw a small heart on the upper-middle part of the handle, with two even bumps and a pointed bottom.
Keep it medium-sized with a little space around it so the decoration stands out.
Pro Tip: Center the heart along the handle’s middle line so it looks neat and cute.
Step 7: Color in your drawing!
Fun Facts
- Many kitchen knives have a “spine” edge that is thicker for strength.
- A knife’s handle shape is designed for comfort and steady control.
- Cartoon designs often use simple faces to make objects feel friendly.
Pin it now, Draw later!
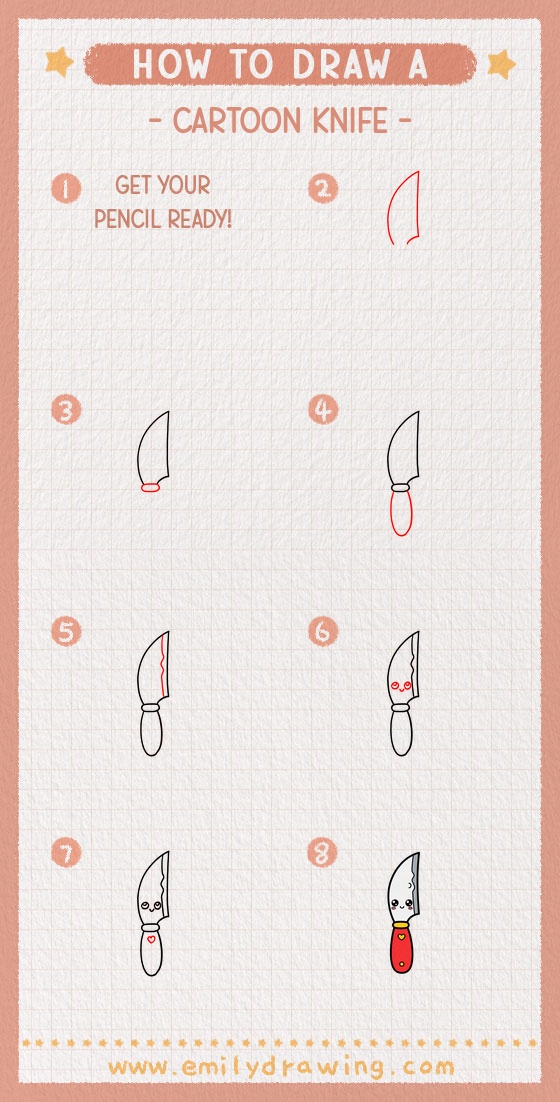
Trace your final lines with a pen, then erase any extra sketch marks gently.
You can color the blade light gray and the handle any bright color you like.
Now you know how to draw a cartoon knife step by step—try drawing a whole set of cute kitchen tools next!
Get the FREE Printable Drawing Guide
FREE Download Printable Cartoon Knife Drawing Tutorial
Frequently Asked Questions
How do I make the cartoon knife look less scary?
Keep the face small and friendly, and round the corners of the shapes.
What if my blade looks too skinny or too wide?
Adjust the outer curved edge first, then re-place the inner edge to match.
Can I add more details without making it messy?
Yes—add one simple detail at a time, like dots, stripes, or a second small symbol.



