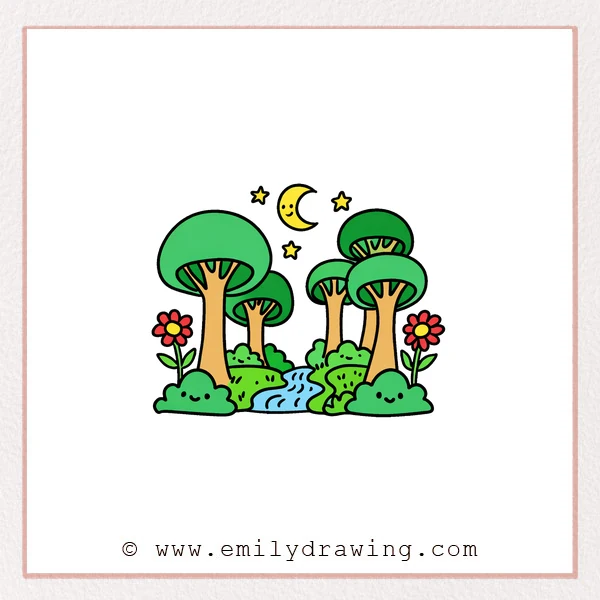
This easy drawing tutorial shows you how to draw a cartoon forest with simple shapes.
You will build a scene with trees, cute bushes, and a winding path, one step at a time.
Take your time, and keep your lines light until the end.
What You Will Need
- Pencil and eraser, or a digital drawing brush
- Black pen or darker brush for final lines
- Paper (any size) or a drawing tablet
- Optional: colored pencils or markers for finishing
Here are my RECOMMENDED Art Supplies!
- Crayola Coloring Set (140 Pieces – Mega Value!)
- 24 Colored Crayon Set
- A4 Printer Paper
- Crayola Coloring Pencils
- HP Home Printer with Instant Ink!
Time needed:
11 minutes.
Step-by-Step Drawing Guide
Step 1: Block in the first cartoon forest tree
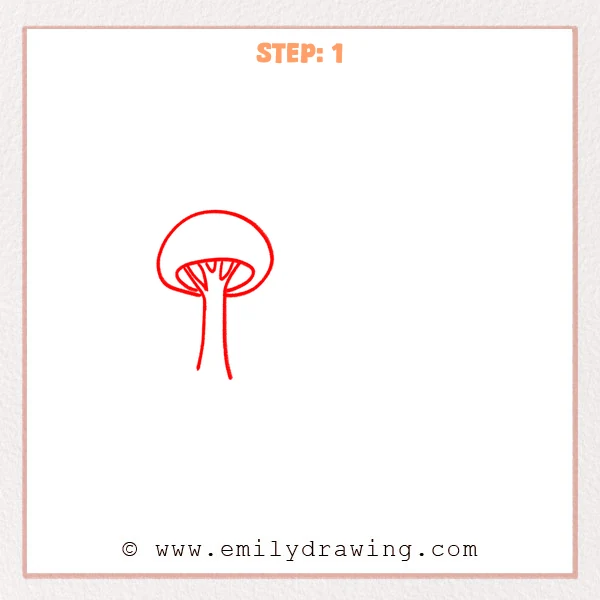
Draw a big dome shape for the treetop, with a curved edge underneath.
Add two lines that taper downward for the trunk, then place a few short curved ribs under the canopy.
Pro Tip: Keep the trunk much slimmer than the canopy for a cute, stable look.
Step 2: Add a smaller background tree for depth
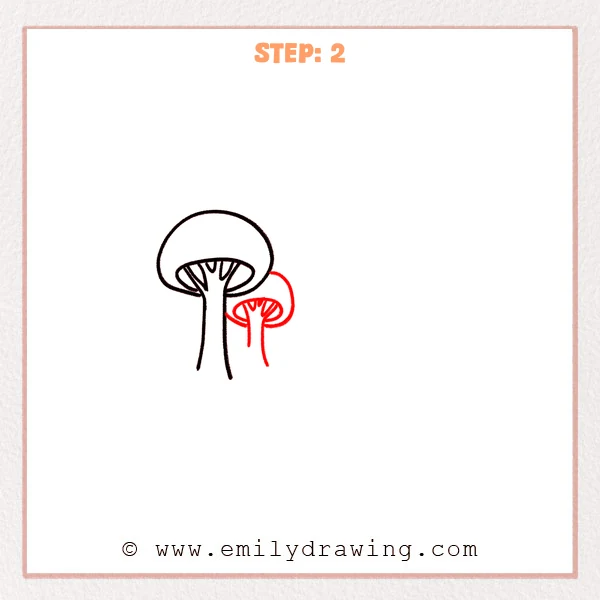
Draw a smaller dome canopy behind the big tree on the right, with a little overlap.
Add a slim trunk and a few short curved ribs under the canopy to match the style.
Pro Tip: Make the small canopy about half the big one’s height to feel farther away.
Step 3: Add a farther tree on the right
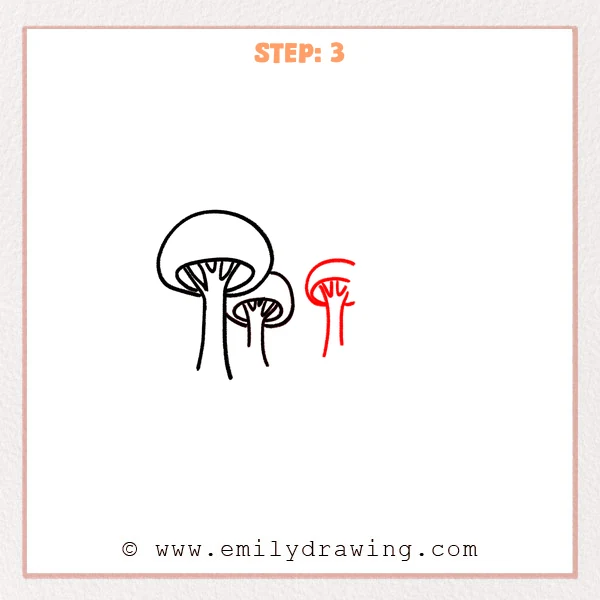
In the open space to the right, draw a smaller canopy, using curved strokes for the top and underside.
Add a short, slim trunk and a few small curved ribs underneath to match the first trees.
Pro Tip: Make this tree smaller and thinner, and place it slightly higher for depth.
Step 4: Start the new treetop in the upper right
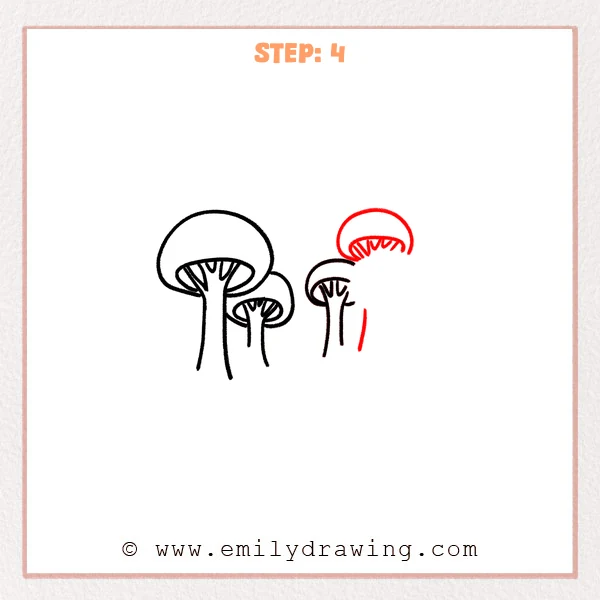
Draw a larger dome canopy in the upper right, sitting behind the third tree.
Add a curved underside and a few radiating short ribs, then place one trunk side line to set the trunk position.
Pro Tip: Let this canopy be bigger than the third tree’s, and draw only one trunk side first for easy adjustments.
Step 5: Finish a larger foreground tree on the right
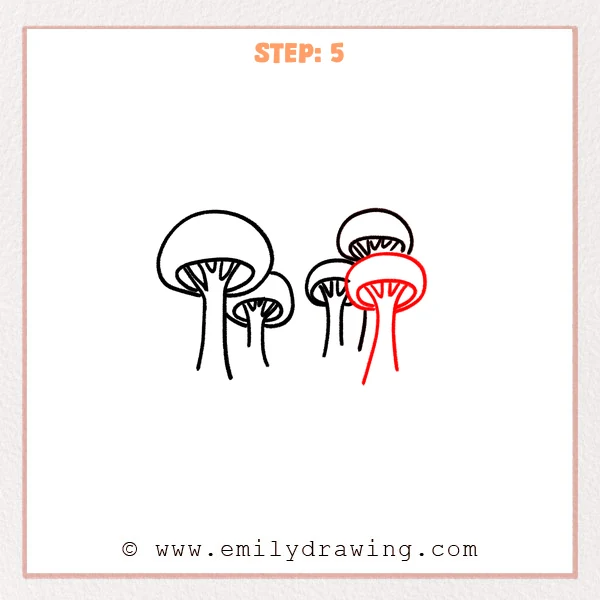
Draw a bigger canopy in the front-right, overlapping the smaller tree behind it for depth.
Complete both sides of the trunk with a slight outward flare, then add more short underside ribs for clearer texture.
Pro Tip: Make the foreground tree slightly bolder and add a few extra ribs so it stands out.
Step 6: Add cute cloud bushes on the ground
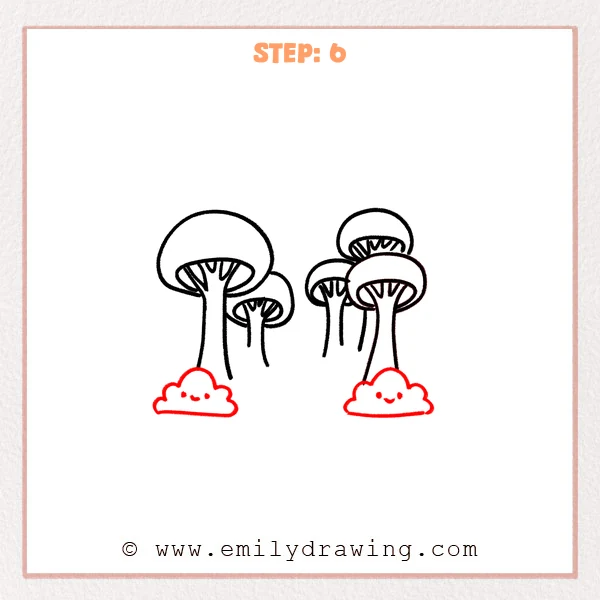
Draw two cloud-shaped bushes at the bottom left and bottom right using rounded scallop bumps.
Add two tiny eyes and a small smiling mouth inside each bush for extra charm.
Pro Tip: Keep the scallop bumps evenly rounded to make the bushes look neat.
Step 7: Add little ground mounds and texture
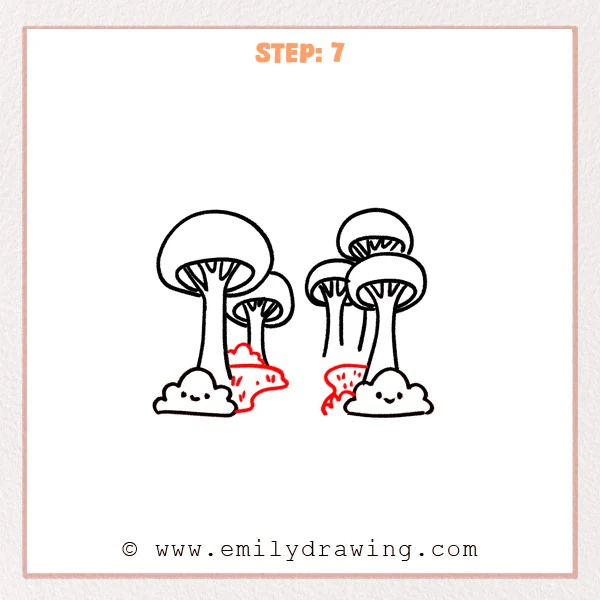
Draw a curved ground mound peeking out behind the left-side bush near the middle.
Add another mound behind the right foreground bush, then sprinkle small teardrop dots on each mound for texture.
Pro Tip: Let the mound curves tuck under the bushes so the overlap feels natural.
Step 8: Draw a winding path or stream through the center
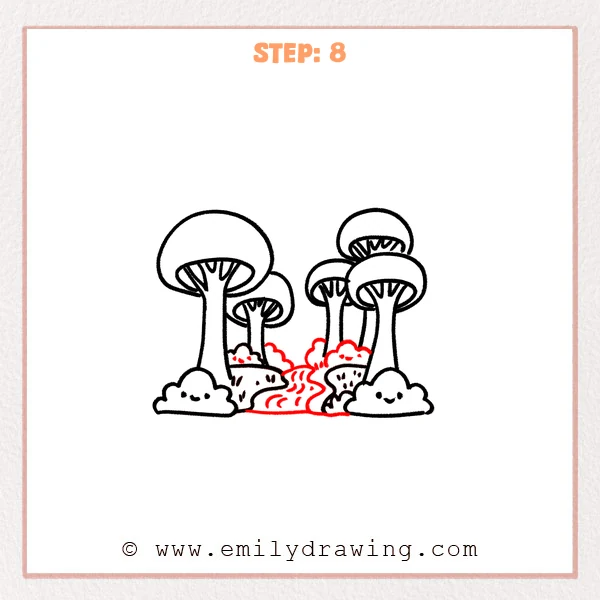
Between the two mounds, sketch a curving corridor that narrows into the distance, using two wavy edges.
Add a few flowing wavy lines inside it to suggest movement, like water ripples or path texture.
Pro Tip: Make the path narrower and the curves gentler as it goes back for depth.
Step 9: Add flowers and a night-sky decoration
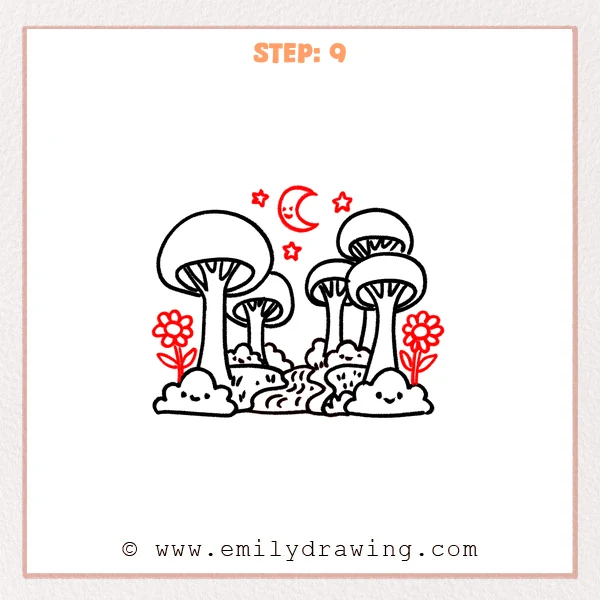
Draw a simple cartoon flower on each side: a round center, petal loops, then a thin stem with two leaves.
Add a crescent moon with a tiny face above, then place a few small stars around it.
Pro Tip: Keep the flowers near the edges, and place the moon and stars in open space.
Step 10: Color in your drawing!
Fun Facts
- Forest scenes look deeper when bigger objects overlap smaller ones.
- Winding paths are a classic trick to guide the viewer’s eye into the picture.
- Rounded “cloud” shapes often feel friendly in cartoon art.
Pin it now, Draw later!
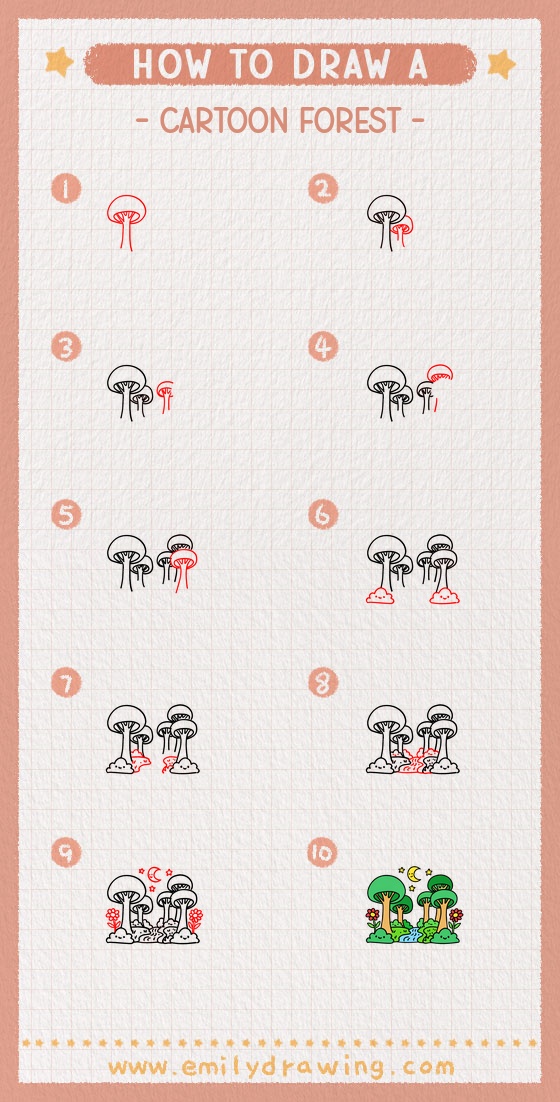
Go over your final lines a little darker, and erase any extra sketch marks.
If you want color, try soft greens for canopies and a light blue for the stream.
Now you know how to draw a cartoon forest step by step—try adding more trees or a tiny animal next.
Get the FREE Printable Drawing Guide
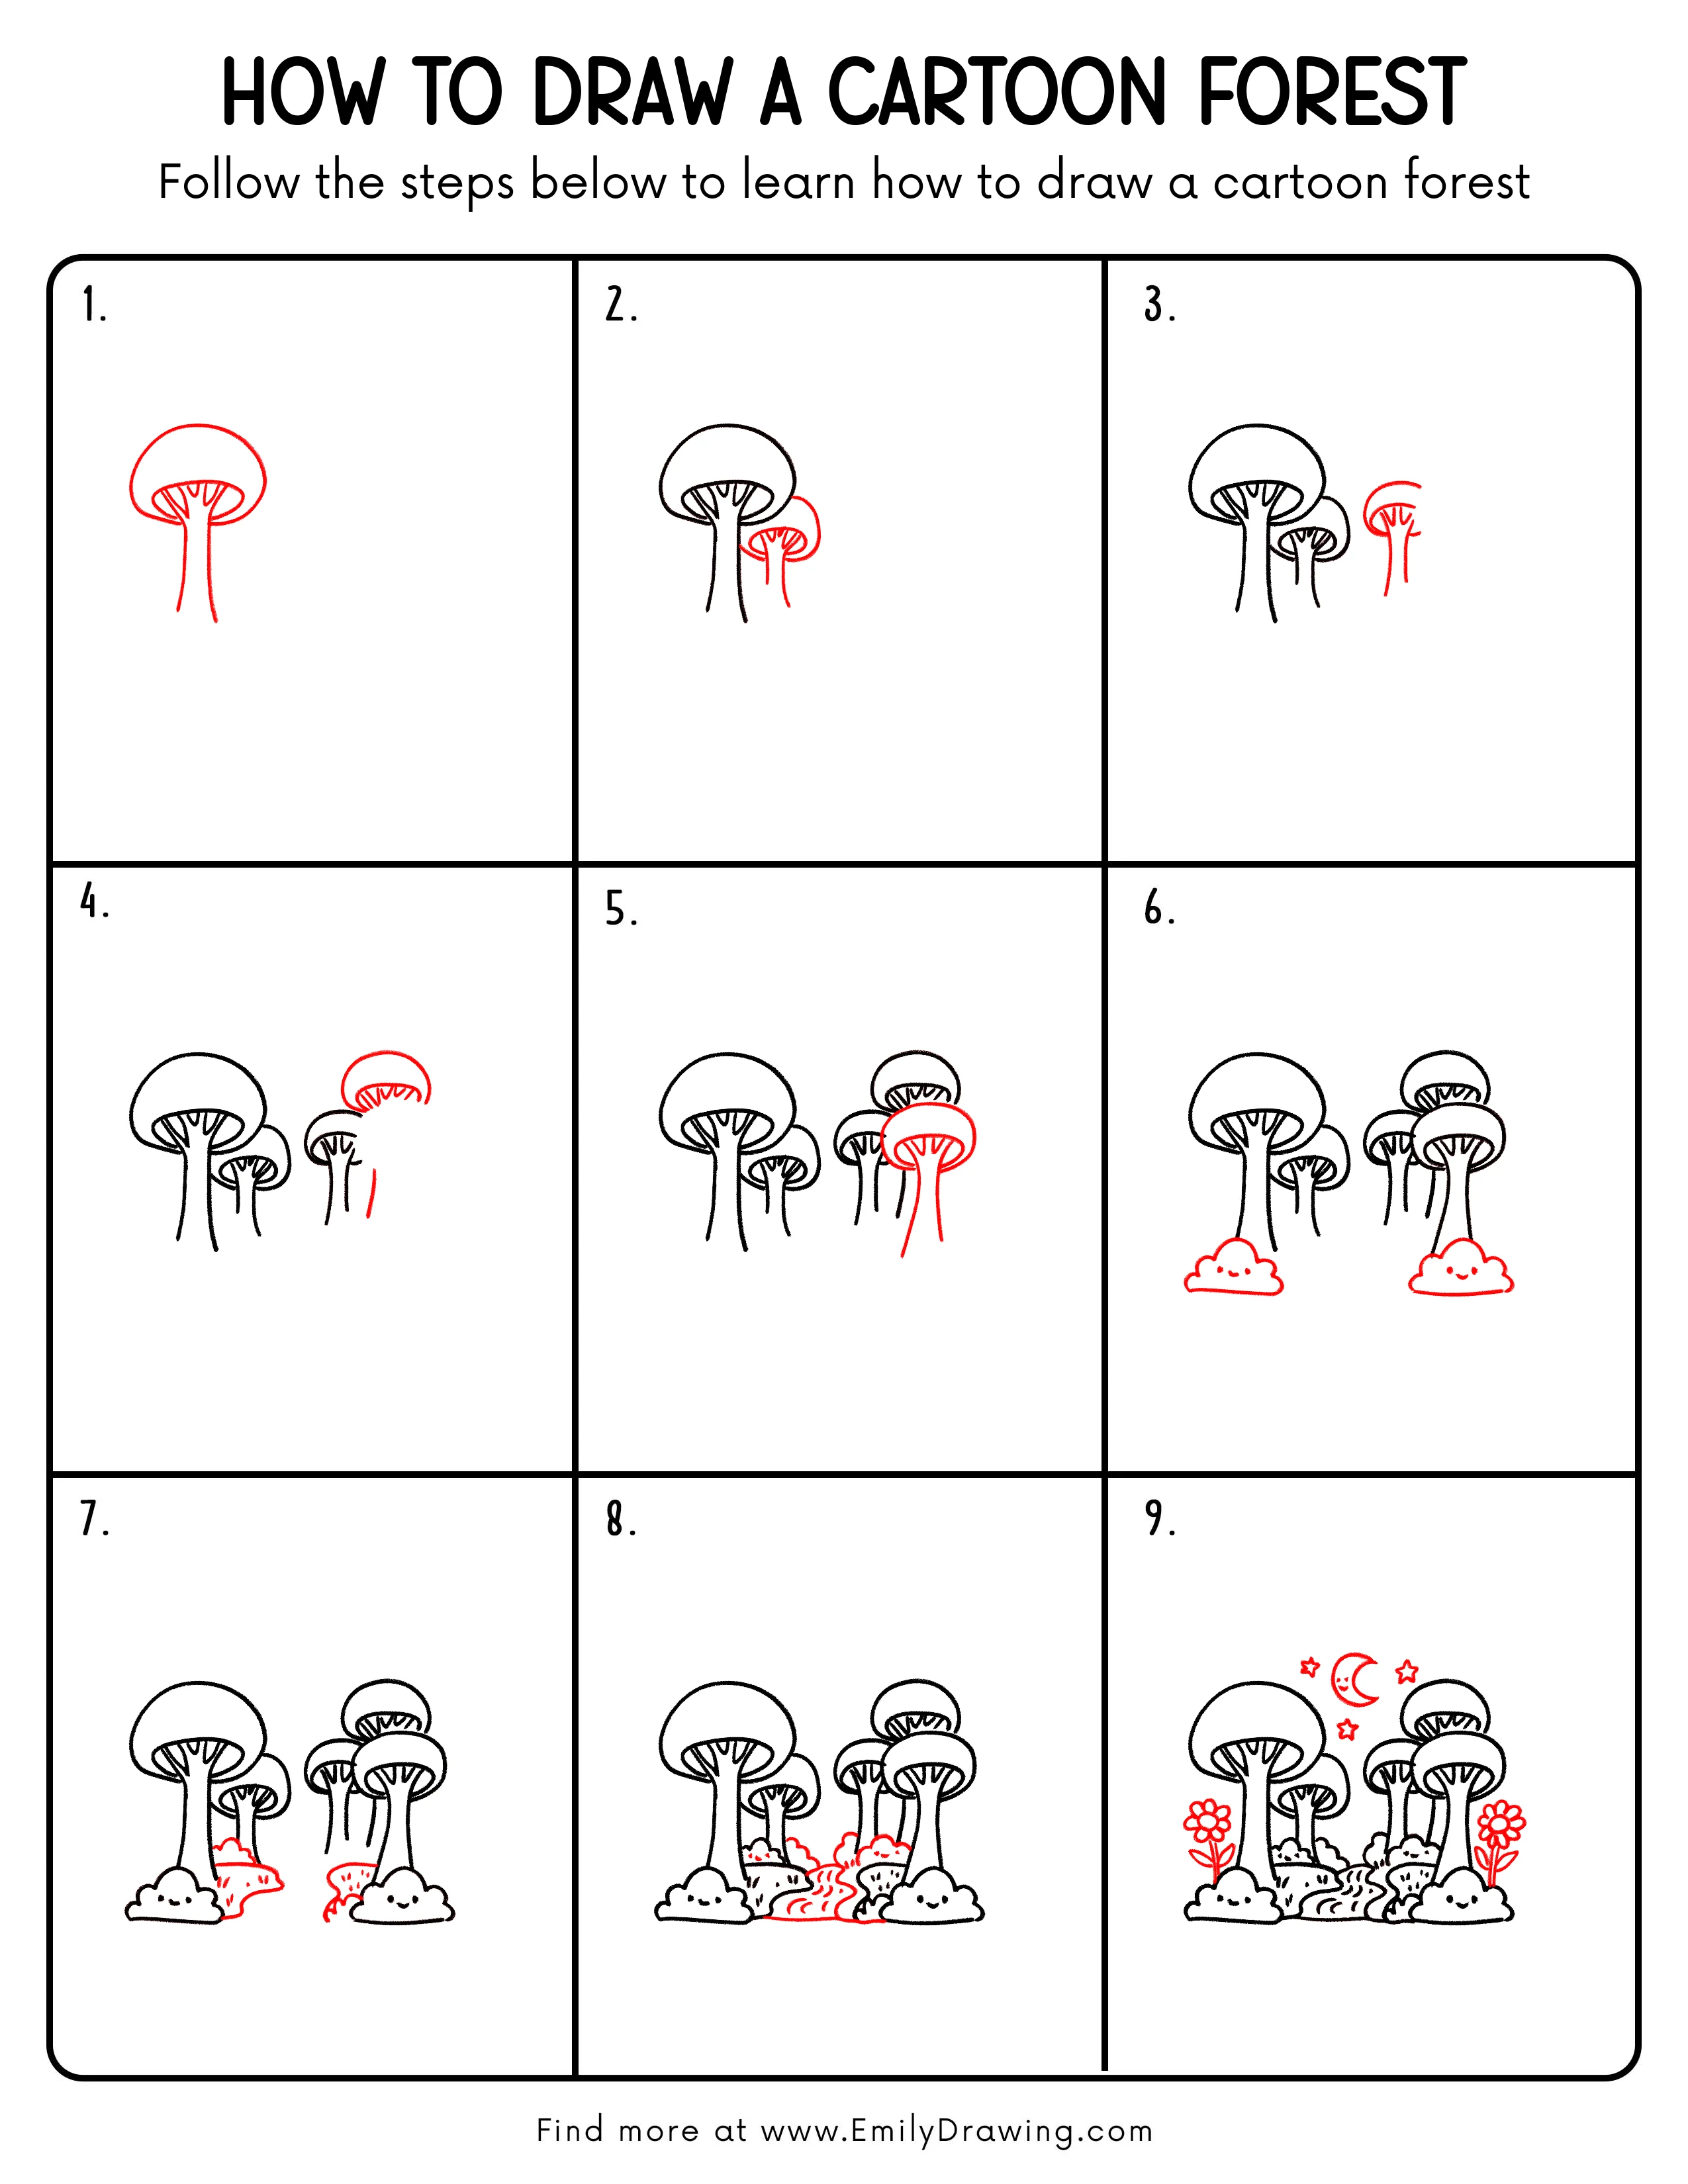
FREE Download Printable Cartoon Forest Drawing Tutorial
Frequently Asked Questions
How do I make my cartoon forest look more crowded?
Add a few small tree canopies in the back and let them overlap lightly.
What if my trees look uneven?
Keep the trunks narrow and use similar dome shapes, then adjust sizes for distance.
Can this be a daytime scene instead of night?
Yes—swap the moon and stars for a simple sun and a few small clouds.