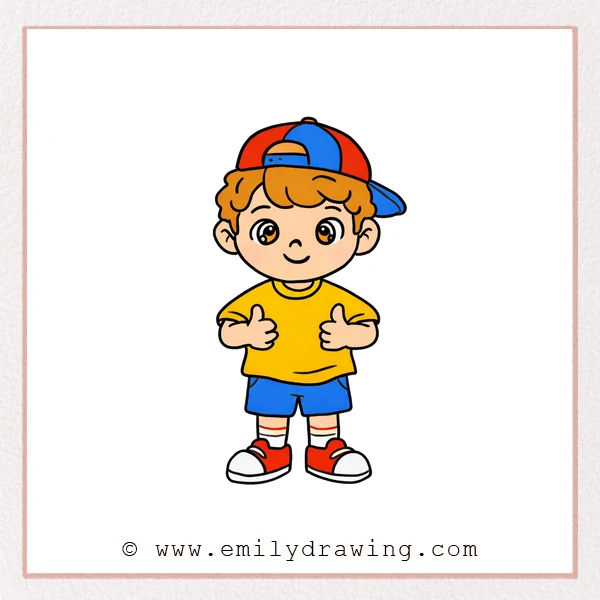
This easy drawing tutorial shows how to draw a cartoon boy step by step. You will build the drawing in simple shapes, then refine the details for a clean, friendly character. It is a calm, clear drawing for beginners that works well with pencil or marker.
What You Will Need
- Pencil and eraser (or a light sketch pen)
- Black marker or fineliner (optional for outlining)
- Paper
- Coloring tools (crayons, markers, or colored pencils)
Here are my RECOMMENDED Art Supplies!
- Crayola Coloring Set (140 Pieces – Mega Value!)
- 24 Colored Crayon Set
- A4 Printer Paper
- Crayola Coloring Pencils
- HP Home Printer with Instant Ink!
Time needed:
29 minutes.
Step-by-Step Drawing Guide
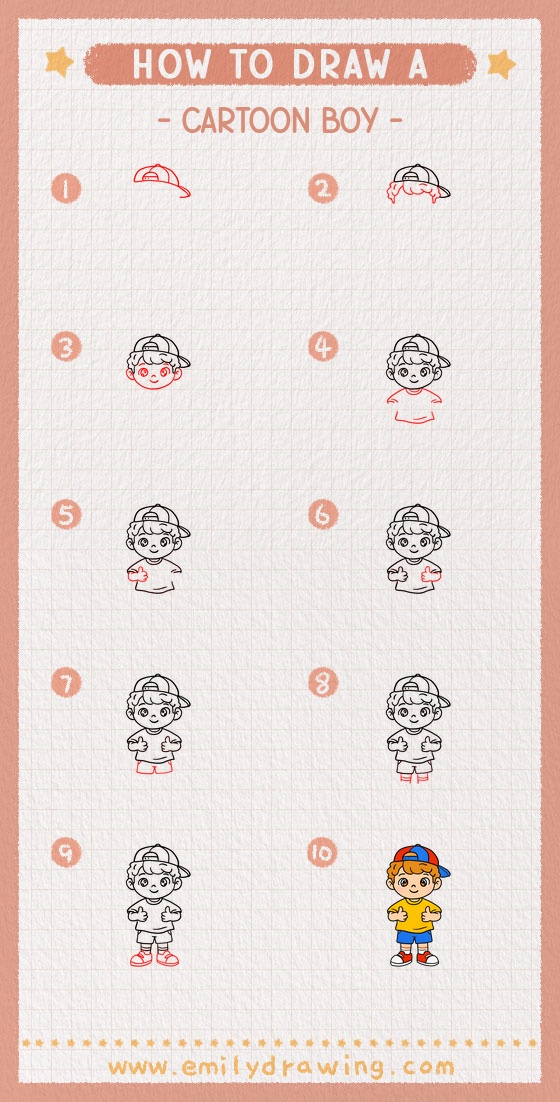
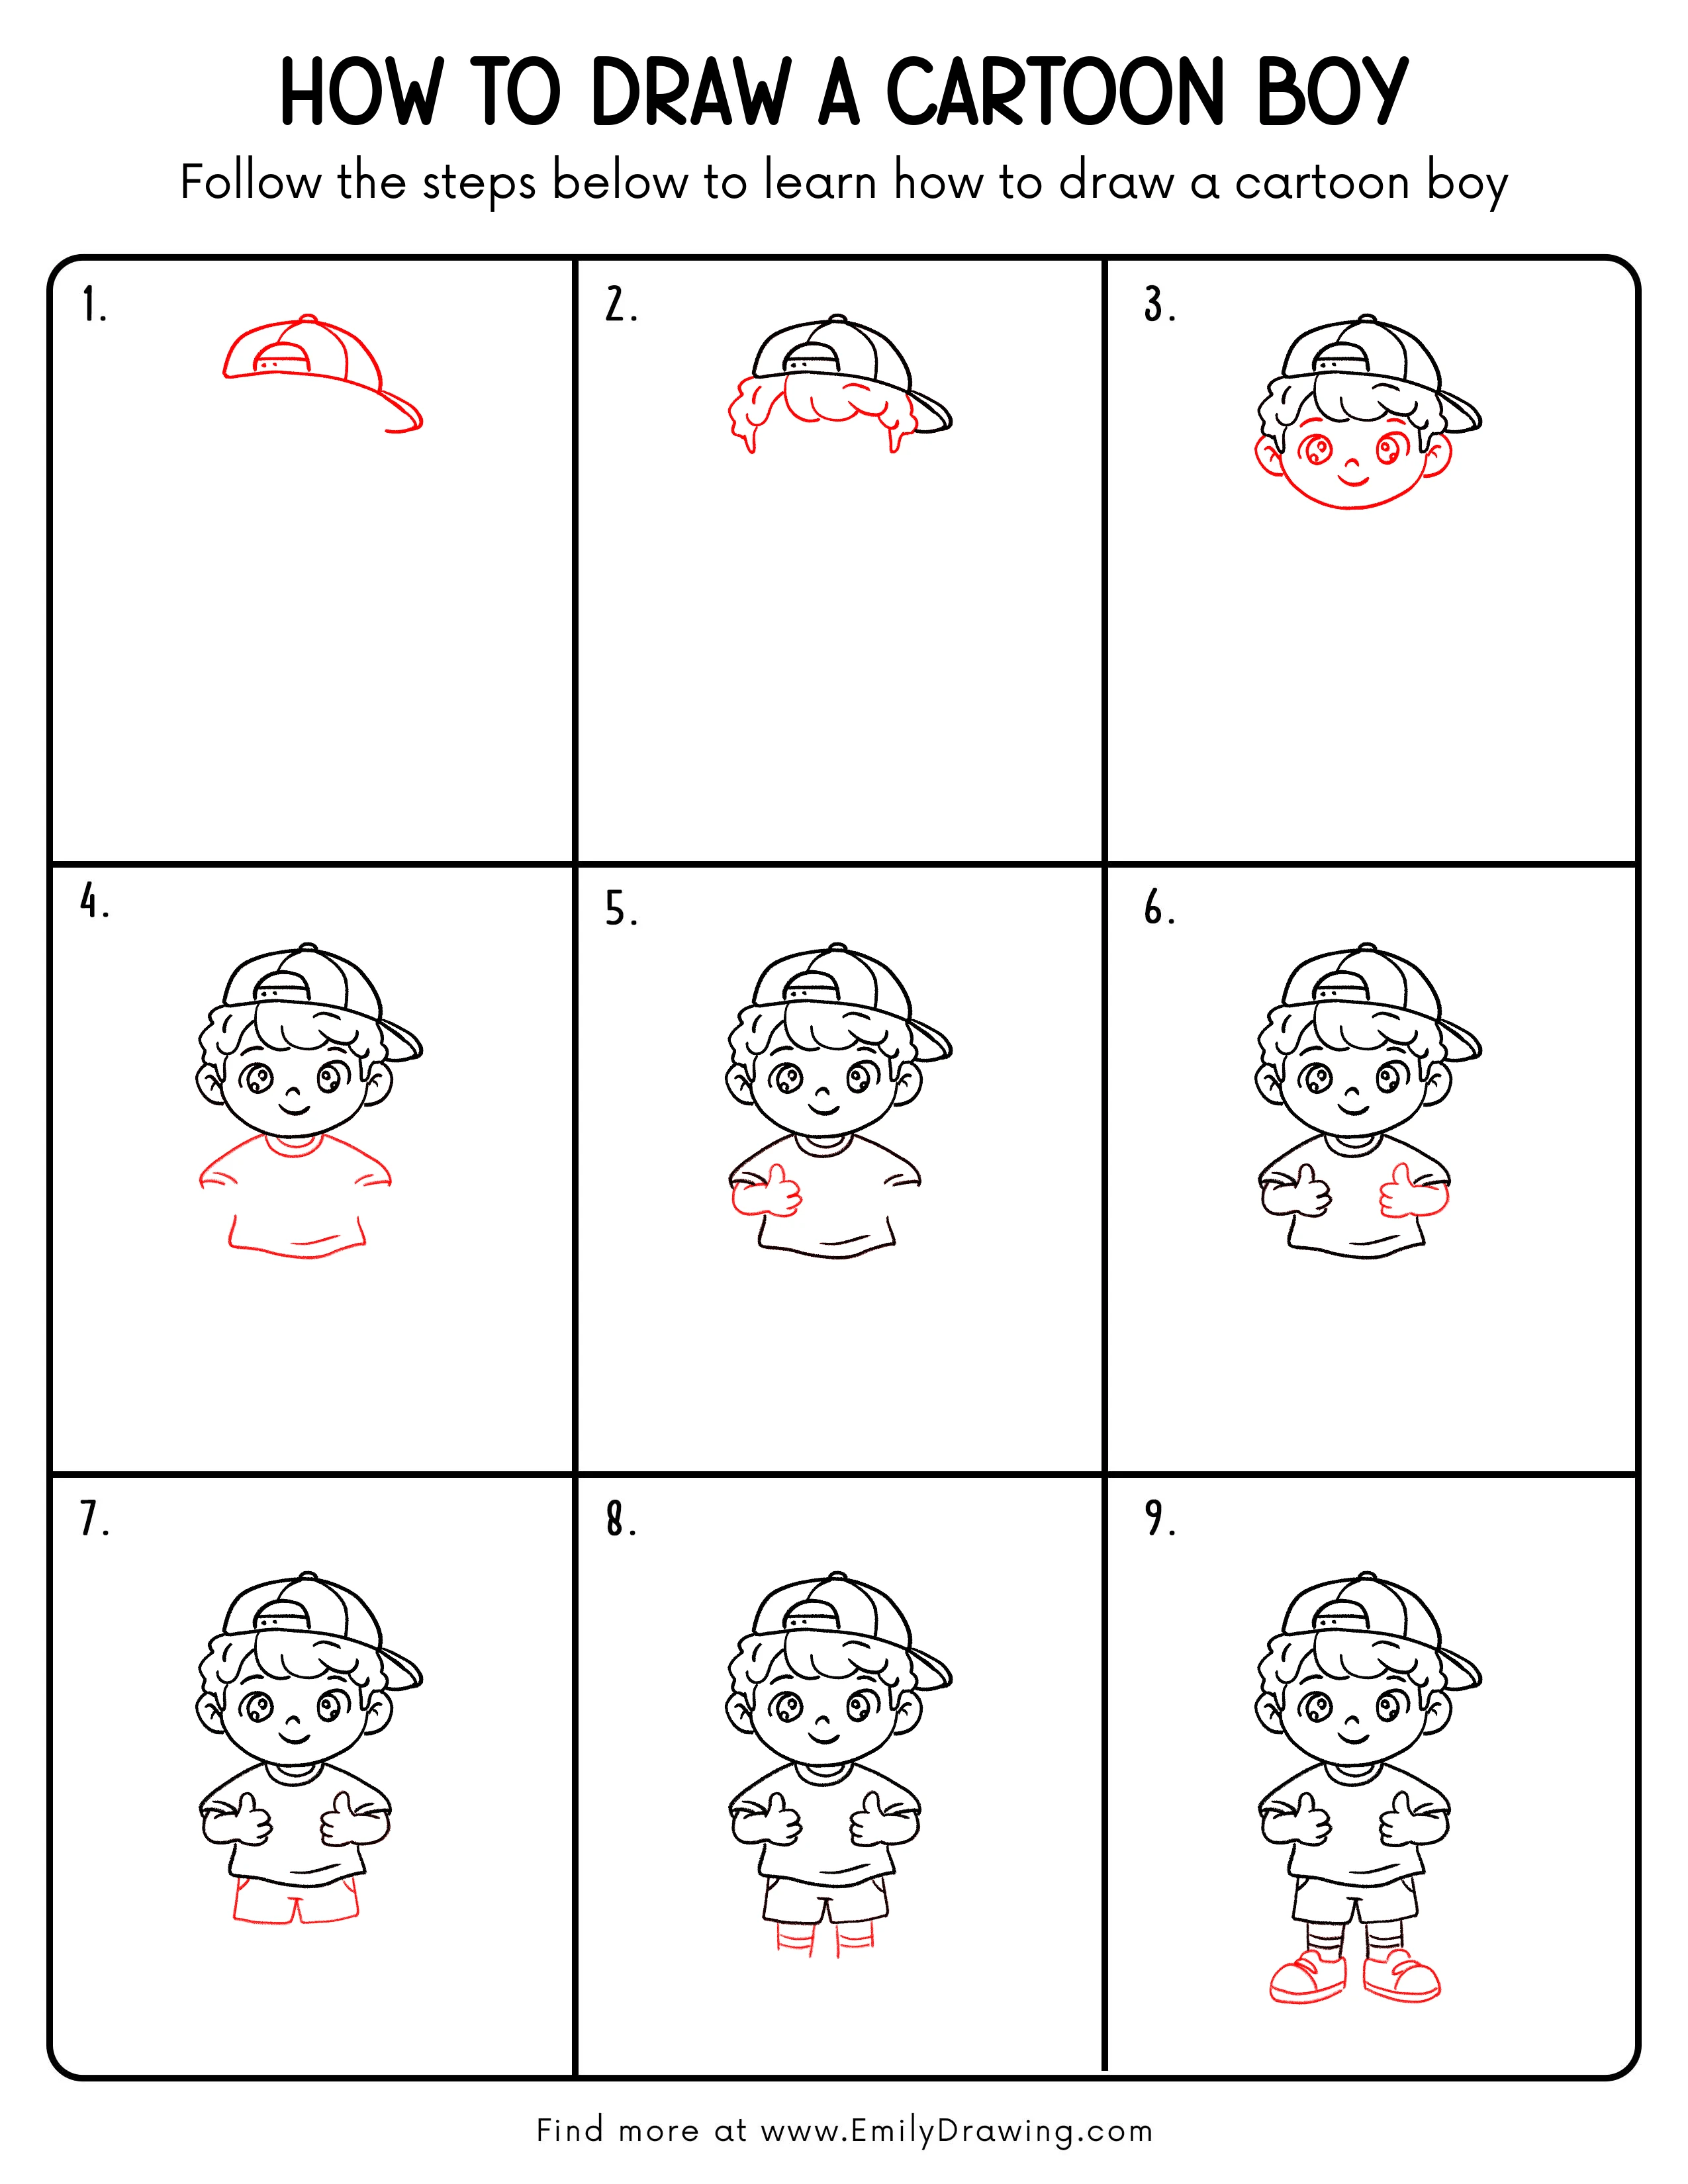
Step 1: Outline the Backward Baseball Cap

Start near the top of your page with a wide curved dome for the cap. Add a long brim stretching to the right, using a second curved line to show its thickness. Sketch a small strap shape in the center and add two tiny holes for detail.
Pro Tip: Keep the brim rounded, not sharp, for a more cartoon look.
Step 2: Add Fluffy Hair Under the Cap
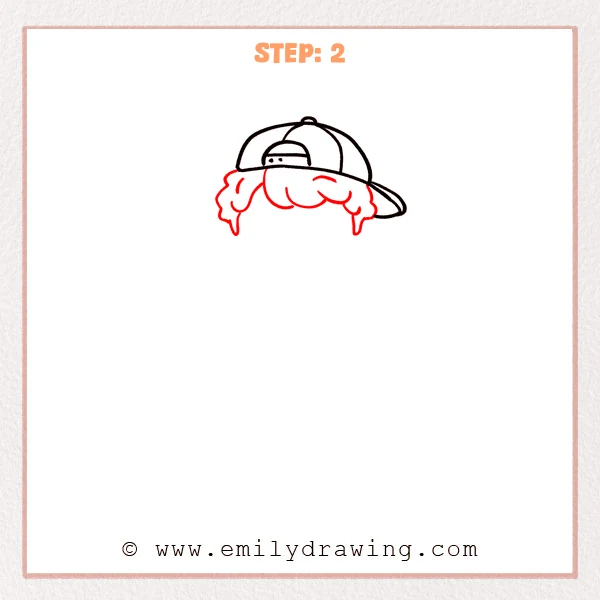
Along the bottom edge of the cap, add rounded, bumpy curves to form fluffy hair. Draw a longer hanging lock on the left and a smaller lock on the right to balance the shape. Let the ends taper softly so the hair feels light.
Pro Tip: Vary the size of the bumps to make the hair feel fuller.
Step 3: Add the Round Face and Friendly Features
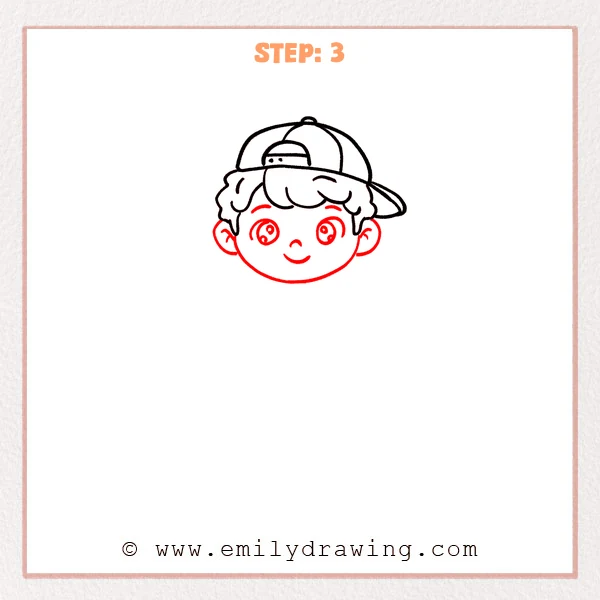
Under the hair, add a rounded face shape and close it with a soft curved chin. Draw a half-circle ear on each side, then add a small inner curve for detail. Finish with big sparkling eyes, a tiny nose, and a gentle smiling mouth.
Pro Tip: Keep both eyes level, with similar space on each side.
Step 4: Add the Neck and Shirt Outline
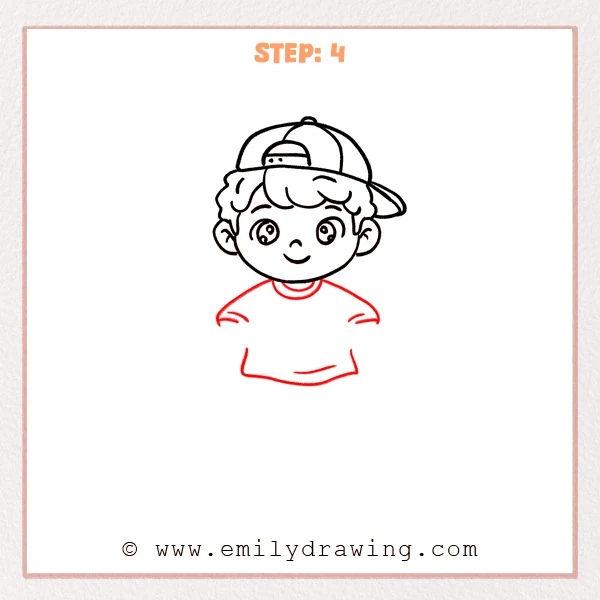
Draw two short curved lines under the chin for the neck, then add a double curved collar like a simple crewneck. From each side, sketch rounded shoulders and soft sleeve curves. Finish with a gently wavy hem line and one or two folds to show fabric.
Pro Tip: Round the shoulder lines to keep the boy looking relaxed and cute.
Step 5: Add the Thumbs-Up Hand and Arm
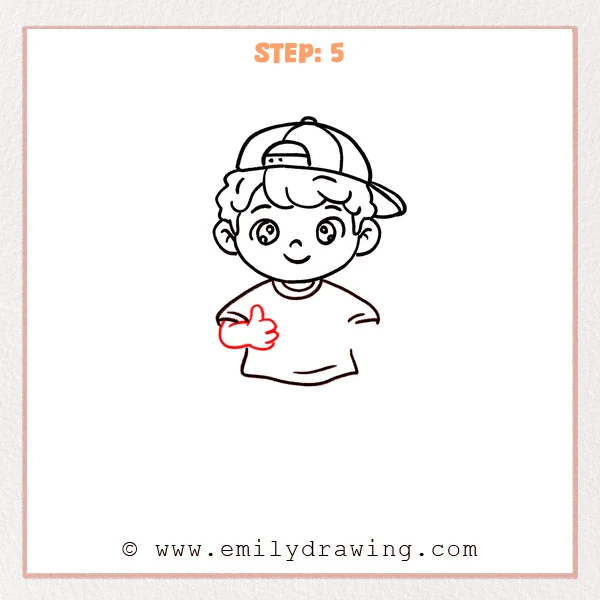
Under the left sleeve, sketch a short forearm and end it with a rounded mitten-like hand. Pull one rounded thumb upward, then add a couple of short curved lines to separate the fingers. Keep the hand in front of the shirt so the gesture reads clearly.
Pro Tip: Make the hand slightly larger than you think for a cartoon proportion.
Step 6: Add the Second Thumbs-Up Hand
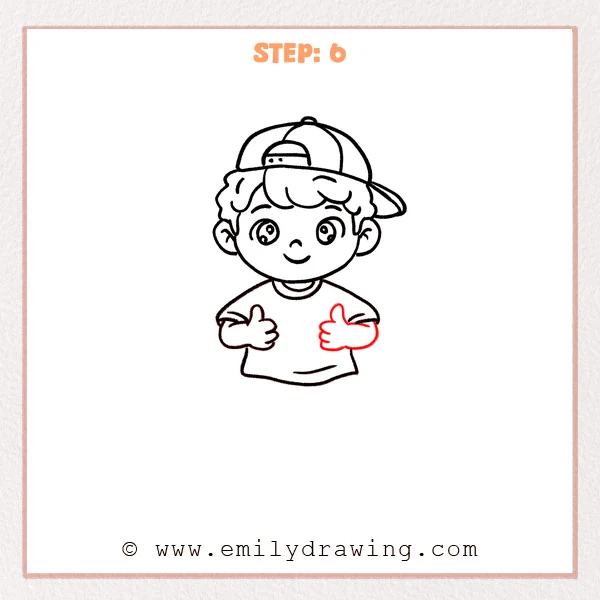
Under the right sleeve, draw a short forearm reaching toward the chest. Sketch a rounded hand and lift the thumb upward, keeping it close in size to the first hand. Add one or two short curves to suggest finger separation so both gestures match.
Pro Tip: Align the height of both thumbs to make the pose look neat.
Step 7: Draw the Shorts and Hem Structure
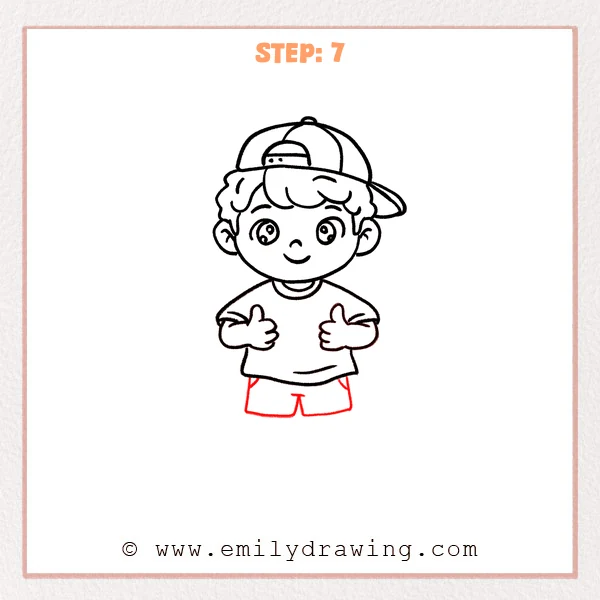
Under the shirt, sketch the outline of loose shorts with simple lines for each leg. Add a small inverted “V” or short curve in the center to separate the legs. Finish by adding small pocket openings on both sides to give the shorts a real clothing feel.
Pro Tip: Keep both legs similar in length so the shorts look balanced.
Step 8: Draw the Legs and Sock Stripes
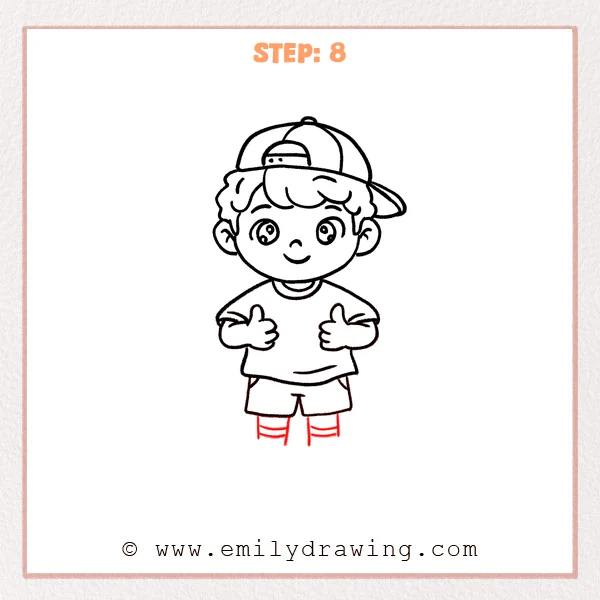
Under the shorts, add two simple legs using pairs of slightly tapered lines, and leave the feet open for now. On the lower part of each leg, draw two curved horizontal bands to suggest sporty sock stripes. Keep both legs close in length so the pose feels steady.
Pro Tip: Curve the sock bands slightly to match the roundness of the legs.
Step 9: Draw the Sneakers and Add Simple Details
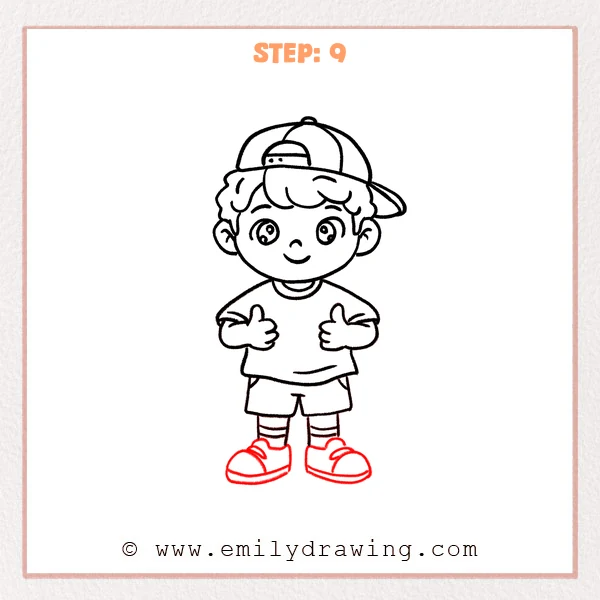
At the bottom of each leg, draw big sneakers with rounded toe caps and a long curved sole. Add a curved seam across each toe area, then sketch two or three short curves for laces or shoe folds. Keep the sole thickness similar on both shoes so the boy stands firmly.
Pro Tip: Draw the shoes a bit oversized to boost the cute cartoon style.
Step 10: Color in your drawing!
Fun Facts
- Many cartoon styles use bigger eyes to make characters look friendly and readable.
- A backward baseball cap is a simple shape that adds personality fast.
- Oversized shoes are a classic cartoon trick for a cute, playful look.
Pin it now, Draw later!
You have built a complete cartoon boy by adding one clear piece at a time. Try coloring the cap and shirt in bright tones, then add light shading under the brim and along the shirt folds. A common beginner mistake is making the arms different sizes, so compare both sides before inking. Keep practicing this step by step drawing, and try drawing the same cartoon boy with a new expression or outfit next.
Get the FREE Printable Drawing Guide
FREE Download Printable Cartoon Boy Drawing Tutorial
Frequently Asked Questions
How do I keep the face looking even on both sides?
Lightly mark where the eyes and ears will go, then match the spacing.
What if my hands look too small or too messy?
Make the palms bigger and simplify the finger lines to just a few curves.
Can I change the pose without redrawing everything?
Yes, keep the head and body, then redraw only the arms and hands in a new position.