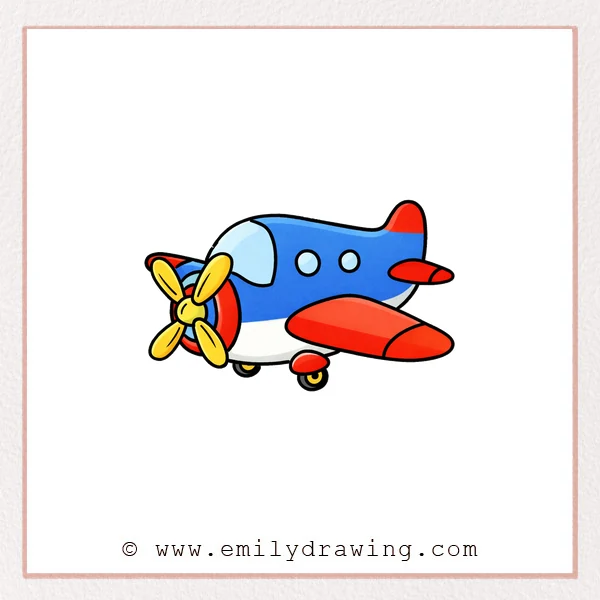
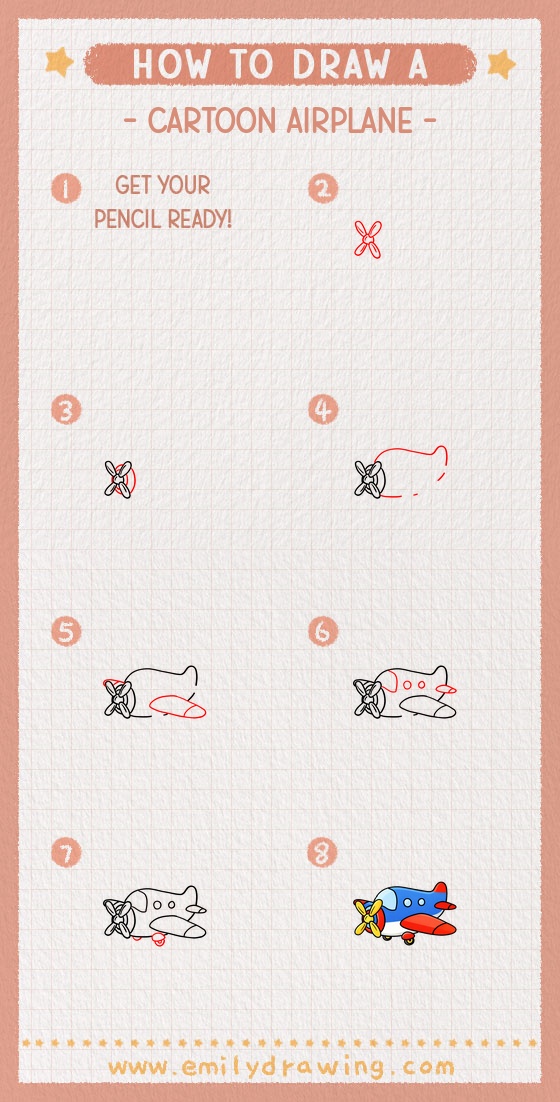
This easy drawing tutorial shows how to draw a cartoon airplane step by step. You will build the airplane from simple shapes, then refine the details. Take your time, and enjoy this drawing for beginners.
What You Will Need
- Pencil
- Eraser
- Black marker or fineliner
- Coloring tools (crayons, colored pencils, or markers)
- Paper
Here are my RECOMMENDED Art Supplies!
- Crayola Coloring Set (140 Pieces – Mega Value!)
- 24 Colored Crayon Set
- A4 Printer Paper
- Crayola Coloring Pencils
- HP Home Printer with Instant Ink!
Time needed:
18 minutes.
Step-by-Step Drawing Guide
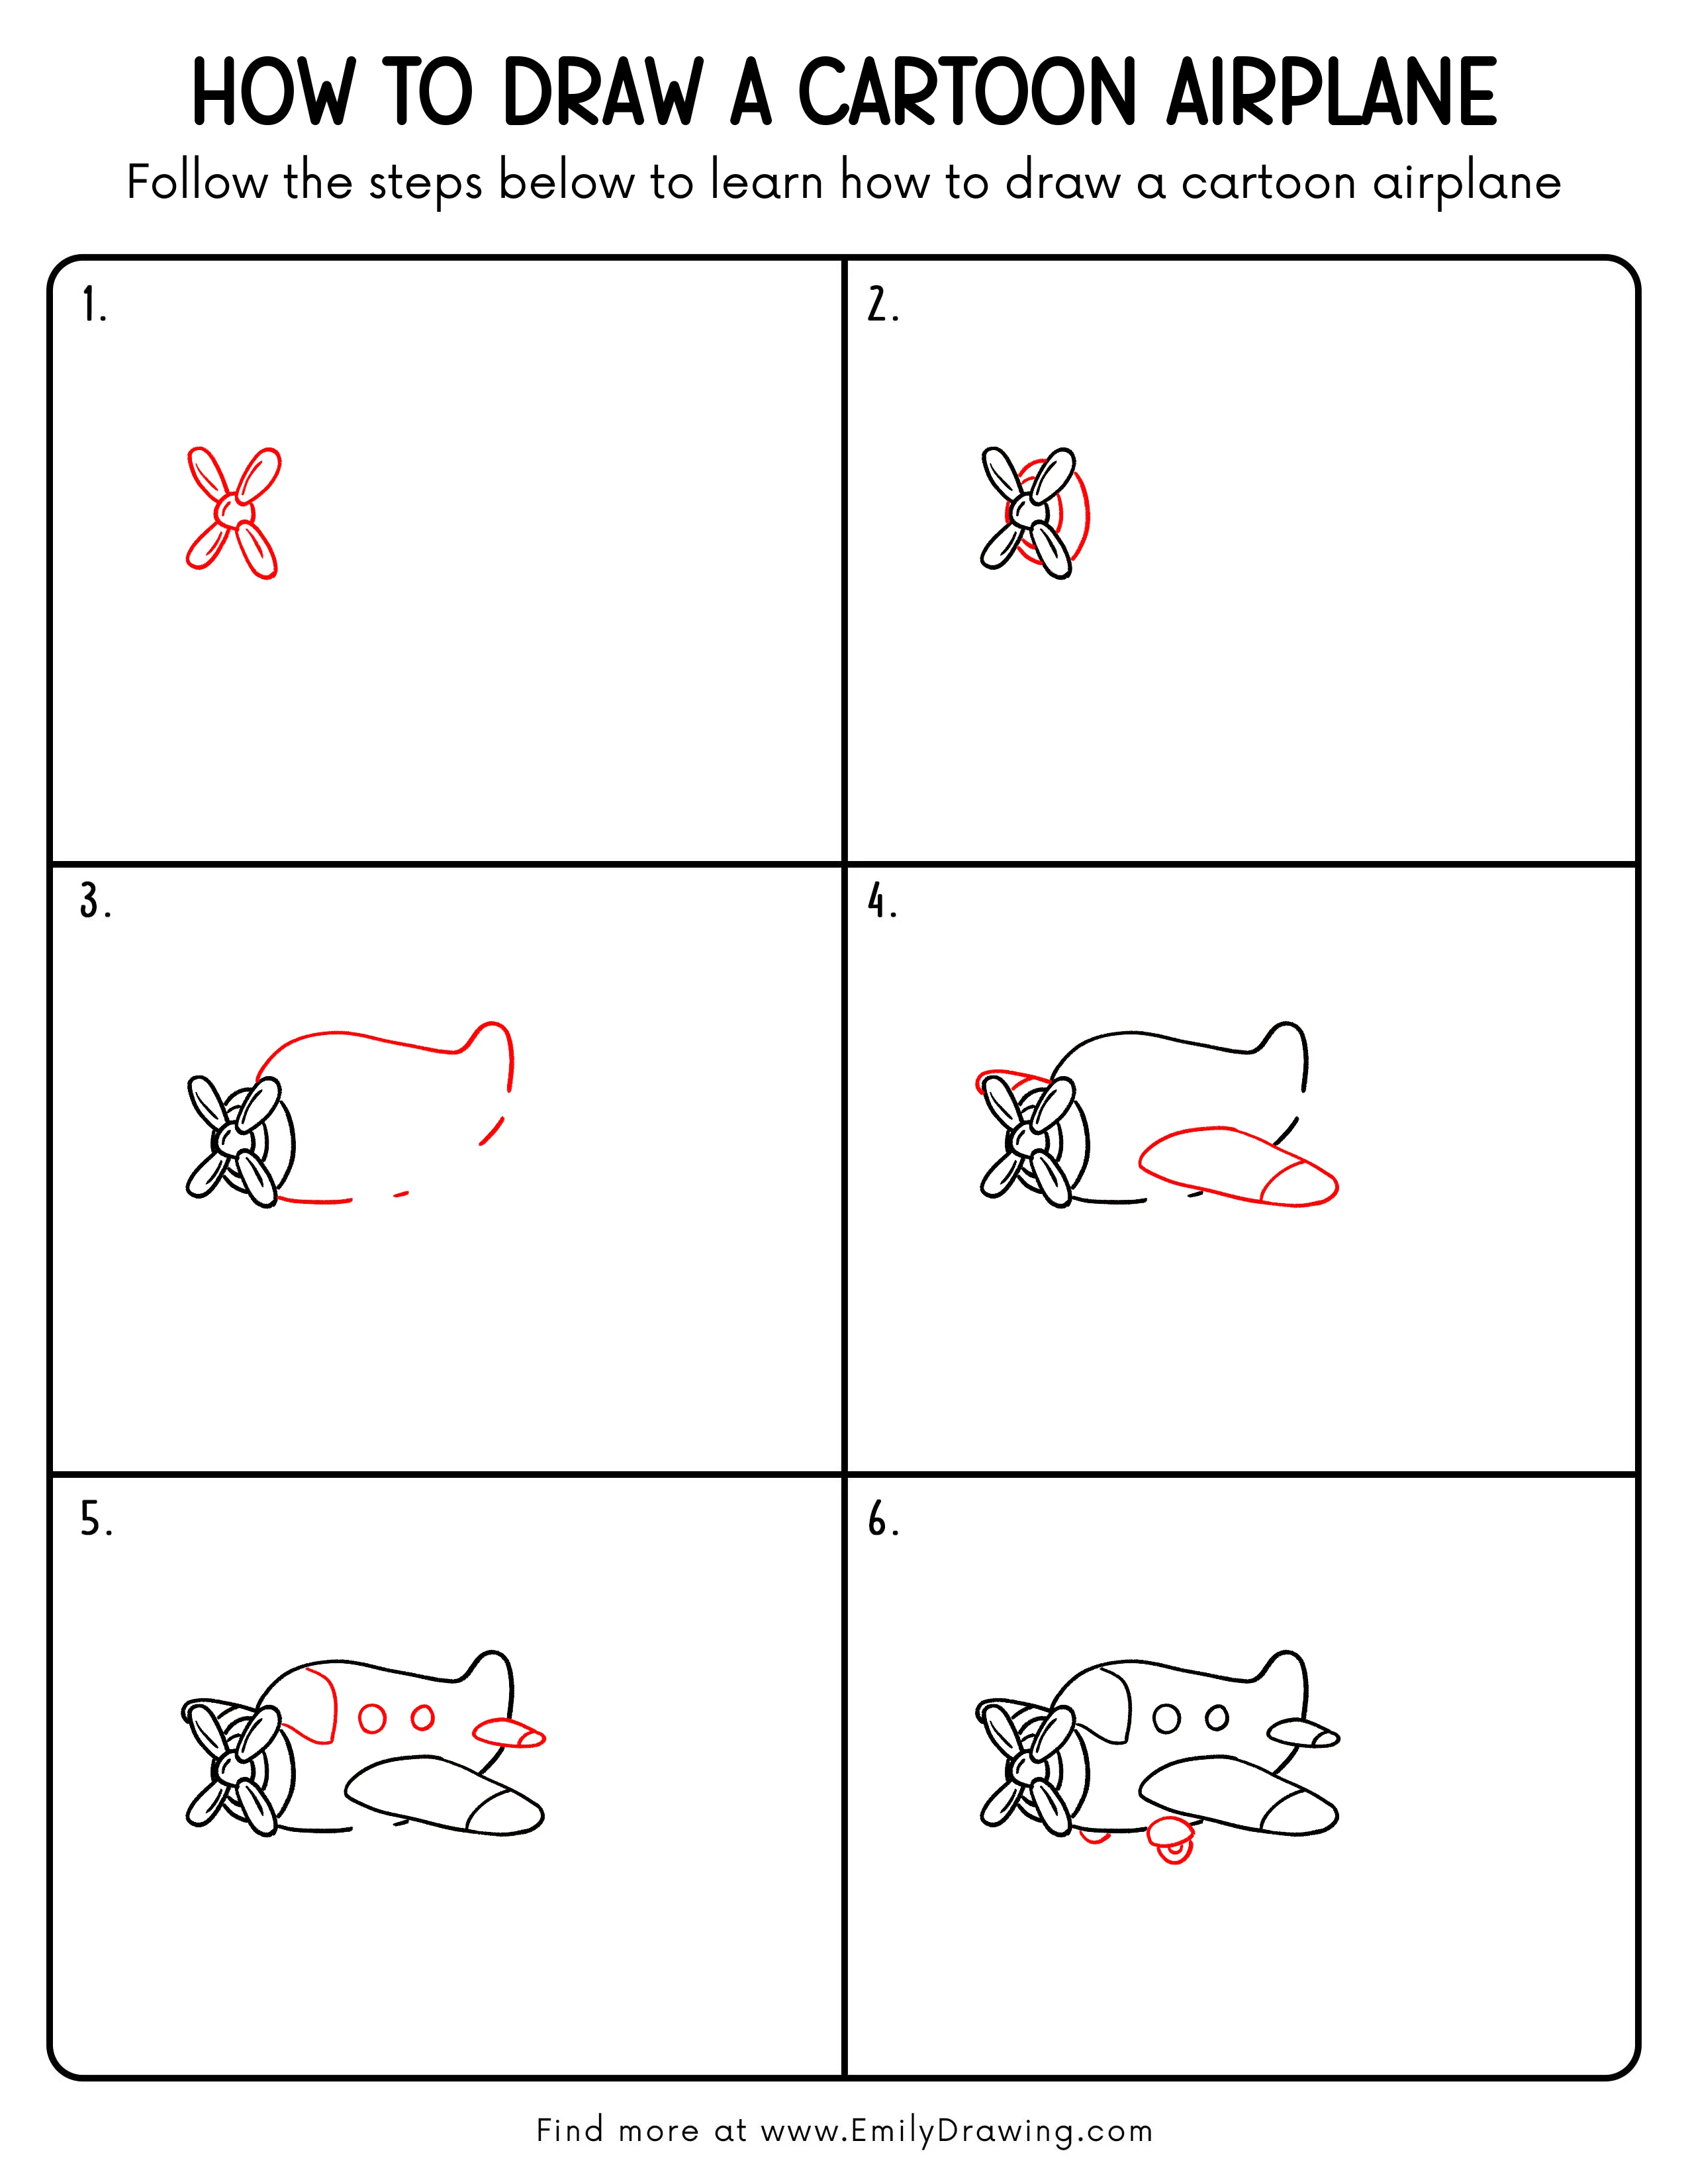
Step 1: Draw the Propeller Base
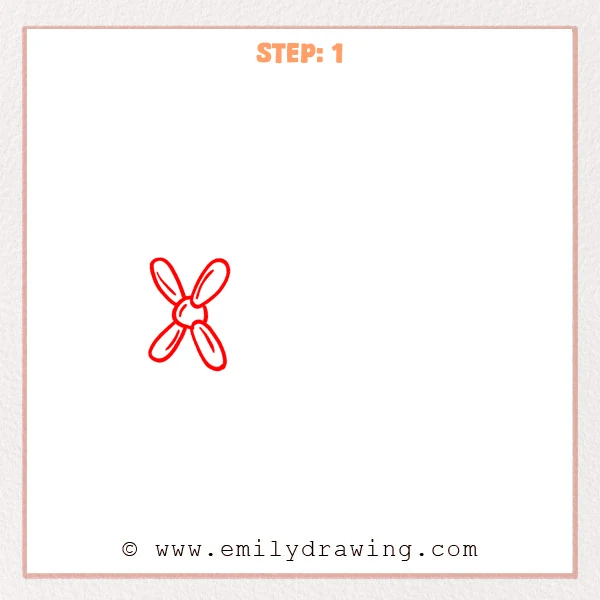
Start with a small rounded hub slightly left on the page. Add four long oval blades coming out in four directions, spaced evenly like a four-petal flower. Keep the ovals soft and rounded.
Pro Tip: Keep the blades similar in length so the propeller looks balanced.
Step 2: Add the Nose Ring
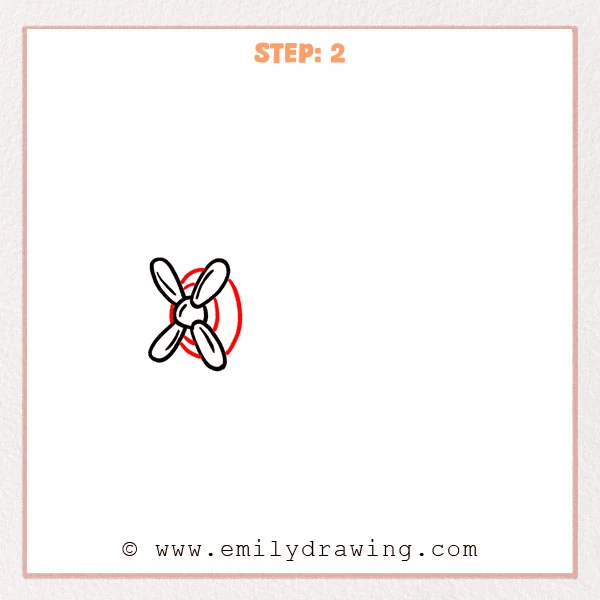
Behind the propeller, sketch a tall oval ring so the propeller sits in front of it. Add a smaller curved line inside the ring to create a double rim. This helps the airplane’s nose feel sturdy.
Pro Tip: Leave a small gap around the propeller so the nose looks more three-dimensional.
Step 3: Sketch the Long Fuselage Outline
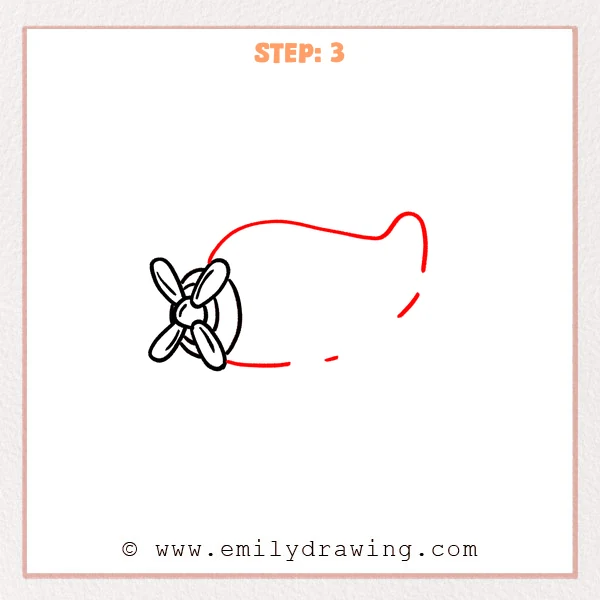
From the top of the nose ring, sweep a long curved line to the right to form a rounded back. Near the far right, lift the line slightly to create a gentle tail bump. Keep the very end open for now.
Pro Tip: Try to keep the top line smooth in one stroke for a cleaner airplane shape.
Step 4: Add the Wing and Front Detail
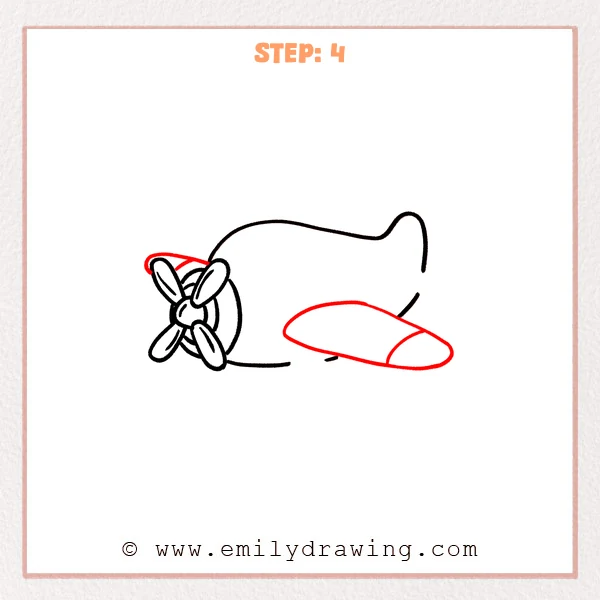
Draw a large rounded wing under the right side of the fuselage, shaped like a flattened capsule stretching to the right. Add a curved divider near the wing’s right end to suggest thickness. Place a short curved line above the propeller to add a little nose detail.
Pro Tip: Let the wing tuck neatly into the body so the airplane feels sturdy.
Step 5: Add the Cockpit, Windows, and Small Tail Wing
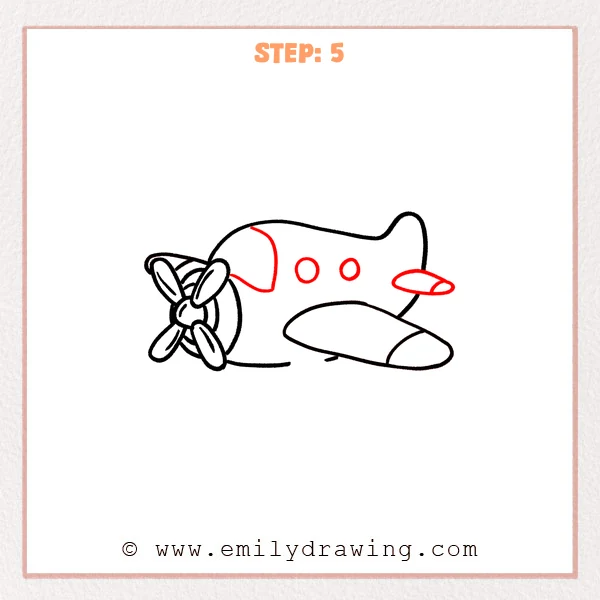
Sketch a rounded cockpit window on the front-top of the fuselage, like a curved rectangle. Add two small circular windows in the middle, spaced evenly. Then draw a small side tail wing at the back-right, shaped like a tiny capsule.
Pro Tip: Keep the windows on the same level so the airplane looks neat.
Step 6: Add the Landing Gear and Wheels
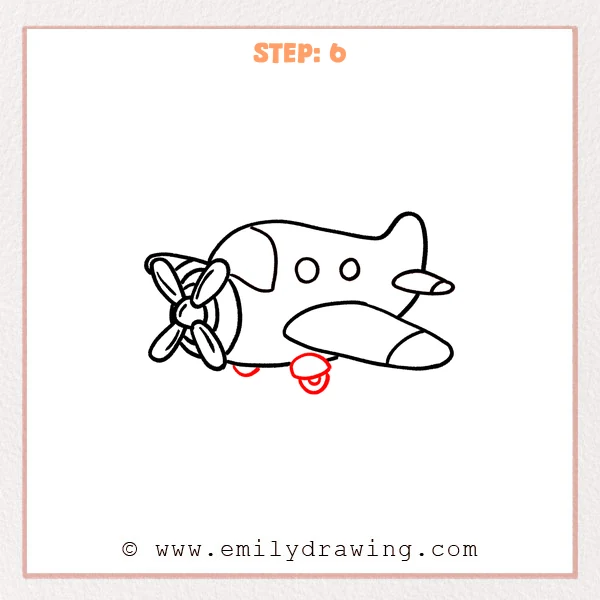
Under the fuselage near the front, add a small curved support like a tiny crescent. Under the wing area, draw a larger wheel set with a flat oval cover. Add a small round tire beneath it so the airplane looks ready to land.
Pro Tip: Put the main wheel slightly under the wing’s middle for a natural balance.
Step 7: Color in your drawing!
Fun Facts
- Propellers pull or push air to create thrust, helping some planes move forward.
- Landing gear is designed to absorb bumps, making takeoffs and landings smoother.
- Many small airplanes have simple rounded shapes, which are great for beginner drawings.
Pin it now, Draw later!
Now you have a clear cartoon airplane shape with a propeller, wing, windows, and wheels. Trace your final lines with a marker, then erase leftover pencil marks slowly. Try adding shading under the wing and belly, and make the windows a darker color for contrast. A common beginner mistake is placing the main wheel too far back, so keep it under the wing for balance. Practice this step by step drawing again, and try changing colors or adding clouds in the background for your next easy drawing tutorial.
Get the FREE Printable Drawing Guide
FREE Download Printable Cartoon Airplane Drawing Tutorial
Frequently Asked Questions
How can I make the airplane look more three-dimensional?
Add a light shadow under the fuselage and wing, and thicken the nose ring line slightly. Keeping one side darker makes the form feel round.
What if my propeller blades look uneven?
Erase and redraw one blade at a time, using the hub as your guide. Matching the blade lengths first makes the angles easier.
How do I color a cartoon airplane nicely?
Use two colors: one for the body and one for accents like the wing tip and tail. Add a small highlight on the windows to make them look shiny.