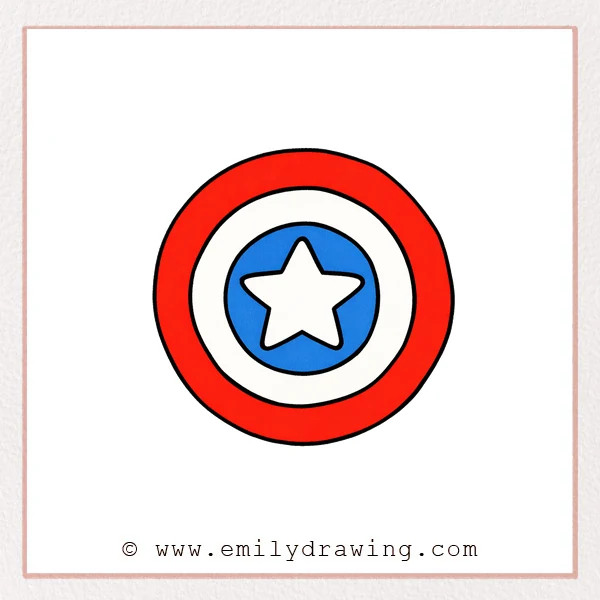
This easy drawing tutorial shows how to draw Captain America’s shield step by step. We will build it using simple circles and a centered star, so it feels clear and calm for drawing beginners. Take your time, and let each ring guide the next one.
What You Will Need
- Pencil
- Eraser
- Black marker or pen (optional, for outlining)
- Ruler or round object to trace (optional)
- Colored pencils or markers (red, white, blue, and gray)
Here are my RECOMMENDED Art Supplies!
- Crayola Coloring Set (140 Pieces – Mega Value!)
- 24 Colored Crayon Set
- A4 Printer Paper
- Crayola Coloring Pencils
- HP Home Printer with Instant Ink!
Time needed:
10 minutes.
Step-by-Step Drawing Guide
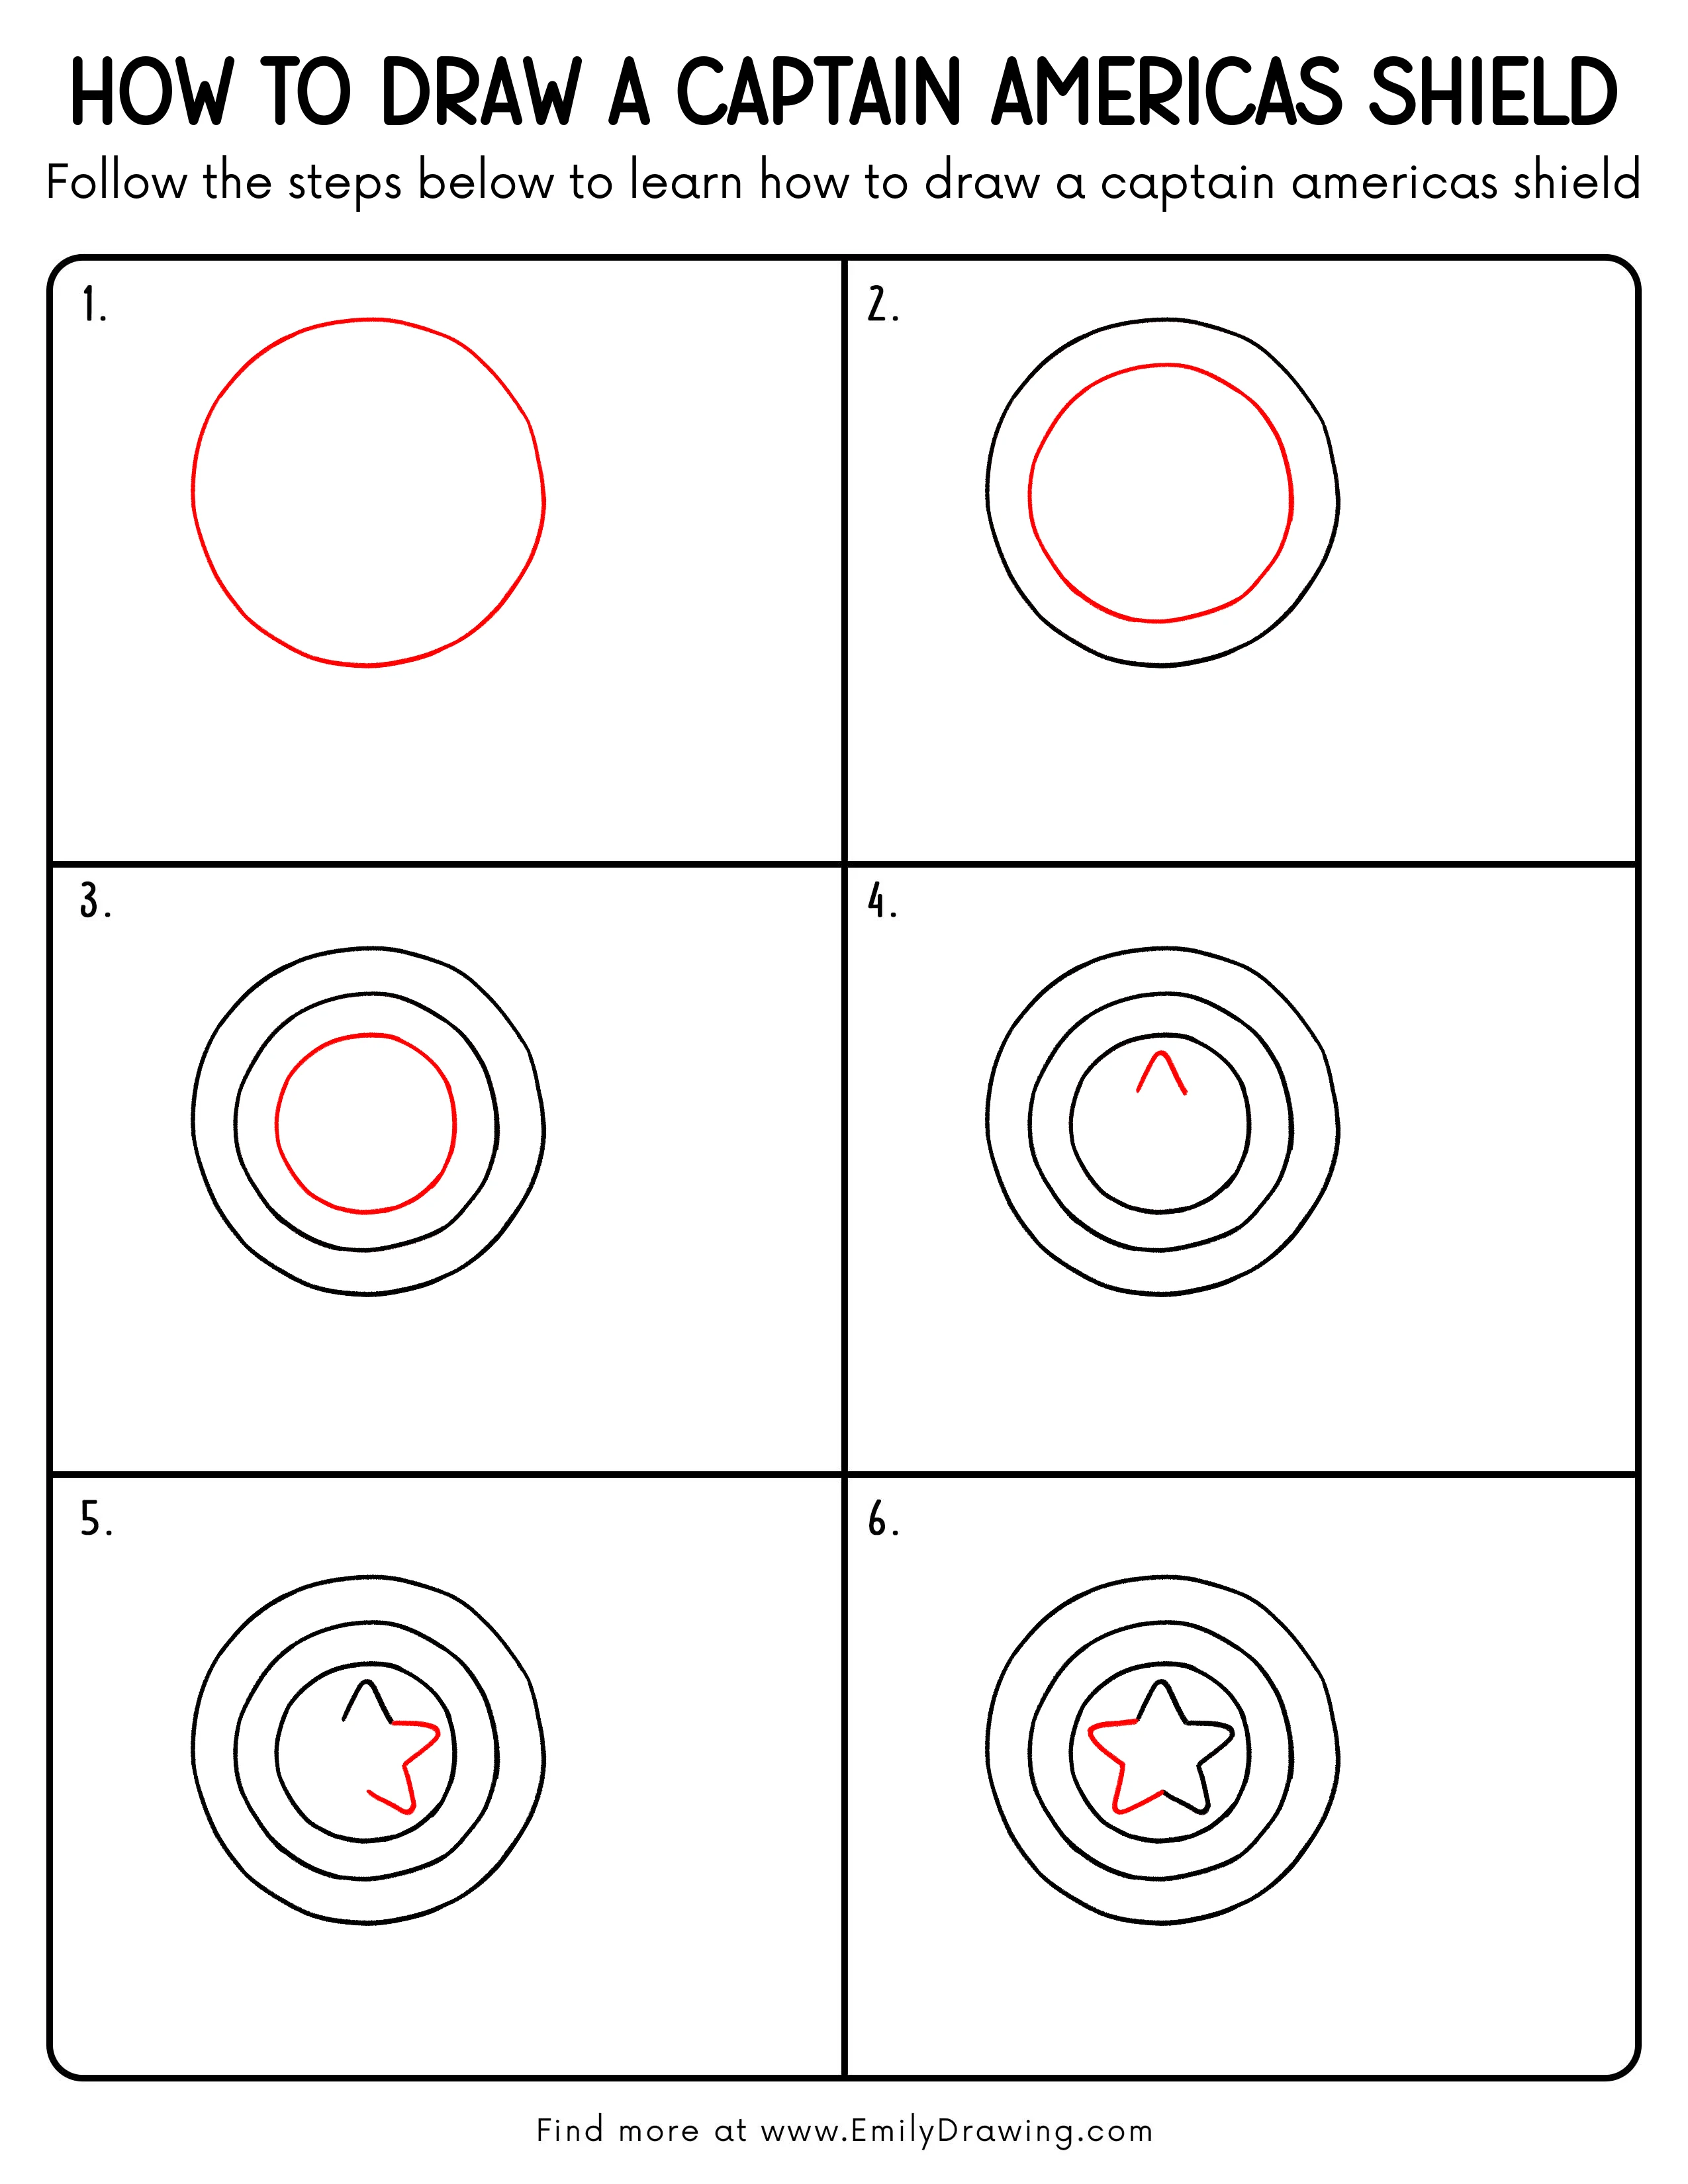
Step 1: Draw the Shield’s Outer Circle
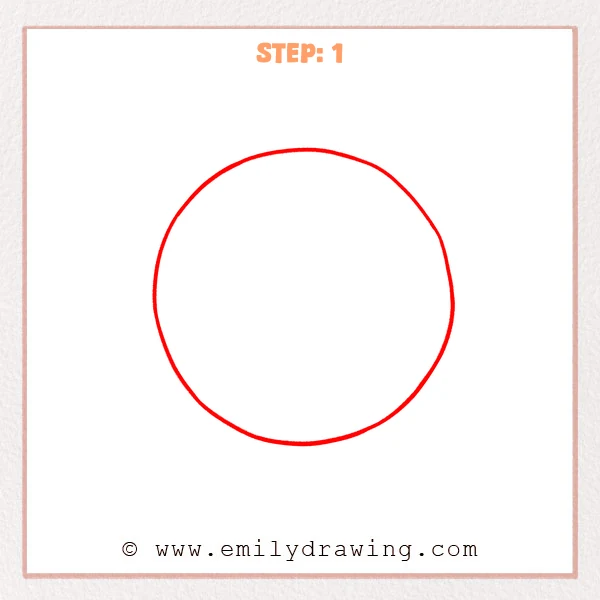
Start with a large circle in the center of your page for the shield’s outer edge. It does not need to be perfect, just smooth and closed. You can keep the line slightly thicker to make the border stand out.
Pro Tip: Sketch the circle lightly first, then trace it darker once the placement feels right.
Step 2: Add an Inner Circle
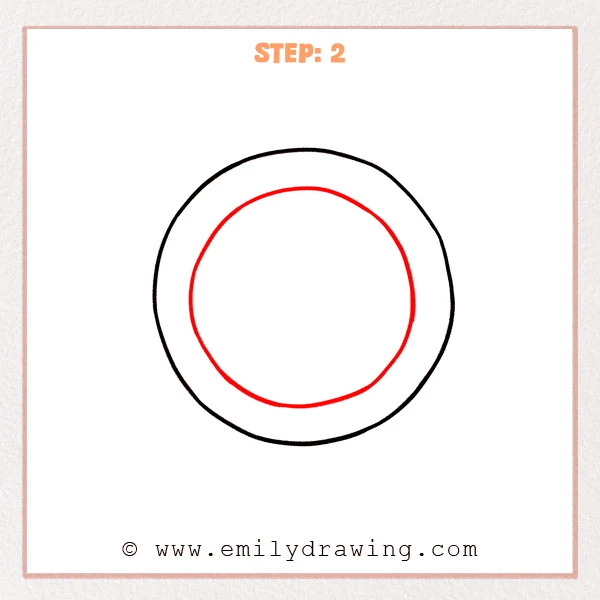
Inside the first big circle, draw a smaller circle that stays centered. Try to keep the gap even all the way around, and sketch it lightly before you darken the line.
Pro Tip: Mark four guide points (top, bottom, left, right) before connecting the curve.
Step 3: Add the Middle Ring Circle
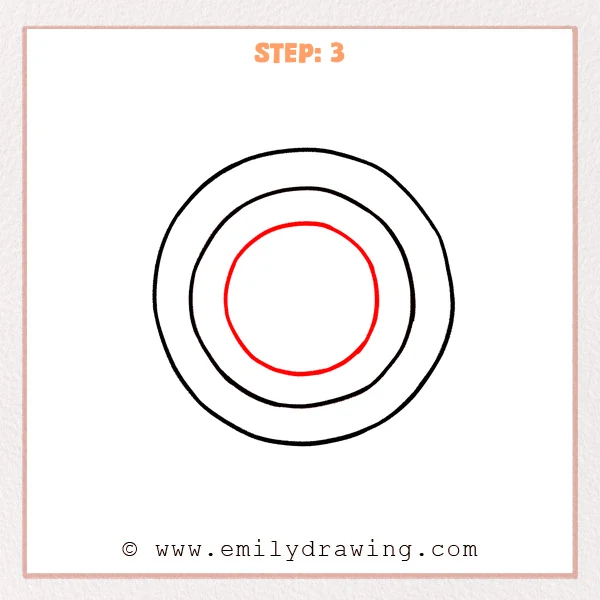
Between the outer circle and the inner circle, sketch one more centered circle to create the middle ring boundary. Let it travel smoothly around, keeping the spacing fairly even from the outer edge.
Pro Tip: Pause halfway to check the spacing all around before finishing the loop.
Step 4: Sketch the Star’s Top Point
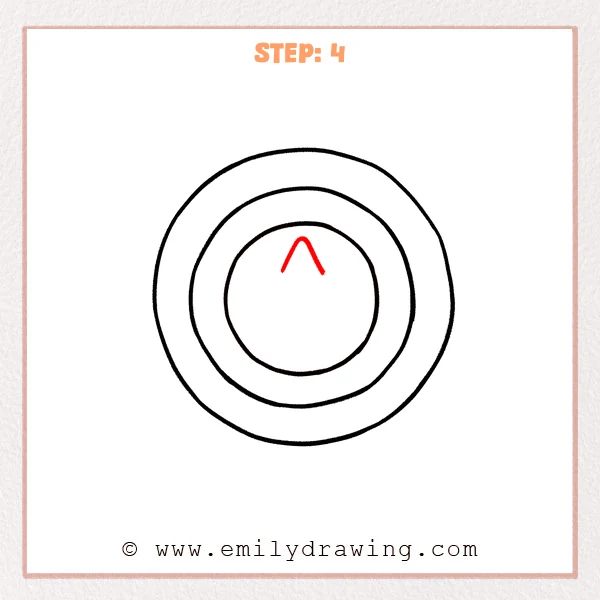
Near the upper area inside the smallest circle, draw a small pointed peak like an upside-down “V.” Let the two lines curve down slightly, and keep them short for now so there is room for the other star points.
Pro Tip: Place the point slightly above the center so the star feels balanced.
Step 5: Add the Right and Lower-Right Star Points
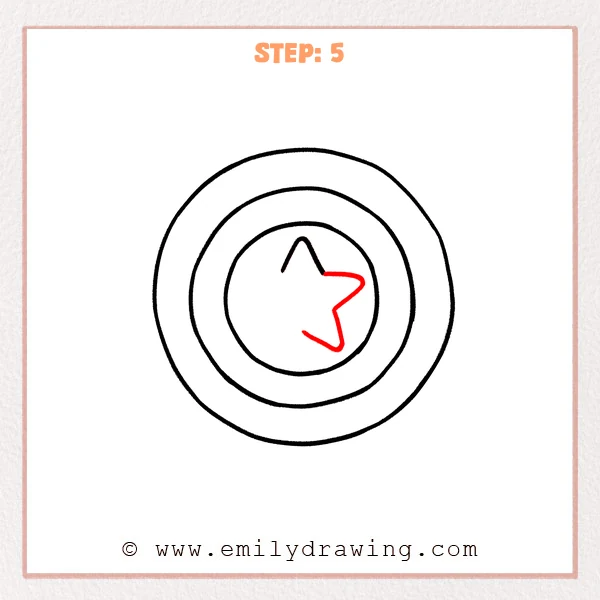
From the right end of the top point, extend a line outward to form the star’s right point. Then angle the line back down to create the lower-right point near the lower center area, keeping the corners clear but not too sharp.
Pro Tip: Leave a small gap from the inner circle so the star stays centered.
Step 6: Complete the Left Side to Close the Star
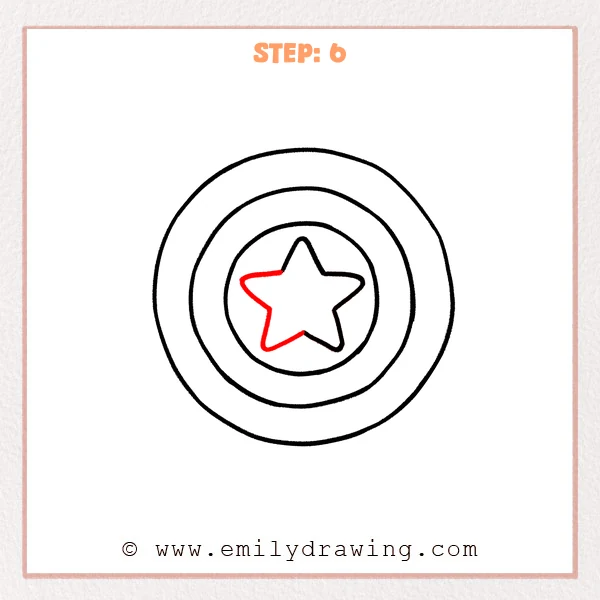
From the left end of the top point, extend a line outward to form the star’s left point. Then angle the line back down to meet the notch beside the bottom point, closing the star outline.
Pro Tip: Match the left point length to the right for a balanced star.
Step 7: Color in your drawing!
Fun Facts
- Captain America’s shield is often shown with bold rings and a bright center star, which makes it easy to recognize.
- Circles and stars are strong “symbol shapes,” so they read clearly even in simple drawings.
- Many artists build the shield with concentric circles first, then place the star last for clean symmetry.
Pin it now, Draw later!

Now you have the main shapes for Captain America’s shield: rings plus a centered star. If you want to color it, make the outer ring red, the next ring white, the next ring red, and the center area blue behind the white star. Add gentle shading by darkening one side of each ring and leaving a light highlight on the opposite side.
A common beginner mistake is letting the rings drift off-center, which makes the shield look lopsided. If that happens, lightly erase and adjust the circle spacing until the gaps feel even again.
Keep practicing this step by step drawing, and try drawing it at different sizes. When you feel ready, sketch the shield at an angle for an extra challenge, or explore another easy drawing tutorial for beginners.
Get the FREE Printable Drawing Guide
FREE Download Printable Captain Americas Shield Drawing Tutorial
Frequently Asked Questions
How do I keep the rings evenly spaced?
Use small guide marks at the top, bottom, left, and right before drawing each circle. Then connect the marks with smooth curved strokes.
My star looks uneven. What can I do?
Check that the top point is centered and that the left and right points reach out to similar distances. You can lightly redraw one point at a time until the star feels balanced.
Can I draw Captain America’s shield without a compass?
Yes. You can trace round objects like cups or lids, or draw the circles slowly using short curved lines that connect smoothly.