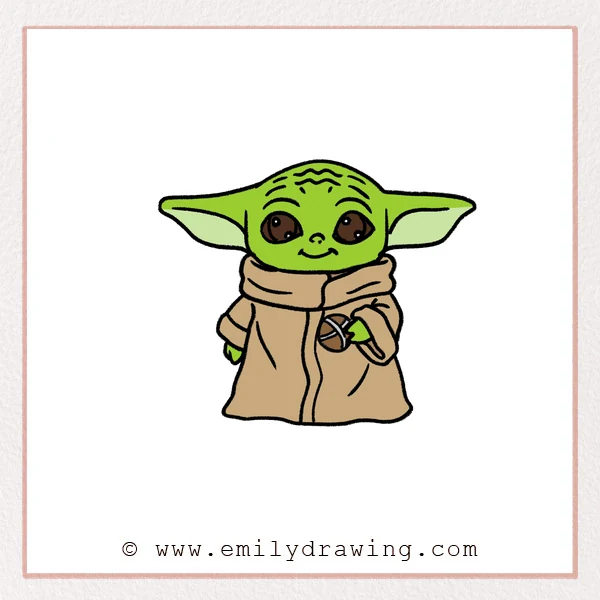
This easy drawing tutorial shows how to draw Baby Yoda step by step.
You will start with the head and ears, then add a cozy scarf and robe.
It is a calm drawing for beginners, built from simple curved shapes.
What You Will Need
- Pencil
- Eraser
- Black pen or fine liner
- Paper
- Colored pencils or markers (optional)
Here are my RECOMMENDED Art Supplies!
- Crayola Coloring Set (140 Pieces – Mega Value!)
- 24 Colored Crayon Set
- A4 Printer Paper
- Crayola Coloring Pencils
- HP Home Printer with Instant Ink!
Time needed:
18 minutes.
Step-by-Step Drawing Guide
Step 1: Outline Baby Yoda’s Head and Big Ears
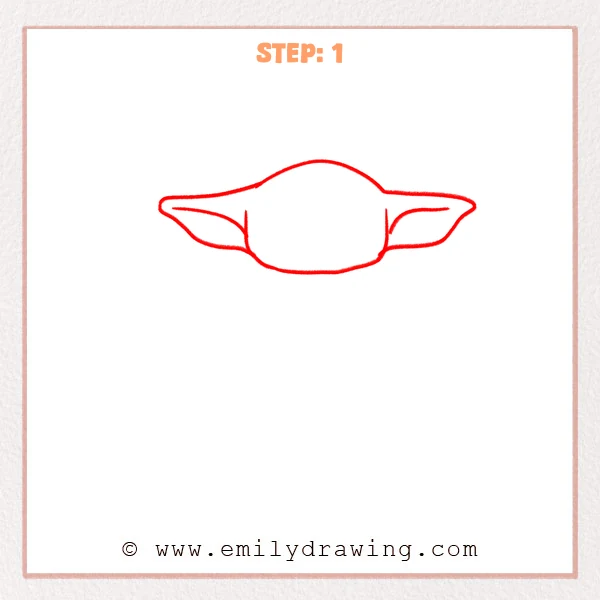
Start with a rounded head shape with a slightly flatter bottom.
Stretch long ears out to both sides, ending in soft points.
Add an inner ear line on each side to show thickness.
Pro Tip: Lightly sketch a horizontal guide so both ears sit at the same height.
Step 2: Add the Basic Big Eye Shapes
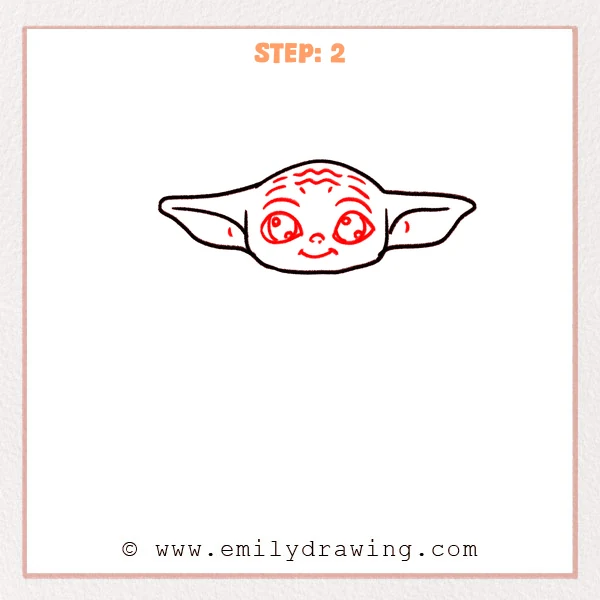
Draw two large eye circles on the left and right sides of the face.
Keep them level and similar in size, with a small gap between them.
Leave space inside each eye for pupils and highlights later.
Pro Tip: Mark the eye centers first to keep them symmetrical.
Step 3: Draw the Thick Scarf Collar
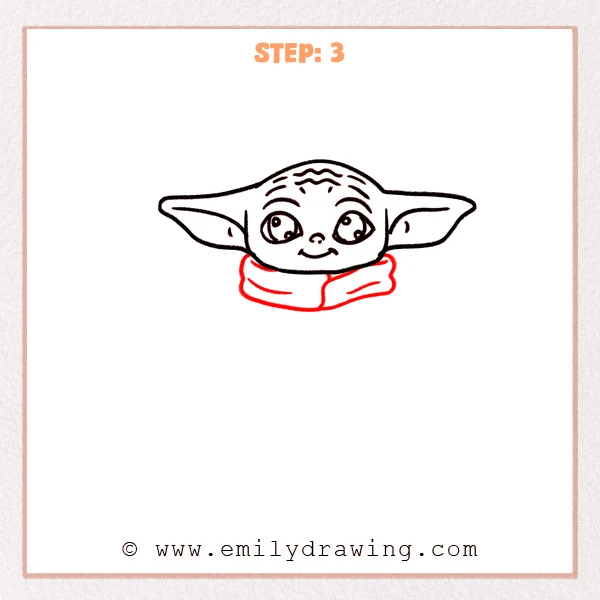
Under the chin, draw a wide scarf ring with similar thickness on both sides.
Use curved turns along the edge to show soft folds and padding.
Let the scarf wrap gently around the neck area.
Pro Tip: Draw the big scarf shape first, then add fold lines neatly.
Step 4: Add the Left Sleeve and Small Hand
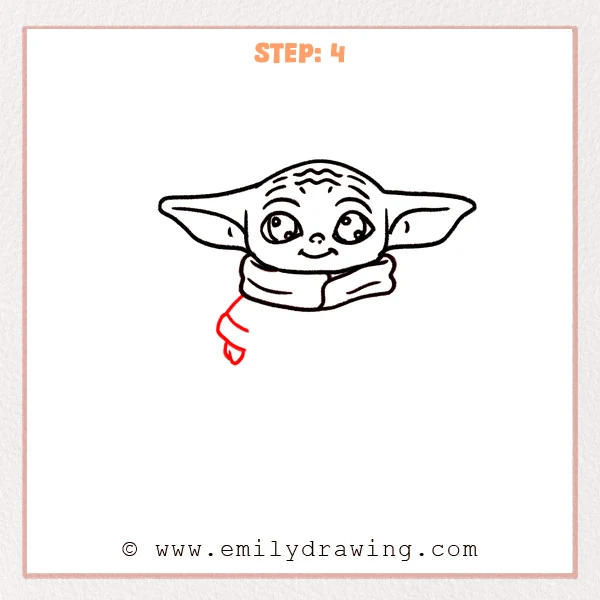
Draw a short sleeve under the scarf on the left side, using a rounded cuff.
Add a tiny hand at the end, using simple pointed curves for fingers.
Let the hand tuck slightly into the sleeve opening.
Pro Tip: Keep the hand small and the sleeve larger for a robe-like feel.
Step 5: Finish the Right Sleeve and Raised Hand Gesture
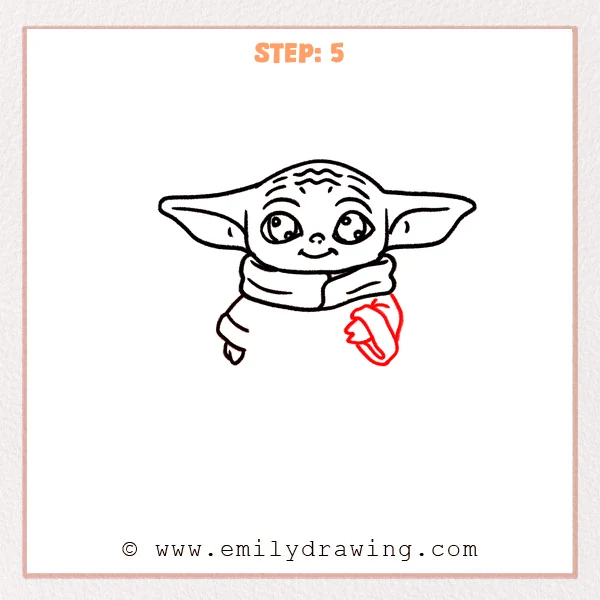
Add a raised right sleeve with an oval opening for the cuff.
Sketch a small hand near the cuff edge so it looks like a lifted gesture.
Balance the right sleeve size with the left sleeve.
Pro Tip: Place the raised hand a bit closer to the face for a lively pose.
Step 6: Draw the Robe Body and Hem
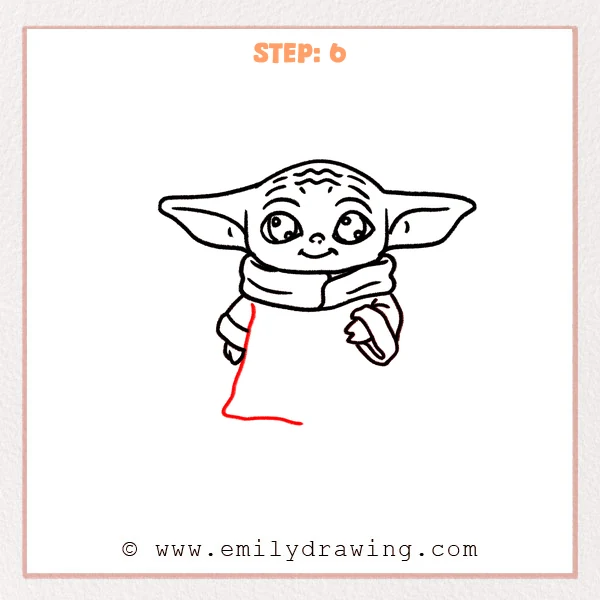
From under the scarf, draw the robe body shape starting with the left side.
Add a gently wavy hem line at the bottom to suggest soft fabric.
Keep the robe wide and cozy rather than narrow.
Pro Tip: Keep the hem waves minimal, using only 2–3 gentle bumps.
Step 7: Complete the Right Side of the Robe
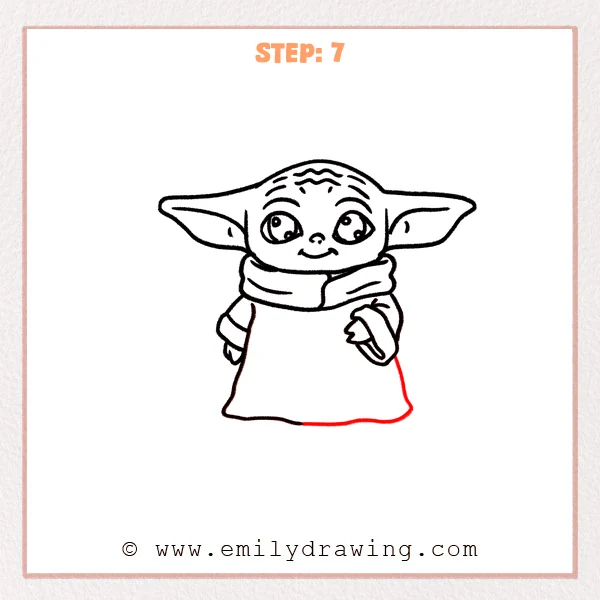
Finish the robe’s right outer outline so it matches the left side’s width.
Let the line drop smoothly under the sleeve and connect into the hem.
This closes the robe shape cleanly.
Pro Tip: Use one smooth stroke on the right edge to avoid sharp corners.
Step 8: Add the Robe Center Line and Folds
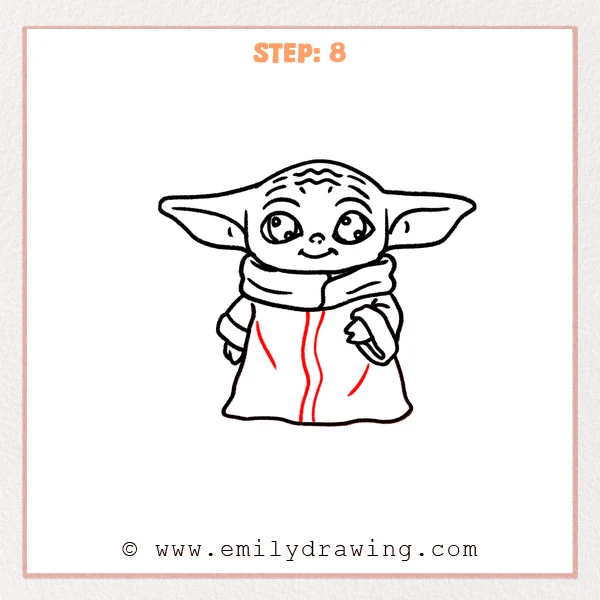
Draw a slightly curved vertical line down the robe for a seam or opening.
Add a few long curved fold lines that follow the fabric’s downward drape.
Keep the folds simple so the drawing stays clear.
Pro Tip: Start fold lines under the scarf so they feel naturally connected.
Step 9: Add a Small Ball in the Right Hand
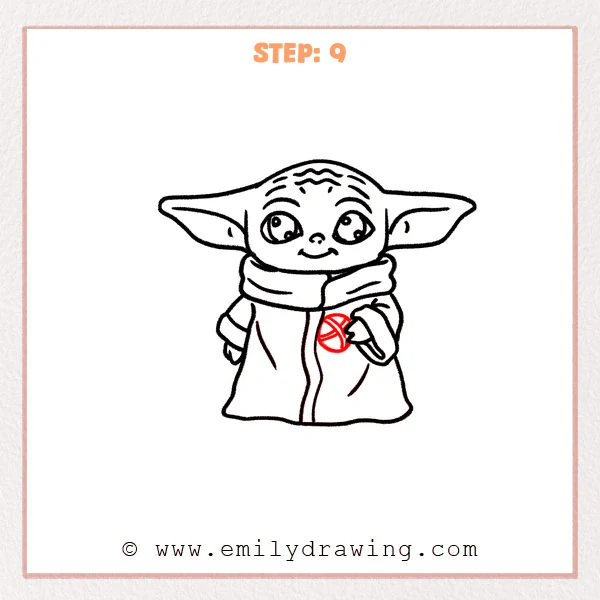
Draw a small circle in front of the right hand, about ping-pong size.
Connect it to the fingers with a short curved line so it looks held.
Add a tiny highlight dot on the ball for a round, solid feel.
Pro Tip: Do not cover the whole hand with the ball; let a finger edge show.
Step 10: Color in your drawing!
Fun Facts
- Baby Yoda is known for big ears and a calm, gentle expression.
- Large eyes and a small smile help create a friendly character.
- Simple fold lines can make clothes look soft without extra detail.
Pin it now, Draw later!
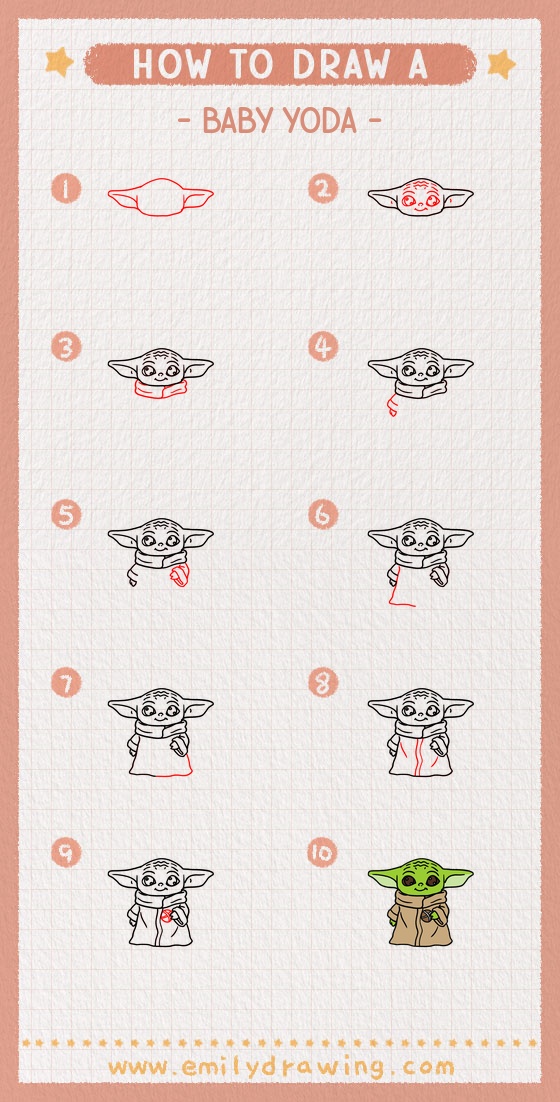
You have drawn Baby Yoda with big ears, a cozy scarf, and a simple robe.
Now erase extra pencil marks and smooth any wobbly curves.
For coloring, try light green skin and a warm tan robe.
Shade under the scarf and along one side of the robe folds.
One common beginner mistake is making one ear longer than the other.
If that happens, adjust the ear tips before you darken the outline.
Keep practicing how to draw Baby Yoda step by step, and try new poses next.
Get the FREE Printable Drawing Guide
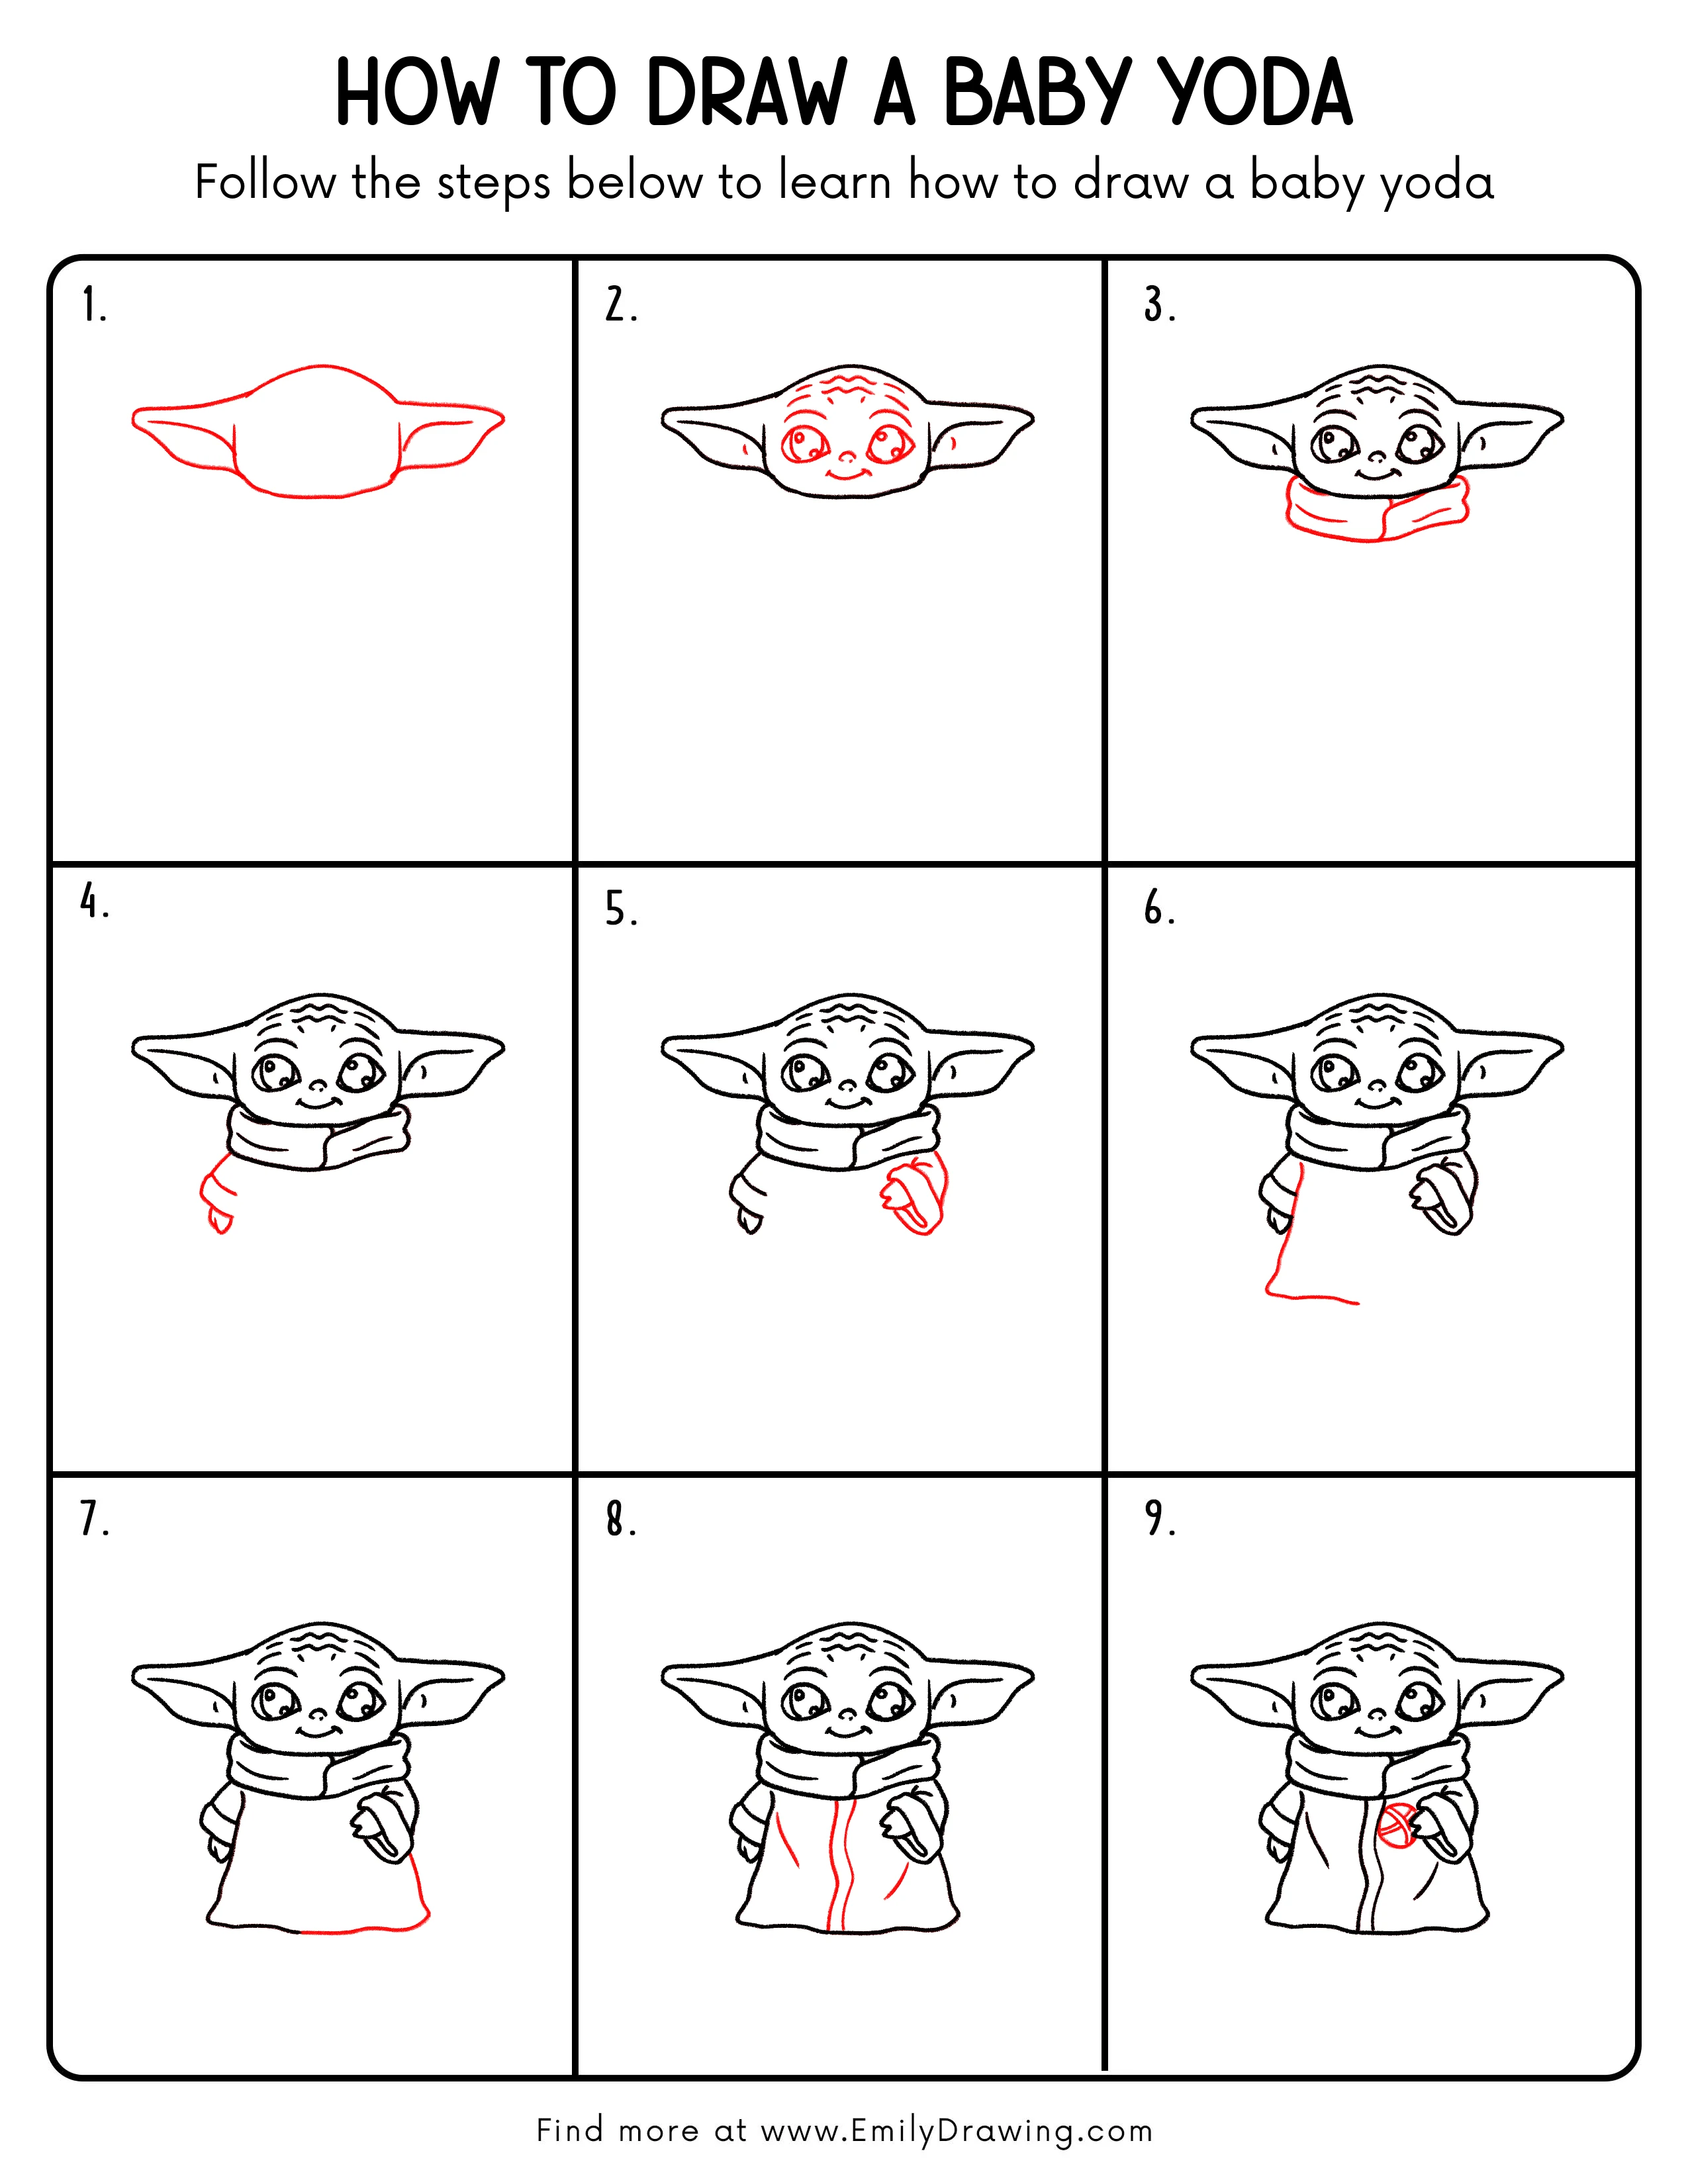
FREE Download Printable Baby Yoda Drawing Tutorial
Frequently Asked Questions
How do I keep both ears even?
Draw a light center line and measure ear length from the head edge.
What if my scarf looks too thin?
Widen the outer line and add one more fold curve to thicken it.
How can I make the ball look rounder?
Add a small highlight and a soft shadow line on the opposite side.