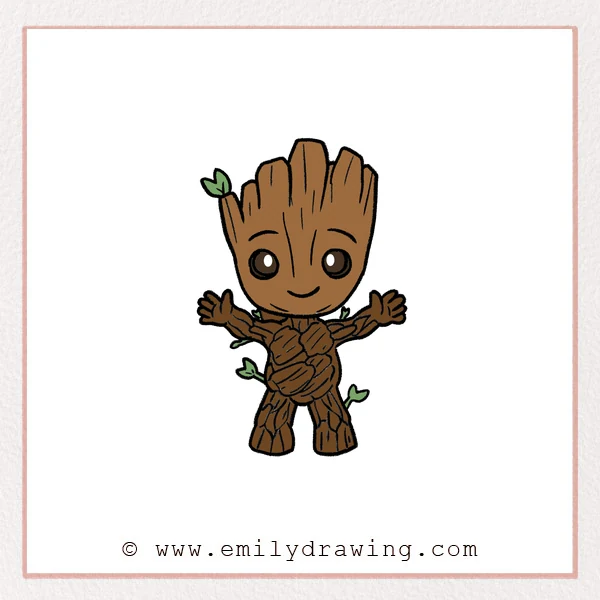
This easy drawing tutorial shows how to draw Baby Groot step by step. You will build the shape slowly, then refine details for a clean, cute character. Take your time and enjoy drawing for beginners at a steady pace.
What You Will Need
- Pencil
- Eraser
- Black pen or fineliner
- Paper
- Colored pencils or markers (optional)
Here are my RECOMMENDED Art Supplies!
- Crayola Coloring Set (140 Pieces – Mega Value!)
- 24 Colored Crayon Set
- A4 Printer Paper
- Crayola Coloring Pencils
- HP Home Printer with Instant Ink!
Time needed:
24 minutes.
Step-by-Step Drawing Guide
Step 1: Head Base Shape
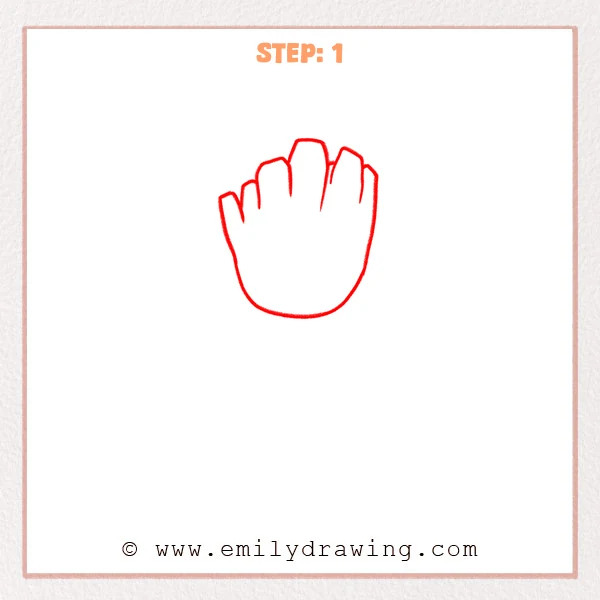
Start with a rounded bucket-like head that is wider at the bottom. Add several uneven wood bumps on top, like soft fingers made of bark. Keep the outline simple and light for now.
Pro Tip: Make the bottom curve extra round to keep Baby Groot looking cute.
Step 2: Eyes, Brows, and a Small Twig
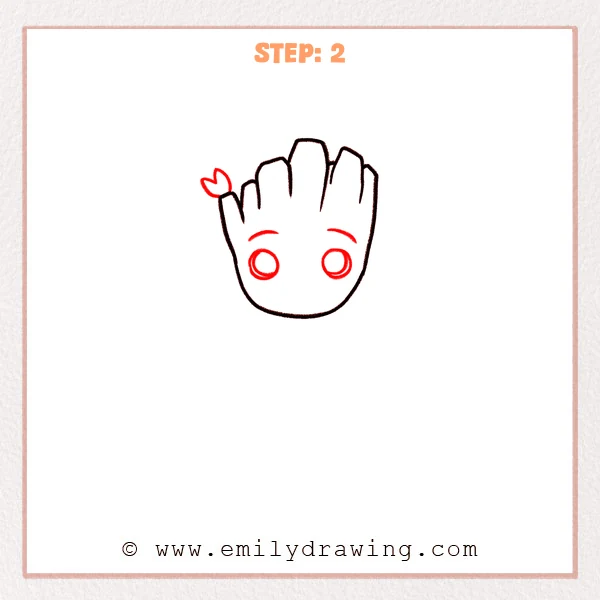
Place two large round eyes in the lower half of the face, leaving even space between them. Add two short curved eyebrows above the eyes. Sketch a small twig with two leaves on the left side of the head.
Pro Tip: Leave about one eye-width between the eyes for a balanced face.
Step 3: Smile and Open Hands
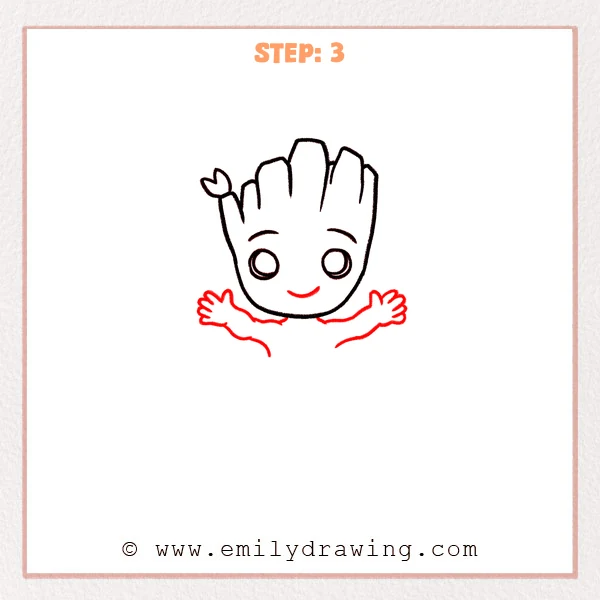
Add a small curved smile below the eyes, centered and gentle. Extend two curved arms from the sides of the head, angled outward like a welcoming hug. Shape each hand with rounded finger bumps so the hands feel soft and chubby.
Pro Tip: Draw each palm like a small cloud first, then split it into fingers.
Step 4: Body and Leg Outline
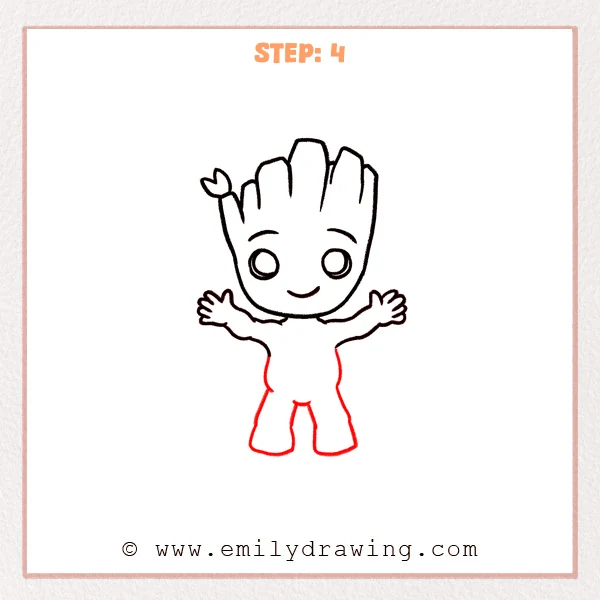
Draw a short neck connection under the head, then add a rounded body shaped like an upside-down teardrop. Split the bottom into two short legs with wide oval feet. Keep the legs similar in length so Baby Groot looks stable.
Pro Tip: Shorter torsos feel more baby-like, so avoid making the body too long.
Step 5: Sprouts and Bark Sections
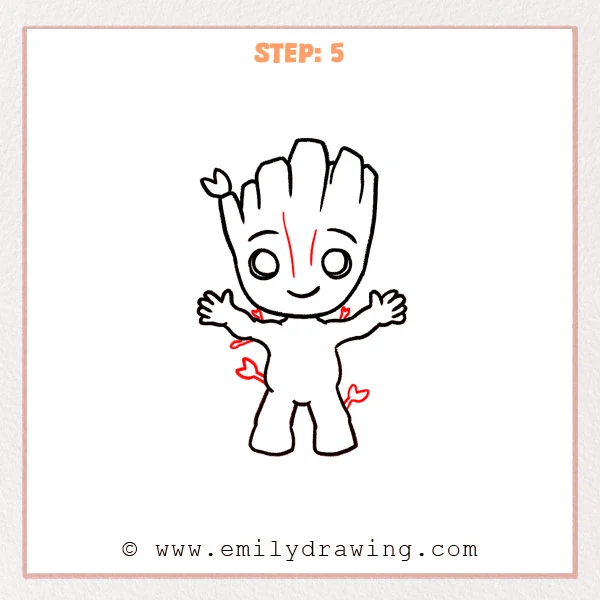
Add a few small side twigs with tiny leaves around the torso and legs, placing them at different heights. Draw curved section lines on the head and legs to suggest wooden segments. Let each line follow the curve of the form instead of cutting straight across.
Pro Tip: Slightly curved bark lines look more natural than straight ones.
Step 6: Bark Cracks and Chest Wood Plates
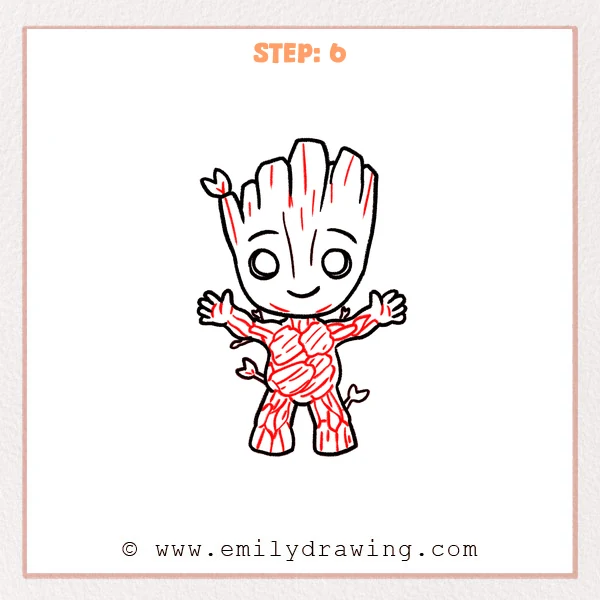
Sketch a few vertical bark cracks on the head and face to strengthen the wood texture. Add irregular wood-plate shapes on the chest, then place short texture lines along arms, torso, and legs. Thicken the outer outline slightly to make the final drawing clear.
Pro Tip: Put most texture near edges and bends to keep the drawing neat.
Step 7: Color in your drawing!
Fun Facts
- Baby Groot is a plant-like character, so bark lines can curve and branch naturally.
- Cute character designs often use a big head and short body for a friendly look.
- Small leaf sprouts help show that Baby Groot is growing and full of life.
Pin it now, Draw later!
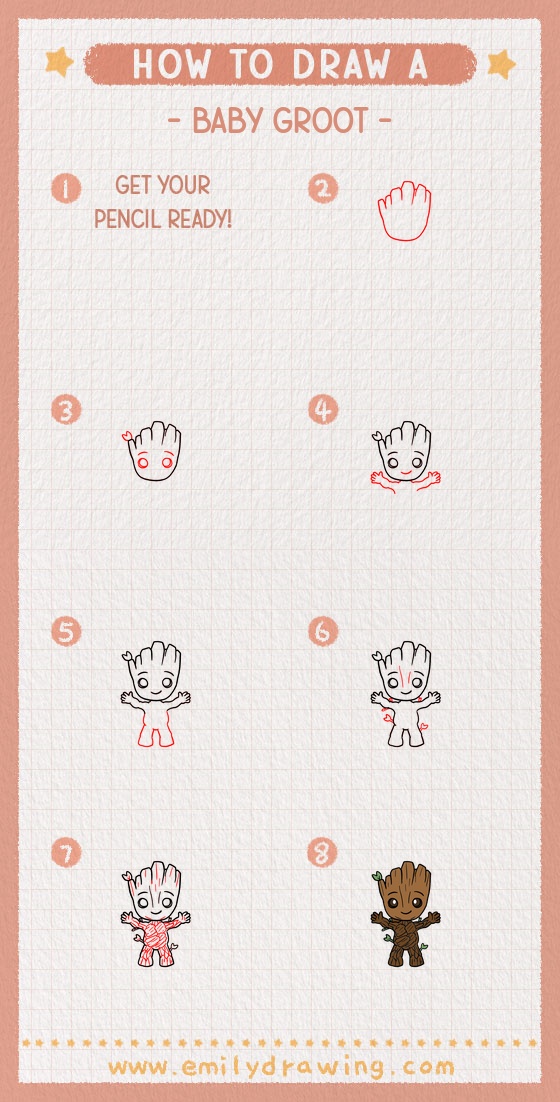
You just learned how to draw Baby Groot step by step by starting with simple shapes and refining bark details. For coloring, try light browns and warm grays, then shade under the chin, inside the arms, and between the legs for depth. Add a slightly darker brown in bark cracks, and keep highlights on the forehead and cheeks.
A common beginner mistake is adding too many texture lines everywhere, which can make the drawing look messy. Choose a few areas for detail, and let the rest stay clean. Practice this easy drawing tutorial again, then try changing the pose or adding a tiny flower pot to make your own version.
Get the FREE Printable Drawing Guide
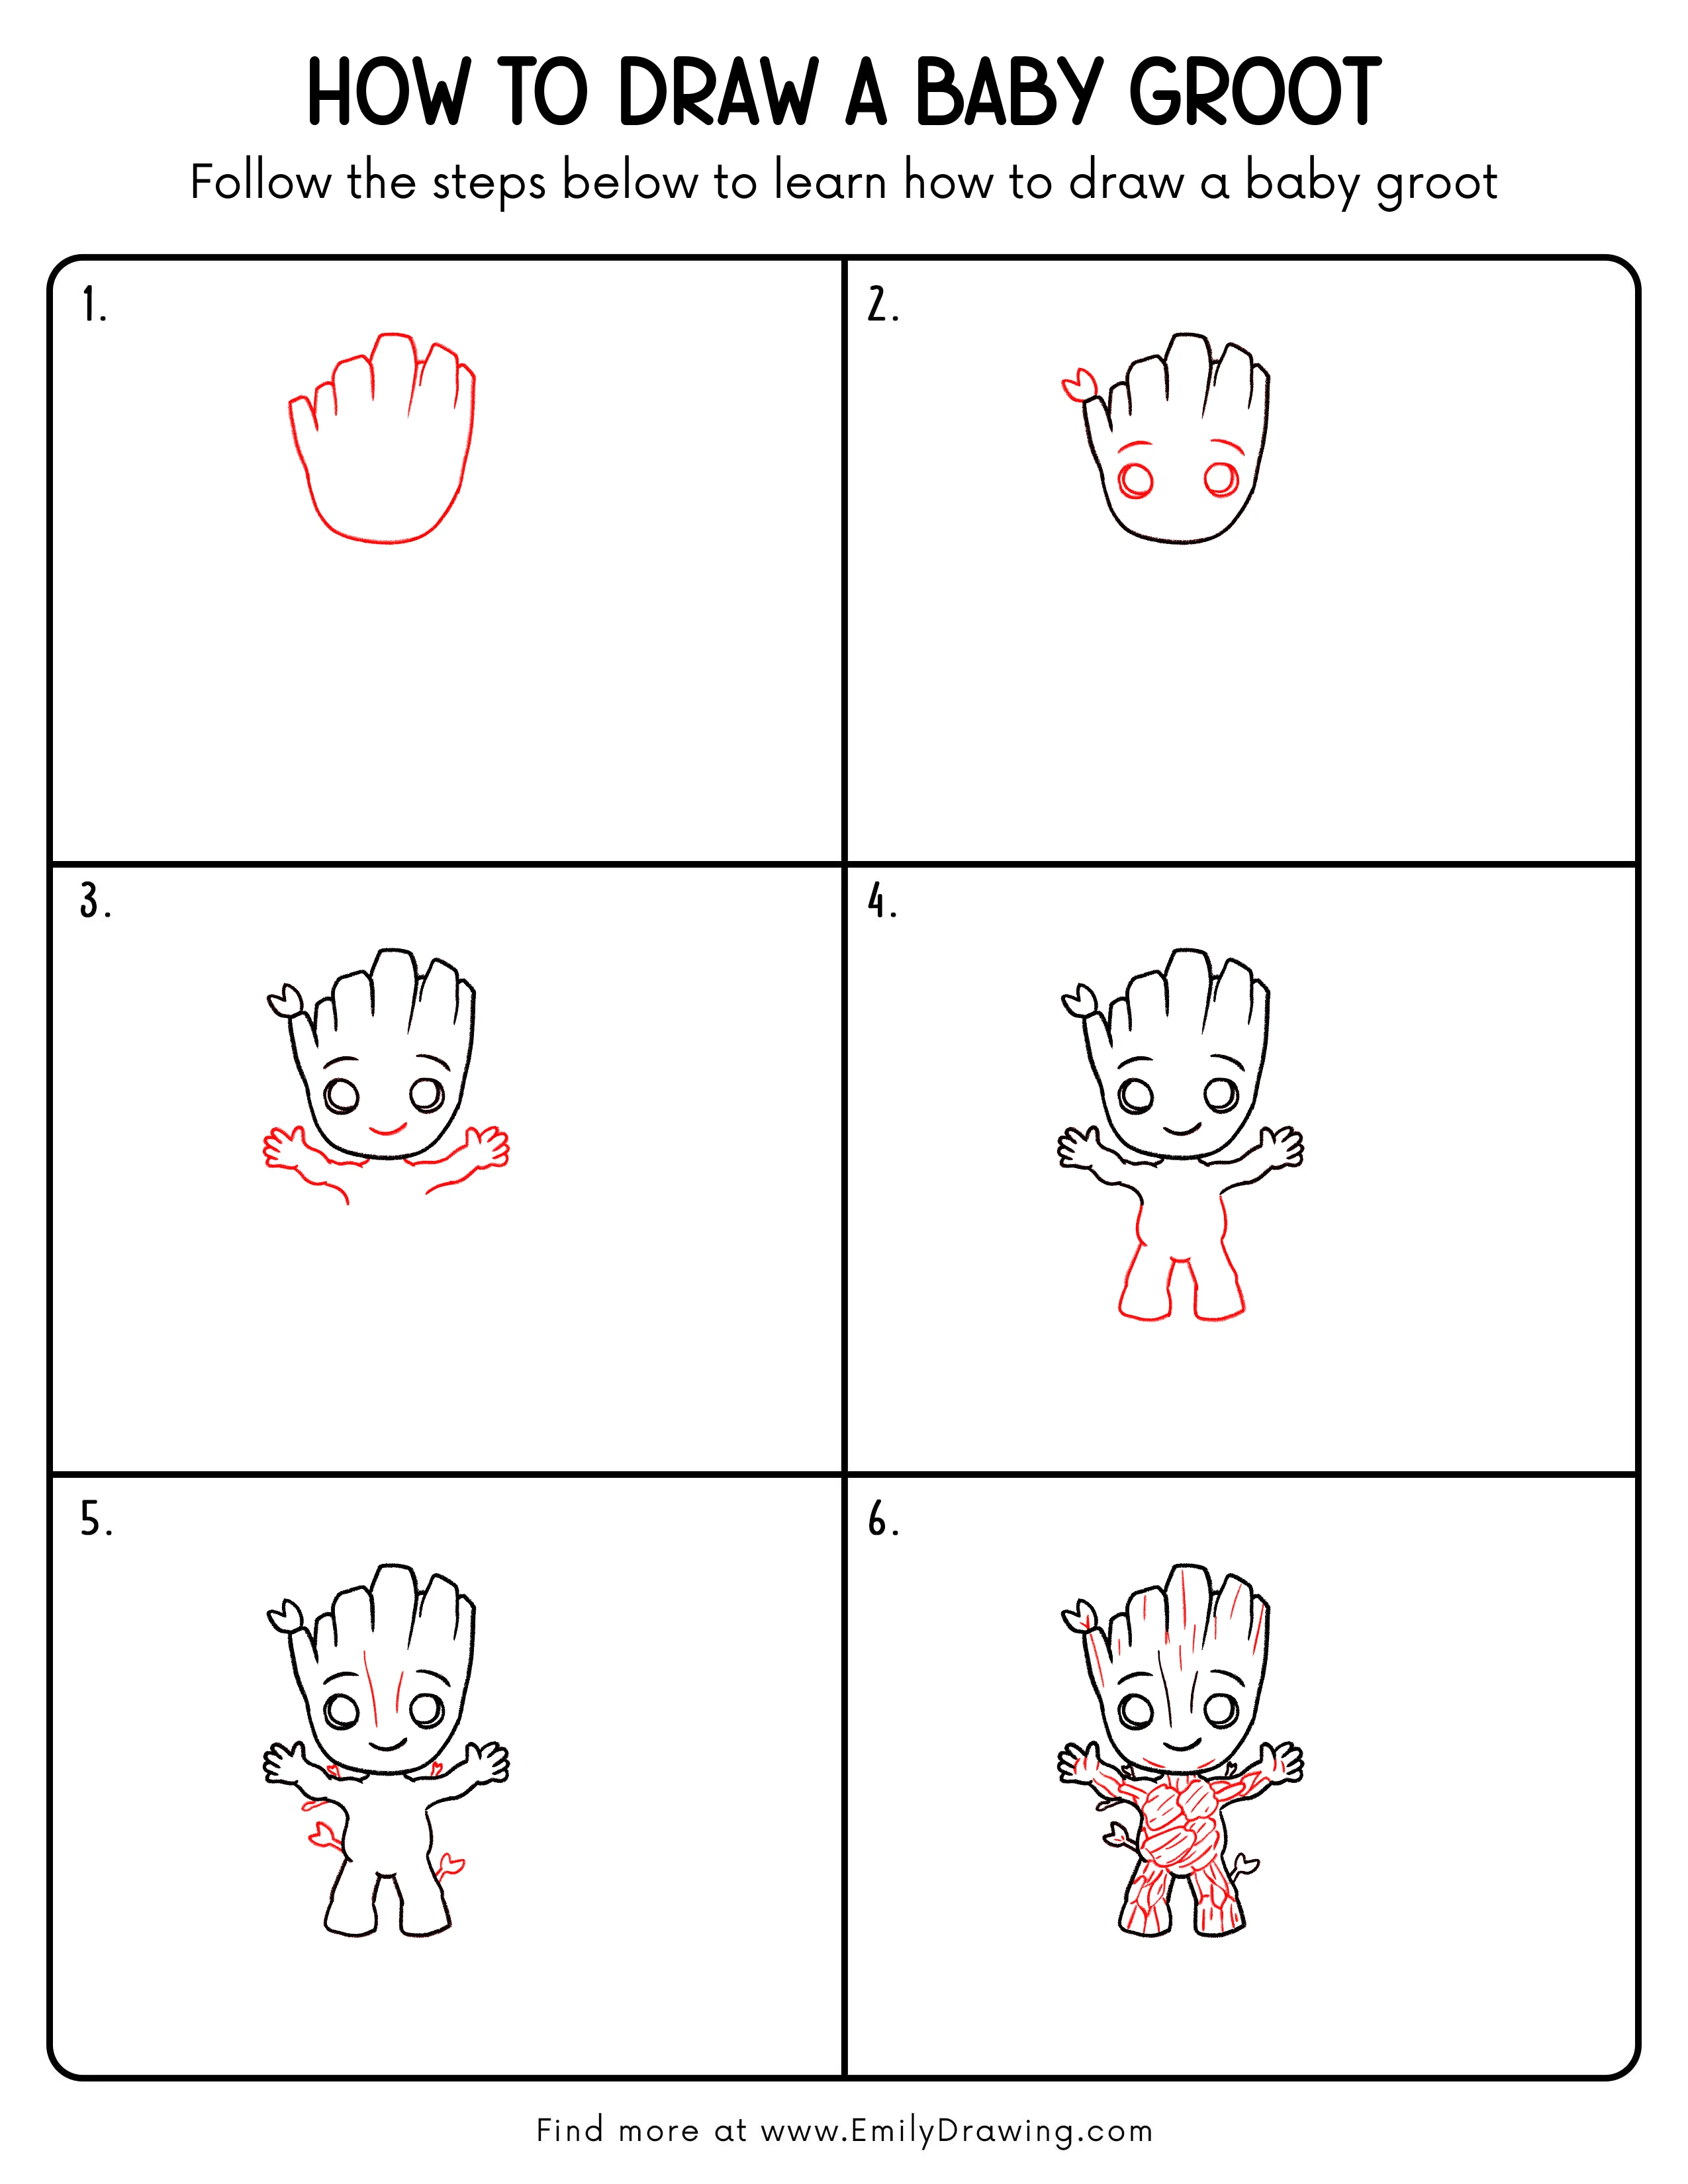
FREE Download Printable Baby Groot Drawing Tutorial
Frequently Asked Questions
How do I make Baby Groot look cuter?
Make the head larger than the body and keep the eyes big and round. A small smile and soft curves also help.
What if my arms look uneven?
Check where each arm starts on the head and match the angle on both sides. Lightly redraw the longer arm so the hands line up.
How can I shade the bark without making it too dark?
Use gentle layers with a light brown first, then add a slightly darker tone only in cracks and under overlaps. Leave some areas white for highlights.