Hello and welcome to another 10-step cupcake drawing tutorial on how to draw a cupcake! Today, we’re going to have another food-themed project: a cupcake!
Cupcakes are sweet treats that are great to have once in a while. Whether it be a birthday party or some other event, you might see cupcakes served with lots of frosting on top. Did you know that the earliest cupcakes actually didn’t have frosting on them? They just add spices and nuts. We prefer ones with frosting!
Technically, cupcakes originated in the United States around 1796. These treats had a surge of popularity in 1919 when a big brand started mass producing them. They also got even more popular in the early 2000s, when fancy bakeries got famous for their gourmet cupcakes.
Cupcakes, of course, are just cup-sized cakes, making it easier to eat and serve to a lot of people. They are also really fun to make and decorate at home!
If you enjoy drawing desserts like sweet treats, you might also love How to Draw an Ice Cream Cone or How to Draw a Birthday Cake.
With all that said, let’s get to drawing!
Materials:
- a piece of paper
- a pencil for the guiding lines and sketching
- an eraser
- a black sharpie or a pen for the outlines
- markers or colored pencils for coloring
- our printable drawing guide (Join my Email List below to get this Tutorial)
Here are my RECOMMENDED Art Supplies!
- Crayola Coloring Set (140 Pieces – Mega Value!)
- 24 Colored Crayon Set
- A4 Printer Paper
- Crayola Coloring Pencils
- HP Home Printer with Instant Ink!
Time needed:
13 minutes.
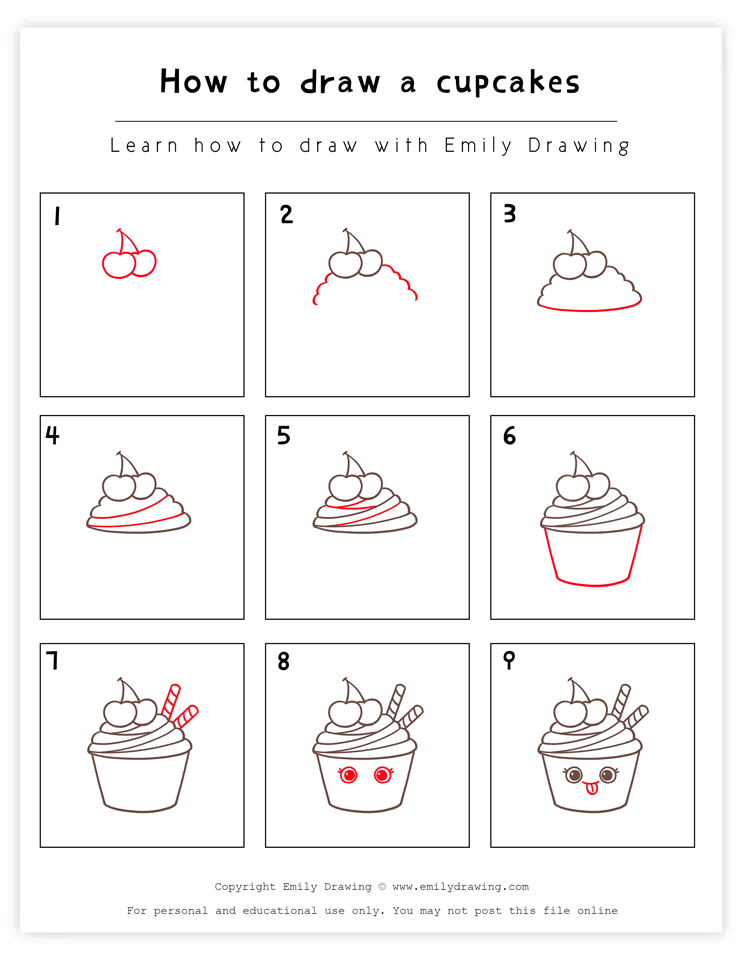
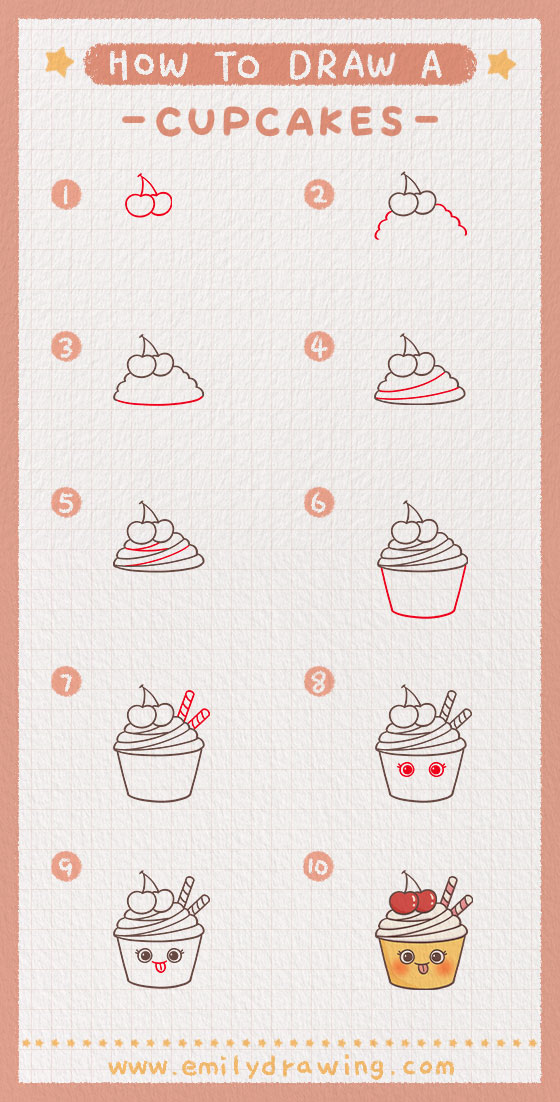
How to Draw a Cupcakes — Let’s get started!
Step 1 – Draw two cherries.
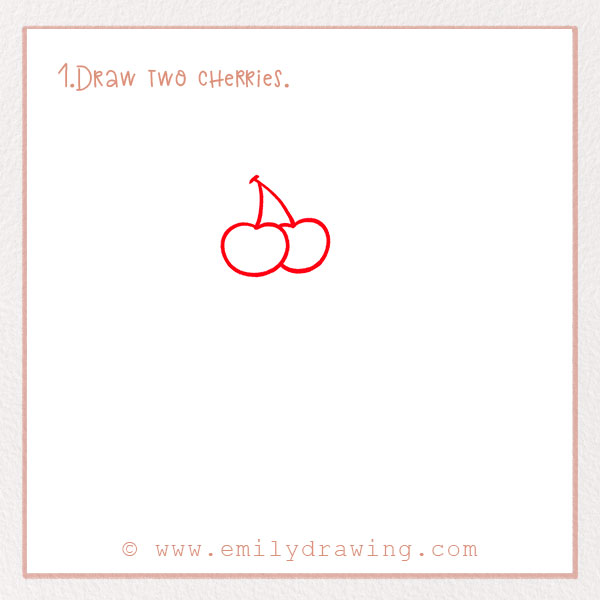
Sometimes, cupcakes might be topped with candied cherries for extra flavor. Let’s start our drawing by adding cherries!
Near the top of the page, draw two short curved lines that merge together at the top. These are the cherry stems. At the bottom of each line, draw a heart shape for the fruit of the cherry. Leave plenty of room on the page for the rest of the drawing!
Step 2 – Start drawing the frosting.
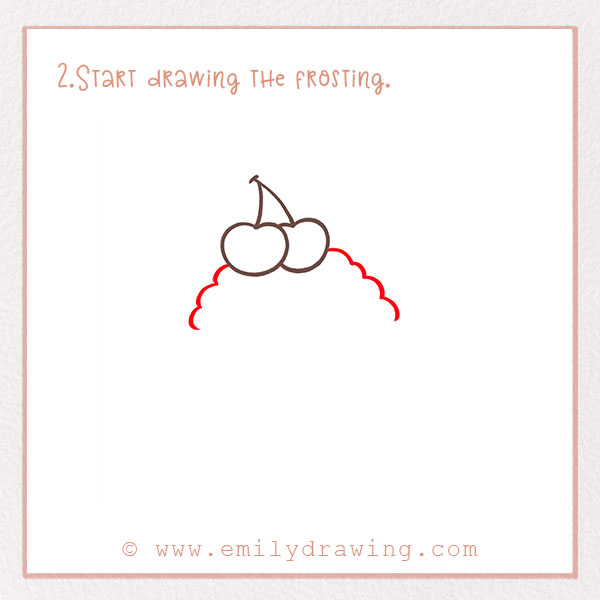
Our cupcake has to have yummy frosting! Most of the time, frosting is vanilla, chocolate, or buttercream.
So, draw some squiggly lines on the other side of the cherries. They should curve downwards. Check out the photo!
For more tutorials with structured shapes, check out How to Draw a Popsicle or How to Draw a Watermelon.
Step 3 – Keep drawing the frosting outline.
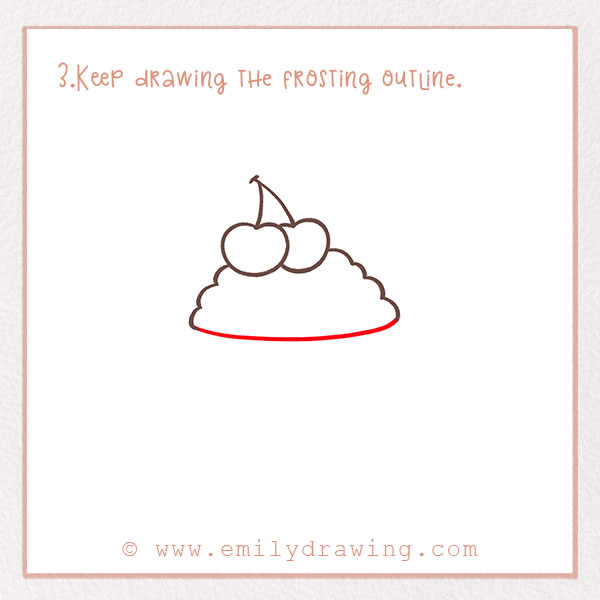
Next, draw a horizontal curved line that connects the two squiggly lines we just drew. This completes the outline of the frosting. Now we can move onto the base of the cupcake.
Step 4 – Add detail to the frosting.
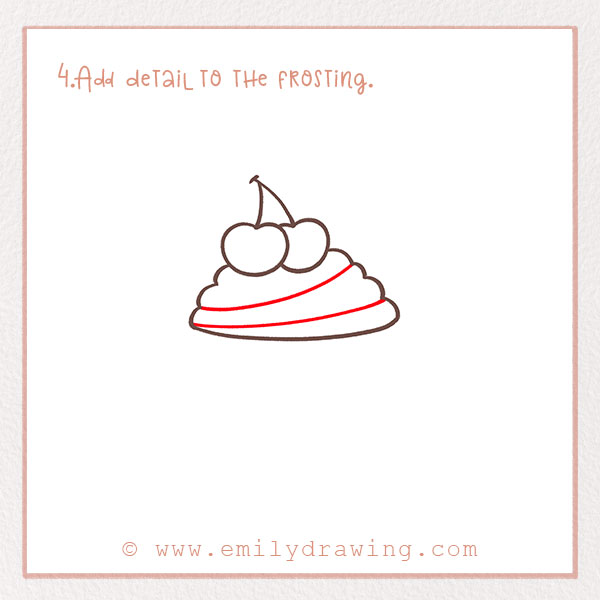
Oftentimes, frosting is applied to the top of a cupcake using a pipe, which makes a pretty pattern. We want to mimic how this looks in our drawing! Inside the frosting outline, draw two slightly curved horizontal lines. Now we have some good detail and texture there.
If you enjoy adding decorative details, you might like How to Draw a Christmas Tree or How to Draw a Crown.
Step 5 – Add more detail to the frosting.
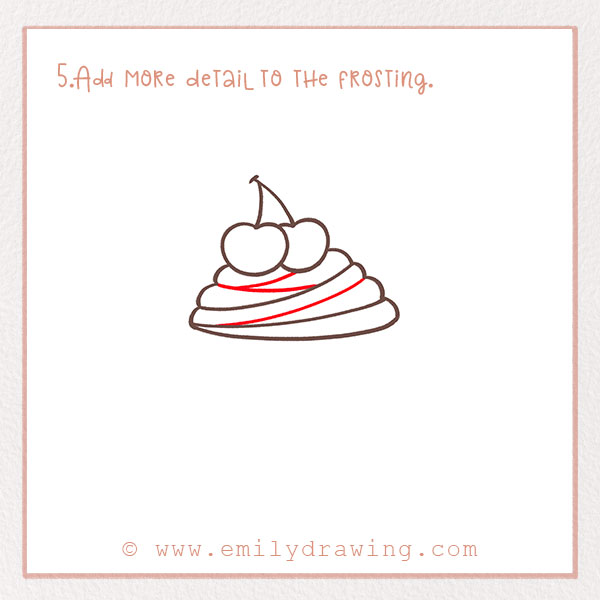
We’re still not done with the frosting! Fill in the shape with even more horizontal curved lines. They should be curved to the opposite side this time. Refer to the photo to see what we mean! Good job!
Step 6 – Draw the cup.
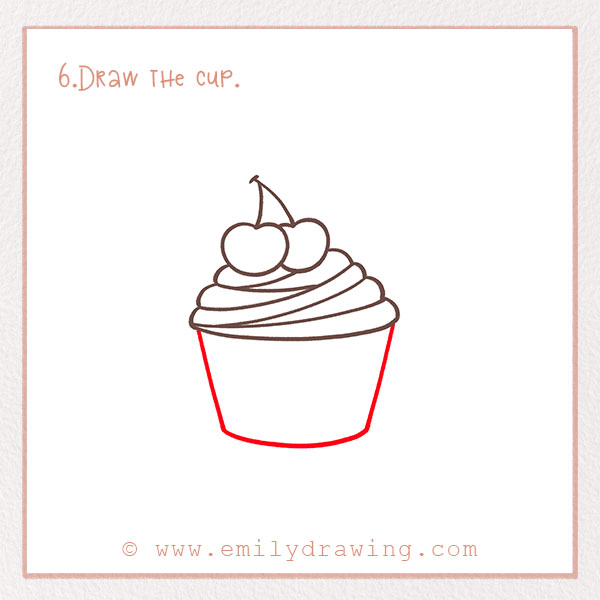
Let’s draw the actual “cup” part of the cupcake. From the bottom corners of the frosting outline, draw lines that slightly slant inwards. Connect them with a line at the bottom. Now we have completed the basic shape of the cupcake.
Step 7 – Add some decoration to the cupcake.
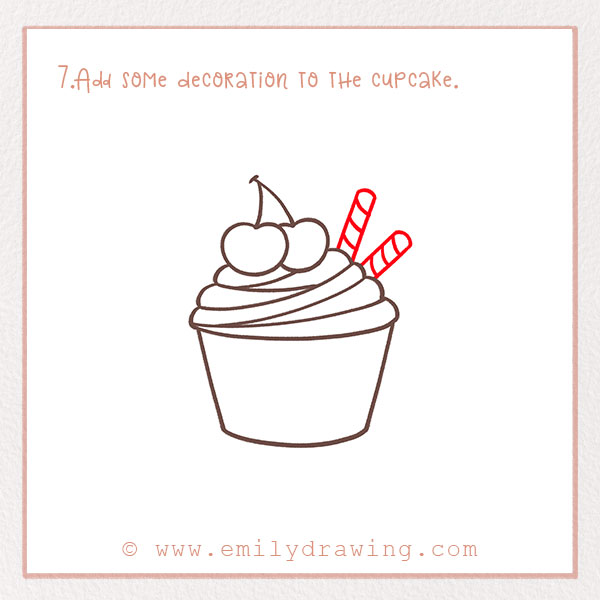
On the upper right edge of the frosting, draw two rectangles extending up and out. Inside each one, draw several lines so they look striped! Check out the photo.
Step 8 – Add eyes to your cupcake!
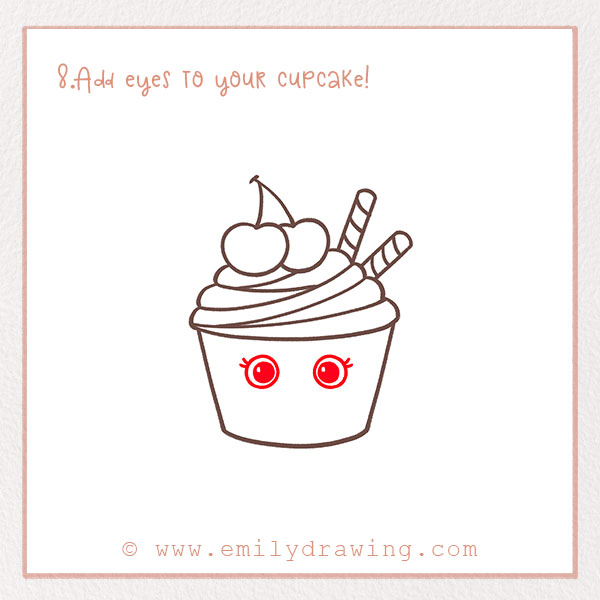
Let’s add more personality to our cupcake. Inside the cupcake, just below the frosting, draw eyes. Do this by drawing a small circle with a slightly smaller one inside. Make sure to add some eyelashes!
Step 9 – Add a mouth.
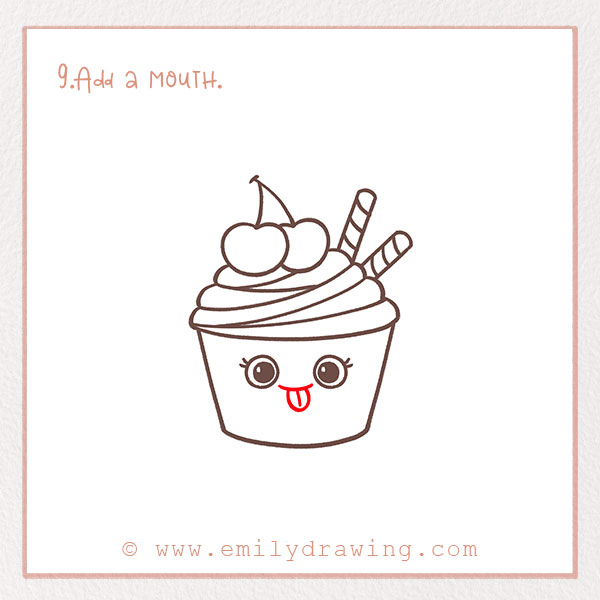
We’re almost done! Draw a little curve centered below the eyes. Then, add a semicircle below. This forms a tongue. Now our cute cupcake illustration has a little face. Good job!
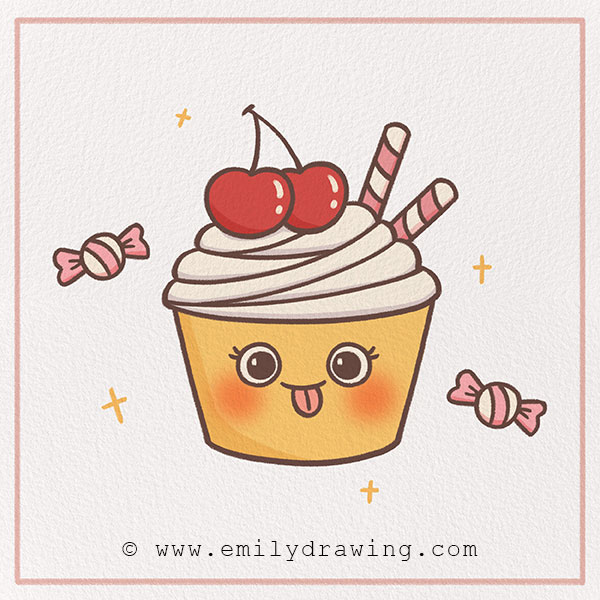
Step 10 – Color in your creation!
Last but not least, let’s add some style to our sweet snack! Cupcakes can be any color. Have fun adding color to your easy cupcake sketch! Don’t forget to fill in the background, too!
There you go! You’re all done. We hope you had as much fun as we did—maybe you can go make an actual cupcake in real life now! We love drawing with you for these tutorials and hopefully you learned some new facts and drawing techniques.
Thanks for drawing with us—browse our site for some more fun and simple 10-step drawing tutorials! We have tons of food-themed tutorials, such as birthday cakes, popcorn, and more, if you want to do more like this one. Until next time!
Once you’ve completed your cupcake, try How to Draw a Hamburger or How to Draw French Fries.
Pin it now, Draw later!
Get the FREE Printable Drawing Guide