Hello and welcome to another 10-step My Little Pony drawing tutorial! We have a super cute and fun drawing for you today—let’s get started!
You might know of her already. Although she started as a cartoon character in an animated series, she has expanded to become the subject of many toy lines, accessories, and other products. Maybe you even have one! She was created in 1981, but still remains very popular worldwide today! She is one of the most iconic popular culture icons alongside characters like Hello Kitty.
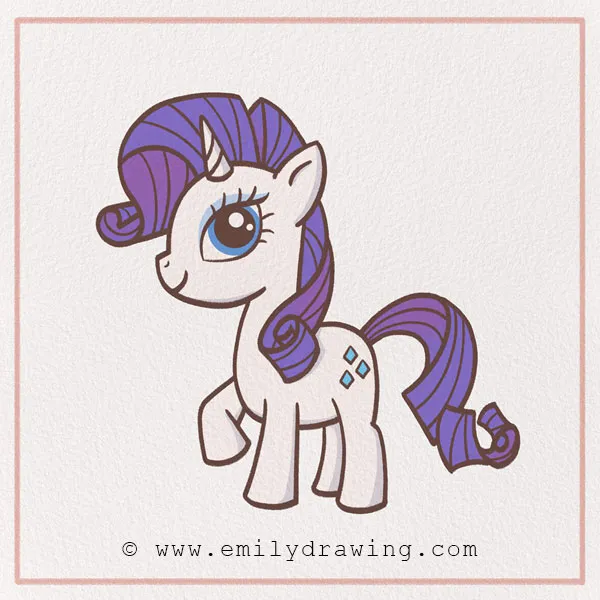
Some of the unique traits of My Little Ponies are their bright, pretty colors, and a symbol on their bodies, like flowers or diamonds. They also have long and luscious manes and tails, just like real ponies! A pony is a type of small horse.
If you enjoy drawing popular and whimsical characters, you might also love How to Draw a Unicorn or How to Draw a Fairy.
Alright, with all that said—grab your favorite drawing tools and follow along with our step-by-step pony sketch tutorial! Keep reading below for Step 1!
Materials:
- a piece of paper
- a pencil for the guiding lines and sketching
- an eraser
- a black sharpie or a pen for the outlines
- markers or colored pencils for coloring
- our printable drawing guide (Join my Email List below to get this Tutorial)
Here are my RECOMMENDED Art Supplies!
- Crayola Coloring Set (140 Pieces – Mega Value!)
- 24 Colored Crayon Set
- A4 Printer Paper
- Crayola Coloring Pencils
- HP Home Printer with Instant Ink!
Time needed:
15 minutes.
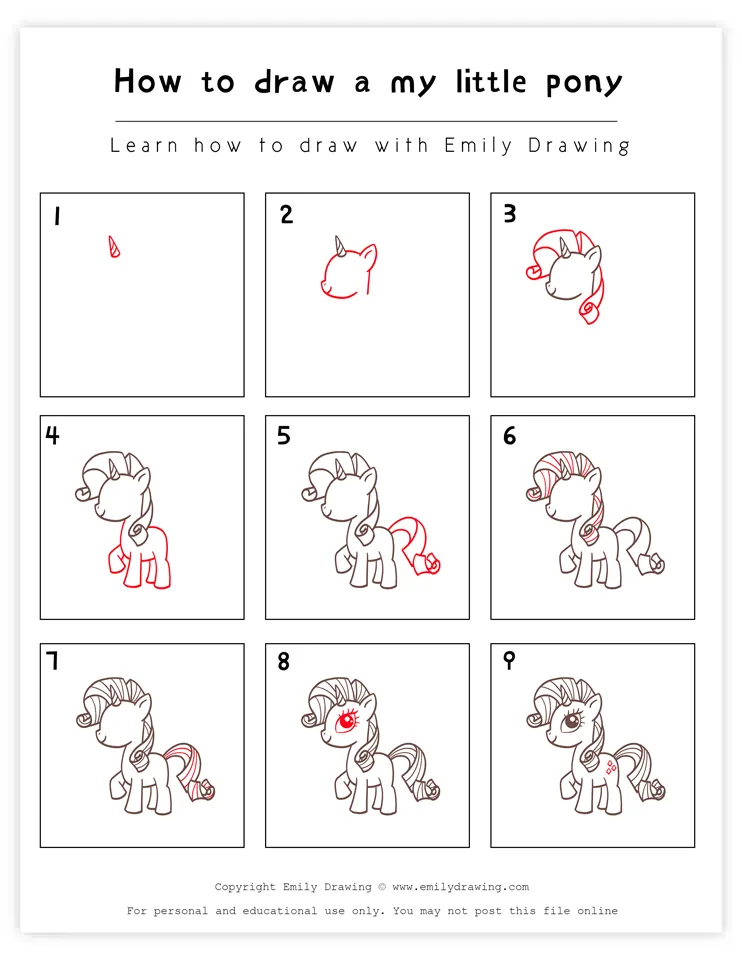
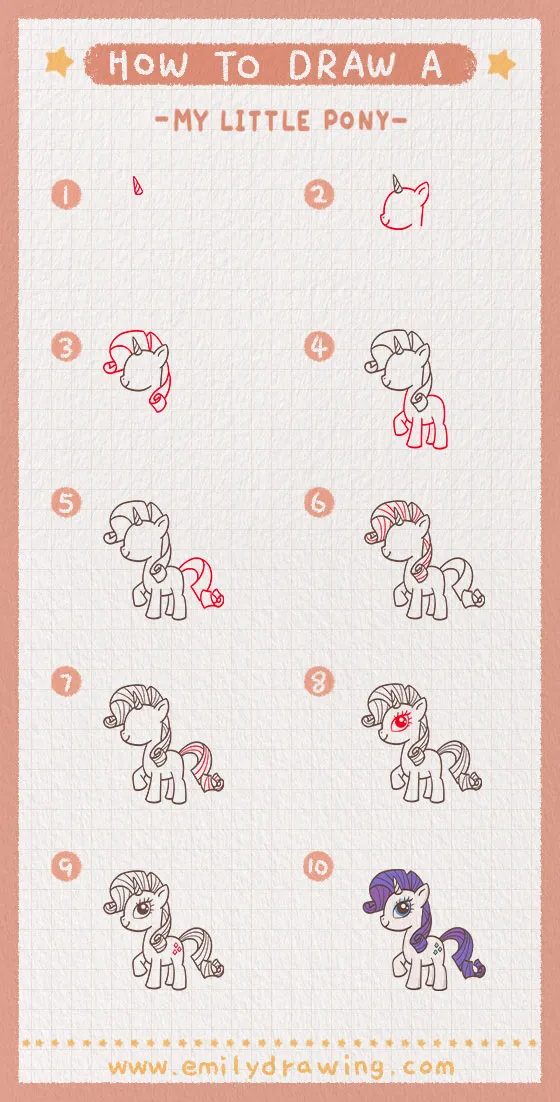
How to Draw a My Little Pony — Let’s get started!
Step 1 – Draw the My Little Pony’s horn.
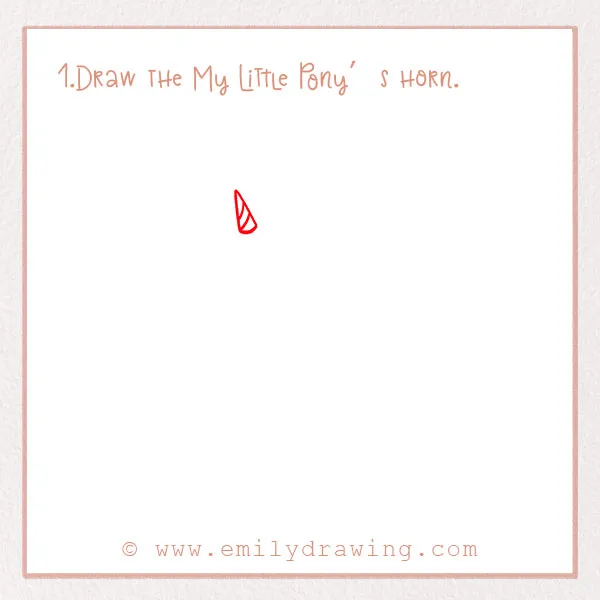
For this first step we’re going to draw the My Little Pony’s horn. Near the top of the page on the left side, draw a small triangle. It should be slightly angled to the left. Inside the triangle, add some stripes for detail. Good job!
Step 2 – Start drawing the head.
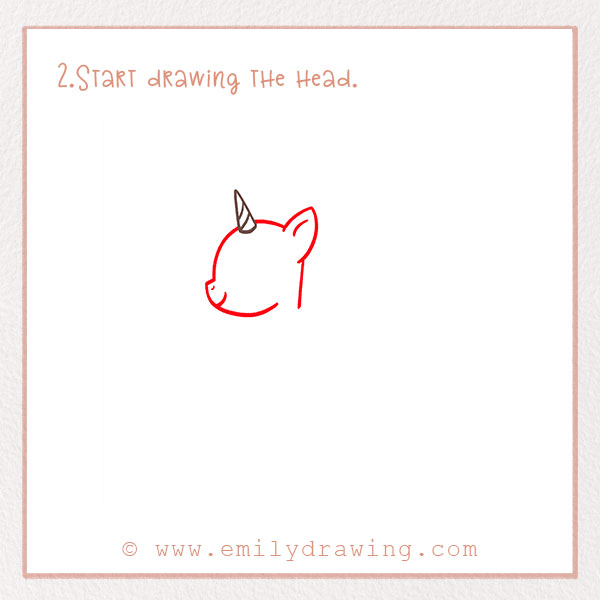
Next, let’s draw the shape of the head. You’ll basically make a line coming out from either side of the horn.
On the upper right, draw a pointed shape for the pony’s ear. On the bottom left, make a little point for the mouth. Make sure to draw a small curve for the smile—great work! Check out the photo for reference.
Step 3 – Draw the pony’s mane!
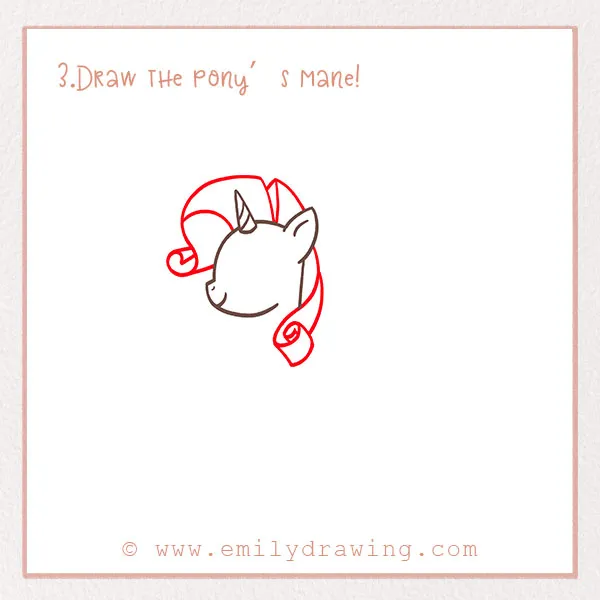
Like we said, one of the trademark qualities of My Little Ponies are their beautiful manes. We’re going to draw the mane now!
The shape is a little complicated but can be broken down fairly easily. On the right side draw a long swirl to make it look a little bit 3-D, just like in the photo. On top of the head draw and another swirl and connect it back to the head. Refer to the photo to see what we mean. Good job! It doesn’t need to be perfect.
For more practice with detailed and flowing lines, try How to Draw a Mermaid or How to Draw a Dolphin.
Step 4 – Draw the rest of the pony’s body.
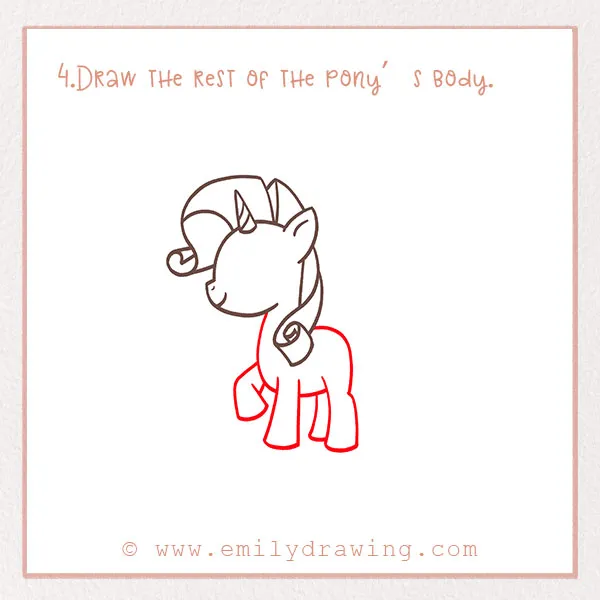
Next we’re going to complete the pony’s body by drawing legs.
To draw the stomach, draw a basic round shape. Next, draw the legs extending from the stomach area. Each leg should be a few inches long and slightly rectangular. Make the front leg slightly bent, as if the pony is in the middle of a step. Good job!
Step 5 – Draw a pretty tail!
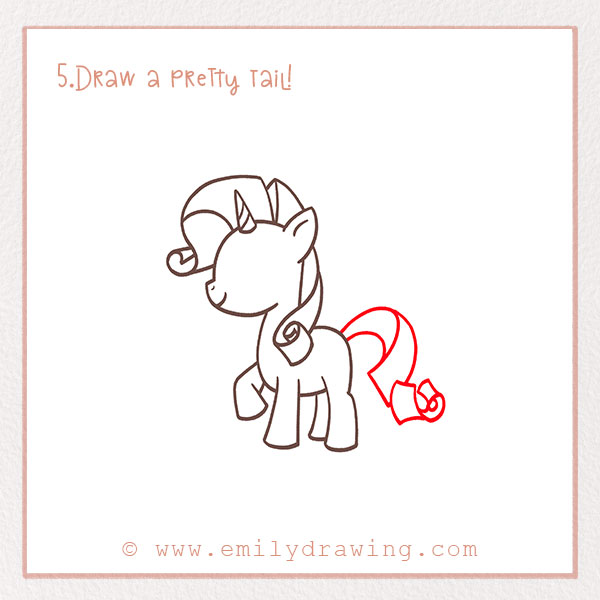
This step is another one full of pretty swirls, because we’re drawing the tail!
On the right side of the body we’re going to draw a tail. Draw a big curve to start. Maybe you want to look at the photo for this. Basically make it look a little bit 3 dimensional by drawing another curve next to the first one. Finish it off with a few swirls at the very end of the tail. Good job!
For tutorials involving expressive faces, check out How to Draw a Cat or How to Draw a Dog.
Step 6 – Add more detail to the mane.
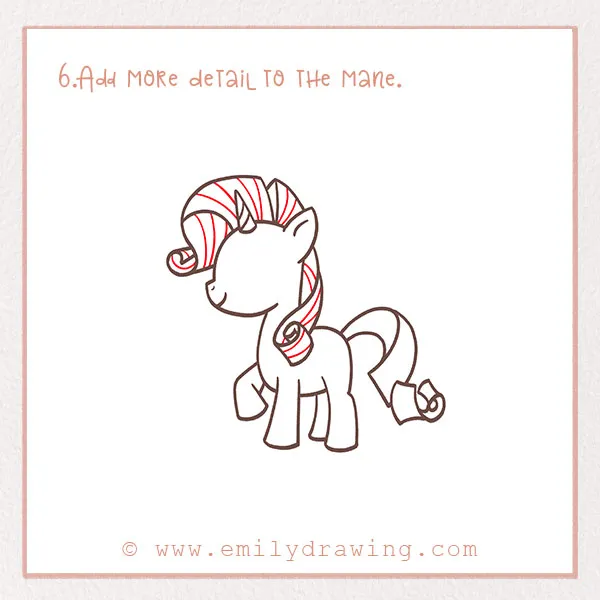
Let’s add some more detail and definition to the mane you drew in Step 3.
Fill the whole mane with stripes, so that you can see the texture of the hair. Follow the same direction of the outlines to make the perspective make sense. Some of the hair should be coming forwards, while others should look like it goes on the other side of the body.
Step 7 – Add detail to the tail.
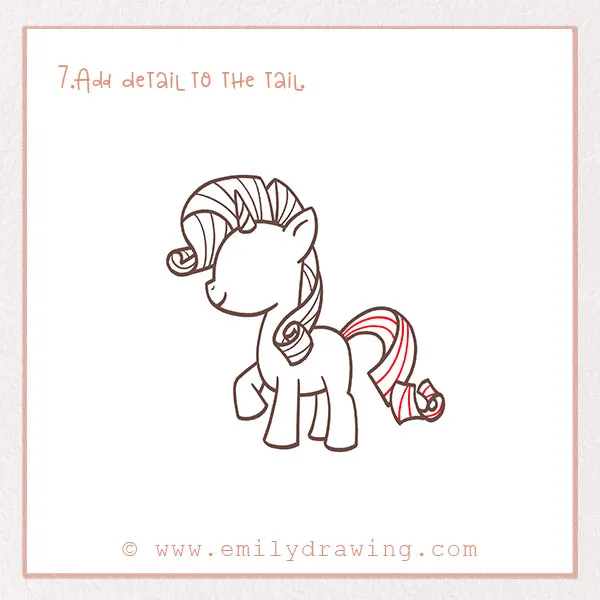
This is very similar to the last step. Just like we did to the mane, add more detail to the tail, again following the outlines we already drew. Now our My Little Pony has beautiful and luscious locks. Good job!
Step 8 – Draw an eye!
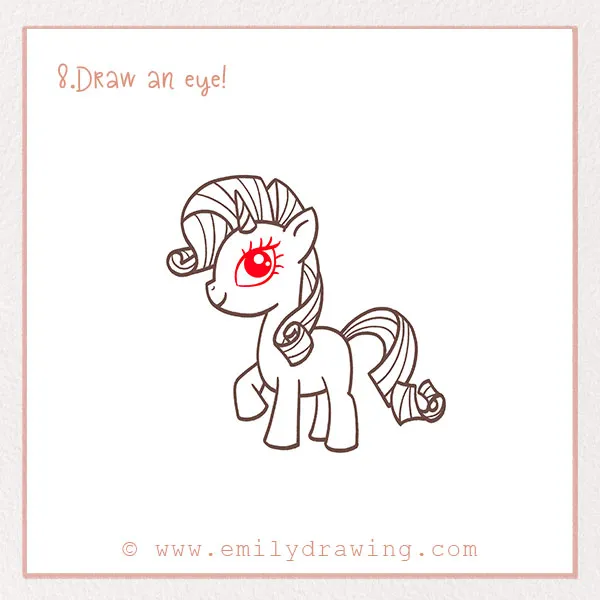
If you’re ever seen a My Little Pony, you probably have seen their really big and pretty eyes. We need to add an eye to our pony now! Did you know that horses have fairly good vision compared to other animals?
Since our pony is walking to the left, we can only see one eye. In the middle of the head, draw an almond shape tilted slightly up to the right. This is the basic shape of the eye.
Next, draw a black circle for the iris. Leave a smaller circle inside unfilled for the pupil.
Lastly, draw several eyelashes above and below the outline of the eye.
Step 9 – Add a marking on the hind leg.
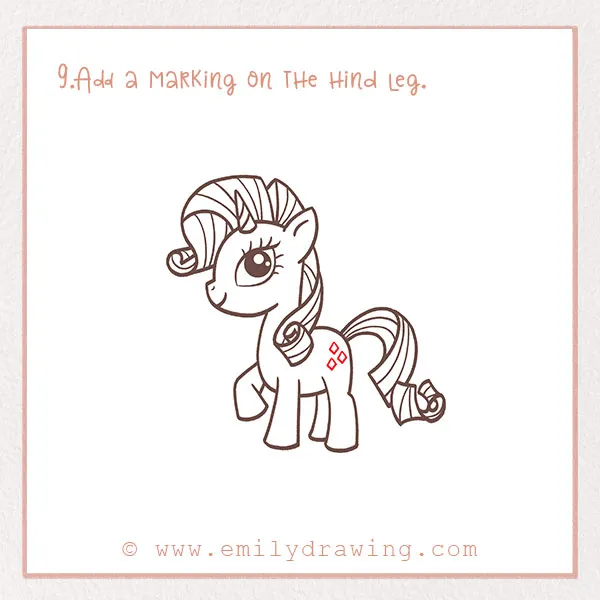
Like we mentioned in the introduction, a very famous aspect of My Little Ponies is the pretty markings on their hind legs. Each one has a different marking to make them unique! Our pony is going to have three diamonds. So, on the rear leg just to the left of the tail, draw three tiny diamonds. Now she has even more style!
Step 10 – Color in your pony!
My Little Ponies are of course really colorful, so we need to add some color. Use pinks, blues, purples, or yellows to complete your easy cartoon pony drawing—whatever colors inspire you!
There you go! You’re all done. We hope you had as much fun as we did!
If you liked this cartoon tutorial, check out Hello Kitty, another famous pop-culture icon. And, of course, please share this tutorial if you found it fun. And, if you have any suggestions for tutorials, let us know in the comments!
Once you’ve mastered your pony, expand your collection with How to Draw a Princess Peach or How to Draw an Angel.
Pin it now, Draw later!
Get the FREE Printable Drawing Guide