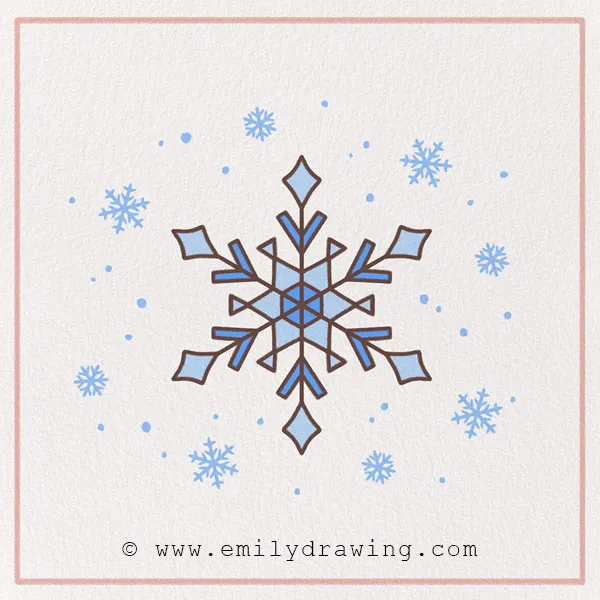
Hello, and welcome to our tutorial on how to draw a snowflake! In just ten steps, you’ll complete this easy snowflake sketch of a beautiful natural phenomenon.
Have you ever seen a snowflake in person? They are made up of ice crystals, which are tiny, flat, and thin structures. These crystals come together to create the beautiful patterns of a snowflake—the temperature in the clouds where snowflakes form can affect their shape. Very cold temperatures can lead to more complex and ornate snowflake structures.
In 1885, a man named Wilson A. Bentley, also known as “Snowflake” Bentley, became famous for his work in photographing thousands of individual snowflakes, highlighting how truly unique they are. While it’s a common saying that “no two snowflakes are alike,” it’s hard to prove scientifically because there are so many snowflakes. However, they are all stunningly different!
Let’s get started on this snowflake drawing tutorial. Find some drawing materials like markers or colored pencils, and let’s get started! Keep reading for Step 1.
Materials:
- a piece of paper
- a pencil for the guiding lines and sketching
- an eraser
- a black sharpie or a pen for the outlines
- markers or colored pencils for coloring
- our printable drawing guide (Join my Email List below to get this Tutorial)
Here are my RECOMMENDED Art Supplies!
- Crayola Coloring Set (140 Pieces – Mega Value!)
- 24 Colored Crayon Set
- A4 Printer Paper
- Crayola Coloring Pencils
- HP Home Printer with Instant Ink!
Time needed:
13 minutes.
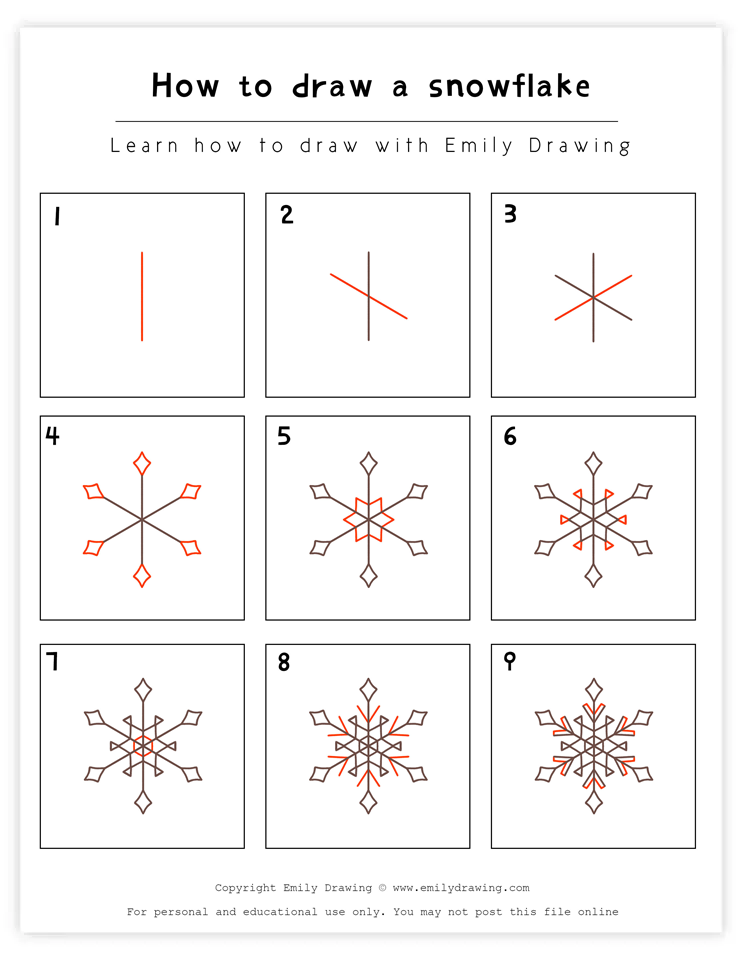
How to Draw a Snowflake — Let’s get started!
Step 1 – Draw a vertical line.
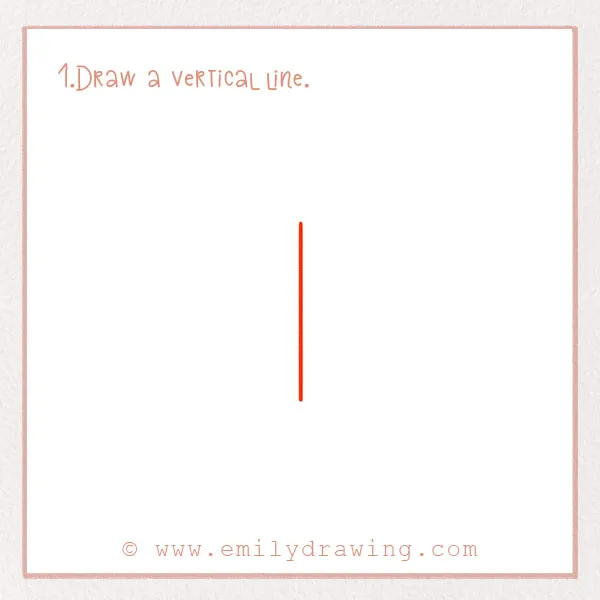
Snowflakes are six-sided. Throughout the next few steps, we are going to add all of these sides slowly. Our snowflake is going to be perfectly symmetrical.
Let’s start with a simple vertical line centered on the page. It should be several inches long.
Step 2 – Draw a diagonal line for the next side.
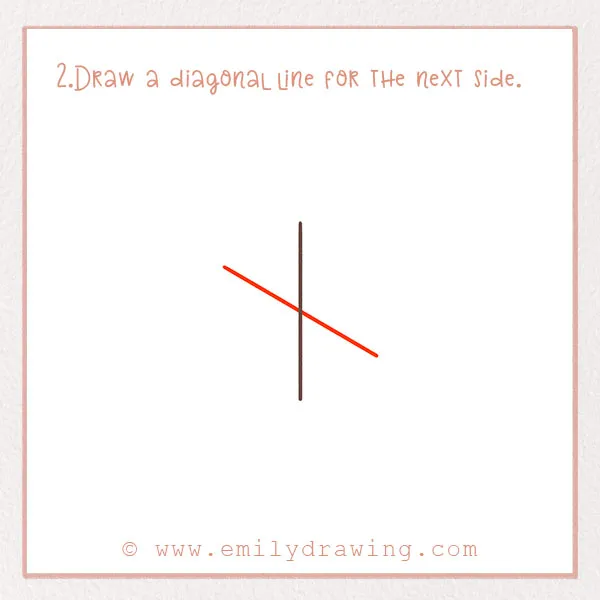
Let’s add diagonal lines for the rest of the snowflake’s shape. Draw another line that slants downward, starting from the top right. If it were a clock, the top of the line should begin at 10 o’clock and end at 4 o’clock.
Step 3 – Draw another diagonal line.
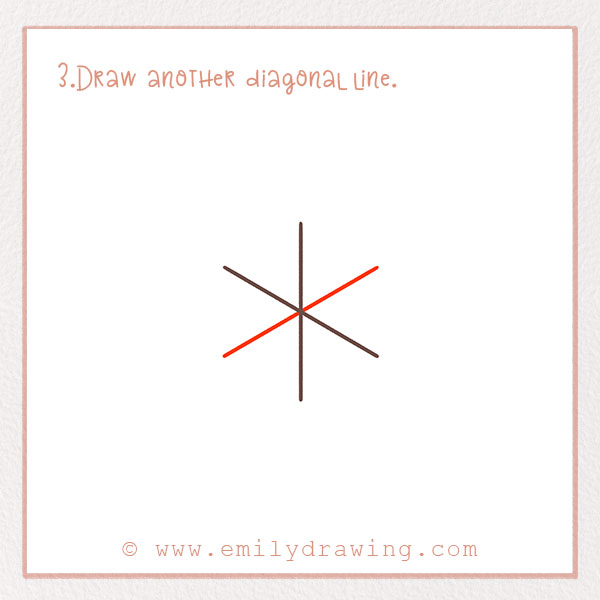
This next line should be a mirror image of the last diagonal line. In the space left, draw one more diagonal line. You should have six sides now. Look at the photo!
Step 4 – Add diamonds to the end of each line.
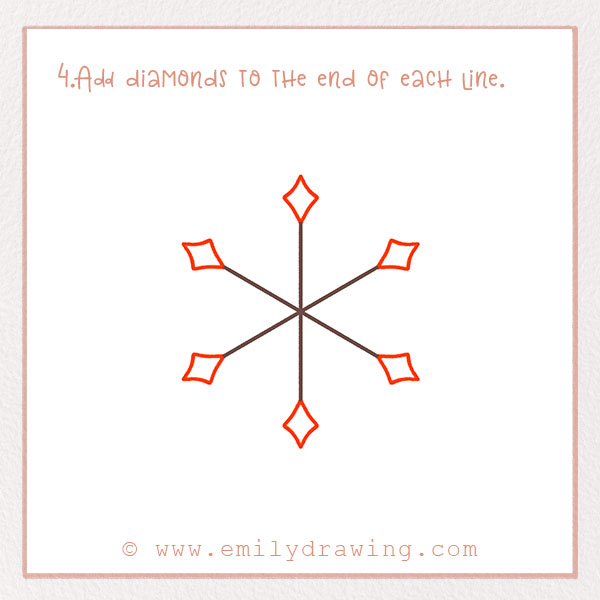
There are many different types of snowflake patterns, from simple hexagons to more intricate designs with branching arms. Ours is going to be more detailed! Let’s start adding these beautiful touches to our drawing.
At the end of each line, draw a diamond, all the same size and shape.
Step 5 – Add a pattern to the middle.
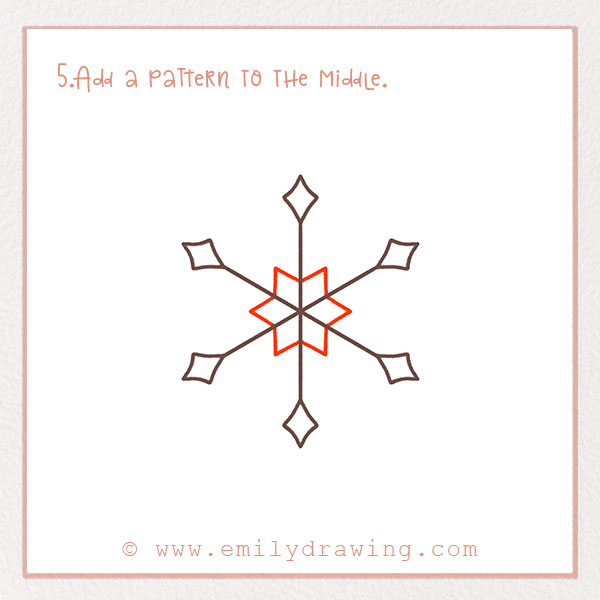
Let’s add a pretty pattern to the center of the snowflake next! Draw a zig-zag line in a circle shape around the center point of the snowflake. It should look like there is a star-like shape in the middle. Refer to the photo for help.
Step 6 – Continue the pattern.
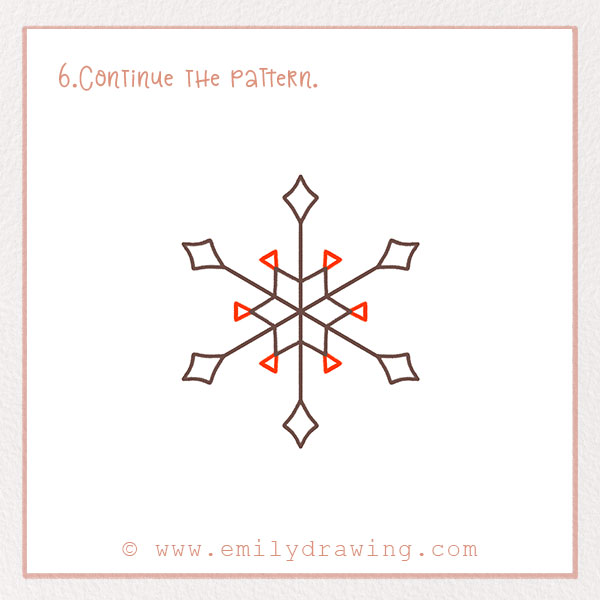
Snowflakes are very intricate, so let’s add more detail! At the tip of each point from the last step’s line, draw a small triangle. The point of each triangle should touch each point of the line from the last step. Make them quite small. Refer to the photo!
Step 7 – Add the center detail.
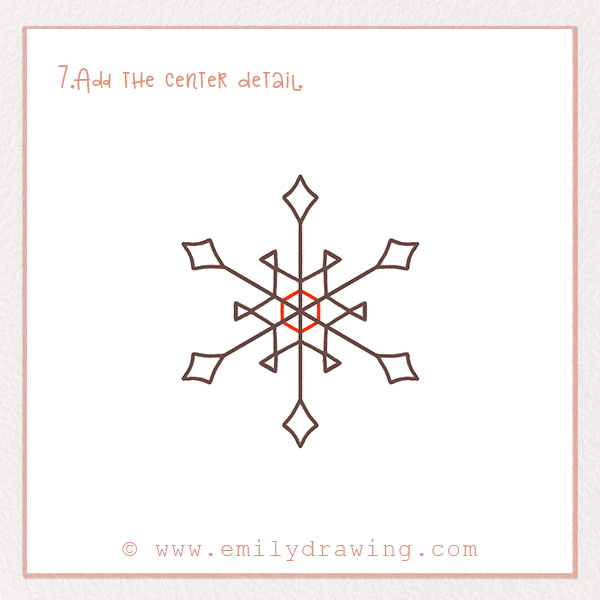
Right in the middle of the snowflake, draw a small circle. It should be inside the star-like shape in Step 5. Good job!
Step 8 – Add more detail to the pattern.
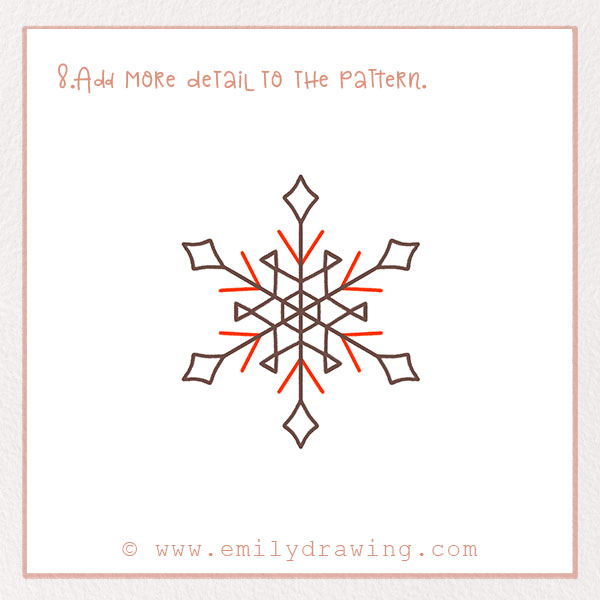
Let’s move to the outer area of the snowflake! In the middle of each arm, draw a V-shape. The point should be pointing inward. There should be six total (one on each arm).
Step 9 – Finish the design.
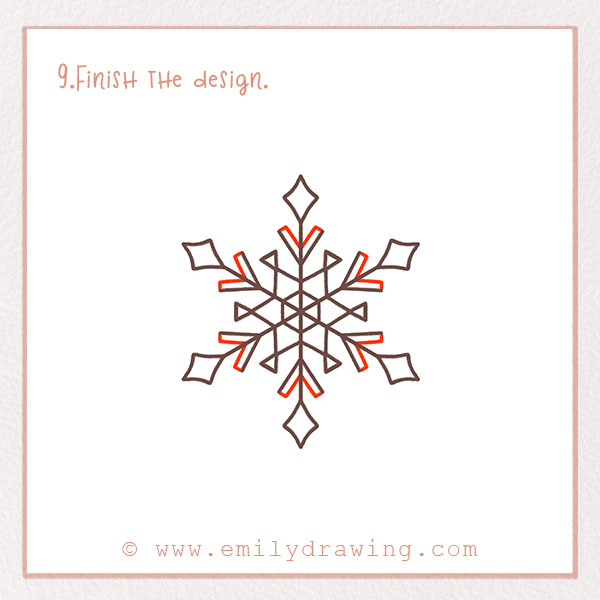
Snowflakes are incredibly small. In fact, you need a microscope to see all the intricate details of a single snowflake. This last step will put the finishing touches on our own super-detailed snowflake!
Add another slightly smaller V-shape directly next to every single one you just drew. Connect them with lines on each side. It should appear like each V-shape is now a small block letter. Refer to the photo.
Step 10 – Color!
Finally, color in your drawing! Of course, snowflakes are normally the beautiful glistening white color of snow, much like the friendly figure in our snowman drawing tutorial. However, they may look different to the eye, as they can reflect light. Add whatever colors you like to your snowflake, as well as the space around it—consider placing it in a magical scene like in our how to draw a snow globe tutorial. You could even add more smaller snowflakes to your drawing for a fun winter art activity!
Pin it now, Draw later!

We are all done. Fantastic job! We hope you love your drawing and learned some fun facts about snowflakes, too. If you’d like to expand your winter-themed art, try our snow globe drawing tutorial. If you live somewhere where it snows, maybe you’ll be lucky enough to see a snowflake in person this winter—or even build your own frosty friend with our guide on how to draw a snowman. If you catch it in your hand, you may have a few moments to discover the beautiful details of it.
Get the FREE Printable Drawing Guide


how to make monkey 🐒