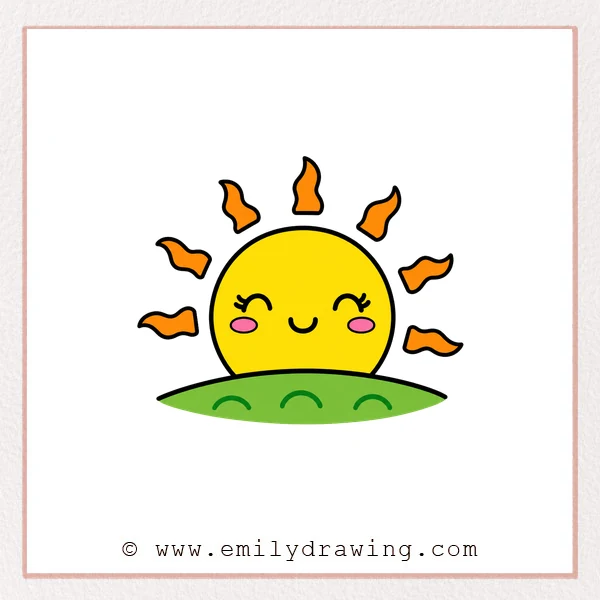
In this tutorial, you will learn how to draw sunrise step by step.
This easy drawing tutorial uses simple curves, clouds, and a cute sun face.
Take your time with each shape, and keep your lines soft and clear.
What You Will Need
- Drawing paper
- Pencil
- Eraser
- Black marker or pen
- Red or warm-colored marker
- Coloring tools, such as crayons or colored pencils
Here are my RECOMMENDED Art Supplies!
- Crayola Coloring Set (140 Pieces – Mega Value!)
- 24 Colored Crayon Set
- A4 Printer Paper
- Crayola Coloring Pencils
- HP Home Printer with Instant Ink!
Time needed:
24 minutes.
Step-by-Step Drawing Guide
Step 1: Draw the Floating Cloud Shapes
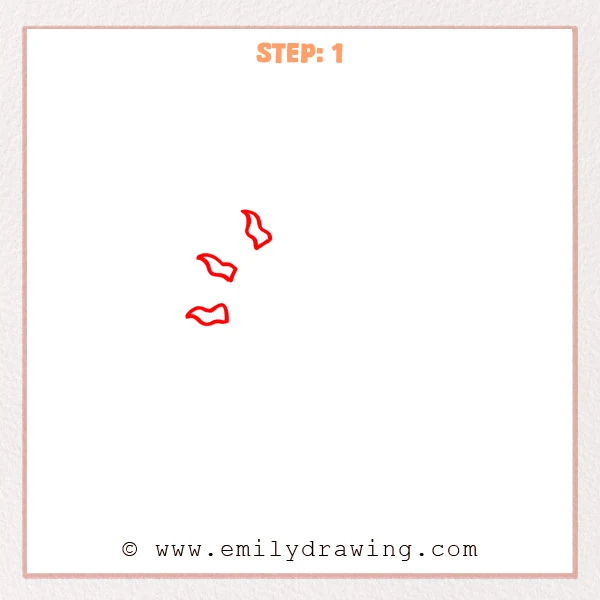
Start with a few curved, wavy lines to draw three small clouds.
Let each cloud edge rise and dip, as if a morning breeze is moving it.
Pro Tip: Leave enough space between the clouds for the sunrise and sky details later.
Step 2: Add More Clouds
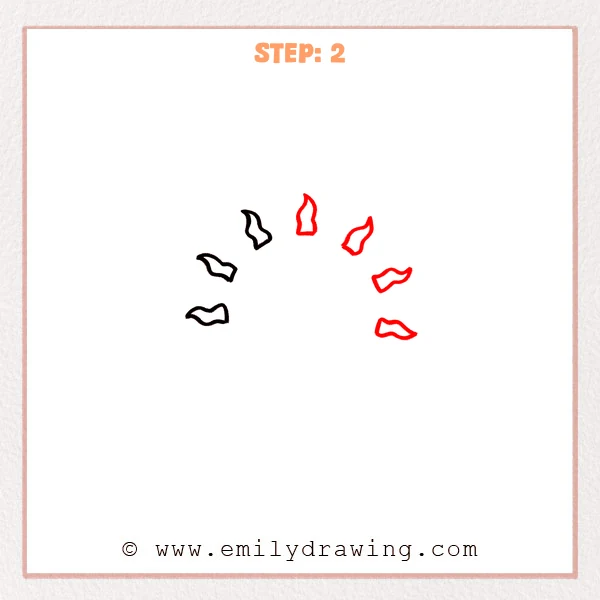
Add several more clouds in the middle and on the right side.
Some new clouds curve upward, while others stretch sideways, giving the sky more depth.
Pro Tip: Vary the cloud sizes and directions to make the scene feel more natural.
Step 3: Draw the Sun Half Circle
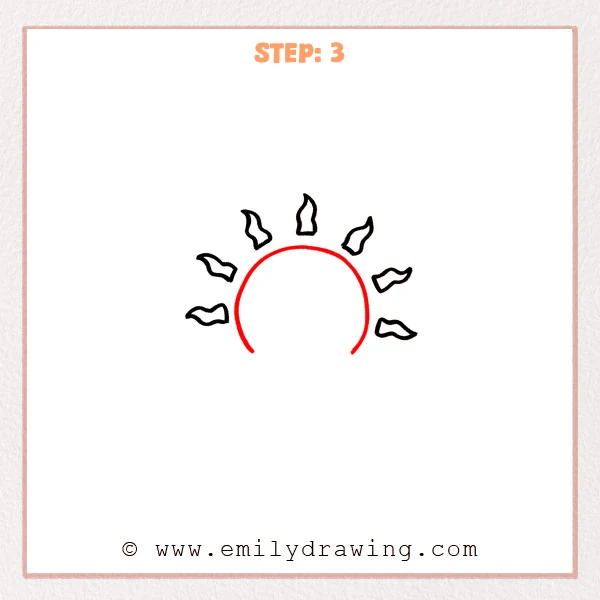
Draw a large half circle below the clouds to form the rising sun.
Let both ends extend slightly downward, keeping the line smooth and rounded.
Pro Tip: Place the sun half circle near the center so the surrounding clouds feel balanced.
Step 4: Add a Cute Face
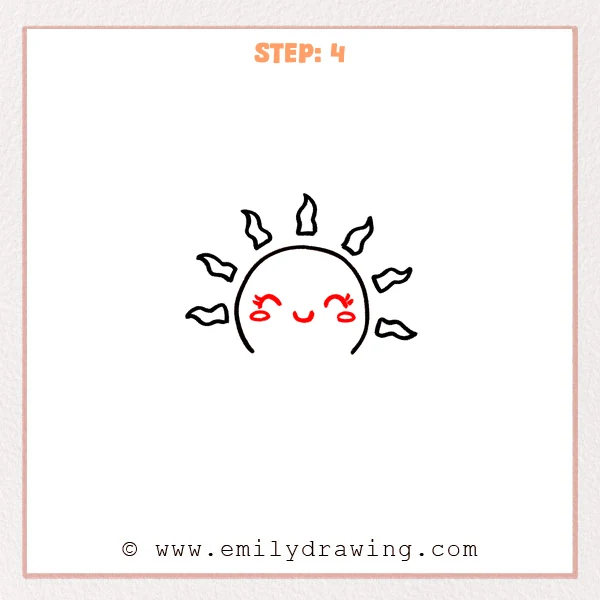
Draw two curved closed eyes and a small mouth inside the sun half circle.
Add two oval cheeks below the eyes to make the sunrise look softer and sweeter.
Pro Tip: Place the face slightly lower in the sun to keep it away from the top curve.
Step 5: Draw the Horizon Line
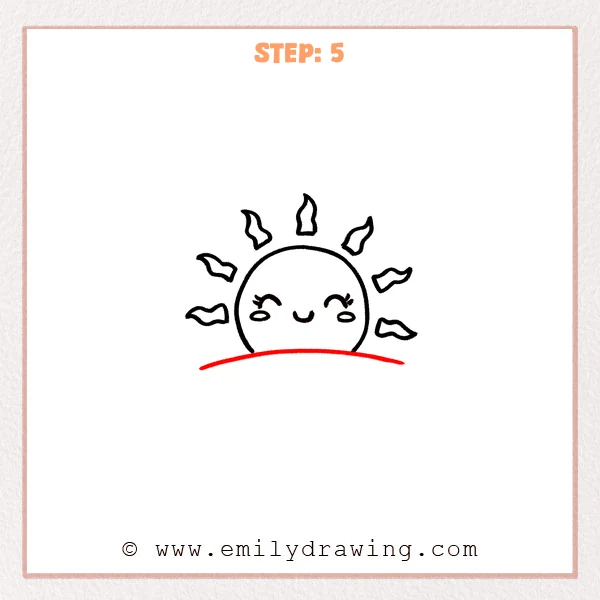
Add a long curved line below the sun to create the horizon.
Let the line arch gently upward, as if the sun is rising from far away.
Pro Tip: Place the horizon near the bottom of the sun to make the sunrise feel clearer.
Step 6: Add Small Foreground Arches
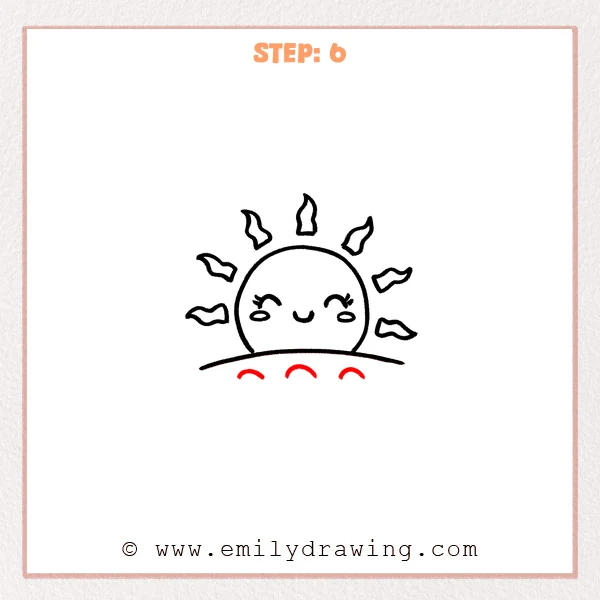
Draw three small half-circle arches below the horizon line.
Arrange them across the bottom, like soft distant hills or decorative ground lines.
Pro Tip: Keep the three small arches at a similar height so the bottom area looks neat.
Step 7: Color in your drawing!
Fun Facts
- A sunrise happens when the sun appears above the horizon in the morning.
- Sunrise colors can look red, orange, pink, or yellow because light spreads through the air.
- Clouds can make a sunrise look more dramatic by catching warm light.
Pin it now, Draw later!
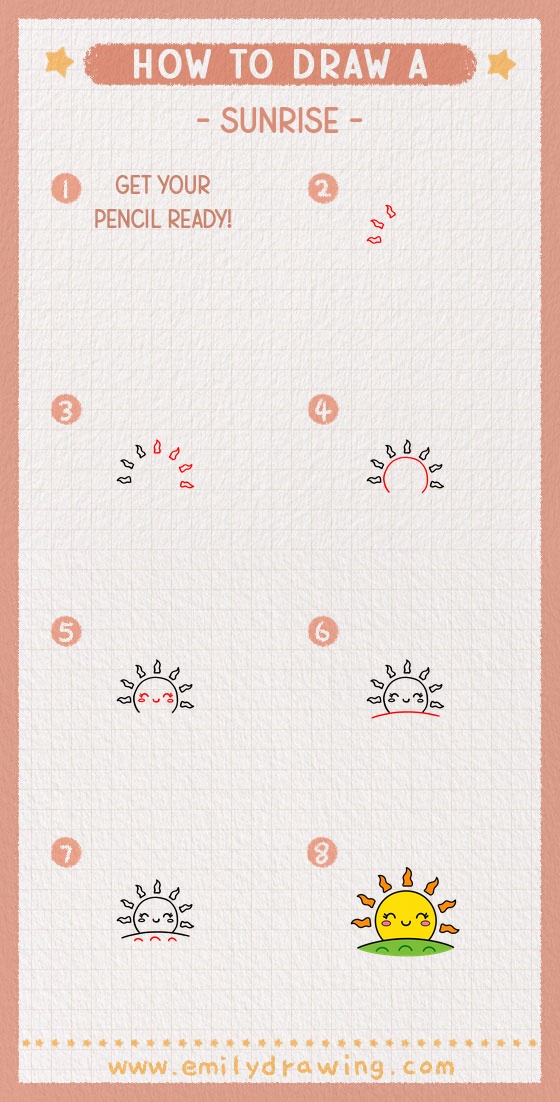
Trace your final sunrise drawing with a clean black marker.
Color the sun with warm yellows, oranges, or soft pinks.
You can shade the clouds lightly to make the sky feel calm and bright.
Now you know how to draw sunrise using simple shapes and gentle details.
Try the step by step drawing again, and add your own sky colors next time.
Get the FREE Printable Drawing Guide
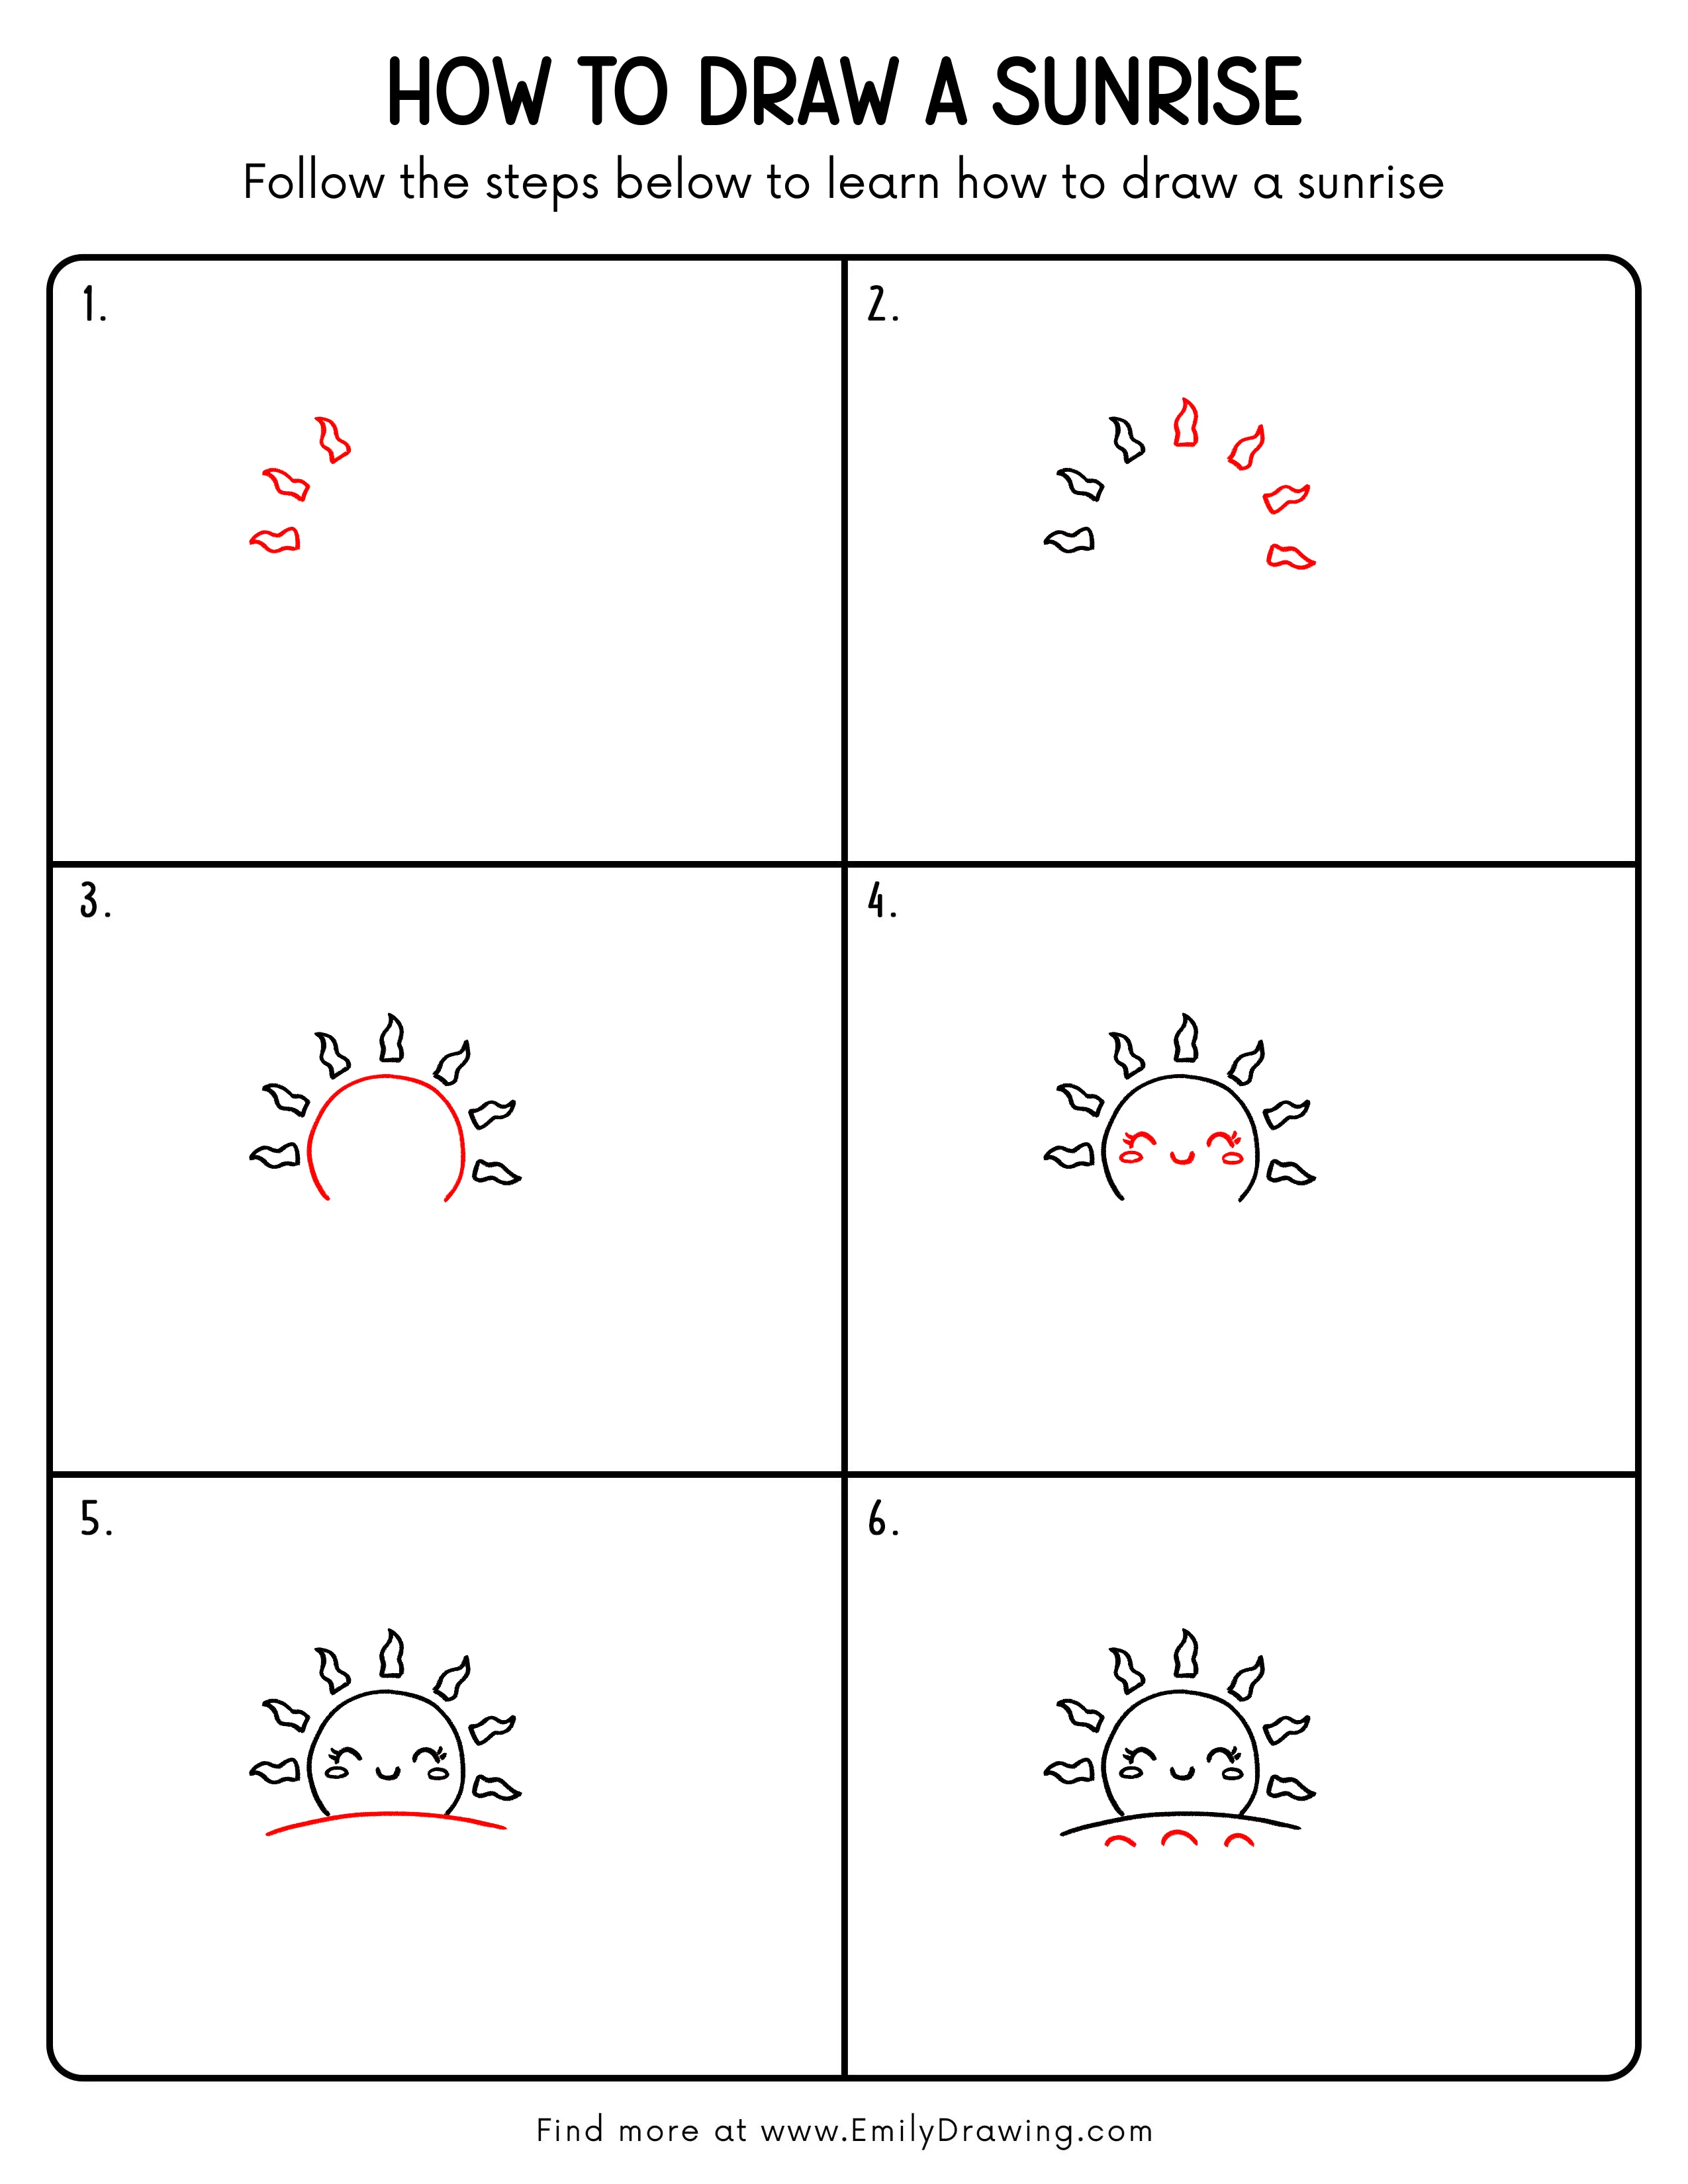
FREE Download Printable Sunrise Drawing Tutorial
Frequently Asked Questions
Is this sunrise drawing for beginners?
Yes, this drawing for beginners uses simple curves, cloud shapes, and easy details.
Can I color the clouds?
Yes, you can use soft pink, orange, yellow, or light blue for the clouds.
How can I make the sunrise look brighter?
Add warm colors around the sun and keep the center of the sky lighter.