Are you ready to learn how to draw something truly special this Ramadan? In this fun and easy tutorial, we’ll show you how to draw a beautiful pair of Ramadan praying hands—perfect as Islamic art for kids—in just eight simple steps. All you need is a pencil, a piece of paper, and your imagination!
Did you know? Praying hands are a powerful symbol of peace, faith, and connection in many cultures. During Ramadan, they remind us of our prayers, gratitude, and the kindness we share with others.
Let’s get those pencils ready and dive into this Ramadan drawing tutorial!
Materials:
- a piece of paper
- a pencil for the guiding lines and sketching
- an eraser
- a black sharpie or a pen for the outlines
- markers or colored pencils for coloring
- our printable drawing guide (Join my Email List below to get this Tutorial)
Here are my RECOMMENDED Art Supplies!
- Crayola Coloring Set (140 Pieces – Mega Value!)
- 24 Colored Crayon Set
- A4 Printer Paper
- Crayola Coloring Pencils
- HP Home Printer with Instant Ink!
Time needed:
15 minutes.
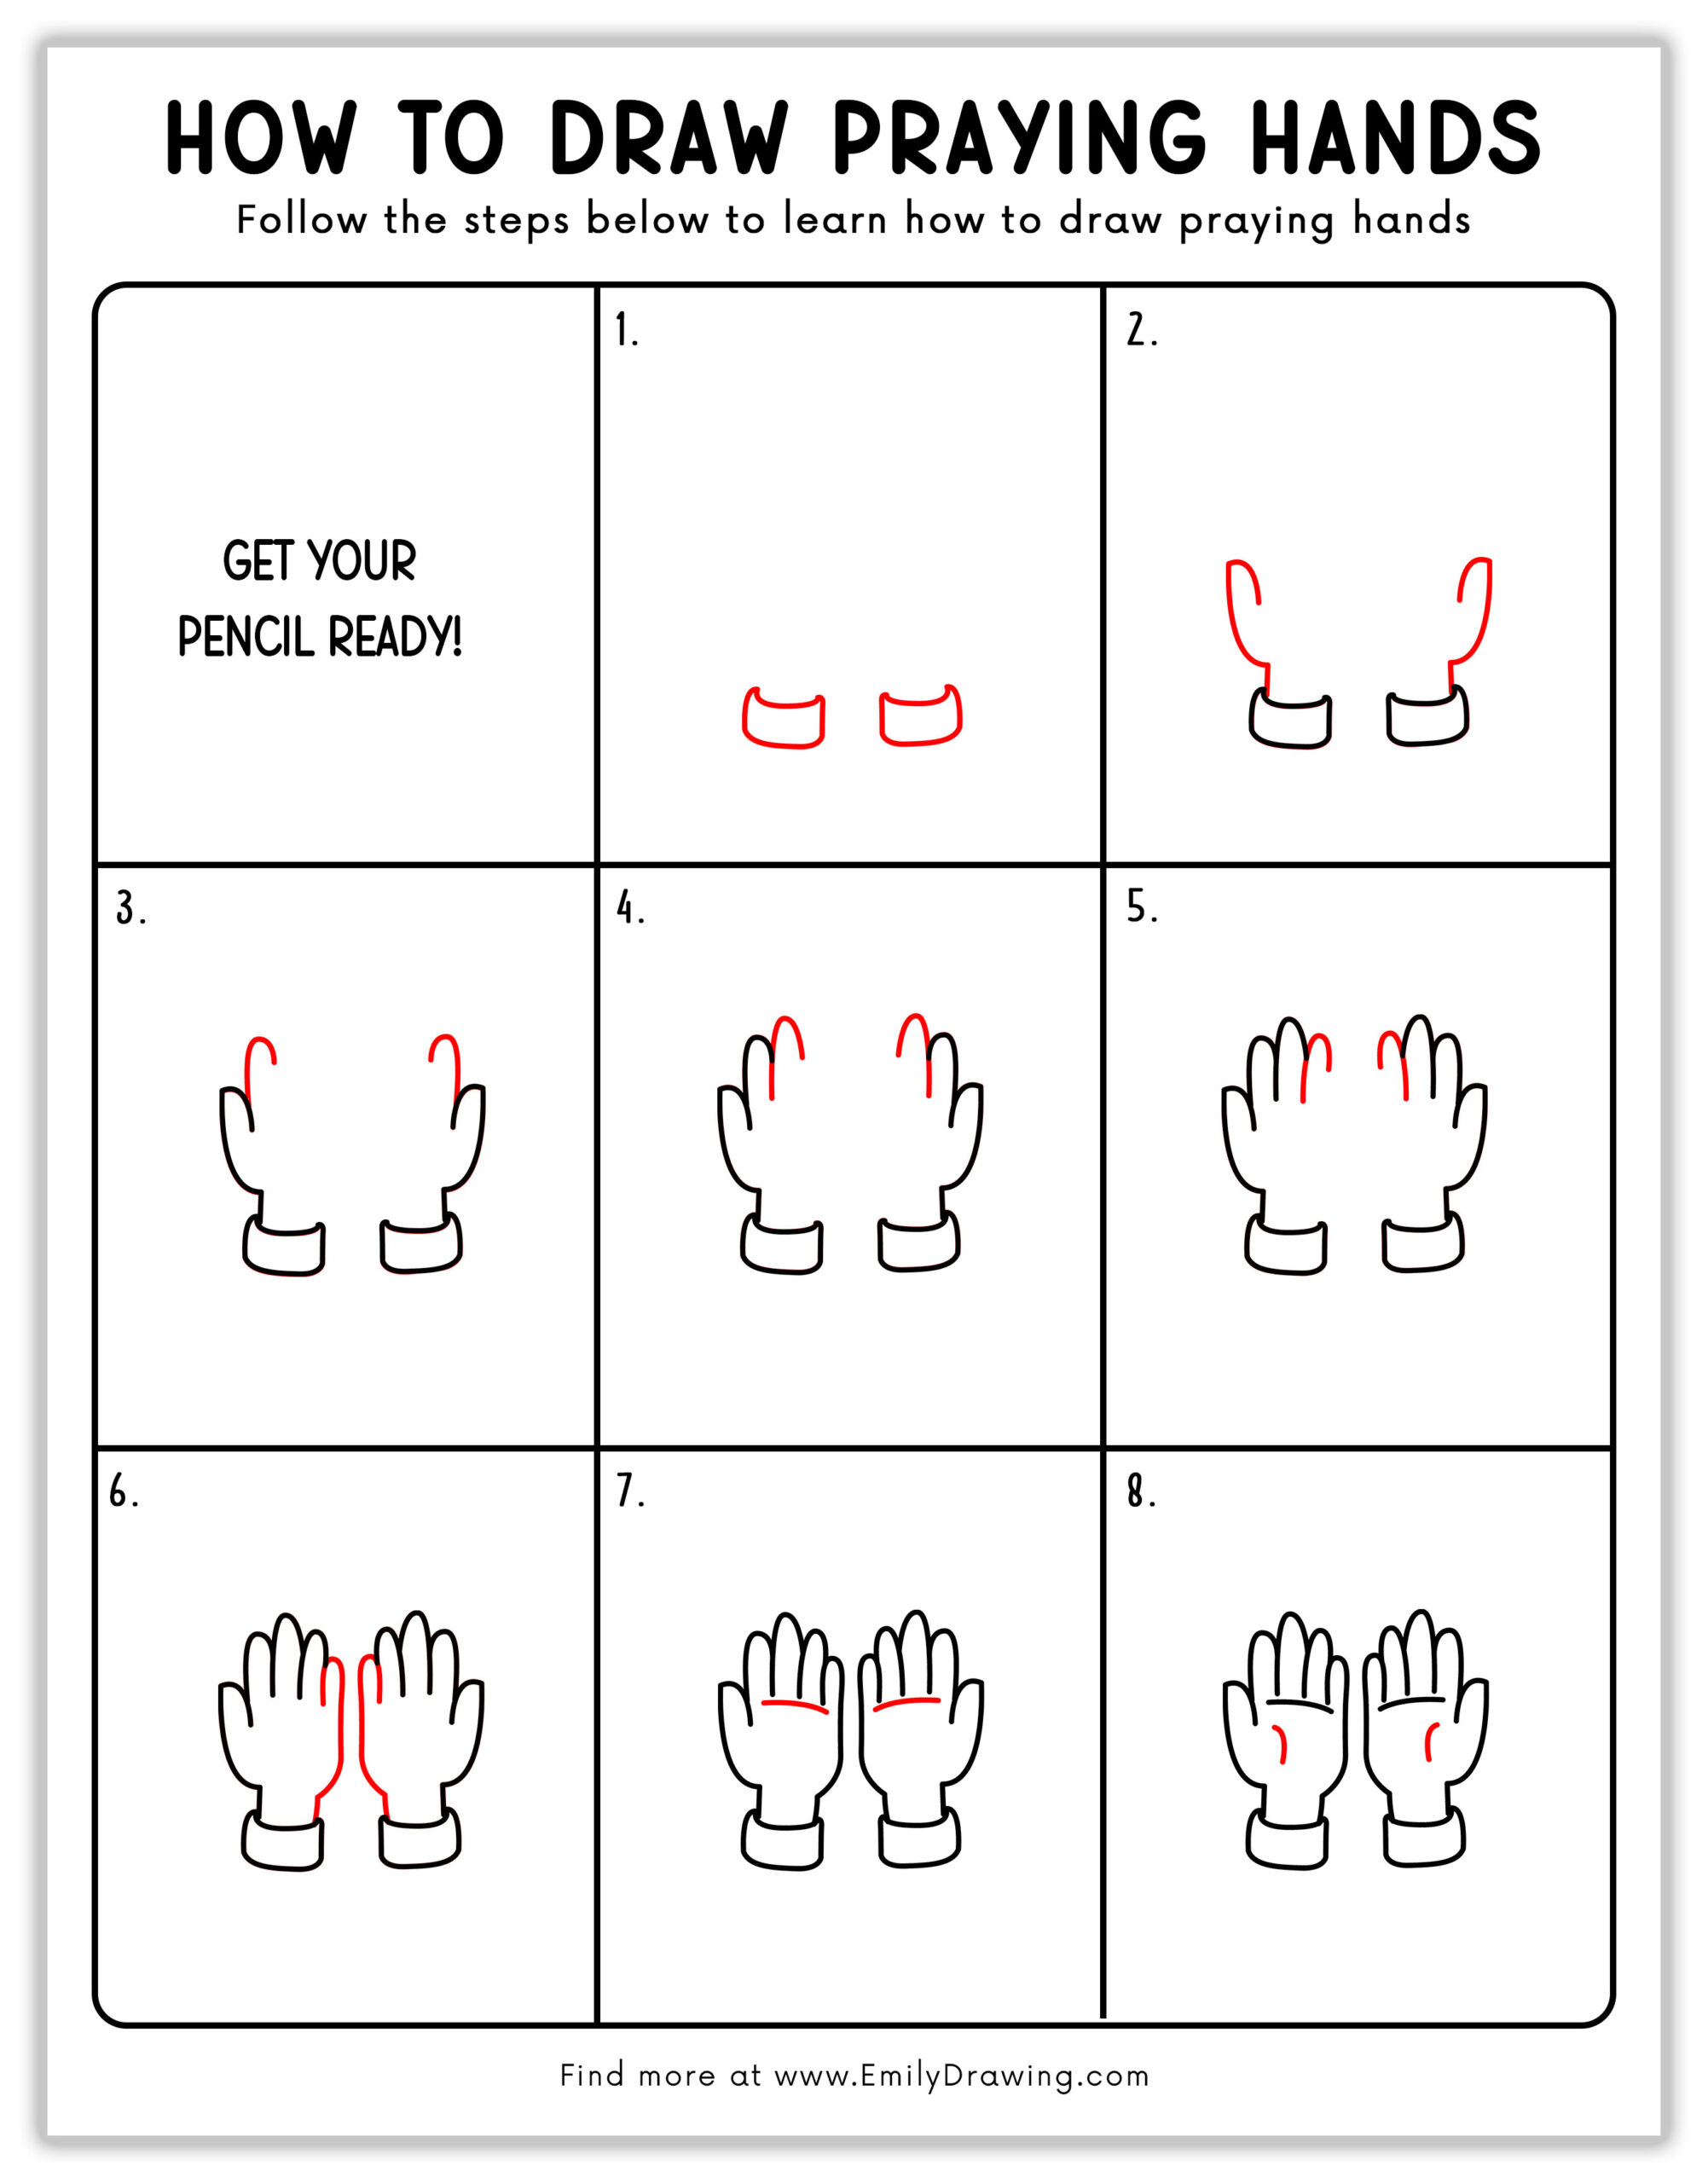
How to Draw Praying Hands — Let’s get started!
Step 1 – Draw the Cuffs.
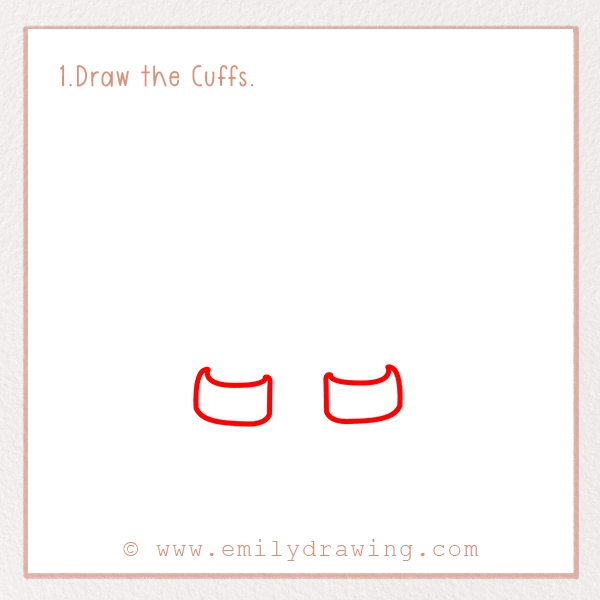
Let’s begin with something simple—the cuffs of the sleeves!
Draw two small rectangles near the bottom center of your page. These rectangles will look like little shirt cuffs and will be the base of your praying hands. Keep them about the same size and leave a small gap between them. Think of them as tiny boxes just waiting to support your hands.
✏️ Top Tip: Make the corners slightly rounded to give them a soft, comfy look.
Step 2 – Sketch the Thumbs.
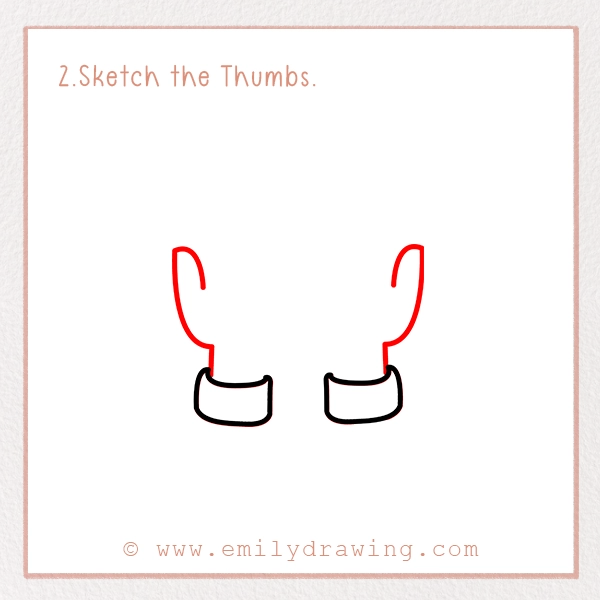
Time to add the thumbs—this is where our hands start to take shape!
Above each cuff, draw a curved line that arches upward and outward. These are the thumbs gently lifted in prayer. Don’t worry about being too perfect—thumbs can be a little different in size or curve. Just make sure they point slightly toward the center but still leave a bit of space between them.
🧠 Fun Fact: The thumb is one of the strongest fingers and helps us grip things like prayer beads or books!
Step 3 – Draw the First Two Fingers.
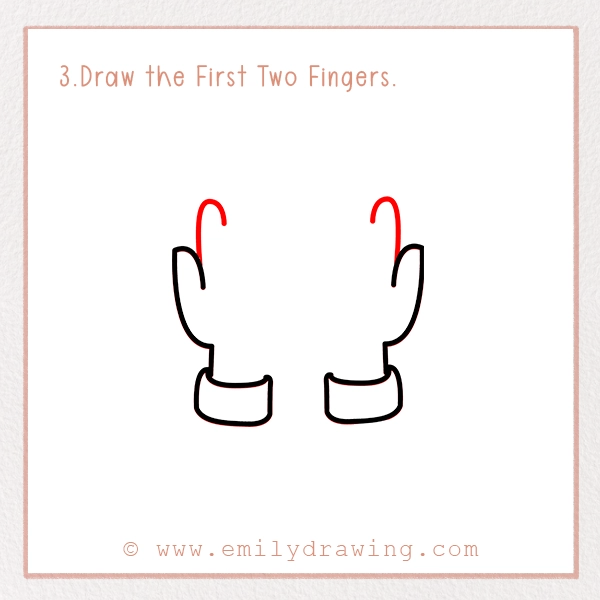
Now let’s begin forming the fingers—starting with the index and middle fingers.
Draw two long, curved lines above each thumb. These will be the first two fingers. Make sure they’re taller than the thumbs and spaced out nicely. They should gently curve inward, as if they’re raised in a quiet moment of reflection.
💡 Pro Tip: Try to keep the fingers symmetrical on both sides, but a little variation makes them look more natural.
Step 4 – Add the Ring Fingers.
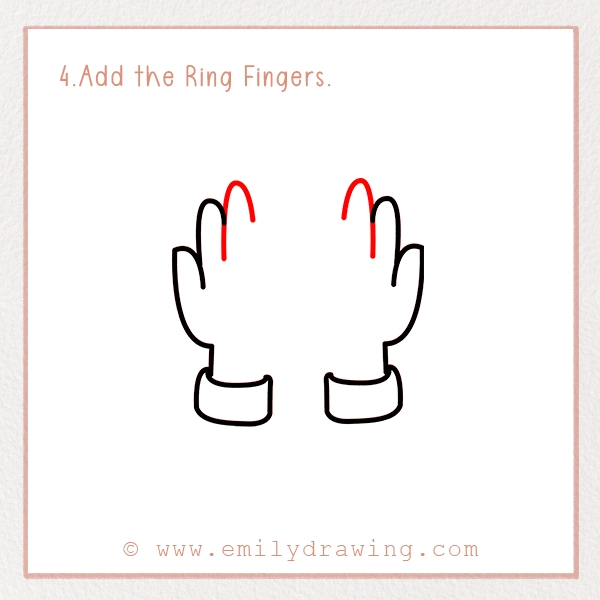
Great job so far—now for the ring fingers!
Right next to the previous fingers, draw another long finger on each hand. These should be slightly shorter than the middle fingers, just like in real hands. Let them curve inward gently, forming a graceful arch of fingers.
Your praying hands are really coming together now!
Step 5 – Add the Pinky Fingers.
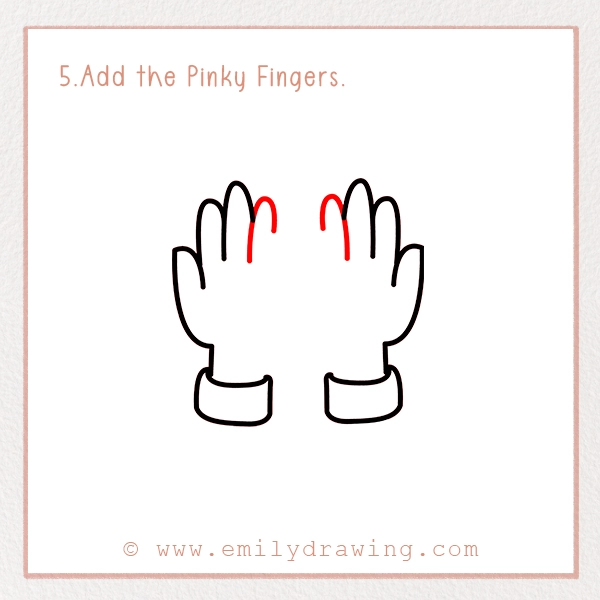
Almost there! Let’s complete the fingers by adding the pinkies.
Draw the last finger on the outer side of each hand. These pinky fingers should be the shortest. Like the others, they’ll curve inward to give your hands that beautiful praying pose.
🔍 Did You Know? Each hand has 14 bones in the fingers—that’s a lot of joints helping us move and express ourselves!
Step 6 – Connect the Hands to the Cuffs.
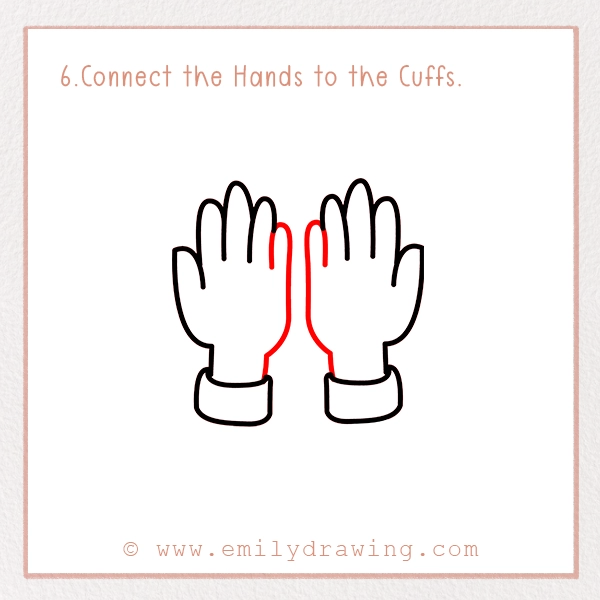
Time to bring the hands together!
Use a curved line to connect the outside of the pinky fingers down to the cuffs. This will shape the outer edges of the hands and join everything together. Try to draw the palm area full and gently curved—it gives the hands a soft and natural feel.
🎨 Creative Tip: Draw the palms with one smooth motion. Don’t rush—steady lines make a big difference!
Step 7 – Add Finger Details.
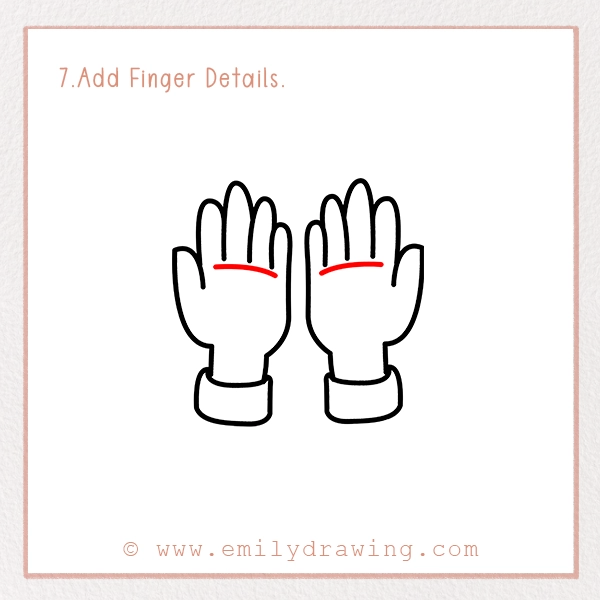
Let’s add some life to those fingers.
Draw a small curve across each palm just below the base of the fingers. These are the creases you see when hands are bent. You can also add a few soft lines or wrinkles on each finger to show movement and realism.
Step 8 – Add the Palm Lines.
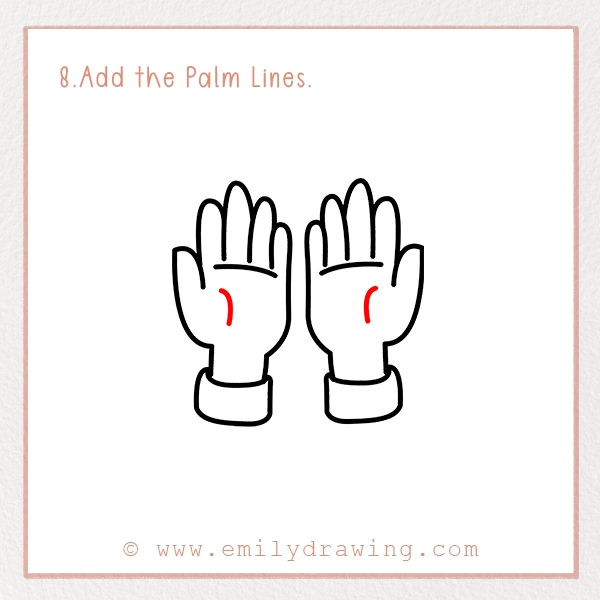
Now let’s finish with the palm lines!
Draw a curved line through the center of each palm. These represent the natural lines of the hand, often found in drawings. Let them curve slightly up or down to match the hand’s shape.
Your drawing now looks complete!
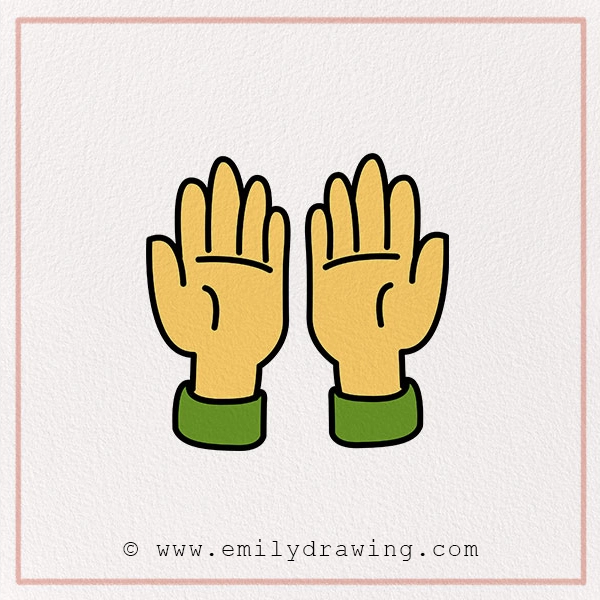
Step 9 – Color Your Drawing!
Now it’s time to bring it all to life with color!
Use soft brown, tan, or peach tones for the skin. Color the cuffs green like in our example—or choose your favorite shade! Try adding some light shading on the palms or fingers for more depth and detail.
🖍️ Fun Challenge: Color each hand with a different skin tone to celebrate diversity and unity in faith!
Pin it now, Draw later!

Fun Facts About Ramadan Praying Hands
- Praying hands have been part of religious art for over 10,000 years!
- During Ramadan, Muslims raise their hands to make du’a (supplication) and connect with Allah through prayer.
- Even young children learn to raise their hands in prayer—it’s a beautiful way to feel part of the tradition!
Tips and Tricks for Better Drawing
- Start with light lines: Sketch lightly so you can erase easily.
- Use your own hands: Look at your hands in a prayer pose for reference.
- Take breaks: Drawing takes time—don’t rush it!
- Practice with tracing: Use tracing paper over this guide to get comfortable with the shapes.
- Decorate the cuffs: Add stars, moons, or tiny prayer beads for extra creativity!
Congratulations! You’ve just created beautiful faith-inspired artwork by learning how to draw Ramadan praying hands from scratch—and they look amazing. Whether you’re using your art for a Ramadan card, a decoration, or just for fun, you’ve created something meaningful and heartfelt—just like you can with these fun Halloween-themed drawing prompts.
Why not share your masterpiece with friends and family? Or post it online using #EmilyDrawing—we’d love to see your beautiful artwork!
Looking for more fun drawing adventures? Check out our other step-by-step guides—like this unique Halloween drawing ideas collection—and fill your sketchbook with creativity and joy!
🌙 Happy Drawing and Ramadan Mubarak!
Get the FREE Printable Drawing Guide