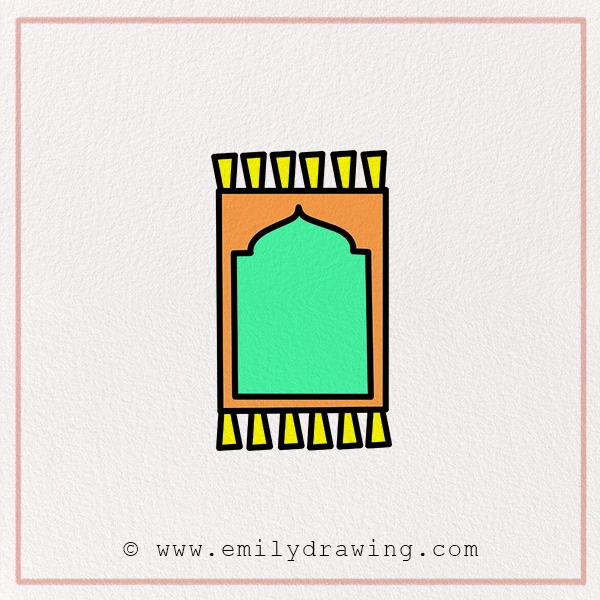
Are you ready to draw something special this Ramadan? In this super fun tutorial, we’ll show you how to draw a beautiful Ramadan prayer mat step by step. It’s simple, exciting, and one of the best Ramadan crafts for kids and parents to enjoy together!
Did you know? Muslims use prayer mats every day to perform salah (prayers). Each mat often features unique Islamic prayer mat designs, soft textures, and sometimes bright, colorful tassels. Whether you’re celebrating Ramadan or just love to draw, this tutorial is a great way to explore both creativity and culture—especially when paired with festive activities like drawing your own lantern.
Grab your pencil, and let’s get drawing!
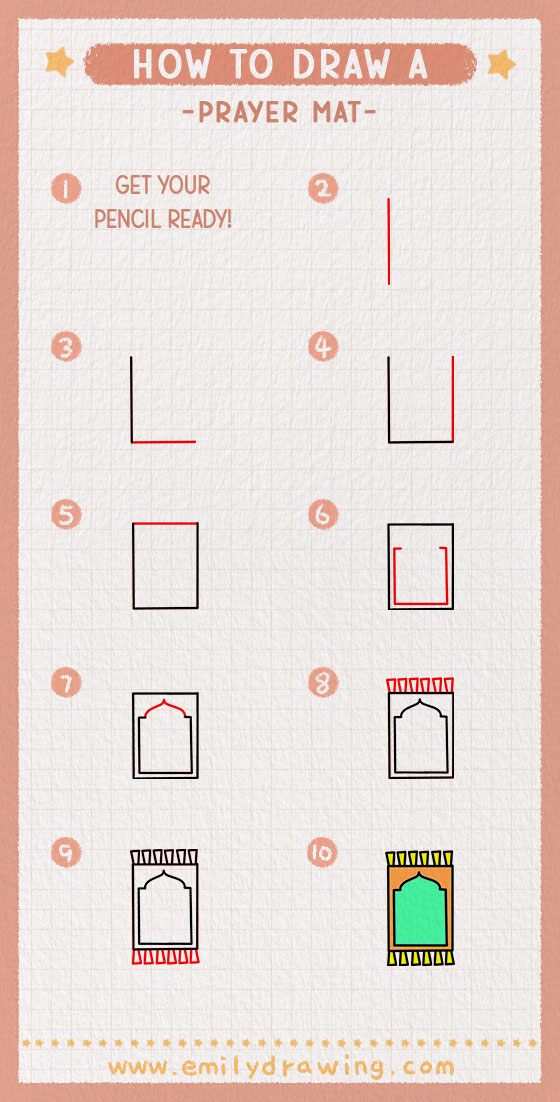
We’ll guide you through eight simple steps to draw a beautiful Ramadan prayer mat—just like the one in our example. No need to be an expert artist. Just follow along and have fun!
Materials:
- a piece of paper
- a pencil for the guiding lines and sketching
- an eraser
- a black sharpie or a pen for the outlines
- markers or colored pencils for coloring
- our printable drawing guide (Join my Email List below to get this Tutorial)
Here are my RECOMMENDED Art Supplies!
- Crayola Coloring Set (140 Pieces – Mega Value!)
- 24 Colored Crayon Set
- A4 Printer Paper
- Crayola Coloring Pencils
- HP Home Printer with Instant Ink!
Time needed:
15 minutes.
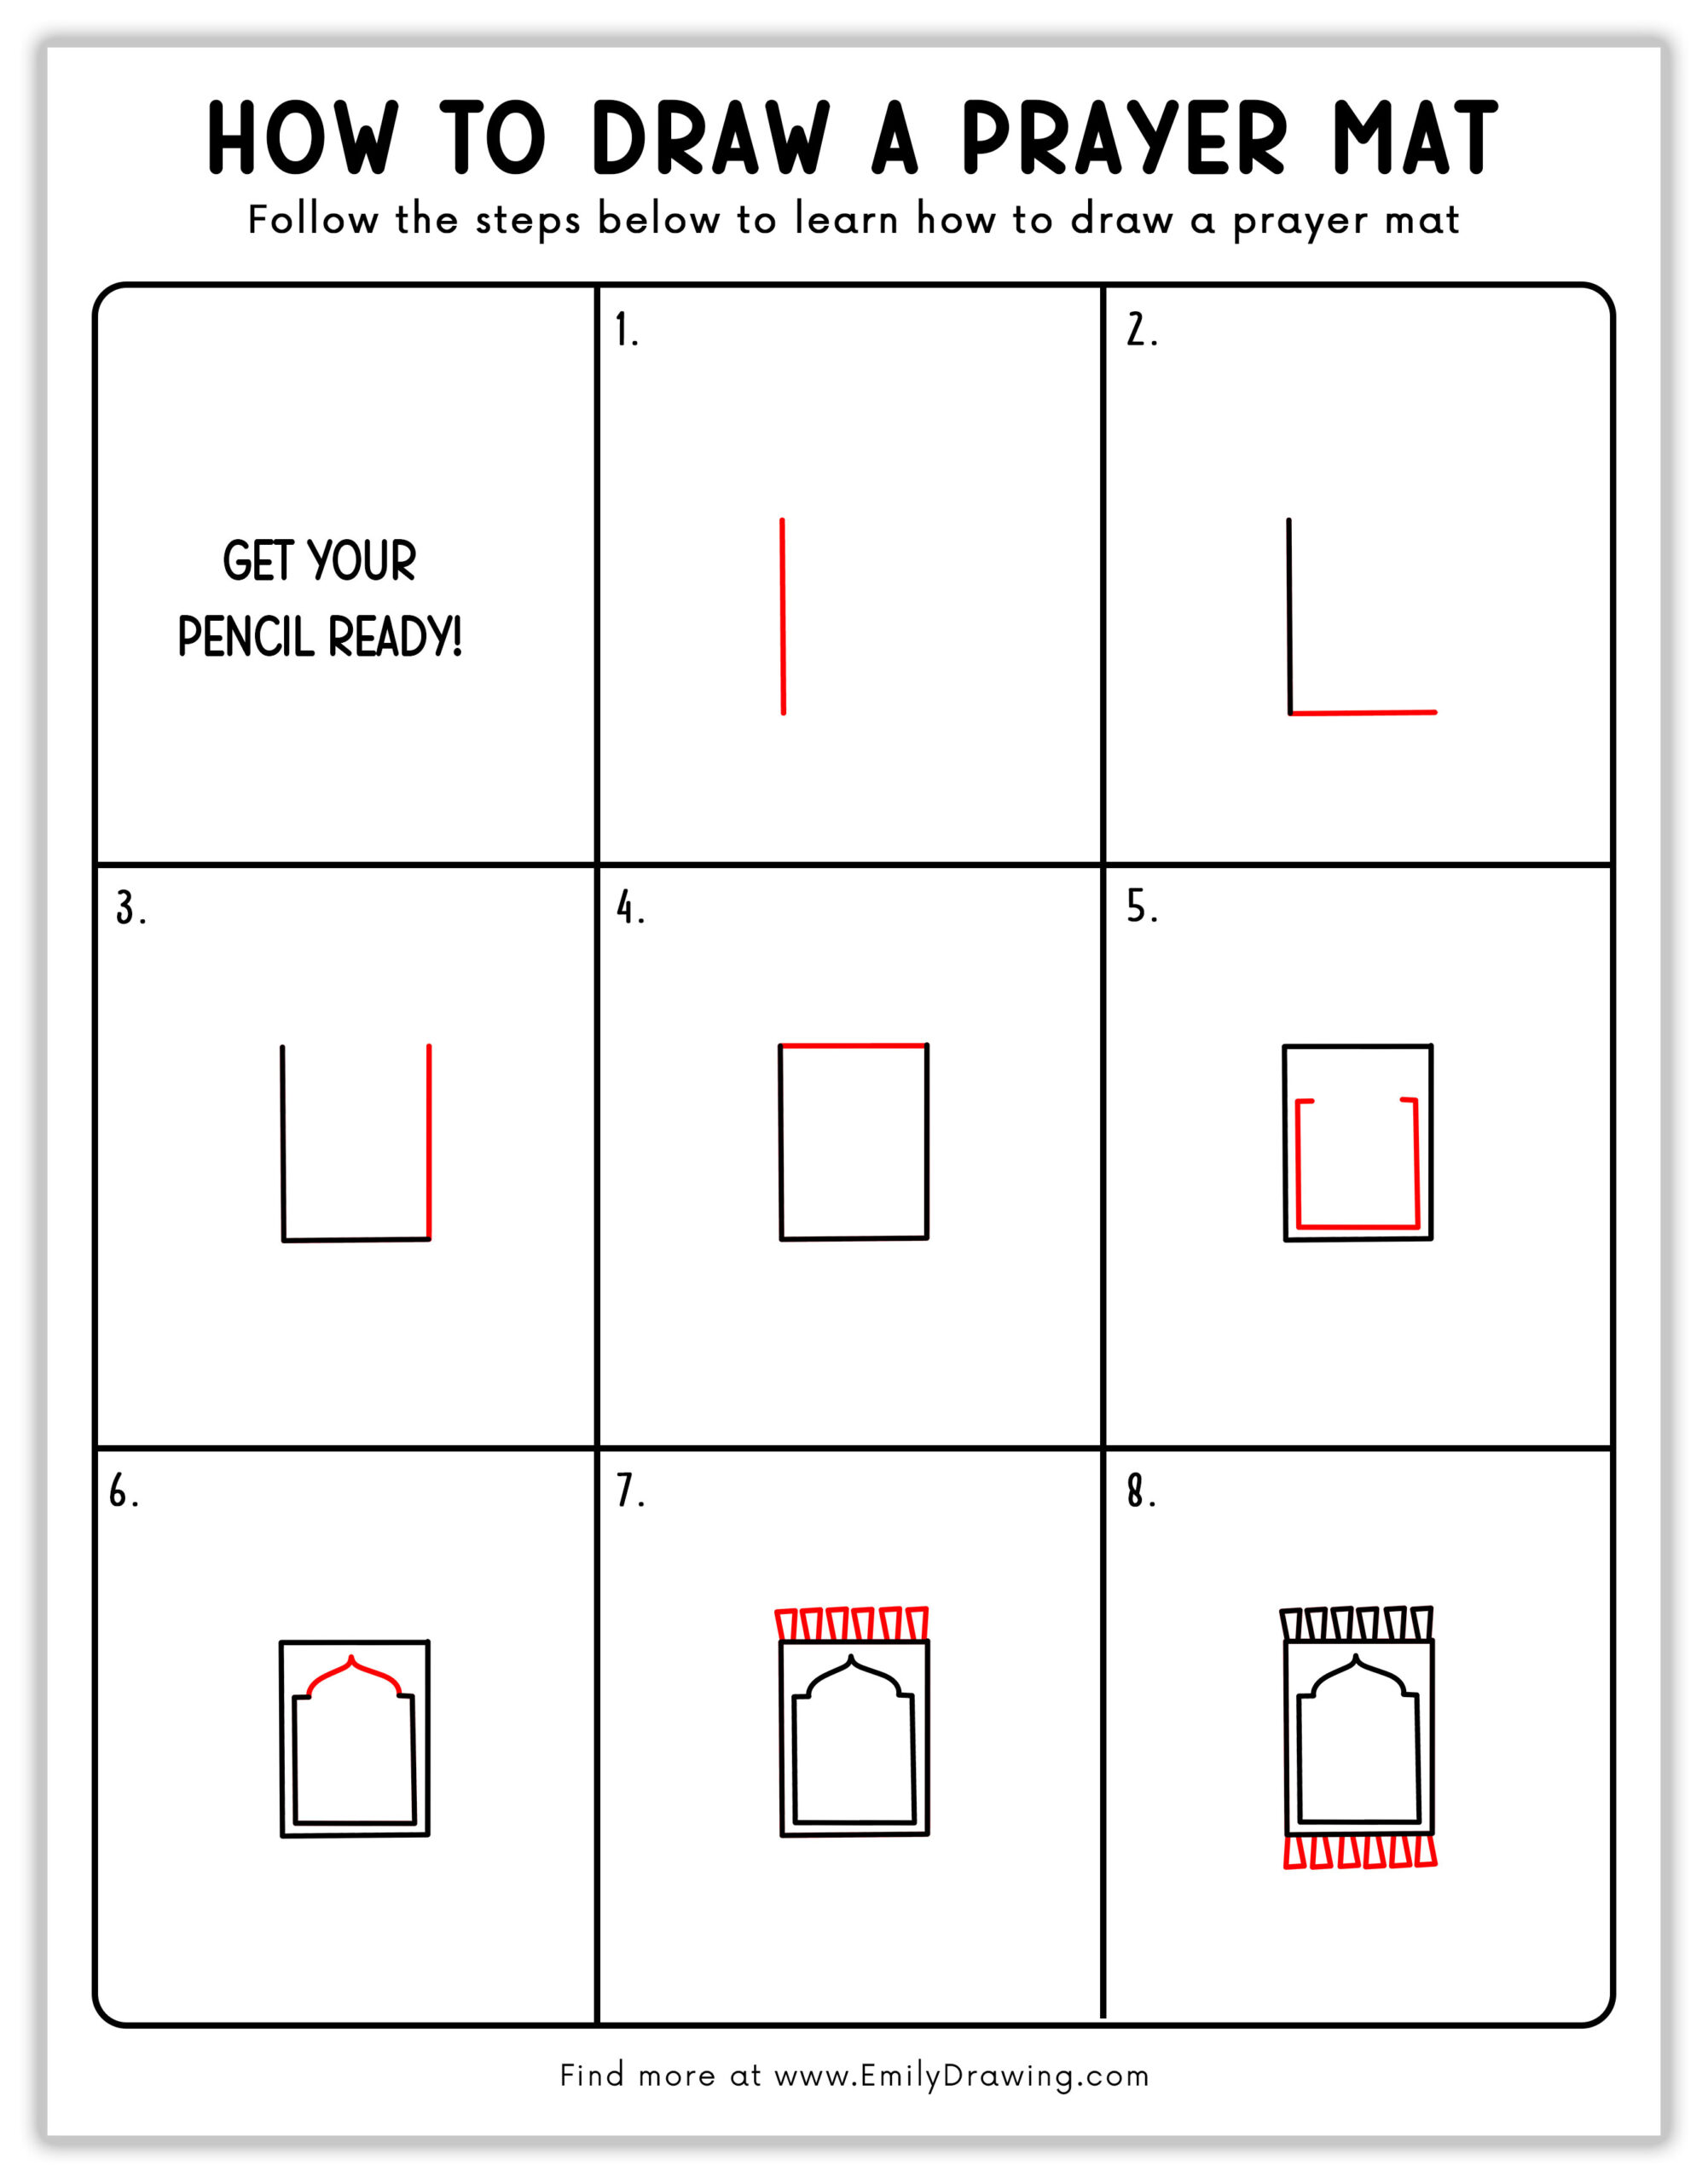
How to Draw a Prayer Mat — Let’s get started!
Step 1 – Draw a Straight Line.
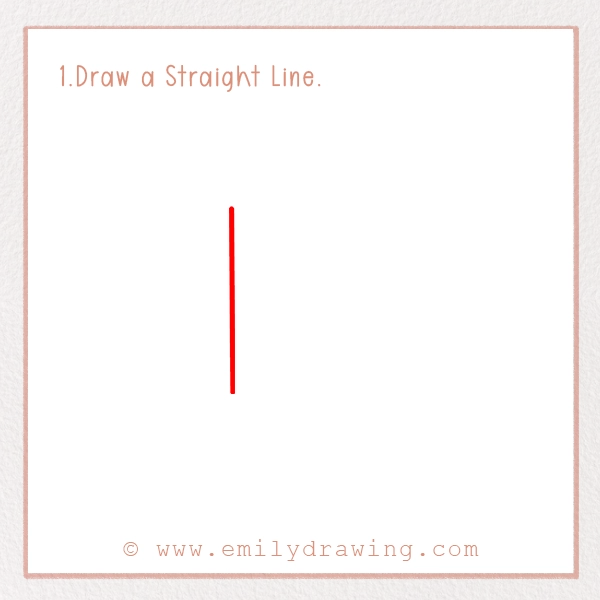
Let’s begin! Draw a single vertical line right in the center of your page. This will be one side of your prayer mat.
🧠 Tip: If it’s tough to draw straight, use a ruler or the edge of a book. Or try sketching it lightly and going over it again.
Step 2 – Make an L Shape.
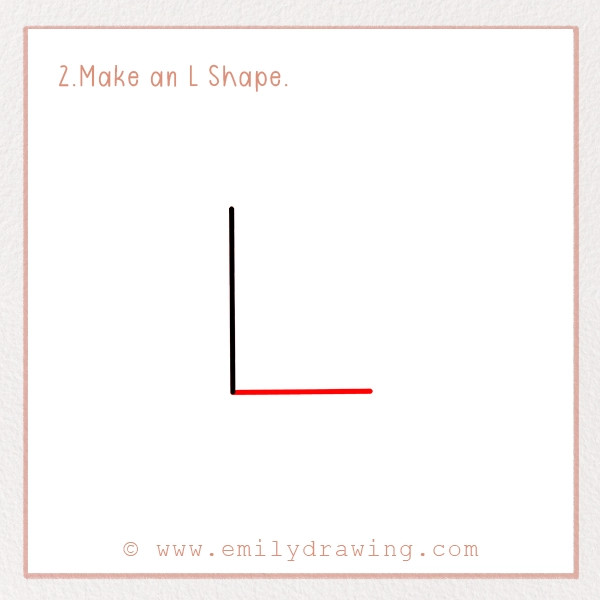
Now draw a horizontal line from the bottom of that vertical line, going to the right. You now have an “L” shape!
This will form the left and bottom sides of the mat’s border.
📖 Fun Fact: Prayer mats are always placed to face Mecca, a special direction for Muslims all around the world.
Step 3 – Draw the Second Vertical Line.
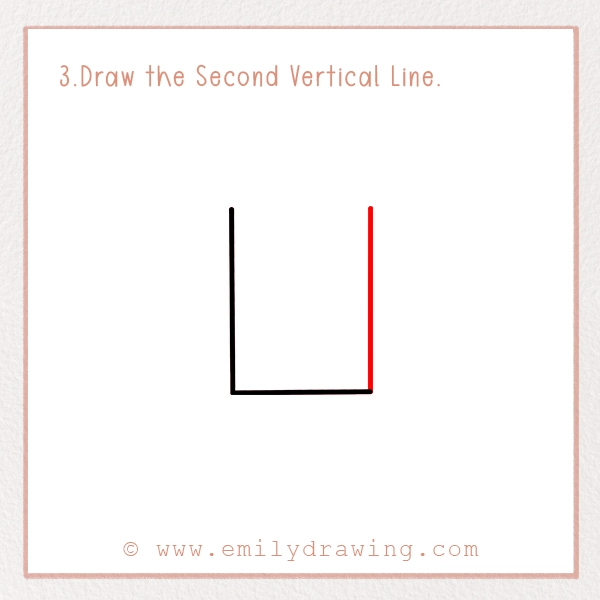
Next, draw another vertical line going up from the end of the horizontal line you just made. This is the right side of the mat.
Starting to look like a rectangle, right?
Step 4 – Complete the Rectangle.
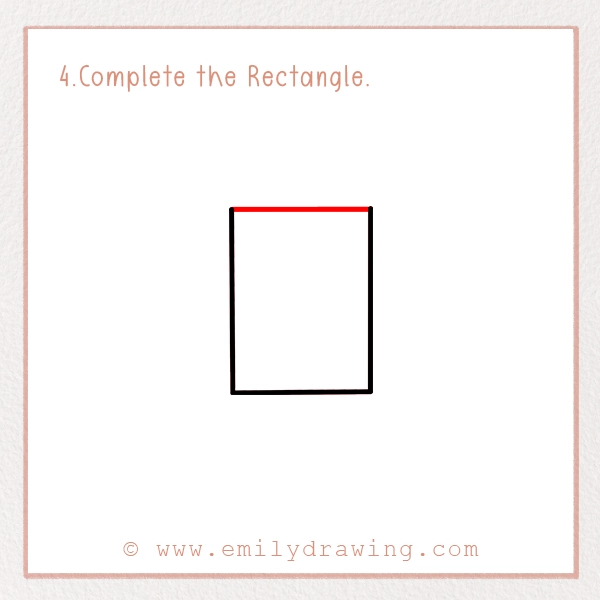
Now close it off! Connect the tops of both vertical lines with a final horizontal line. You’ve now drawn the outer edge of the mat.
🔍 Quick Tip: Try to keep your corners clean and square. It’ll help your drawing look sharp and balanced.
Step 5 – Draw a Smaller Rectangle Inside.
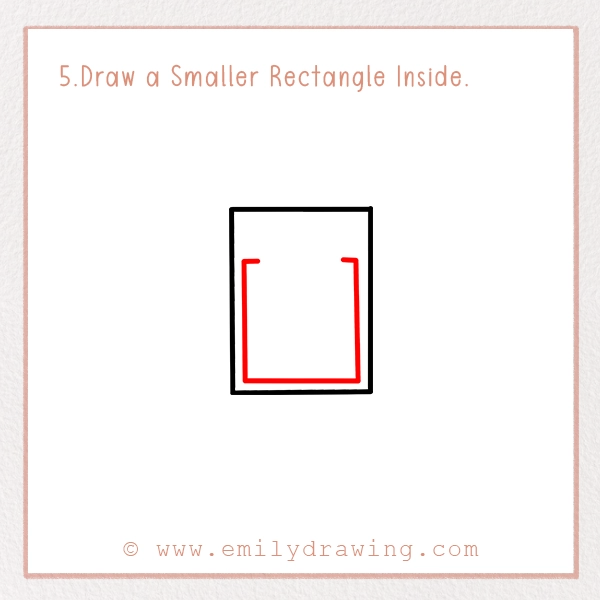
Time to add an inner frame!
Inside the larger rectangle, draw a slightly smaller rectangle. Leave equal space all around it so it looks like a decorative border.
📏 Pro Tip: Use your fingers or a ruler to space it evenly. A balanced frame makes your mat really pop!
Step 6 – Add the Arch (Mihrab).
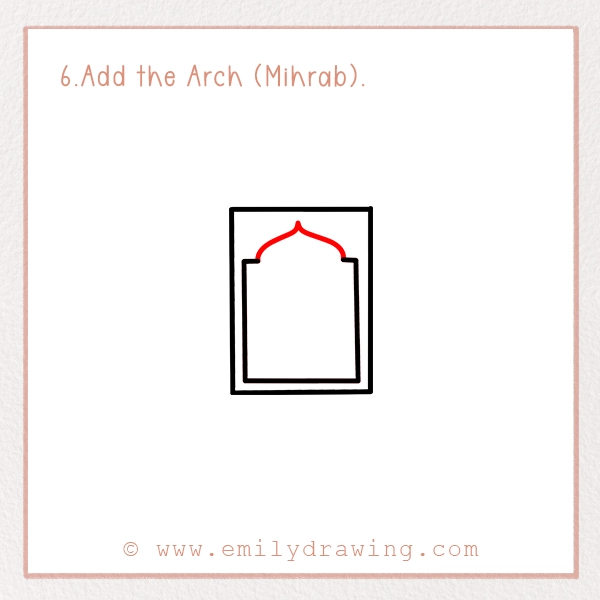
Now for the main design—the mihrab, or prayer arch.
Draw two short vertical lines near the top inside your smaller rectangle. Then connect them with a curved arch—this can be rounded or pointed, just like the domes in a mosque.
🌍 Fun Fact: The arch is inspired by Islamic architecture and points to the qibla—the direction of Mecca.
Step 7 – Add Top Tassels.
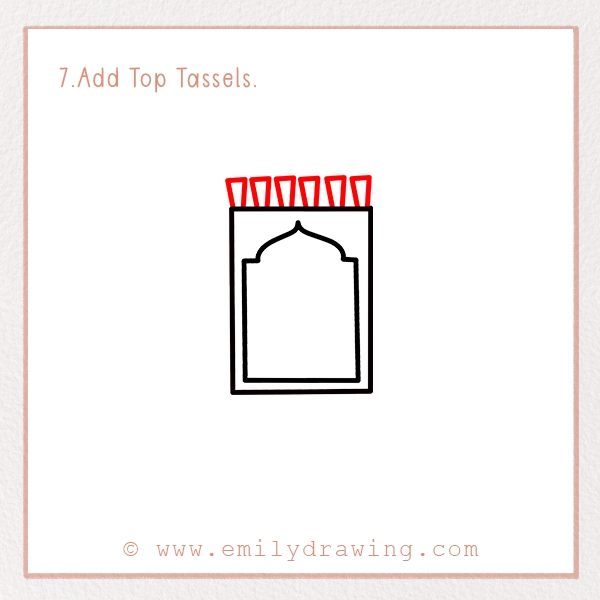
Let’s decorate!
Along the top edge of the mat, draw small tassels—either triangle shapes or little rectangles. These should look like soft, hanging fringes.
🎨 Creative Tip: Want to mix it up? Try alternating lengths or colors later when you color them in!
Step 8 – Add Bottom Tassels.
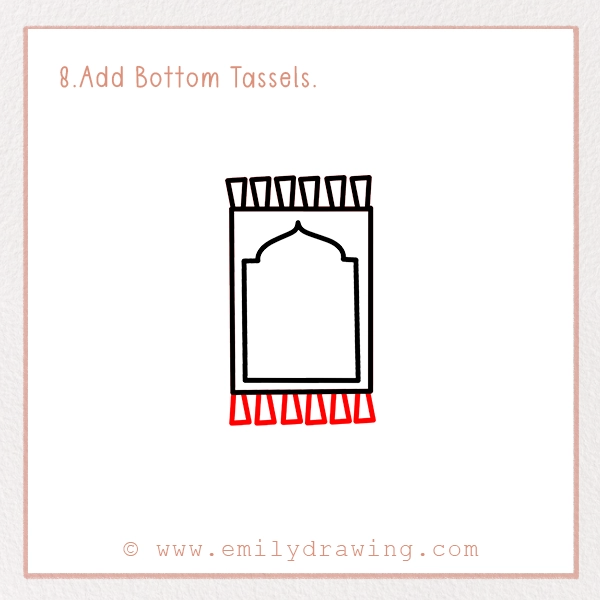
Now do the same at the bottom edge. Add matching tassels to create a finished look.
Make sure they line up with the ones at the top to keep things symmetrical.
✅ Nice work! Your prayer mat outline is complete.
Step 9 – Color Your Drawing!
Now it’s time to bring your art to life—add color!
Try these color ideas:
Outer mat: bold colors like red, orange, or purple
Arch: calming shades like green or blue
Tassels: bright yellow or gold for a shine effect
Add little decorations like stars, crescents, floral patterns, or geometric shapes. Use colored pencils, crayons, markers, or even digital tools—whatever you have on hand!
🖍️ Pro Tip: Mistakes while coloring? No worries! Each new version can be even better. Keep exploring your creativity.
Pin it now, Draw later!
🌙 Fun Facts About Ramadan Prayer Mats
Here are some fun tidbits to share as you draw:
- Used Daily: Muslims use prayer mats five times a day during their daily prayers.
- Decorative & Meaningful: Mats often have a mihrab arch and sometimes Arabic calligraphy, flowers, or mosque images.
- Handmade Treasures: Many mats are handwoven and passed down from generation to generation.
- Global Designs: Muslims in over 50 countries use prayer mats—each region has its own colors, patterns, and textures!
🎨 Tips and Tricks for Better Drawing
- Sketch Lightly First: Use soft pencil lines so you can easily erase any mistakes.
- Use Symmetry: Try folding your paper lightly to check if both sides of your design match.
- Decorate Freely: Stars, moons, flowers—your imagination is the limit!
- Practice Makes Progress: Don’t worry if it’s not perfect. You’re learning with every line.
- Go Wild with Colors: Who says mats have to be green or red? Try rainbow, sunset, or even galaxy themes!
Yay! You did it! You’ve just created your own Ramadan prayer mat from start to finish—line by line, color by color. Your drawing is a meaningful piece of art that reflects your creativity and the spirit of Ramadan—just like when you learn how to draw a lantern, another fun project perfect for the season.
Hang it on the wall, gift it to someone special, or add it to your Ramadan journal!
📸 Don’t forget to share your masterpiece using #EmilyDrawing—we’d love to see what you create!
Want more fun tutorials? Come back for more easy step-by-step art guides and keep your creativity blooming.
Happy drawing—and Ramadan Mubarak! 🌙
Get the FREE Printable Drawing Guide