Learning how to draw UFO can be simple and fun for beginners. This easy drawing tutorial uses basic curves, circles, and oval shapes. Take your time with each step, and your flying saucer will slowly come together.
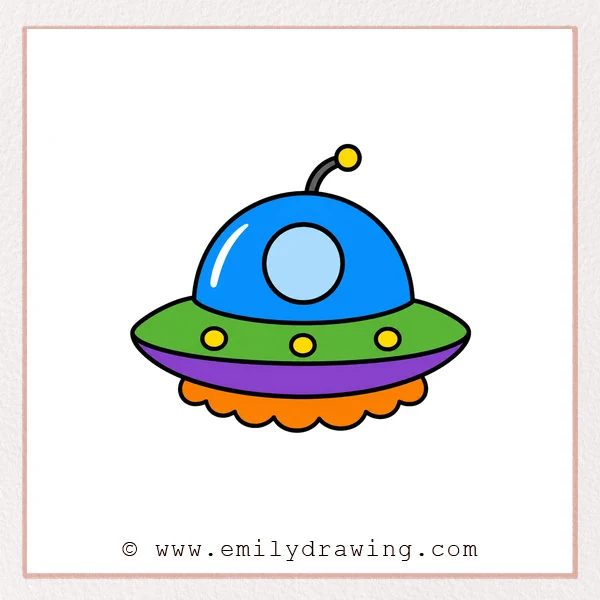
What You Will Need
- Pencil
- Eraser
- Black marker or pen
- Drawing paper
- Colored pencils, crayons, or markers
Here are my RECOMMENDED Art Supplies!
- Crayola Coloring Set (140 Pieces – Mega Value!)
- 24 Colored Crayon Set
- A4 Printer Paper
- Crayola Coloring Pencils
- HP Home Printer with Instant Ink!
Time needed:
25 minutes.
Step-by-Step Drawing Guide
Step 1: Draw the Top of the UFO
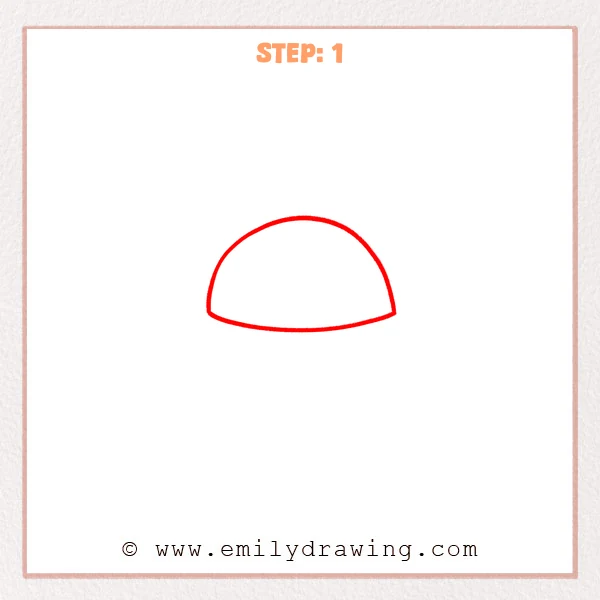
Start with a wide half-circle, like a small bowl turned upside down. Add a gently curved bottom line to connect both ends and form the UFO’s top shape.
Pro Tip: Keep both sides at a similar height so the UFO looks balanced.
Step 2: Add the Window and Highlight
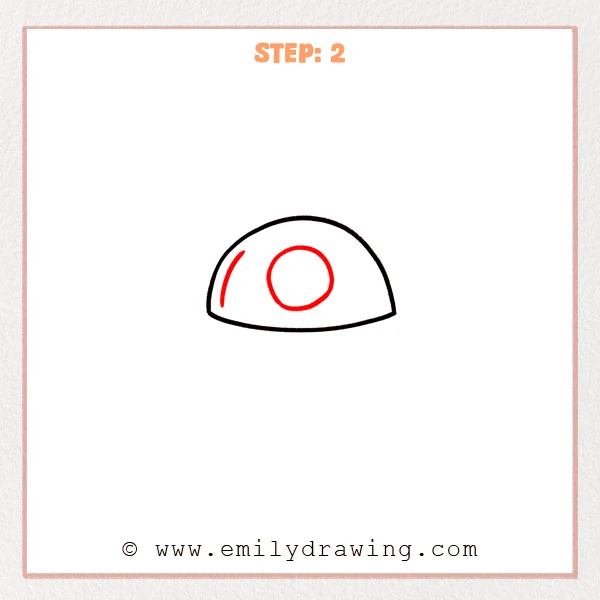
Draw a round window near the middle of the UFO top, placed slightly low. Add a short curved line on the left side to show the shell’s curve and shine.
Pro Tip: Keep the round window modest in size, leaving enough space for later details.
Step 3: Draw the Small Top Antenna
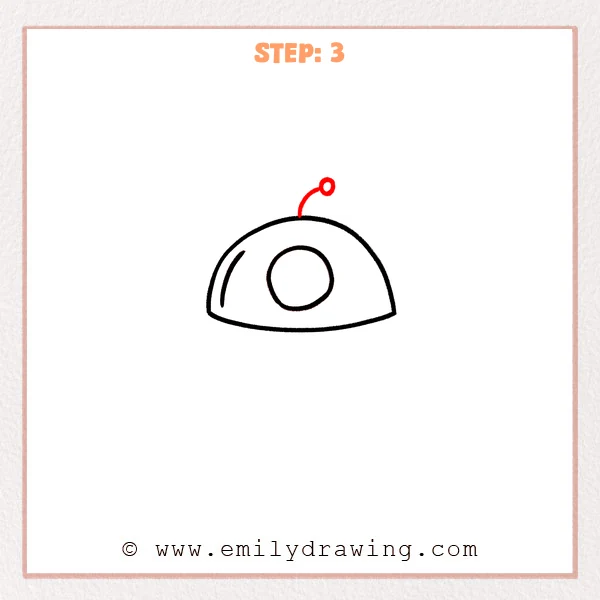
Add a short curved line rising from the top of the UFO as the antenna stem. Draw a small circle at the end to make the UFO look more sci-fi.
Pro Tip: Let the antenna bend slightly to one side so it feels more natural than a straight line.
Step 4: Draw the UFO Saucer Base
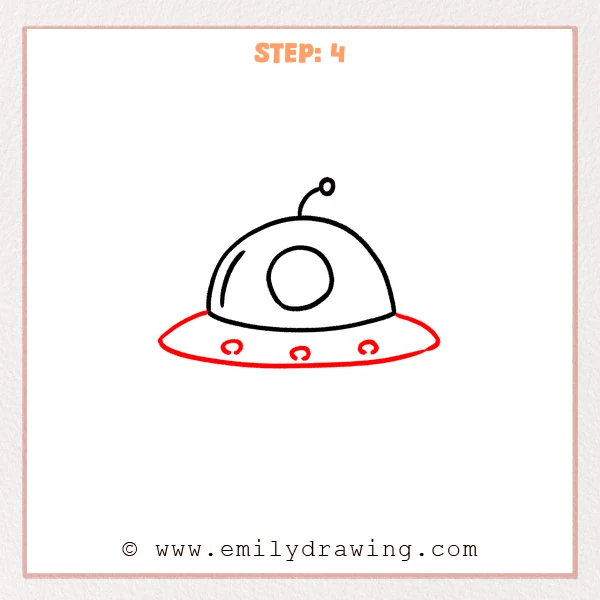
Add a wide oval base beneath the top, letting both ends stretch outward. Draw three small half-circles along the front edge as lights under the UFO.
Pro Tip: Make the base wider than the top so the UFO shape feels stable.
Step 5: Thicken the Lower Saucer Edge
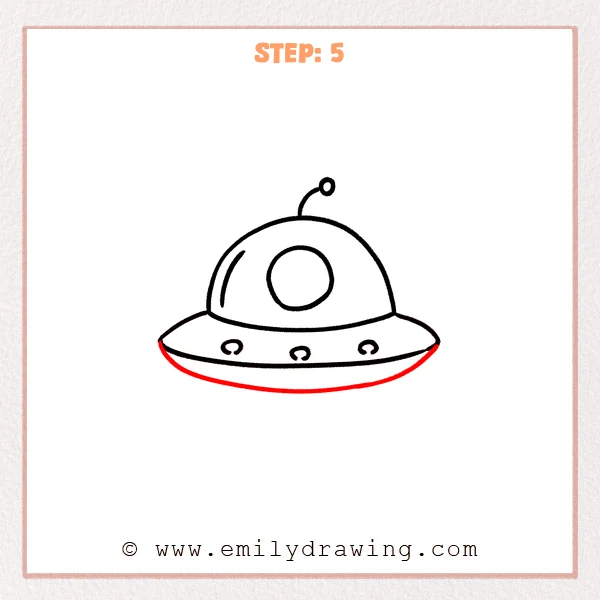
Add another long curved line beneath the saucer base to create a thicker rim. Let this line stretch from the left end to the right end, dipping gently downward.
Pro Tip: Keep the lower curve close in width to the upper edge so the UFO looks neat.
Step 6: Draw the Bottom Flame Cloud
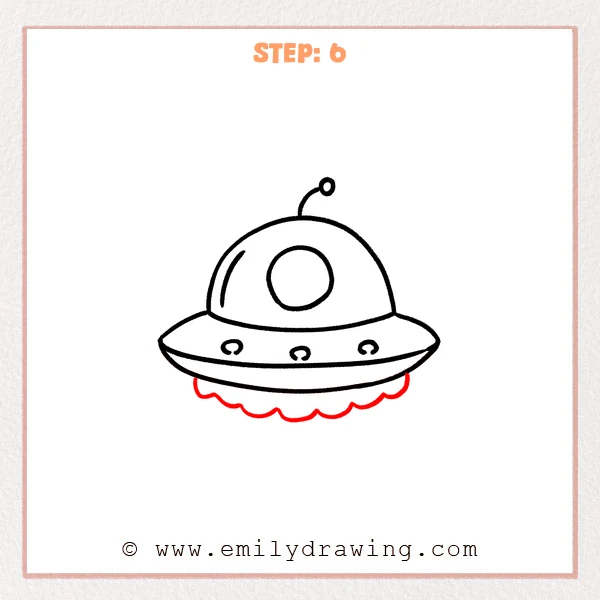
Draw a row of connected small curves beneath the UFO to form a puffy flame cloud. Let the curves vary slightly in height to show the UFO lifting upward.
Pro Tip: Avoid sharp points in the cloud curves, as rounded shapes work better for children’s drawing.
Step 7: Color in your drawing!
Fun Facts
- UFO stands for “unidentified flying object.”
- Flying saucers are often drawn with smooth domes and wide oval bases.
- Many artists use simple shapes first when creating a drawing for beginners.
Pin it now, Draw later!
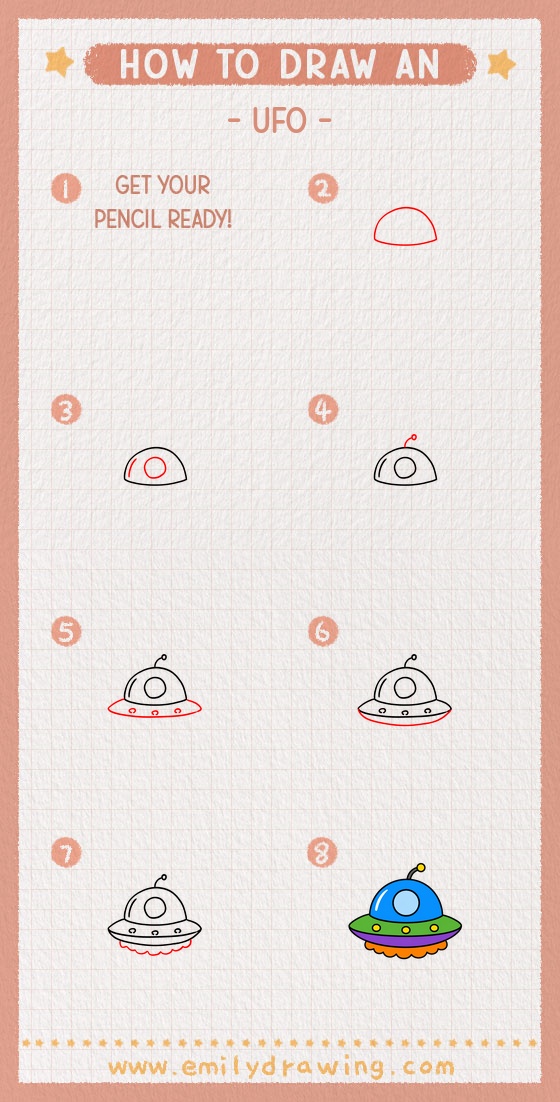
Now you know how to draw UFO using a clear step by step drawing method. Trace your favorite lines with a marker, then erase any extra pencil marks. Add bright colors, glowing lights, or a starry background to finish your easy drawing tutorial.
Keep practicing, and try drawing another UFO with a different antenna or window shape.
Get the FREE Printable Drawing Guide
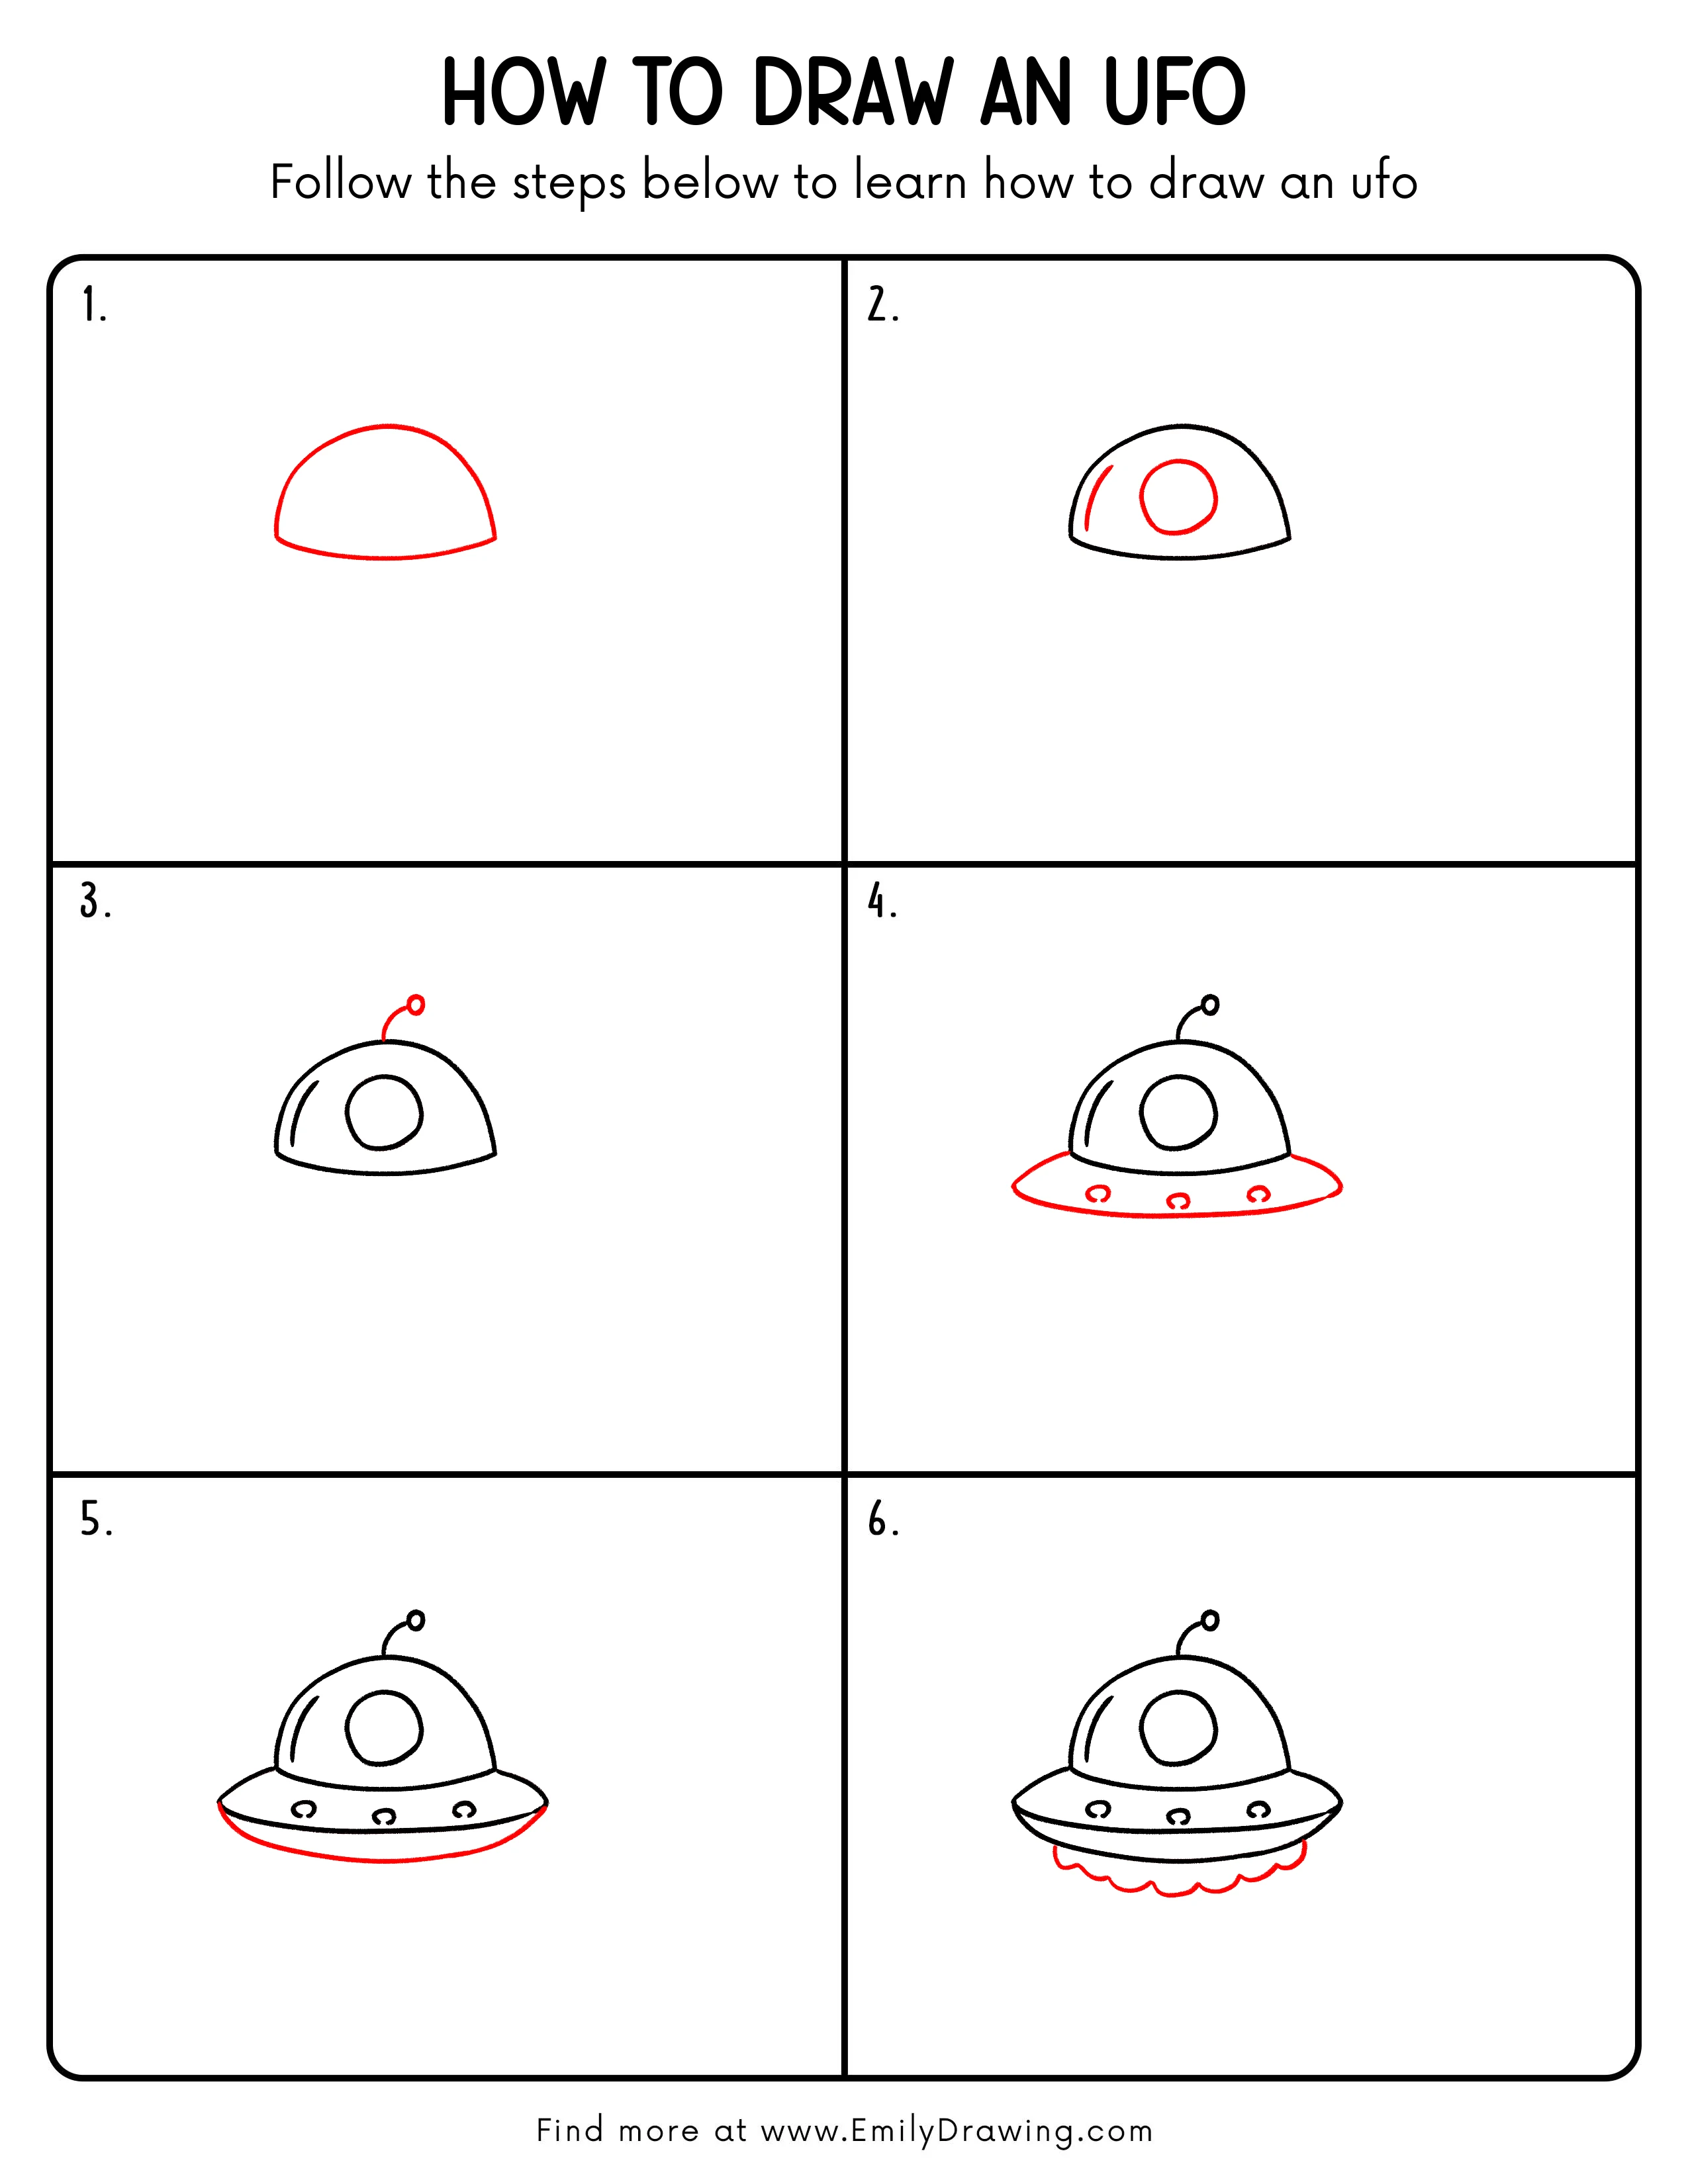
FREE Download Printable Ufo Drawing Tutorial
Frequently Asked Questions
Is this UFO drawing good for beginners?
Yes, this UFO drawing is good for beginners because it uses simple curves, circles, and oval shapes.
What colors should I use for a UFO?
You can use silver, gray, blue, or green for the UFO. Bright yellow or orange works well for the lights and flame cloud.
How can I make my UFO drawing more interesting?
Add stars, planets, sparkles, or a moon in the background. You can also add more small lights along the saucer base.