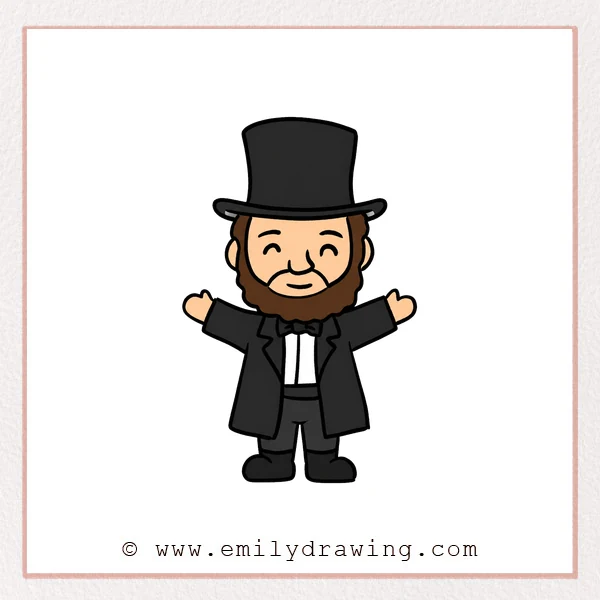
Learning how to draw Abraham Lincoln becomes easier with a clear sequence of simple shapes. This step by step drawing builds his famous hat, friendly face, formal coat, and small cartoon body. Take your time with each stage and keep your first lines light.
What You Will Need
- Drawing paper
- A pencil
- An eraser
- A black marker or fine liner
- Crayons or colored pencils, if desired
Here are my RECOMMENDED Art Supplies!
- Crayola Coloring Set (140 Pieces – Mega Value!)
- 24 Colored Crayon Set
- A4 Printer Paper
- Crayola Coloring Pencils
- HP Home Printer with Instant Ink!
Time needed:
25 minutes.
Step-by-Step Drawing Guide
Step 1: Draw the Tall Hat
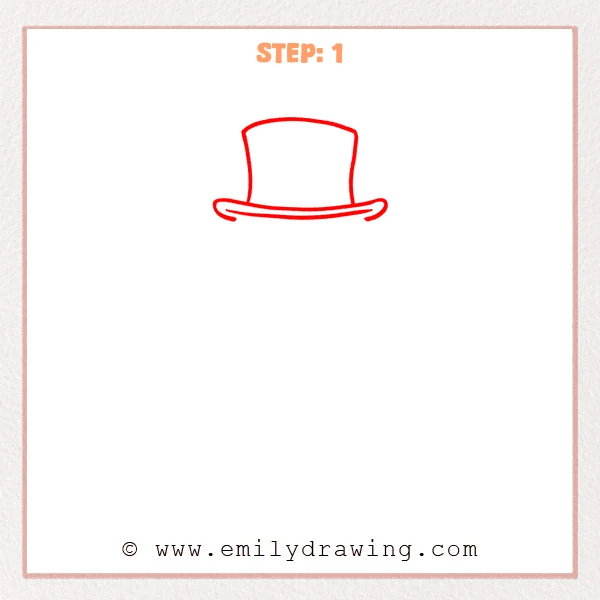
Start with a tall, gently curved rectangle for Abraham Lincoln’s stovepipe hat. Add a wide curved brim beneath it, turning both ends slightly upward.
Pro Tip: Keep the hat centered and make both sides similar in height.
Step 2: Shape the Face and Beard
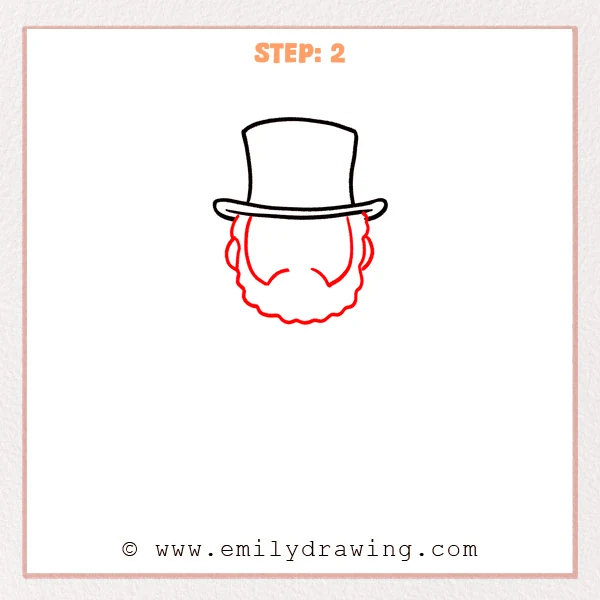
From beneath the brim, curve two lines downward to shape the face. Add rounded ears and short sideburn curves on both sides. Finish with a wide scalloped beard wrapping under the chin.
Pro Tip: Leave enough open space inside the face for the features.
Step 3: Add the Facial Features
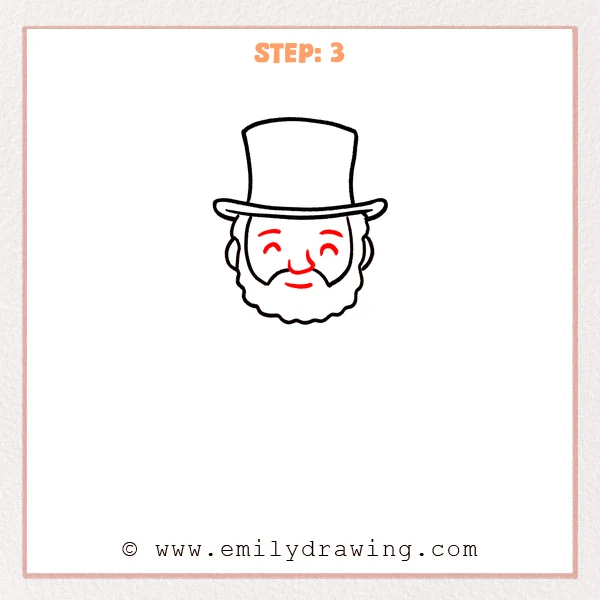
Place two softly arched eyebrows near the upper part of the face. Draw curved closed eyes, a rounded nose, and a small smiling mouth.
Pro Tip: Keep the eyes level and leave equal space around the nose.
Step 4: Build the Coat
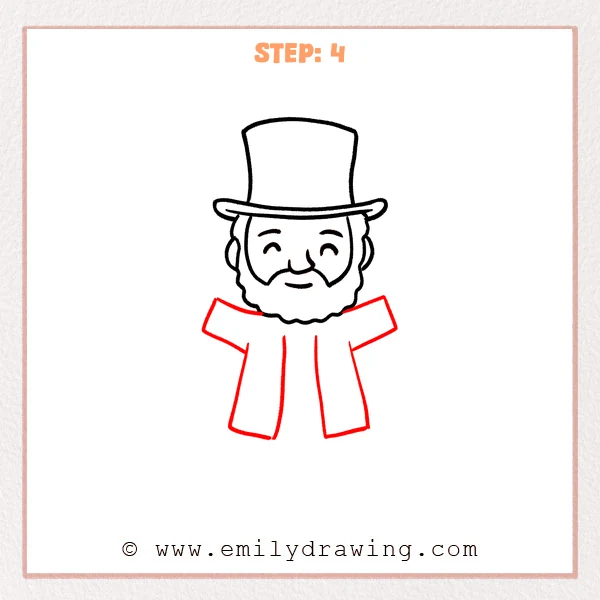
Extend a slanted shoulder and short raised sleeve from each side. Drop two long coat edges downward, leaving a wide open center gap.
Pro Tip: Compare both sides often so the raised arms feel balanced.
Step 5: Add Hands and Clothing Details
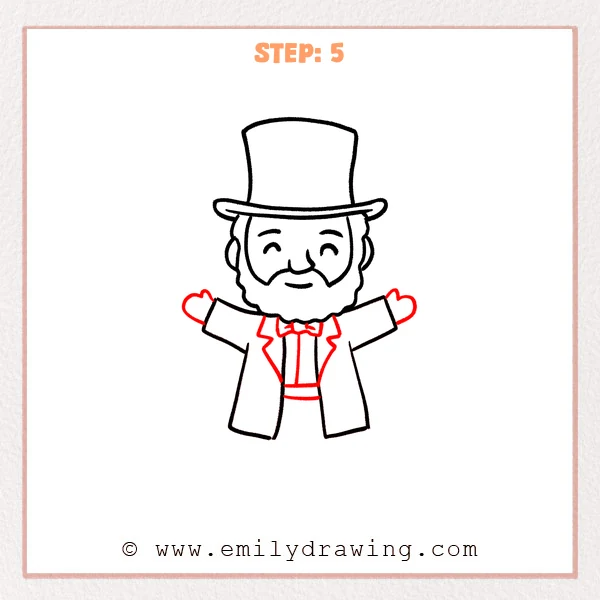
Add a mitten-shaped hand at the end of each raised sleeve. Draw pointed lapels, a centered bow tie, and two vertical shirt lines. Finish the clothing with two narrow horizontal bands across the waist.
Pro Tip: Align the bow tie and shirt lines with the center of the face.
Step 6: Finish the Legs and Shoes
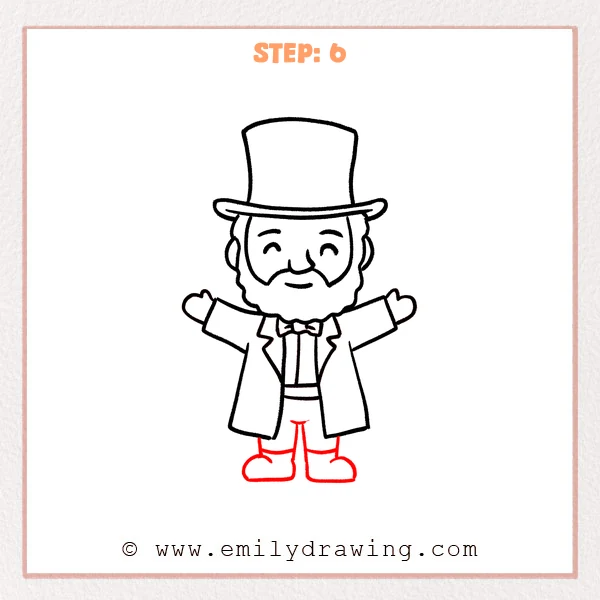
Sketch two short legs beneath the coat with a small gap between them. Add large rounded shoes, keeping their bottoms level and their toes outward.
Pro Tip: Make the shoes slightly wider than the legs for a sturdy base.
Step 7: Color in your drawing!
Fun Facts
- Abraham Lincoln served as the 16th president of the United States.
- His tall stovepipe hat became one of his most recognizable visual features.
- The hat and full beard create a strong silhouette for an easy drawing tutorial.
Pin it now, Draw later!
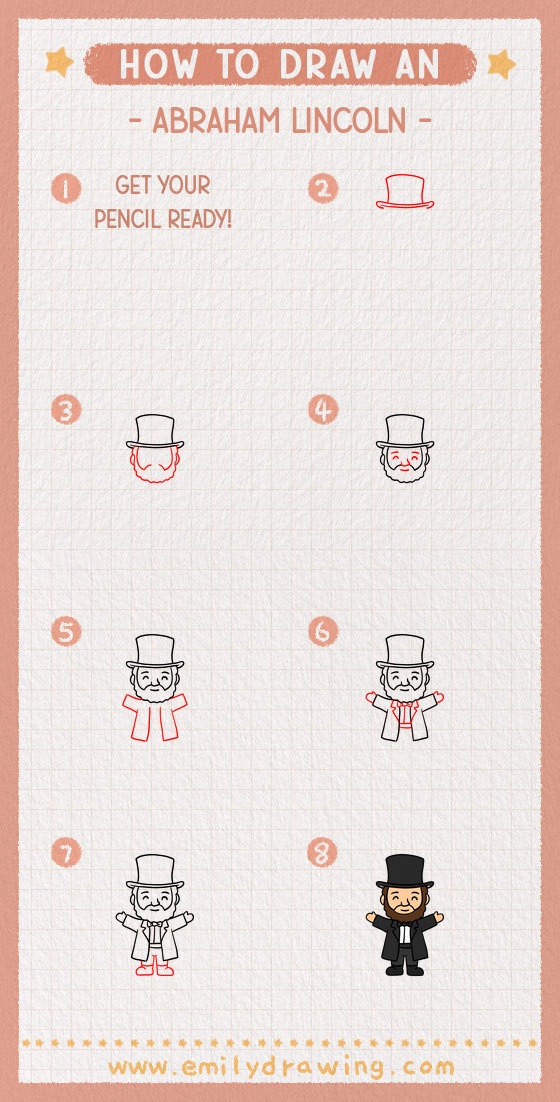
Check the hat, face, coat, and shoes for balanced spacing. Erase unnecessary pencil marks, trace the final lines, and add color if you like. Try drawing Abraham Lincoln again to make each shape smoother and more confident.
Get the FREE Printable Drawing Guide
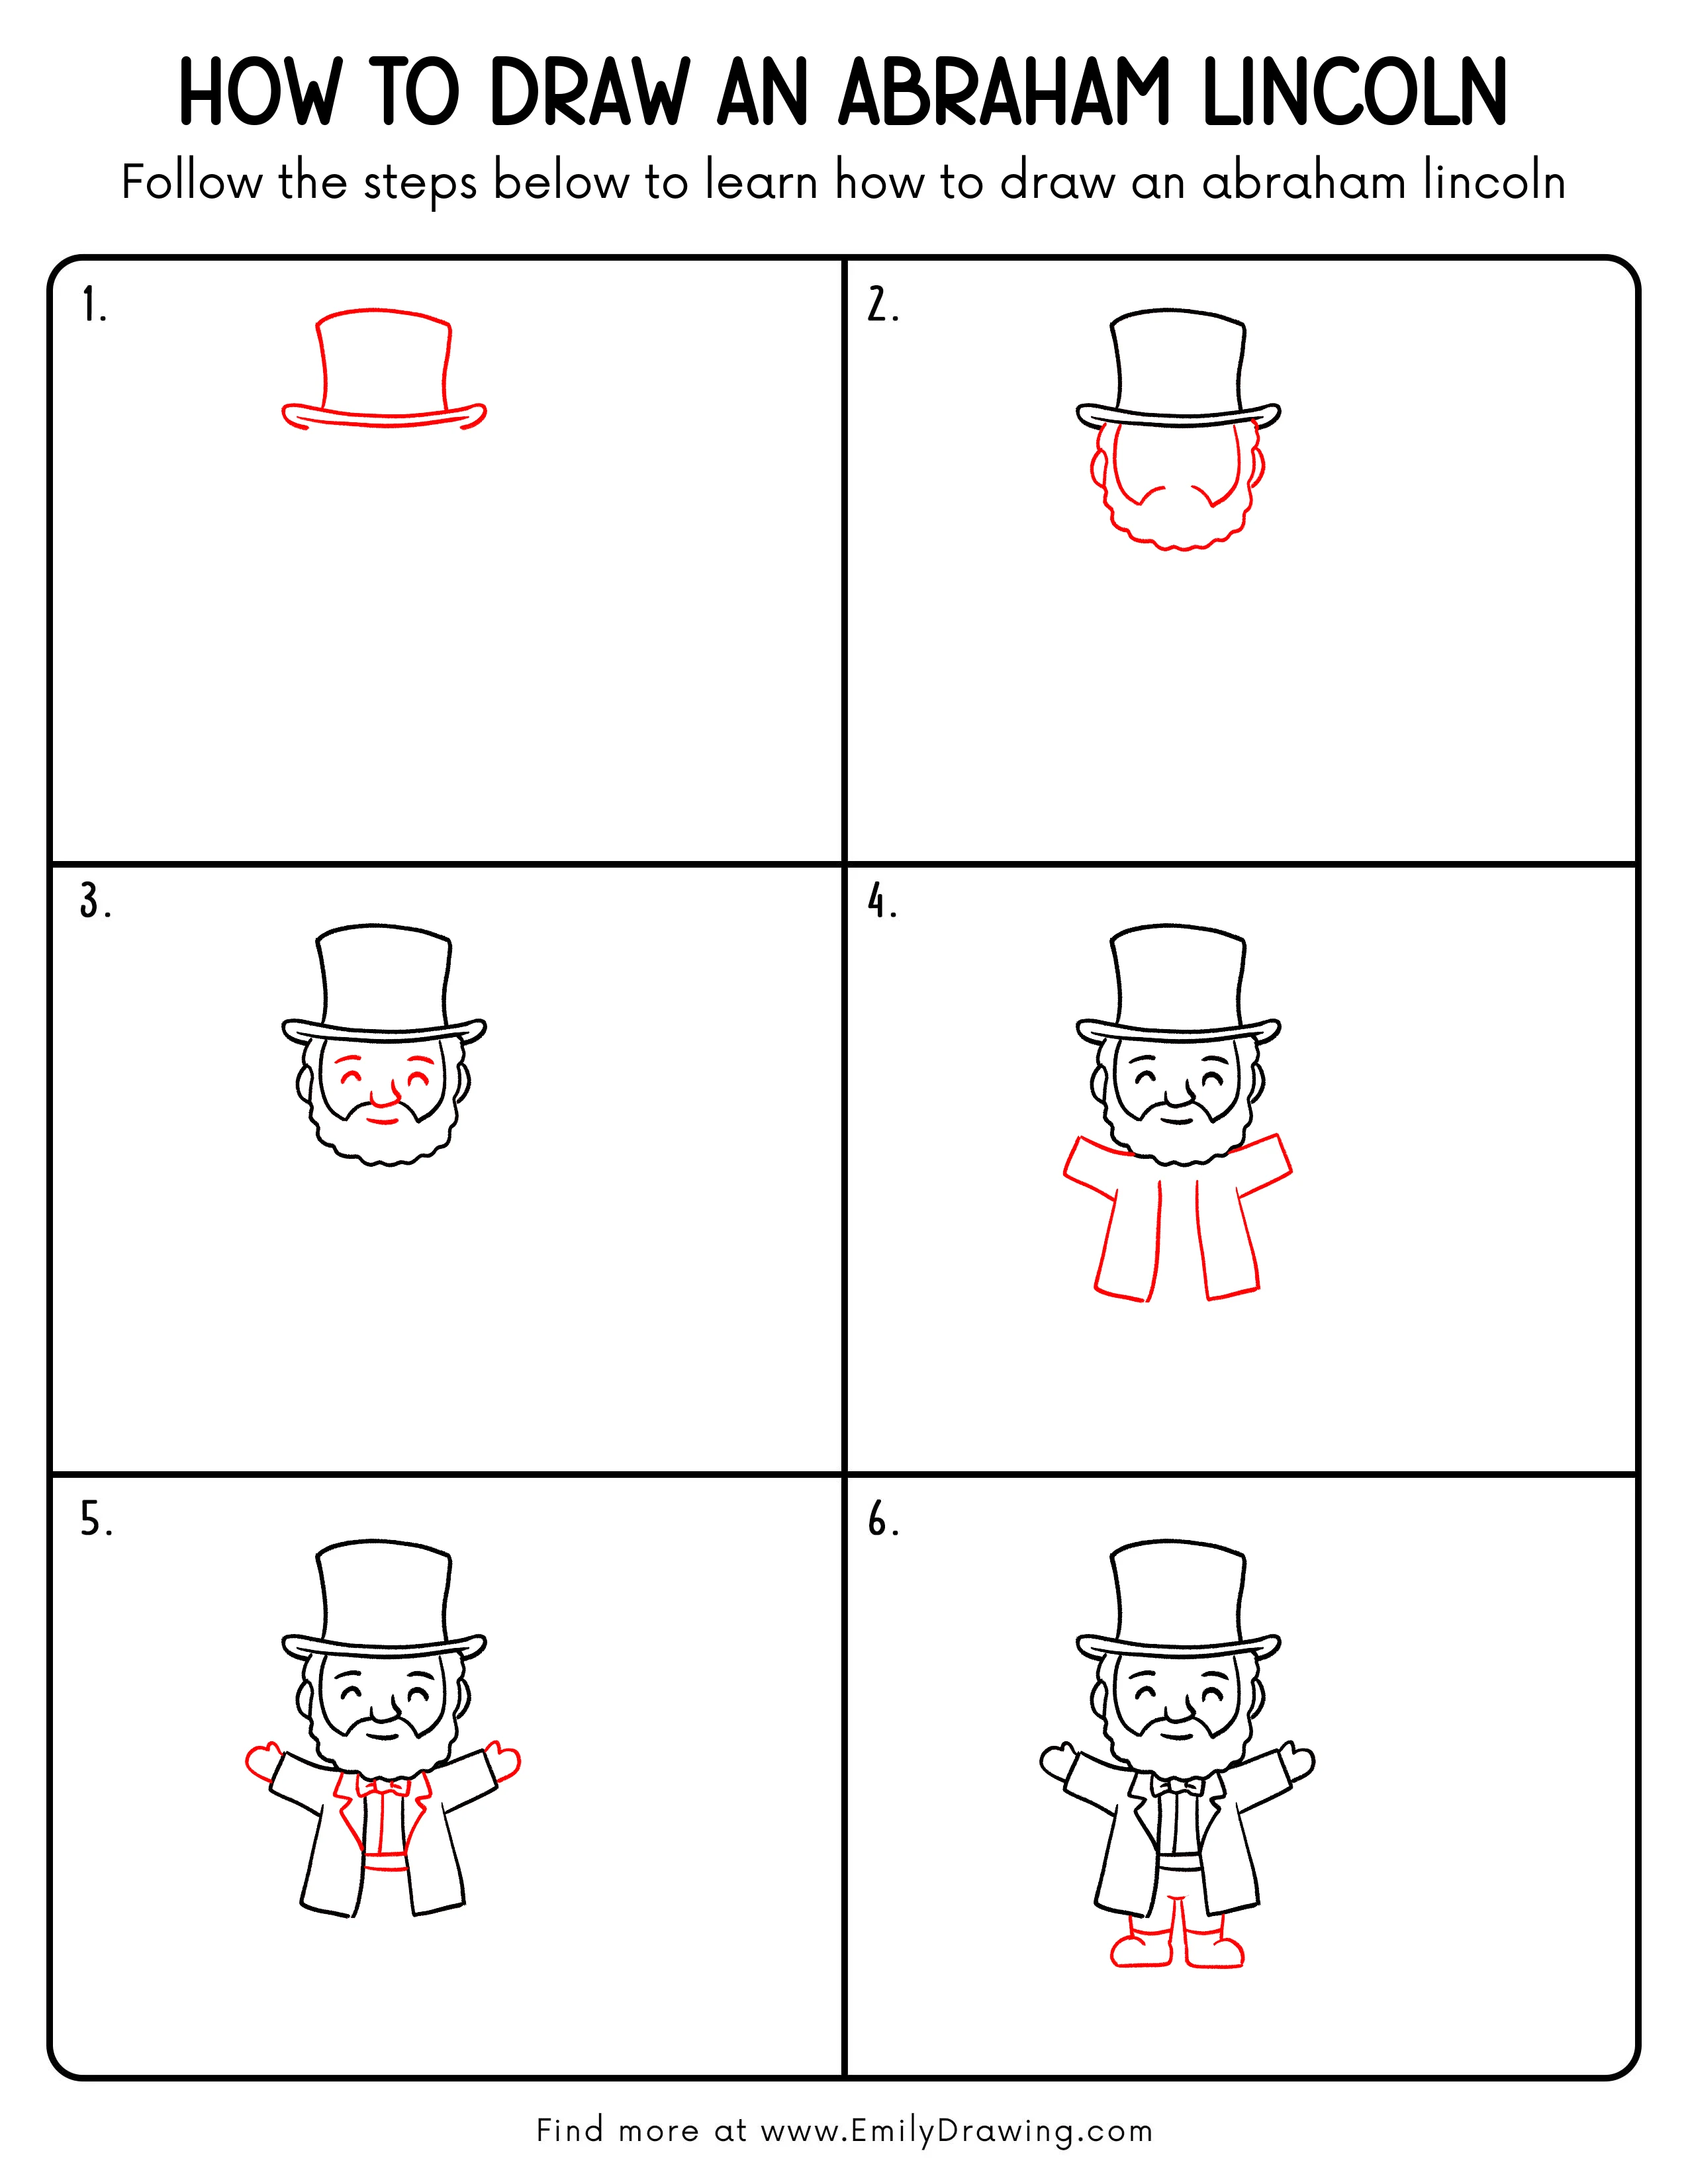
FREE Download Printable Abraham Lincoln Drawing Tutorial
Frequently Asked Questions
Is this Abraham Lincoln drawing suitable for beginners?
Yes. The tutorial separates the character into six clear stages using simple curves, lines, and rounded shapes.
Should I draw with a pencil or marker first?
Begin with a pencil so you can adjust proportions easily. Trace the finished drawing with a marker afterward.
How can I keep the character symmetrical?
Use the center of the hat, nose, bow tie, and shirt as a vertical guide. Compare the left and right sides after every step.