Learning how to draw Tigger is a cheerful way to practice rounded shapes, simple lines, and expressive details. This easy drawing tutorial builds the character step by step, making it friendly for drawing for beginners.
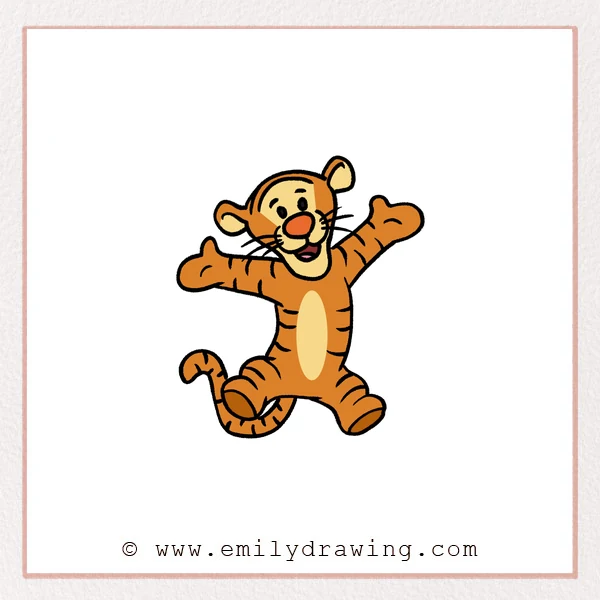
Take your time with each stage, and focus on one new part before moving ahead. By the end, you will have a lively Tigger pose with big paws, a happy face, and a bouncy tail.
What You Will Need
- A pencil
- An eraser
- Drawing paper
- A black marker or pen
- Orange, black, pink, and yellow coloring tools
Here are my RECOMMENDED Art Supplies!
- Crayola Coloring Set (140 Pieces – Mega Value!)
- 24 Colored Crayon Set
- A4 Printer Paper
- Crayola Coloring Pencils
- HP Home Printer with Instant Ink!
Time needed:
22 minutes.
Step-by-Step Drawing Guide
Step 1: Draw Tigger’s Head Outline
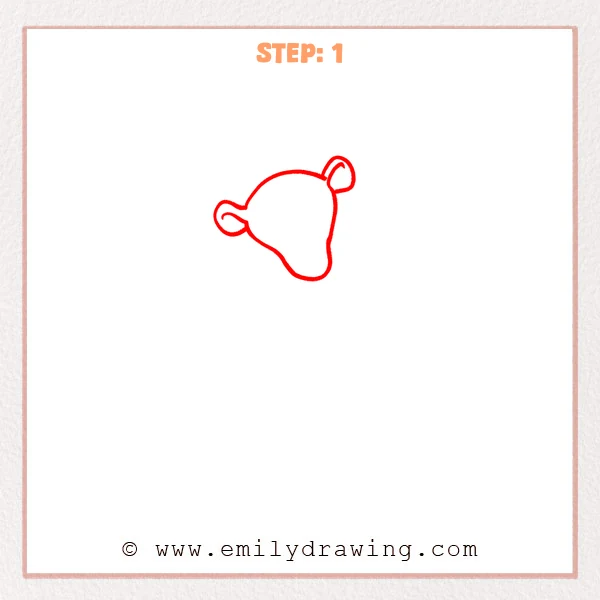
Start with one continuous curved line to form Tigger’s rounded head shape. Add one small ear on each side, with the right ear placed slightly higher.
Pro Tip: Keep the head outline rounded, and avoid making the ears too pointed.
Step 2: Add Tigger’s Face Details
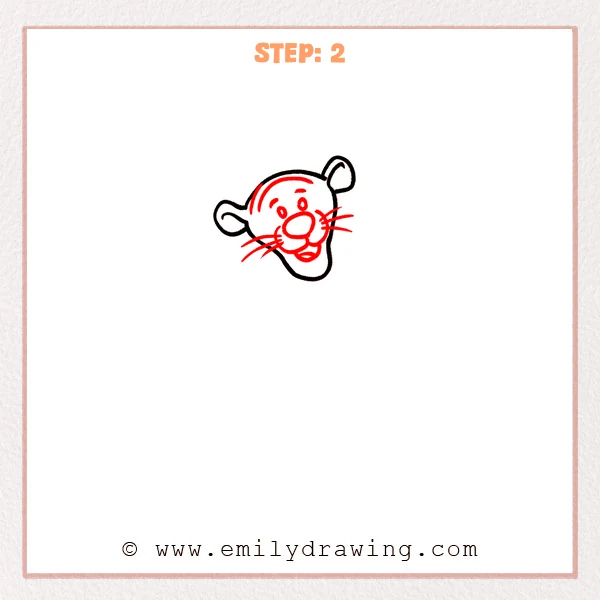
Draw an oval muzzle area in the middle of the head, then add two small eyes and eyebrows. Add the open smiling mouth, cheek curves, whiskers, and curved forehead stripes.
Pro Tip: Keep the muzzle area near the center of the face so Tigger’s expression feels balanced.
Step 3: Draw Tigger’s Outstretched Front Legs
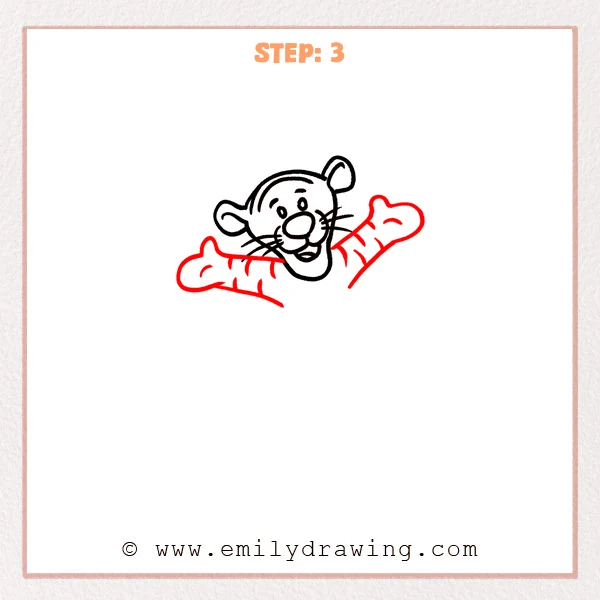
From both sides of the head, draw two long front legs reaching outward. Shape each paw with rounded ends, then add a few short curved lines for stripes.
Pro Tip: Let the front legs be slightly uneven so the pose feels more natural.
Step 4: Add Tigger’s Lower Body
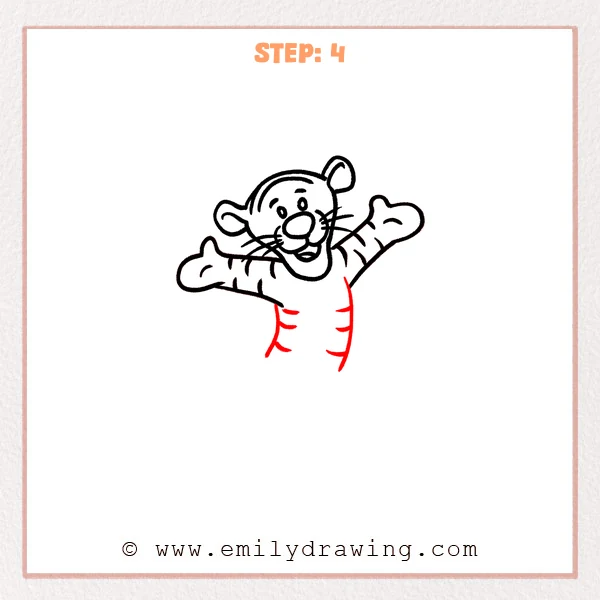
Under the front legs, draw two downward curved side lines to form the stretched torso. Add short curved stripes on both sides so Tigger’s pattern begins to look complete.
Pro Tip: Keep both body lines softly curved instead of making them too straight.
Step 5: Draw Tigger’s Feet and Belly
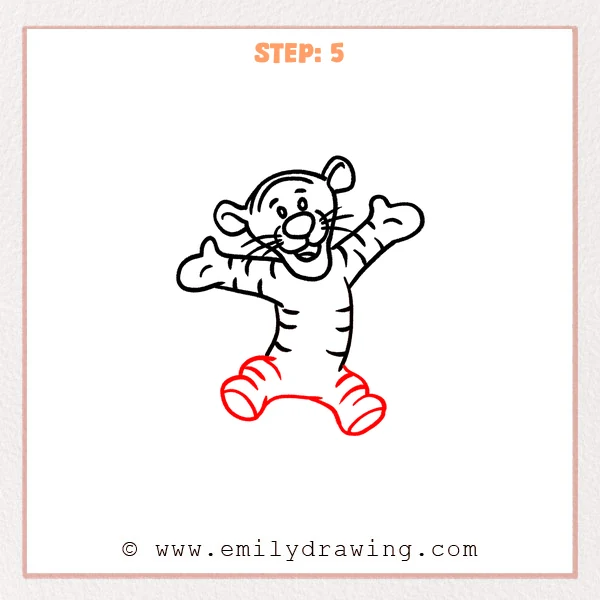
Add two large rounded feet below the body, letting the paws spread outward naturally. Use a soft curved line between the feet, then draw curved toe lines on each foot.
Pro Tip: Make the feet wider than the legs to help the jumping pose feel steady.
Step 6: Add Tigger’s Bouncy Tail
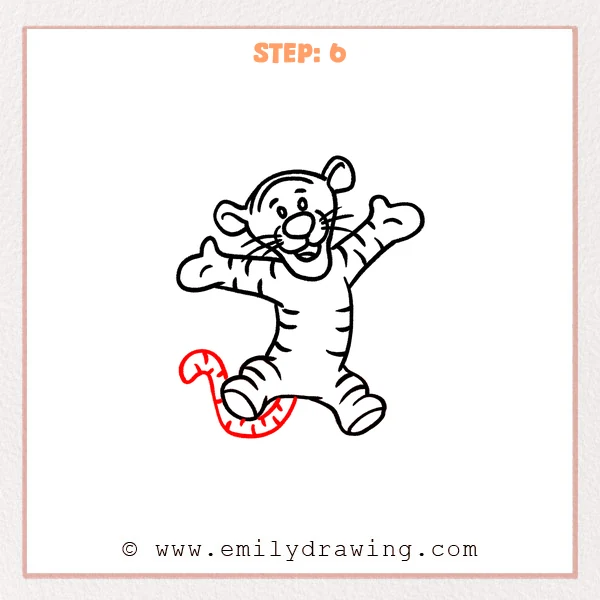
Draw a long tail curling upward from behind the left foot, bending like a spring. Add several short stripes on the tail, then connect it to the lower body.
Pro Tip: Keep the tail width fairly even as it curves so it looks more springy.
Step 7: Color in your drawing!
Fun Facts
Tigger is known for his springy energy and cheerful personality. His bold stripes make him a fun character for practicing curved marks.
This step by step drawing also helps beginners learn how to build a full pose from simple shapes. Big paws, rounded ears, and a curled tail make the drawing easy to recognize.
Pin it now, Draw later!
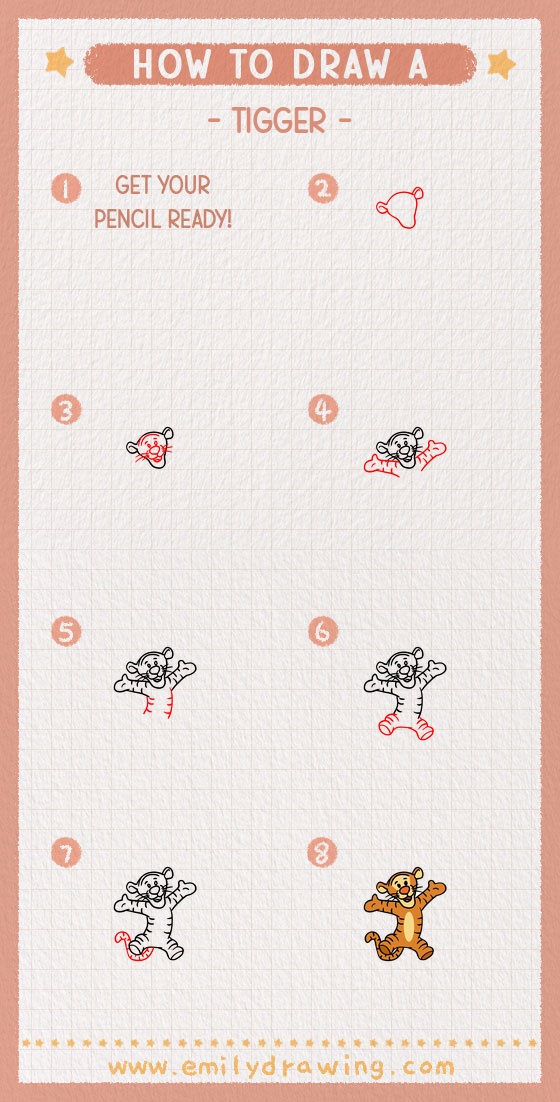
Trace your final lines with a marker when you are happy with the shape. Erase any extra pencil marks, then color Tigger with warm orange, soft yellow, pink, and black stripes.
You have finished a complete Tigger drawing for beginners. Keep practicing the same steps, and try drawing Tigger in another playful pose next time.
Get the FREE Printable Drawing Guide
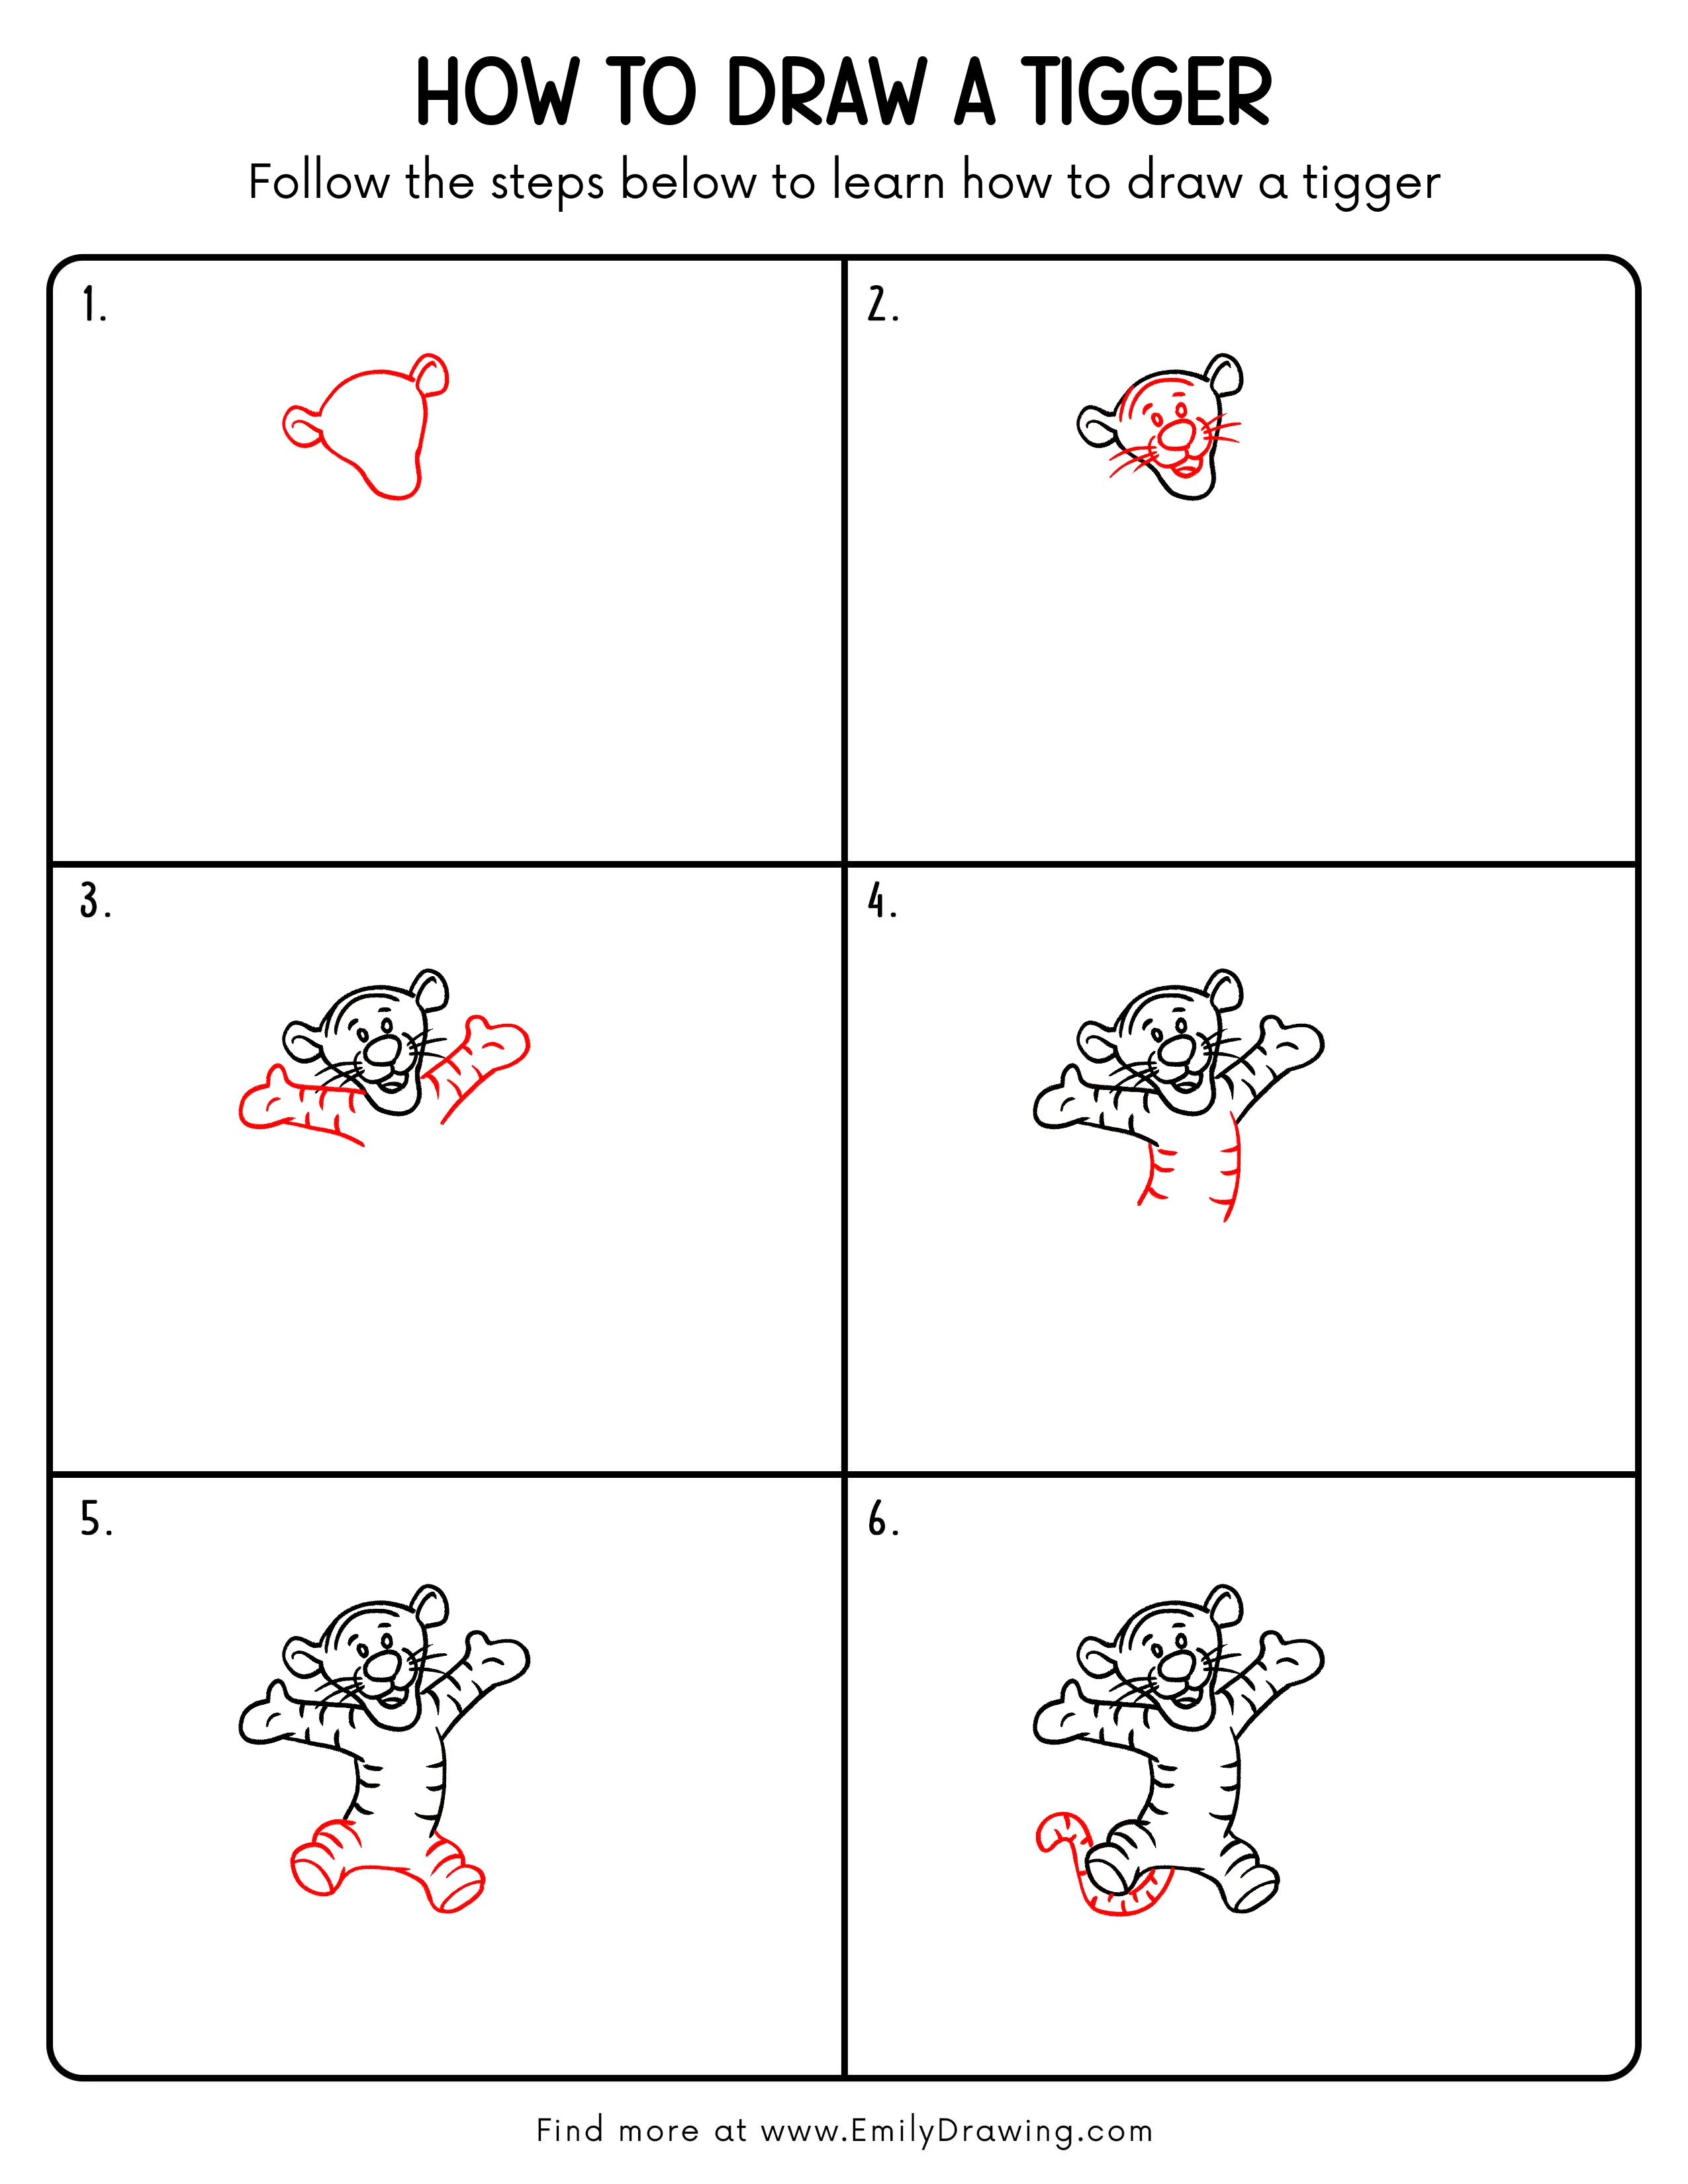
FREE Download Printable Tigger Drawing Tutorial
Frequently Asked Questions
Is this Tigger drawing good for beginners?
Yes, this easy drawing tutorial uses rounded shapes and short curved lines. Each step adds only one clear part at a time.
What is the hardest part when learning how to draw Tigger?
The face can take the most care because the eyes, muzzle, and smile need balance. Start lightly so you can adjust the shapes before tracing.
Can I color Tigger after finishing the outline?
Yes, coloring is a great final step. Use orange for the body, yellow for the muzzle and belly, and black for the stripes.