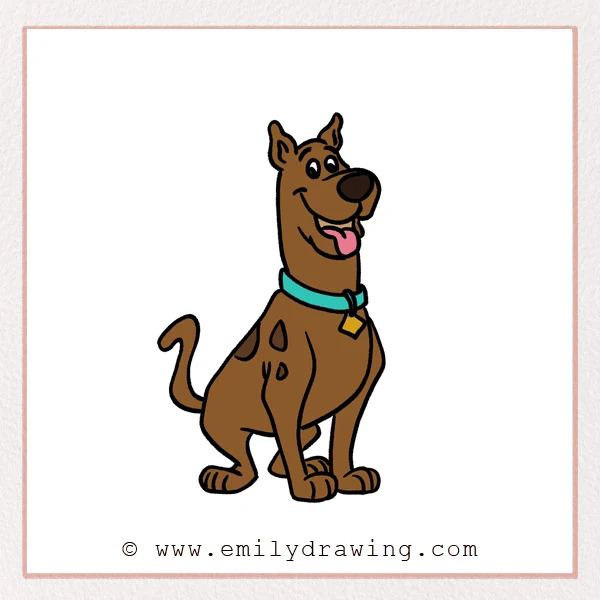
Learn how to draw Scooby Doo with a calm, simple step by step drawing guide. This easy drawing tutorial is made for beginners who want to build the character one part at a time. Take your time with each shape, and keep your lines smooth and friendly.
What You Will Need
- Pencil
- Eraser
- Black marker or pen
- Drawing paper
- Brown, blue, yellow, and black coloring tools
Here are my RECOMMENDED Art Supplies!
- Crayola Coloring Set (140 Pieces – Mega Value!)
- 24 Colored Crayon Set
- A4 Printer Paper
- Crayola Coloring Pencils
- HP Home Printer with Instant Ink!
Time needed:
13 minutes.
Step-by-Step Drawing Guide
Step 1: Draw the Top Head and Ears
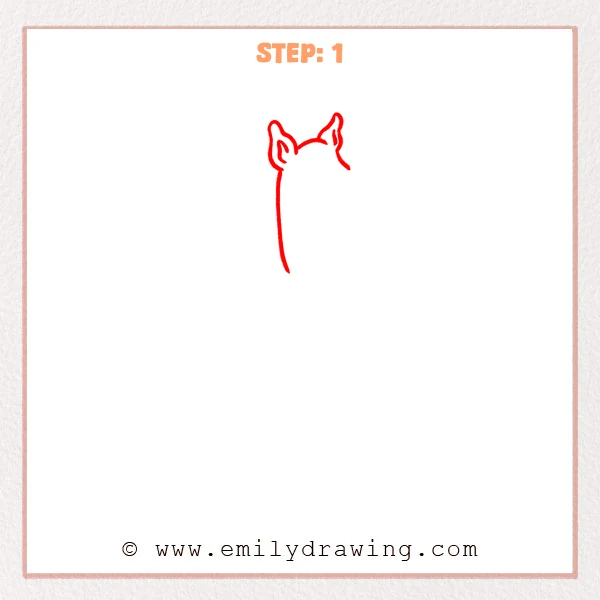
Start with a curved line across the top of the head, then draw two tall ears on both sides. Add short curved lines inside the ears to show Scooby Doo’s inner ear shapes. From under the left ear, pull one long gentle curve downward to begin the side of the head.
Pro Tip: Let the two ears sit slightly unevenly so Scooby Doo looks more natural and lively.
Step 2: Add the Face and Mouth
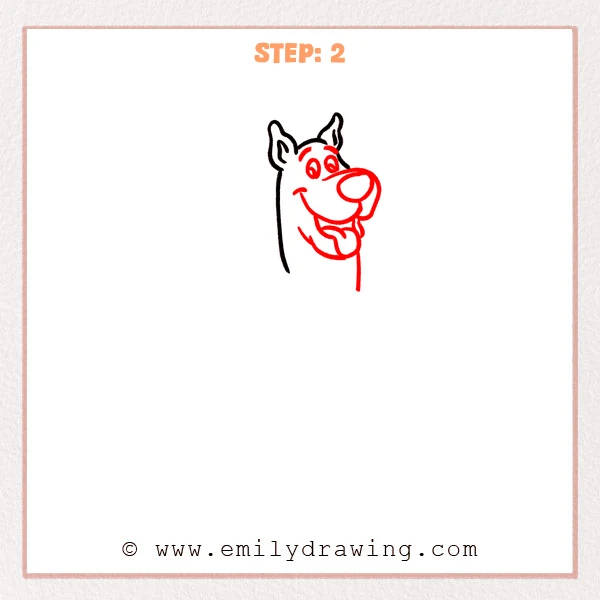
Draw two oval eyes in the middle of the head, then add curved brow lines above them. Extend a long muzzle to the right with a large rounded nose, then connect the smile and mouth with smooth curves. Add the lower jaw, tongue, and one downward neck line so Scooby Doo’s expression takes shape.
Pro Tip: Make the nose much larger than the eyes so Scooby Doo’s face feels recognizable.
Step 3: Draw the Collar and Tag
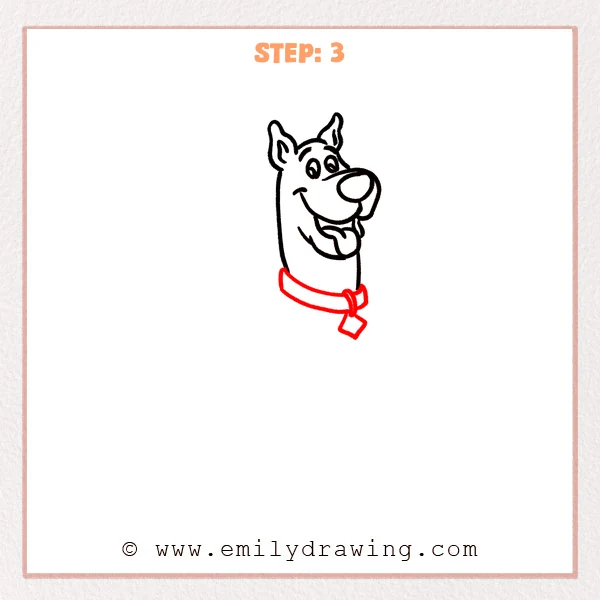
Draw a wide curved band below the neck, wrapping around Scooby Doo’s lower neck. Add a small loop on the right side so the collar has a clear connection point. From the loop, draw a diamond-shaped tag with simple, clean lines.
Pro Tip: Keep the top and bottom collar lines parallel so the width looks steady.
Step 4: Draw the Body Outline and Back Paw
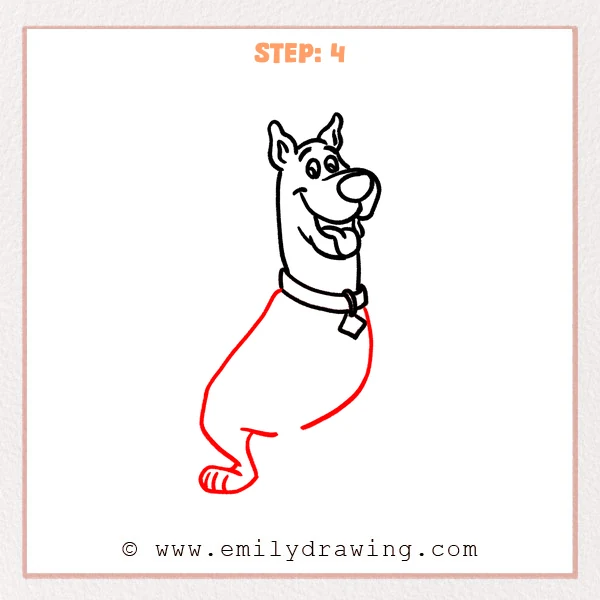
From the lower left side of the collar, draw a long slanted line downward to form Scooby Doo’s back. Continue with a large curve around the hip and back leg so the body begins a sitting pose. Add one wide back paw at the bottom, then include short toe lines.
Pro Tip: Let the back line slope naturally from the collar without making a sudden corner.
Step 5: Complete the Legs and Spots
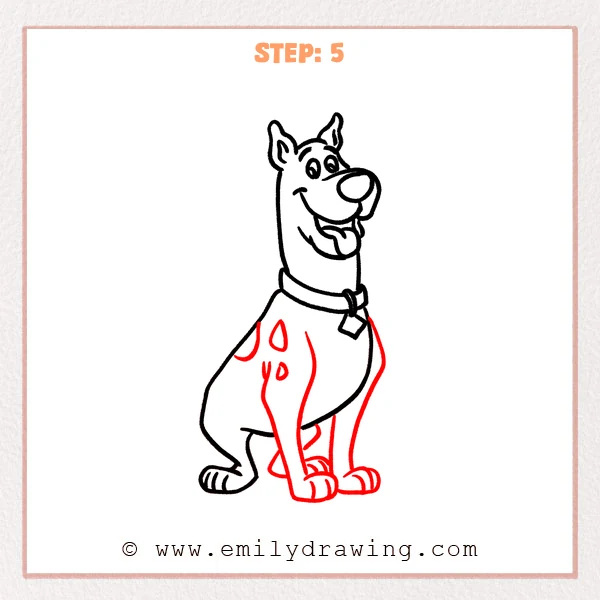
Add the front legs and another front paw below the body, using round curves for the toes. Draw the back leg and back paw on the right so Scooby Doo sits firmly. Add a few rounded body spots, then use inner curves to organize the leg shapes.
Pro Tip: Make the paws a little wide so the sitting pose feels steady.
Step 6: Add the Curled Tail
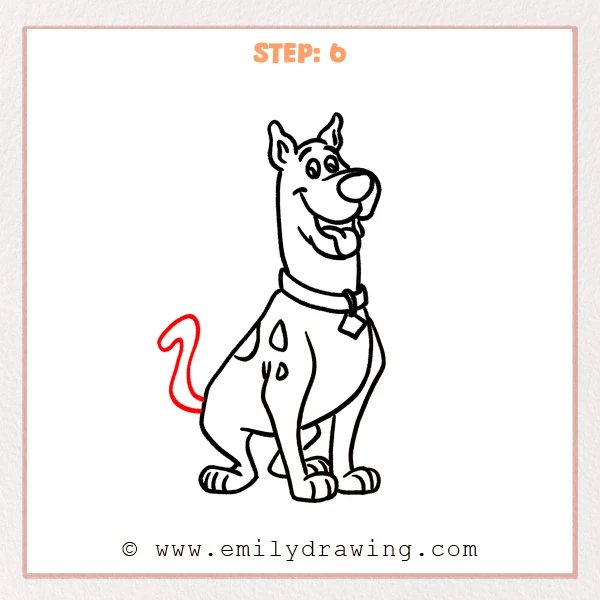
From the back of the body, extend a large curve to the left to begin Scooby Doo’s tail. Curl the tail upward into a smooth hook shape, then connect it near the body. Keep the tail lines relaxed and rounded so the pose feels more lively.
Pro Tip: Avoid sharp bends in the tail because rounded curves suit Scooby Doo better.
Step 7: Color in your drawing!
Fun Facts
Scooby Doo is known for his big ears, long muzzle, and cheerful expression. His collar and diamond tag are important details that help make him easy to recognize. Drawing for beginners becomes easier when large cartoon shapes are built before small details.
Pin it now, Draw later!
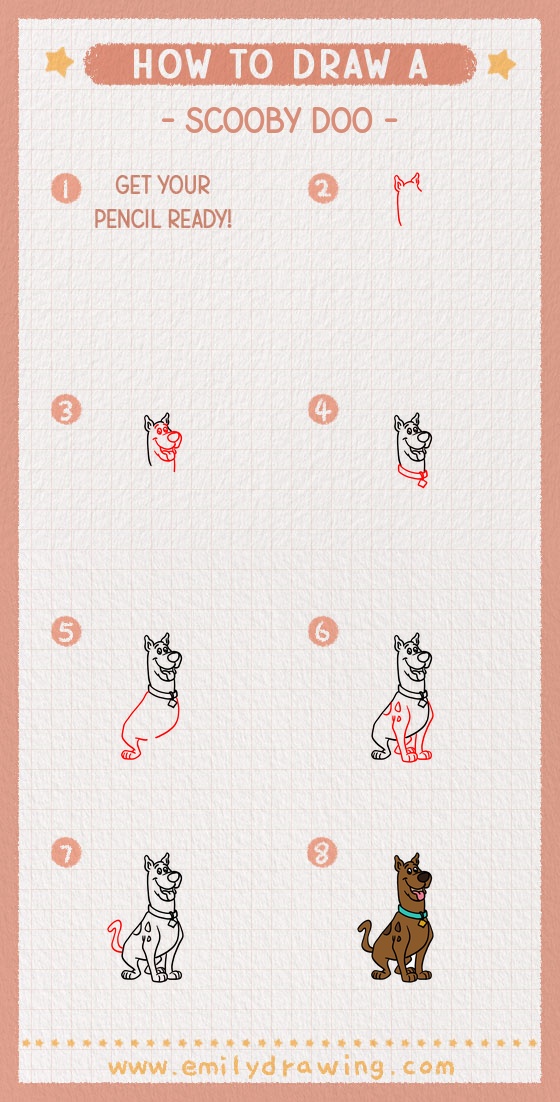
Trace your favorite lines with a black marker, then erase any extra pencil marks. Color Scooby Doo with warm brown fur, darker spots, a blue collar, and a yellow tag. You have completed a simple step by step drawing, and you can try the easy drawing tutorial again to make your lines even smoother.
Get the FREE Printable Drawing Guide
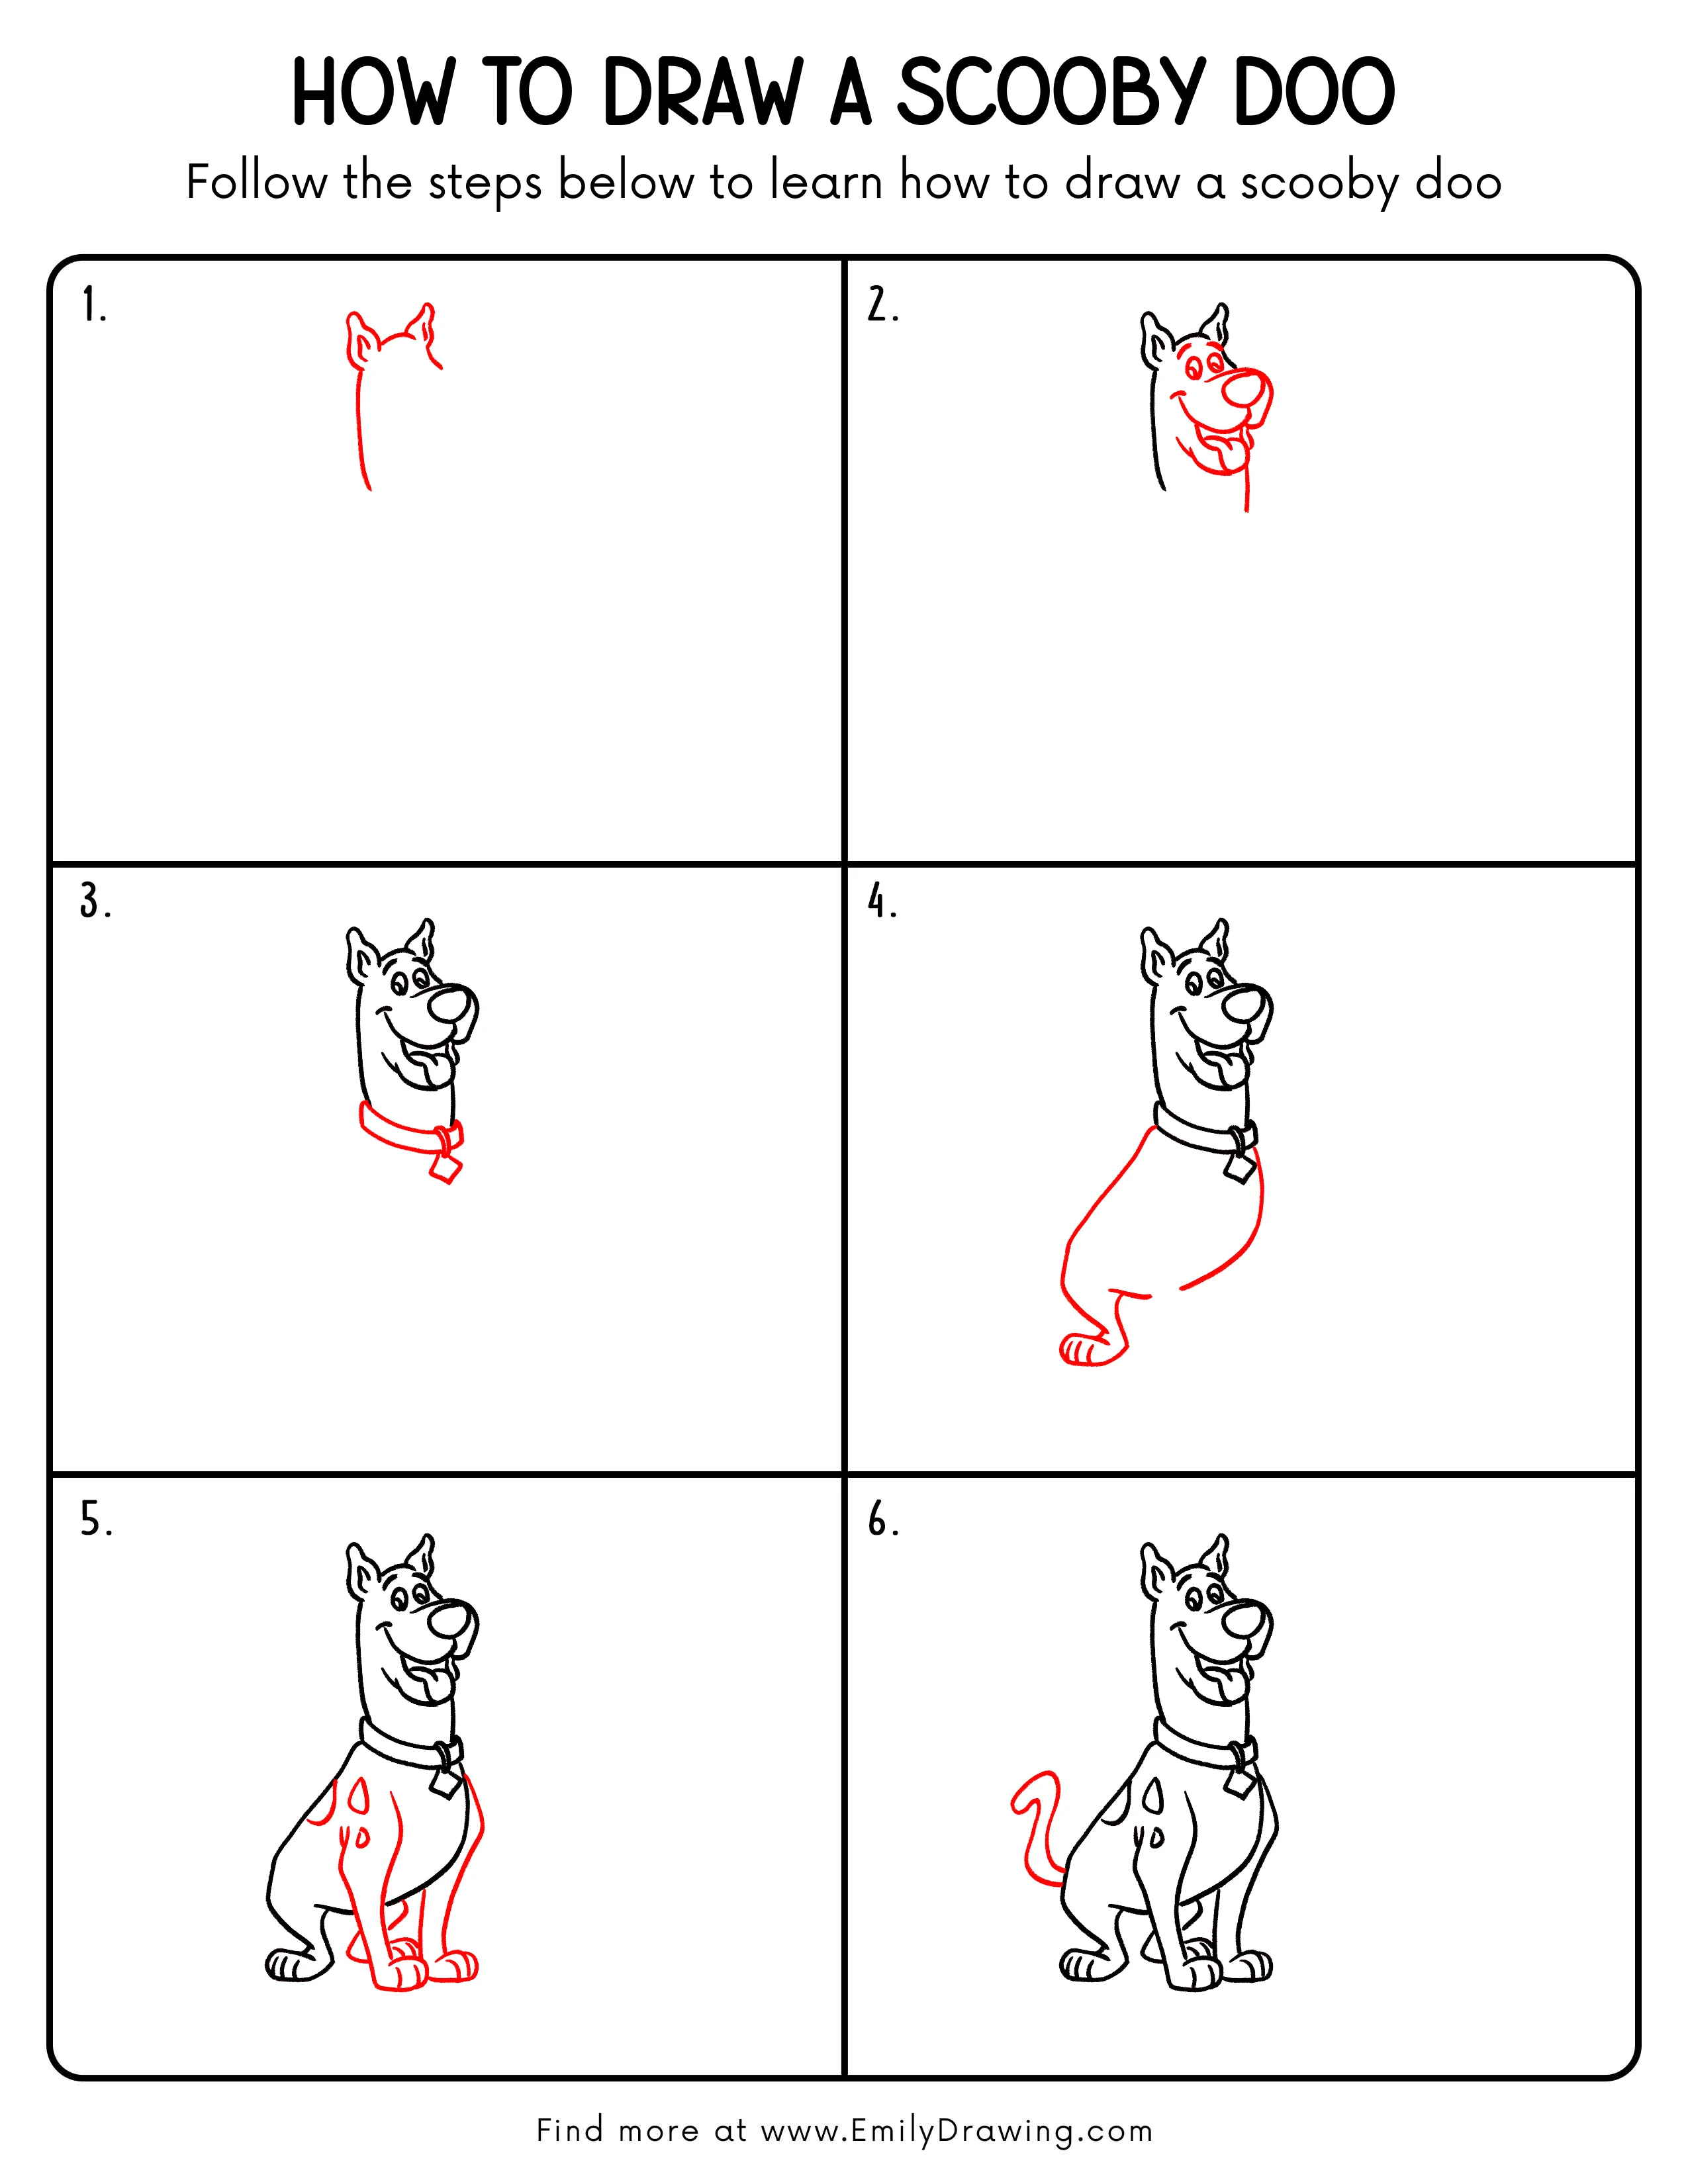
FREE Download Printable Scooby Doo Drawing Tutorial
Frequently Asked Questions
Is this how to draw Scooby Doo for beginners?
Yes, this guide uses simple shapes and short steps, making it friendly for beginners.
What part should I draw first?
Start with the head and ears because they help set Scooby Doo’s expression and character.
How can I make my Scooby Doo drawing look more accurate?
Keep the nose large, the ears tall, and the paws wide to match his cartoon proportions.