
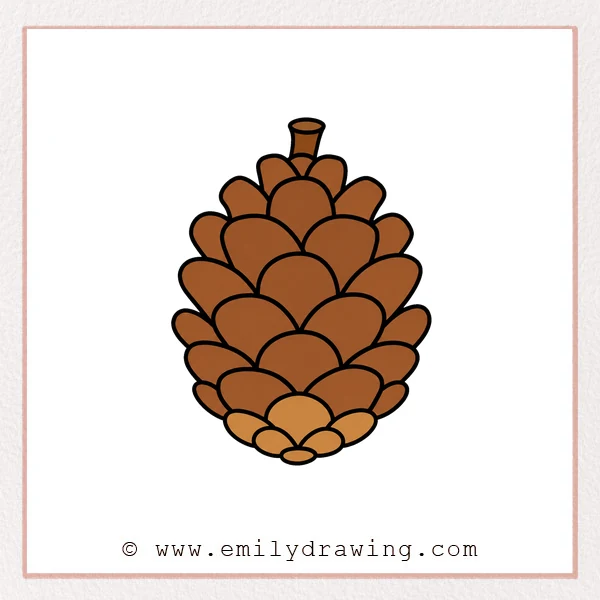
Learn how to draw pinecone with a calm, simple method for beginners. This step by step drawing guide builds the pinecone from the top stem down to the rounded base. Take your time with each curved scale, and let the shape grow wider before it closes at the bottom.
What You Will Need
- Pencil
- Eraser
- Drawing paper
- Black marker or pen
- Colored pencils or crayons
Here are my RECOMMENDED Art Supplies!
- Crayola Coloring Set (140 Pieces – Mega Value!)
- 24 Colored Crayon Set
- A4 Printer Paper
- Crayola Coloring Pencils
- HP Home Printer with Instant Ink!
Time needed:
26 minutes.
Step-by-Step Drawing Guide
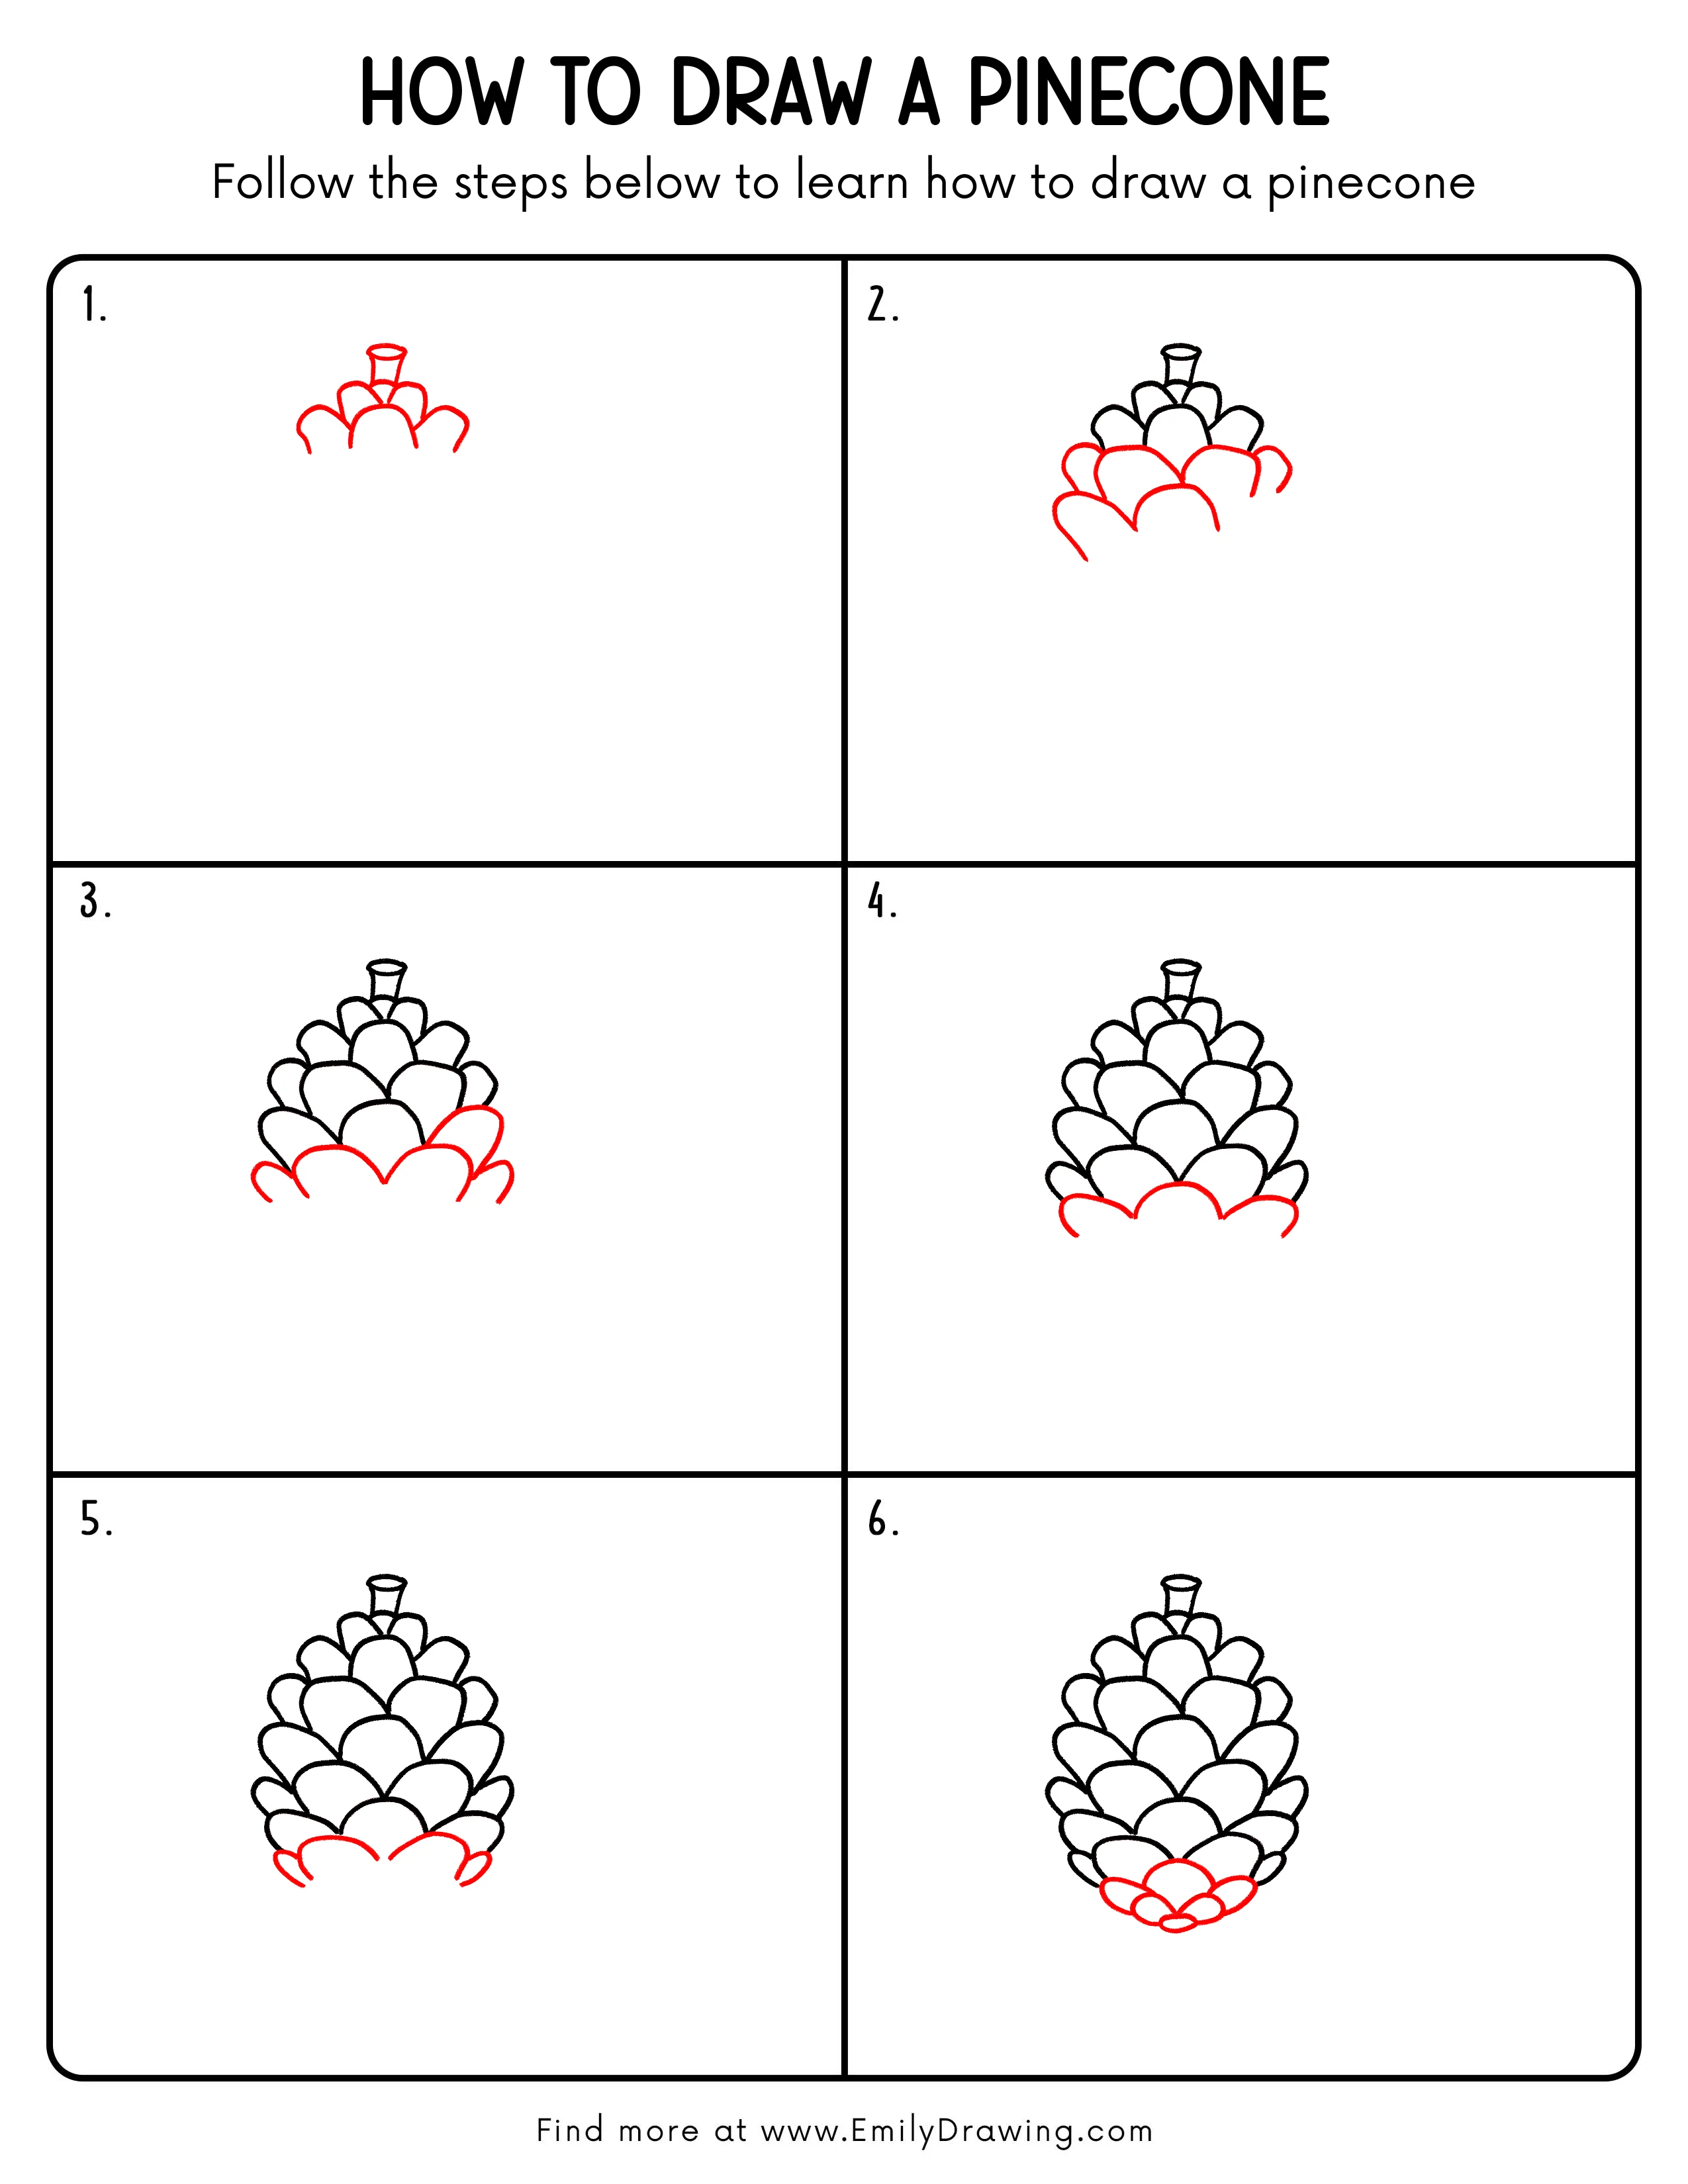
Step 1: Draw the Pinecone Top Outline
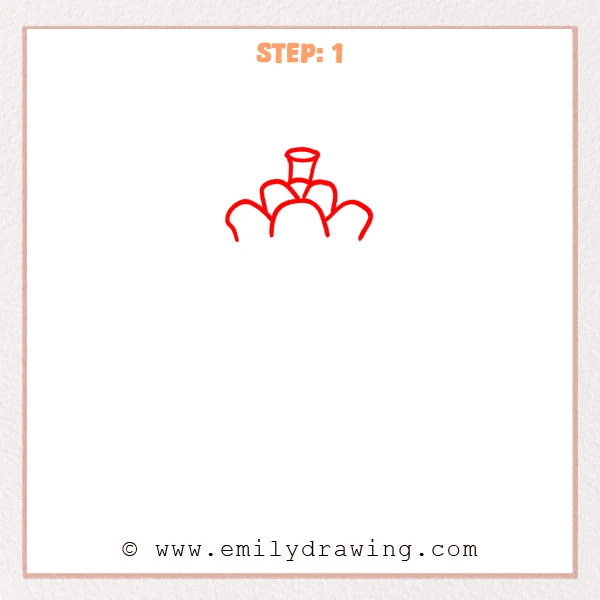
Start at the top of the pinecone with a small cup-like stem. Add a few rounded scale shapes underneath, keeping the center scale slightly lower. Draw wider curved lines on both sides to open the outer shape.
Pro Tip: Keep the left and right curves at similar heights so the pinecone feels balanced.
Step 2: Add the Second Layer of Pinecone Scales
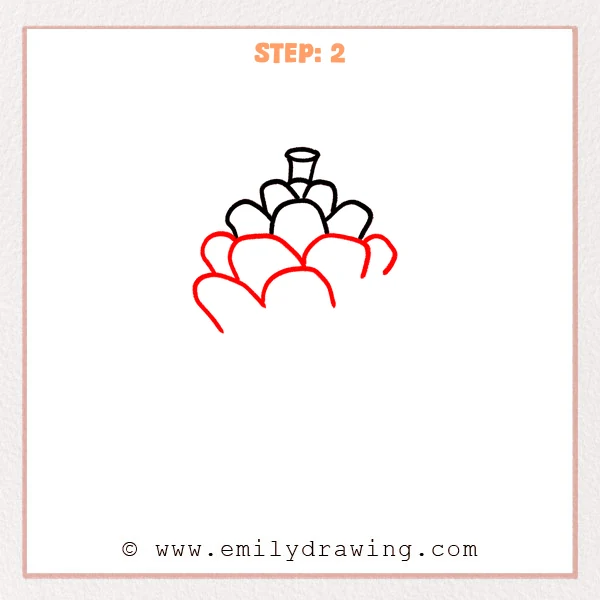
Draw wider rounded scale shapes below the first layer, spreading them left and right. Add a larger curved scale in the middle, placing it slightly lower than the sides. Extend curved outer edges on both sides so the pinecone begins to look full.
Pro Tip: Make the new scales slightly larger than the upper ones to show the pinecone widening downward.
Step 3: Expand the Lower Scales
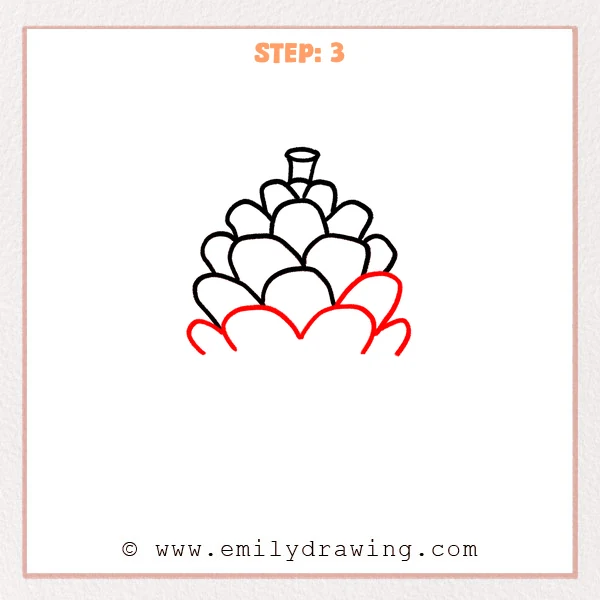
Add larger rounded scales along the lower area, letting the pinecone spread wider. Draw a taller outer scale on the right to create a natural staggered look. Add short curved lines on both lower sides to complete more of the outline.
Pro Tip: The lower scales can be wider, but keep the center position steady.
Step 4: Complete the Bottom Scale Layer
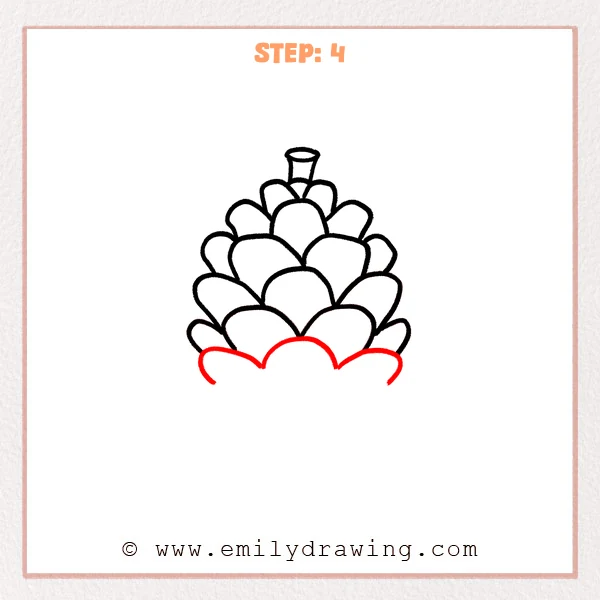
Draw a row of wide rounded scales at the very bottom of the pinecone. Let the center scale arch upward, while the side scales stretch outward. Use this layer to close the lower shape and make the outline feel complete.
Pro Tip: The bottom lines can be a little wider, but do not let the ends drop too low.
Step 5: Add the Small Bottom Scales
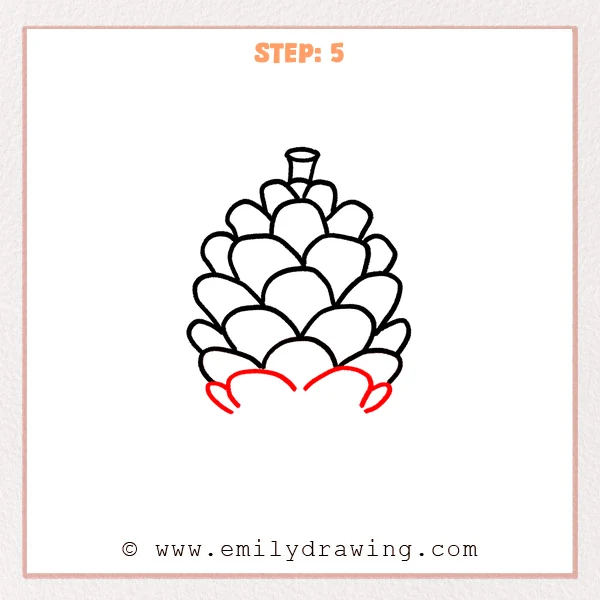
Add one small curved scale on each side of the lowest layer. Draw two inward arching curves near the center, leaving a gentle open space. These small shapes make the pinecone base look rounder and steadier.
Pro Tip: Do not draw the small bottom scales too high; keep them close to the lower edge.
Step 6: Round Off the Pinecone Base
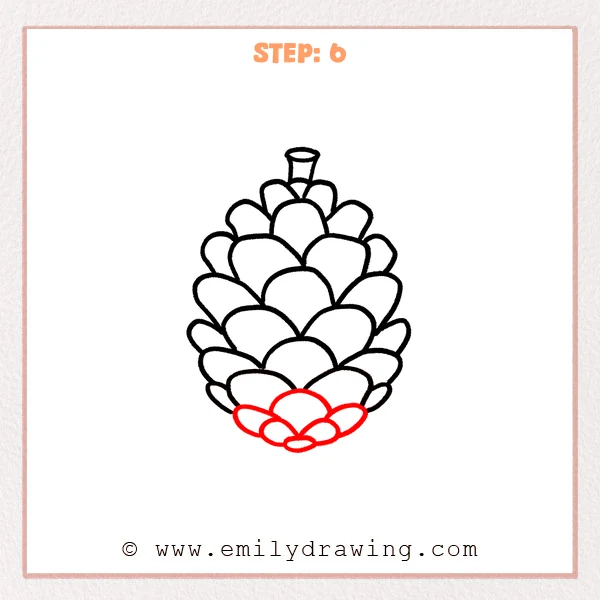
Add several smaller rounded scales along the bottom. Draw a small oval scale in the center as the lowest finishing piece. Let the side scales curve inward so the base feels rounded and neatly closed.
Pro Tip: Keep the bottom scales smaller than the upper ones so the pinecone narrows naturally.
Step 7: Color in your drawing!
Fun Facts
Pinecones protect seeds inside their layered scales. Their scales can open and close depending on moisture in the air. This makes a pinecone a wonderful subject for drawing for beginners because it uses repeated curved shapes.
Pin it now, Draw later!
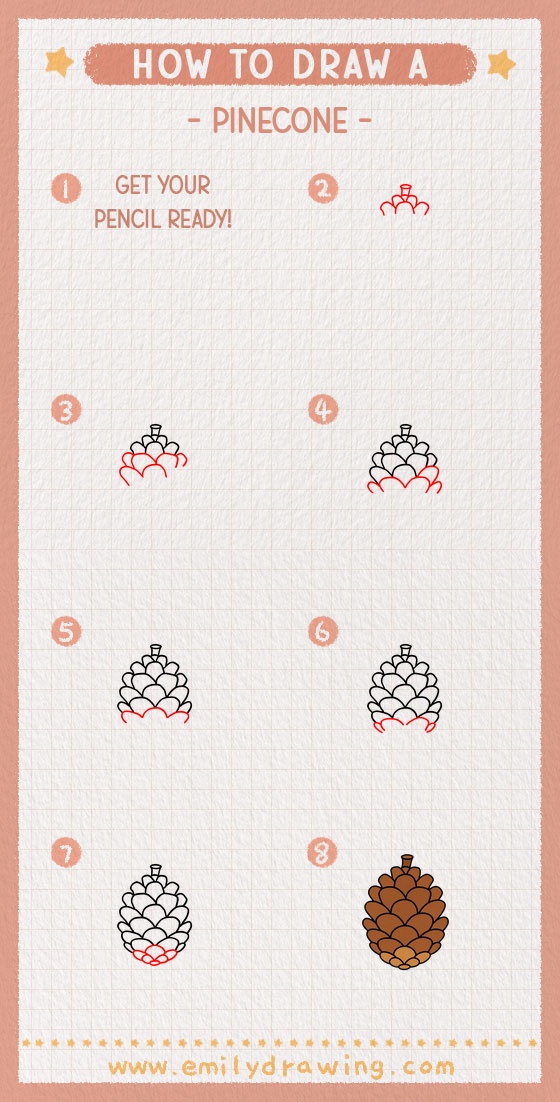
Trace your pinecone with a dark marker when you like the pencil lines. Add light brown, dark brown, and golden tones to give each scale more depth. You have finished an easy drawing tutorial that shows how to draw pinecone one layer at a time.
Keep practicing with different scale sizes, and try drawing a smaller pinecone beside it next.
Get the FREE Printable Drawing Guide
FREE Download Printable Pinecone Drawing Tutorial
Frequently Asked Questions
Is this pinecone drawing good for beginners?
Yes, this drawing for beginners uses simple rounded curves and repeated scale shapes.
How can I make my pinecone look more natural?
Vary the size of the scales slightly, while keeping the overall shape balanced.
Can I color the pinecone after drawing it?
Yes, use soft brown layers and leave small highlights on the curved scale edges.



