
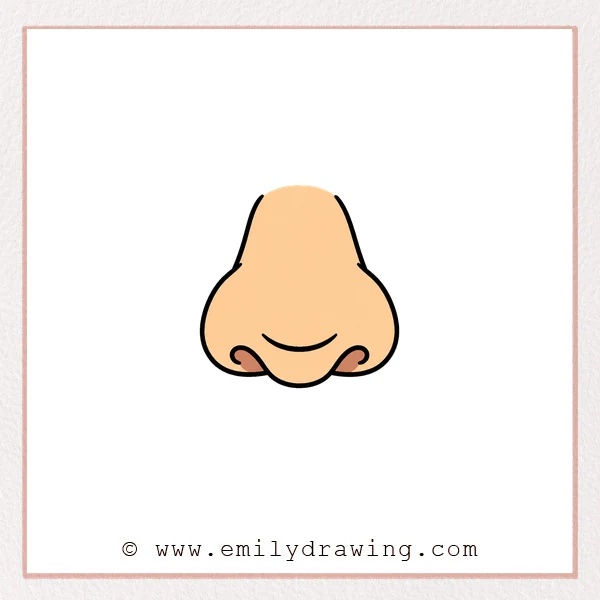
Learning how to draw nose shapes becomes easier when you build the outline slowly. This easy drawing tutorial uses simple curves to help beginners understand the bridge, tip, base, and nostrils. Take your time with each step and keep your lines light at first.
What You Will Need
- Drawing paper
- Pencil
- Eraser
- Black marker or pen
- Colored pencil or marker for practice lines
Here are my RECOMMENDED Art Supplies!
- Crayola Coloring Set (140 Pieces – Mega Value!)
- 24 Colored Crayon Set
- A4 Printer Paper
- Crayola Coloring Pencils
- HP Home Printer with Instant Ink!
Time needed:
19 minutes.
Step-by-Step Drawing Guide
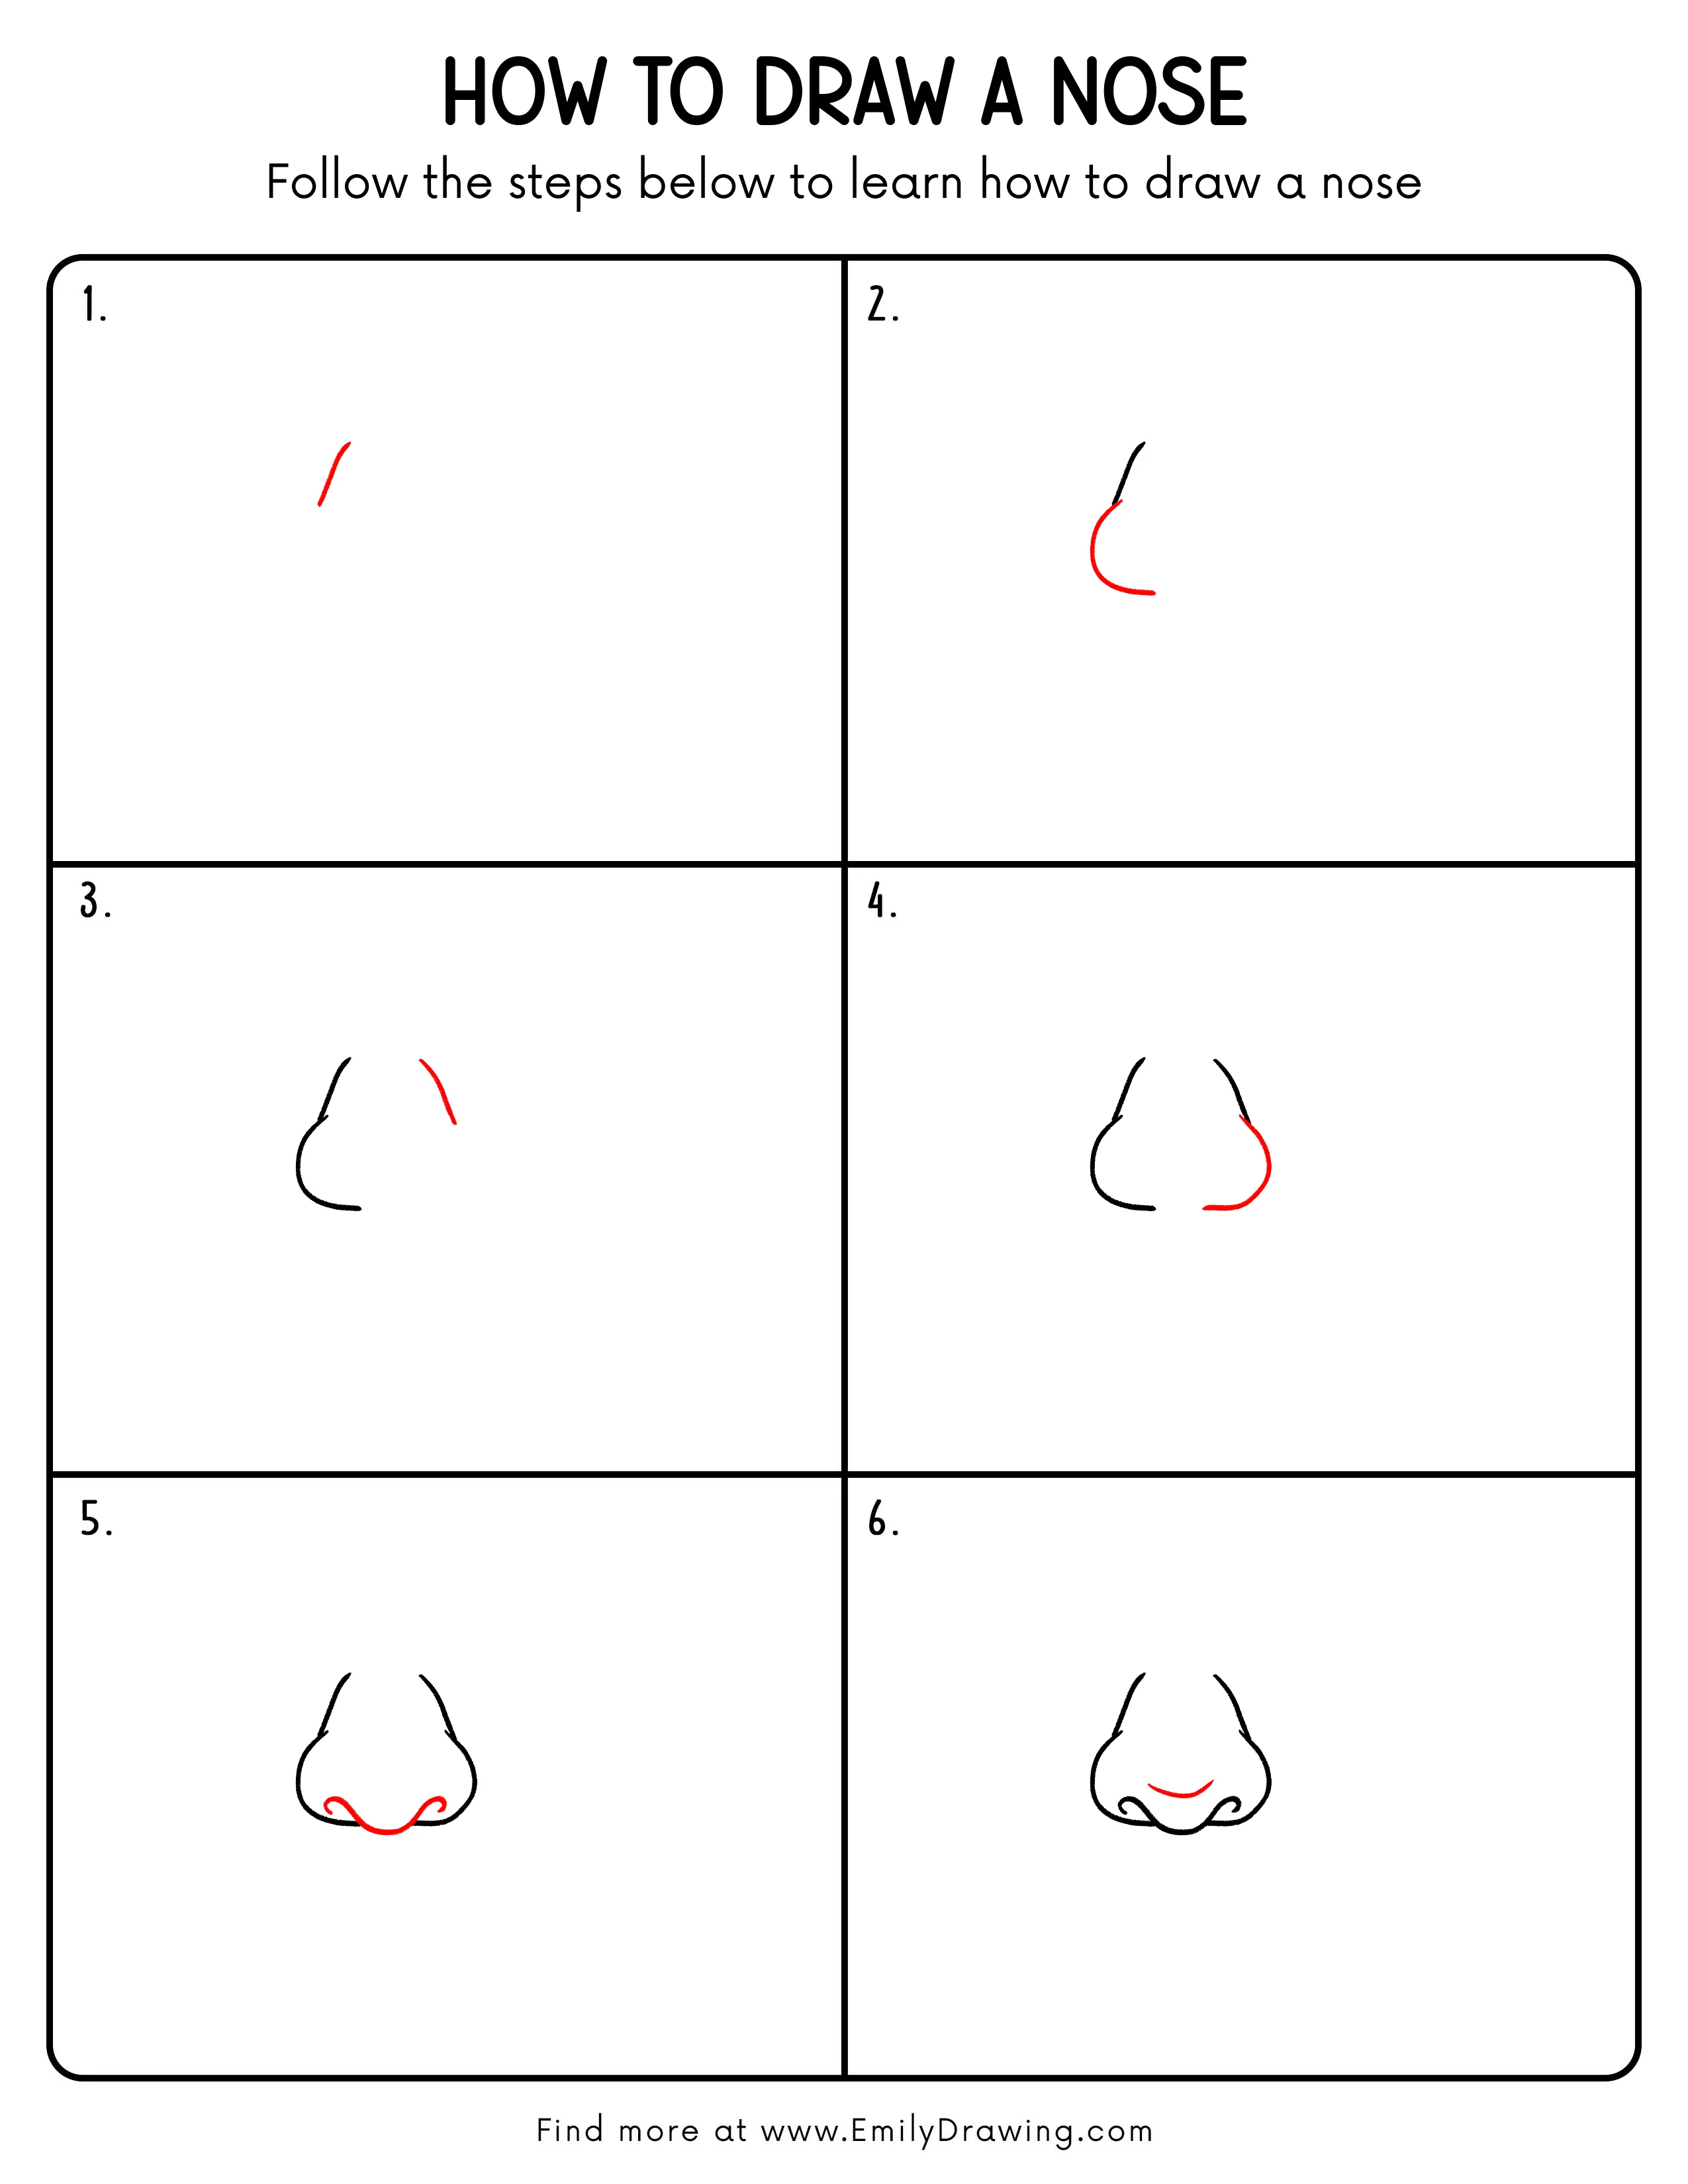
Step 1: Draw the Nose Bridge Curve
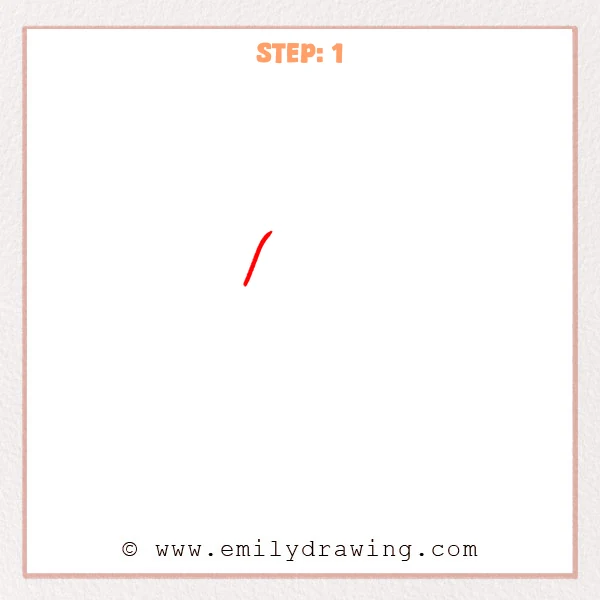
Start near the center of the page with a long curve bending gently to the right. Keep the top smooth and rounded, then let the lower end stop naturally. This first line becomes the basic bridge of the nose.
Pro Tip: Keep the nose bridge line light so you can adjust the proportion later.
Step 2: Add the Nose Tip and Base
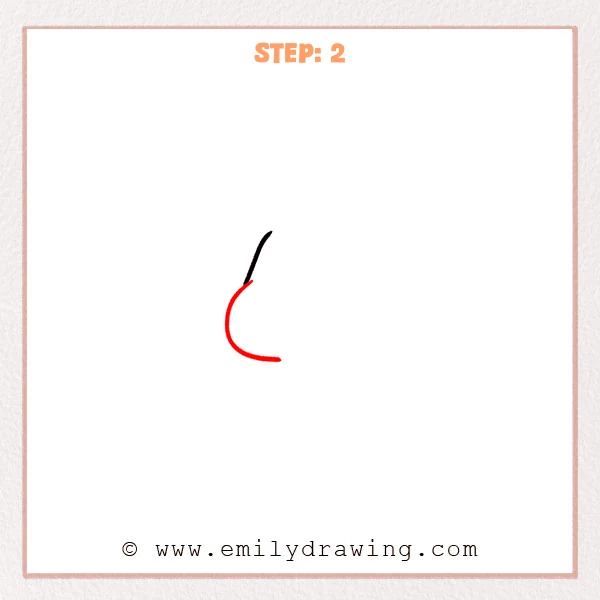
From below the nose bridge, add a curve that bulges gently to the left. Then guide the line slightly to the right to show the base of the nose. Keep the shape open for now.
Pro Tip: Avoid making the nose tip too sharp, because a rounded turn looks more natural.
Step 3: Draw the Inner Nose Bridge Line
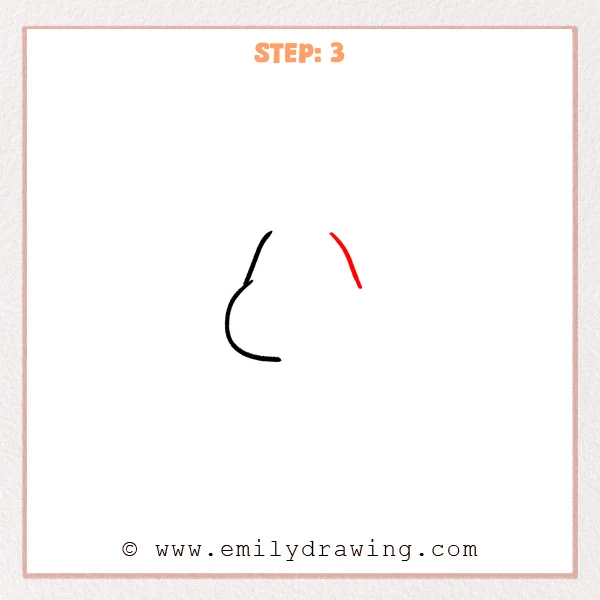
Add a short curved line on the upper right side of the nose. Let it slope gently downward, but keep it separate from the nose tip for now. This line suggests the other side of the nose bridge.
Pro Tip: Leave space between the two bridge lines to make the nose look more dimensional.
Step 4: Complete the Other Nose Tip Outline
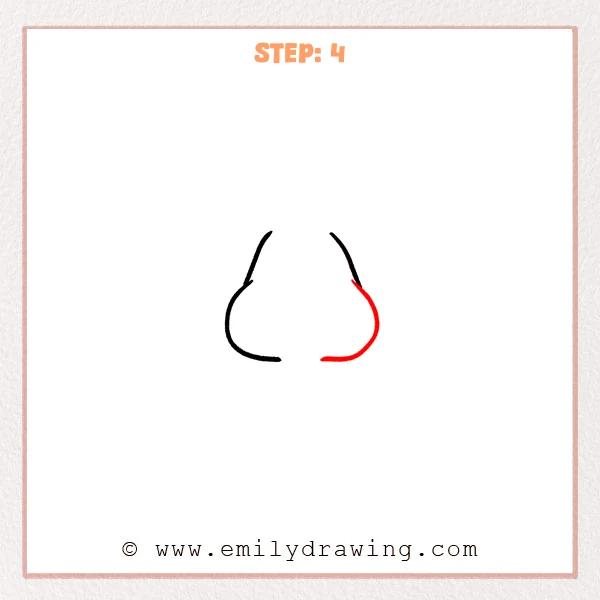
Continue from below the right bridge line to shape the outer nose tip. Let the line bulge downward, then curve back left to form the other nose base. This gives the nose a balanced outline.
Pro Tip: Keep both nose tips at a similar height so the drawing feels balanced.
Step 5: Connect the Nose Base and Nostrils
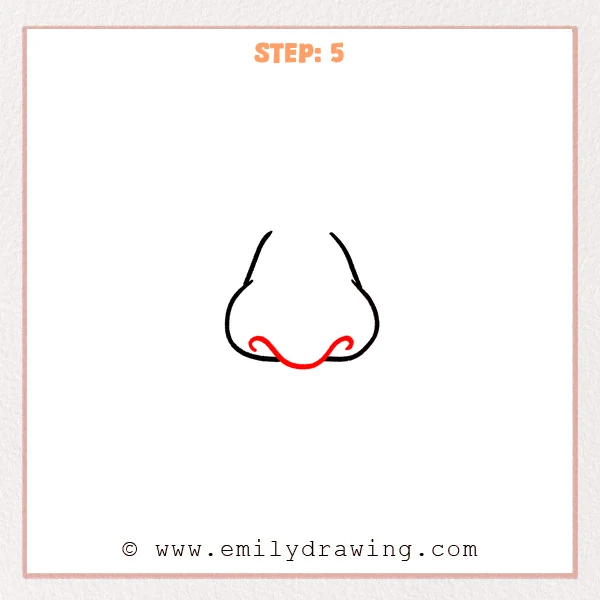
Draw a gentle wavy line along the bottom to connect both sides of the nose. Add a small curled hook at each end to show the rounded nostril openings. These details make the nose easier to recognize.
Pro Tip: Keep the nostril curls small so they do not overpower the main nose shape.
Step 6: Add the Curve Above the Nose Tip
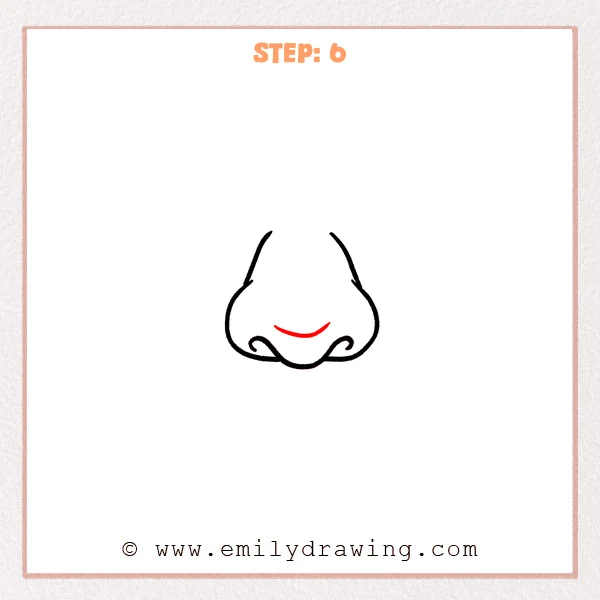
Draw a shallow curved line above the center of the nose, like a soft smile. This line shows the raised nose tip and adds depth to the middle area. Your step by step drawing now has a clear nose structure.
Pro Tip: Keep the center curve short and light, placing it above the space between the nostrils.
Step 7: Color in your drawing!
Fun Facts
- Noses come in many shapes, so small changes can create different characters.
- The nostrils are usually darker because they sit under the nose tip.
- Artists often use curved lines to show soft form without heavy shading.
Pin it now, Draw later!
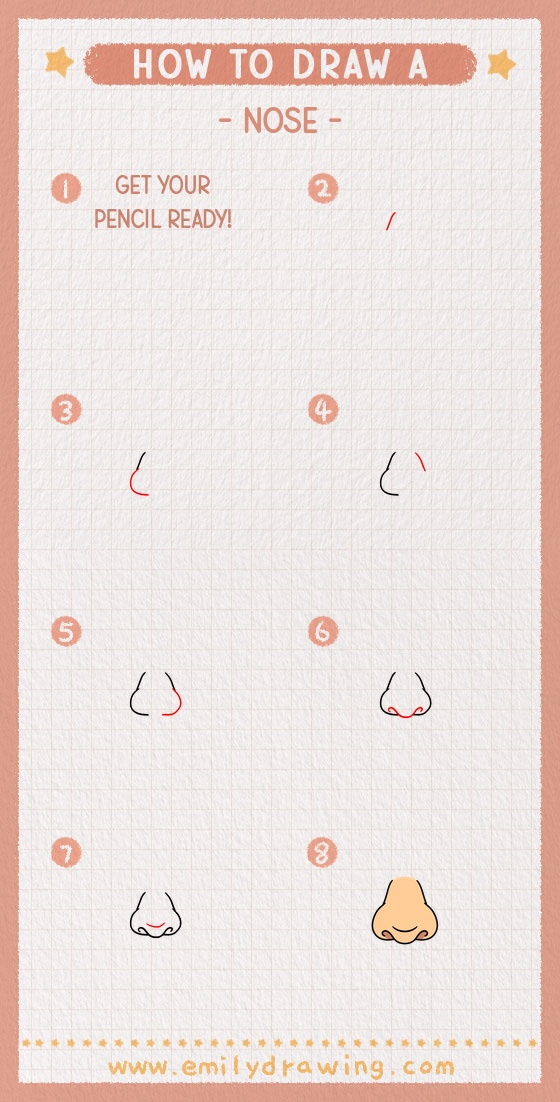
Now you know how to draw nose features using simple beginner-friendly steps. Trace your favorite lines with a marker, then erase any extra pencil marks. Try this drawing for beginners again with a slightly wider or narrower nose to practice different looks.
Get the FREE Printable Drawing Guide
FREE Download Printable Nose Drawing Tutorial
Frequently Asked Questions
Is this nose drawing tutorial good for beginners?
Yes, this easy drawing tutorial uses simple curves and small details. It is designed to help beginners build the nose step by step.
How can I make the nose look more realistic?
Keep the bridge lines light and make the nostrils slightly darker. You can also add soft shading under the nose tip.
What should I do if both sides look uneven?
Compare the height of both nose bases before adding details. Small adjustments can make the nose look balanced.



