
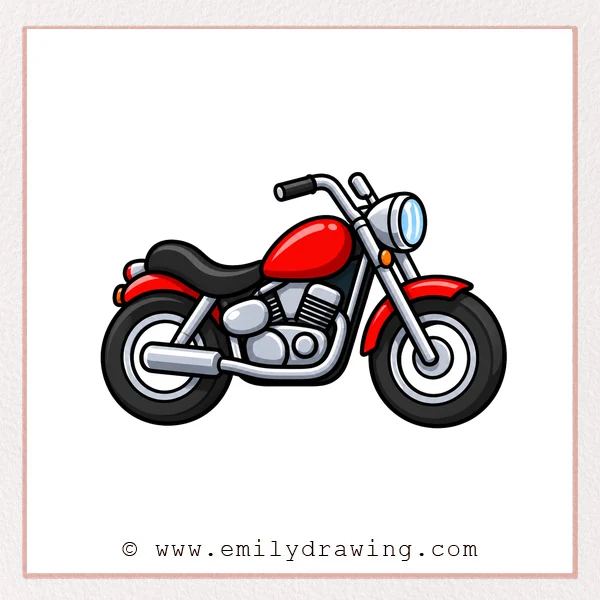
In this easy drawing tutorial, you will learn how to draw a motorcycle step by step. We will build the drawing from simple curves, circles, and rounded shapes. Take your time with each part, and let the motorcycle become clearer with every step.
What You Will Need
- A pencil or drawing marker
- A sheet of white paper
- An eraser
- Colored pencils or markers, if you want to color your motorcycle
Here are my RECOMMENDED Art Supplies!
- Crayola Coloring Set (140 Pieces – Mega Value!)
- 24 Colored Crayon Set
- A4 Printer Paper
- Crayola Coloring Pencils
- HP Home Printer with Instant Ink!
Time needed:
12 minutes.
Step-by-Step Drawing Guide
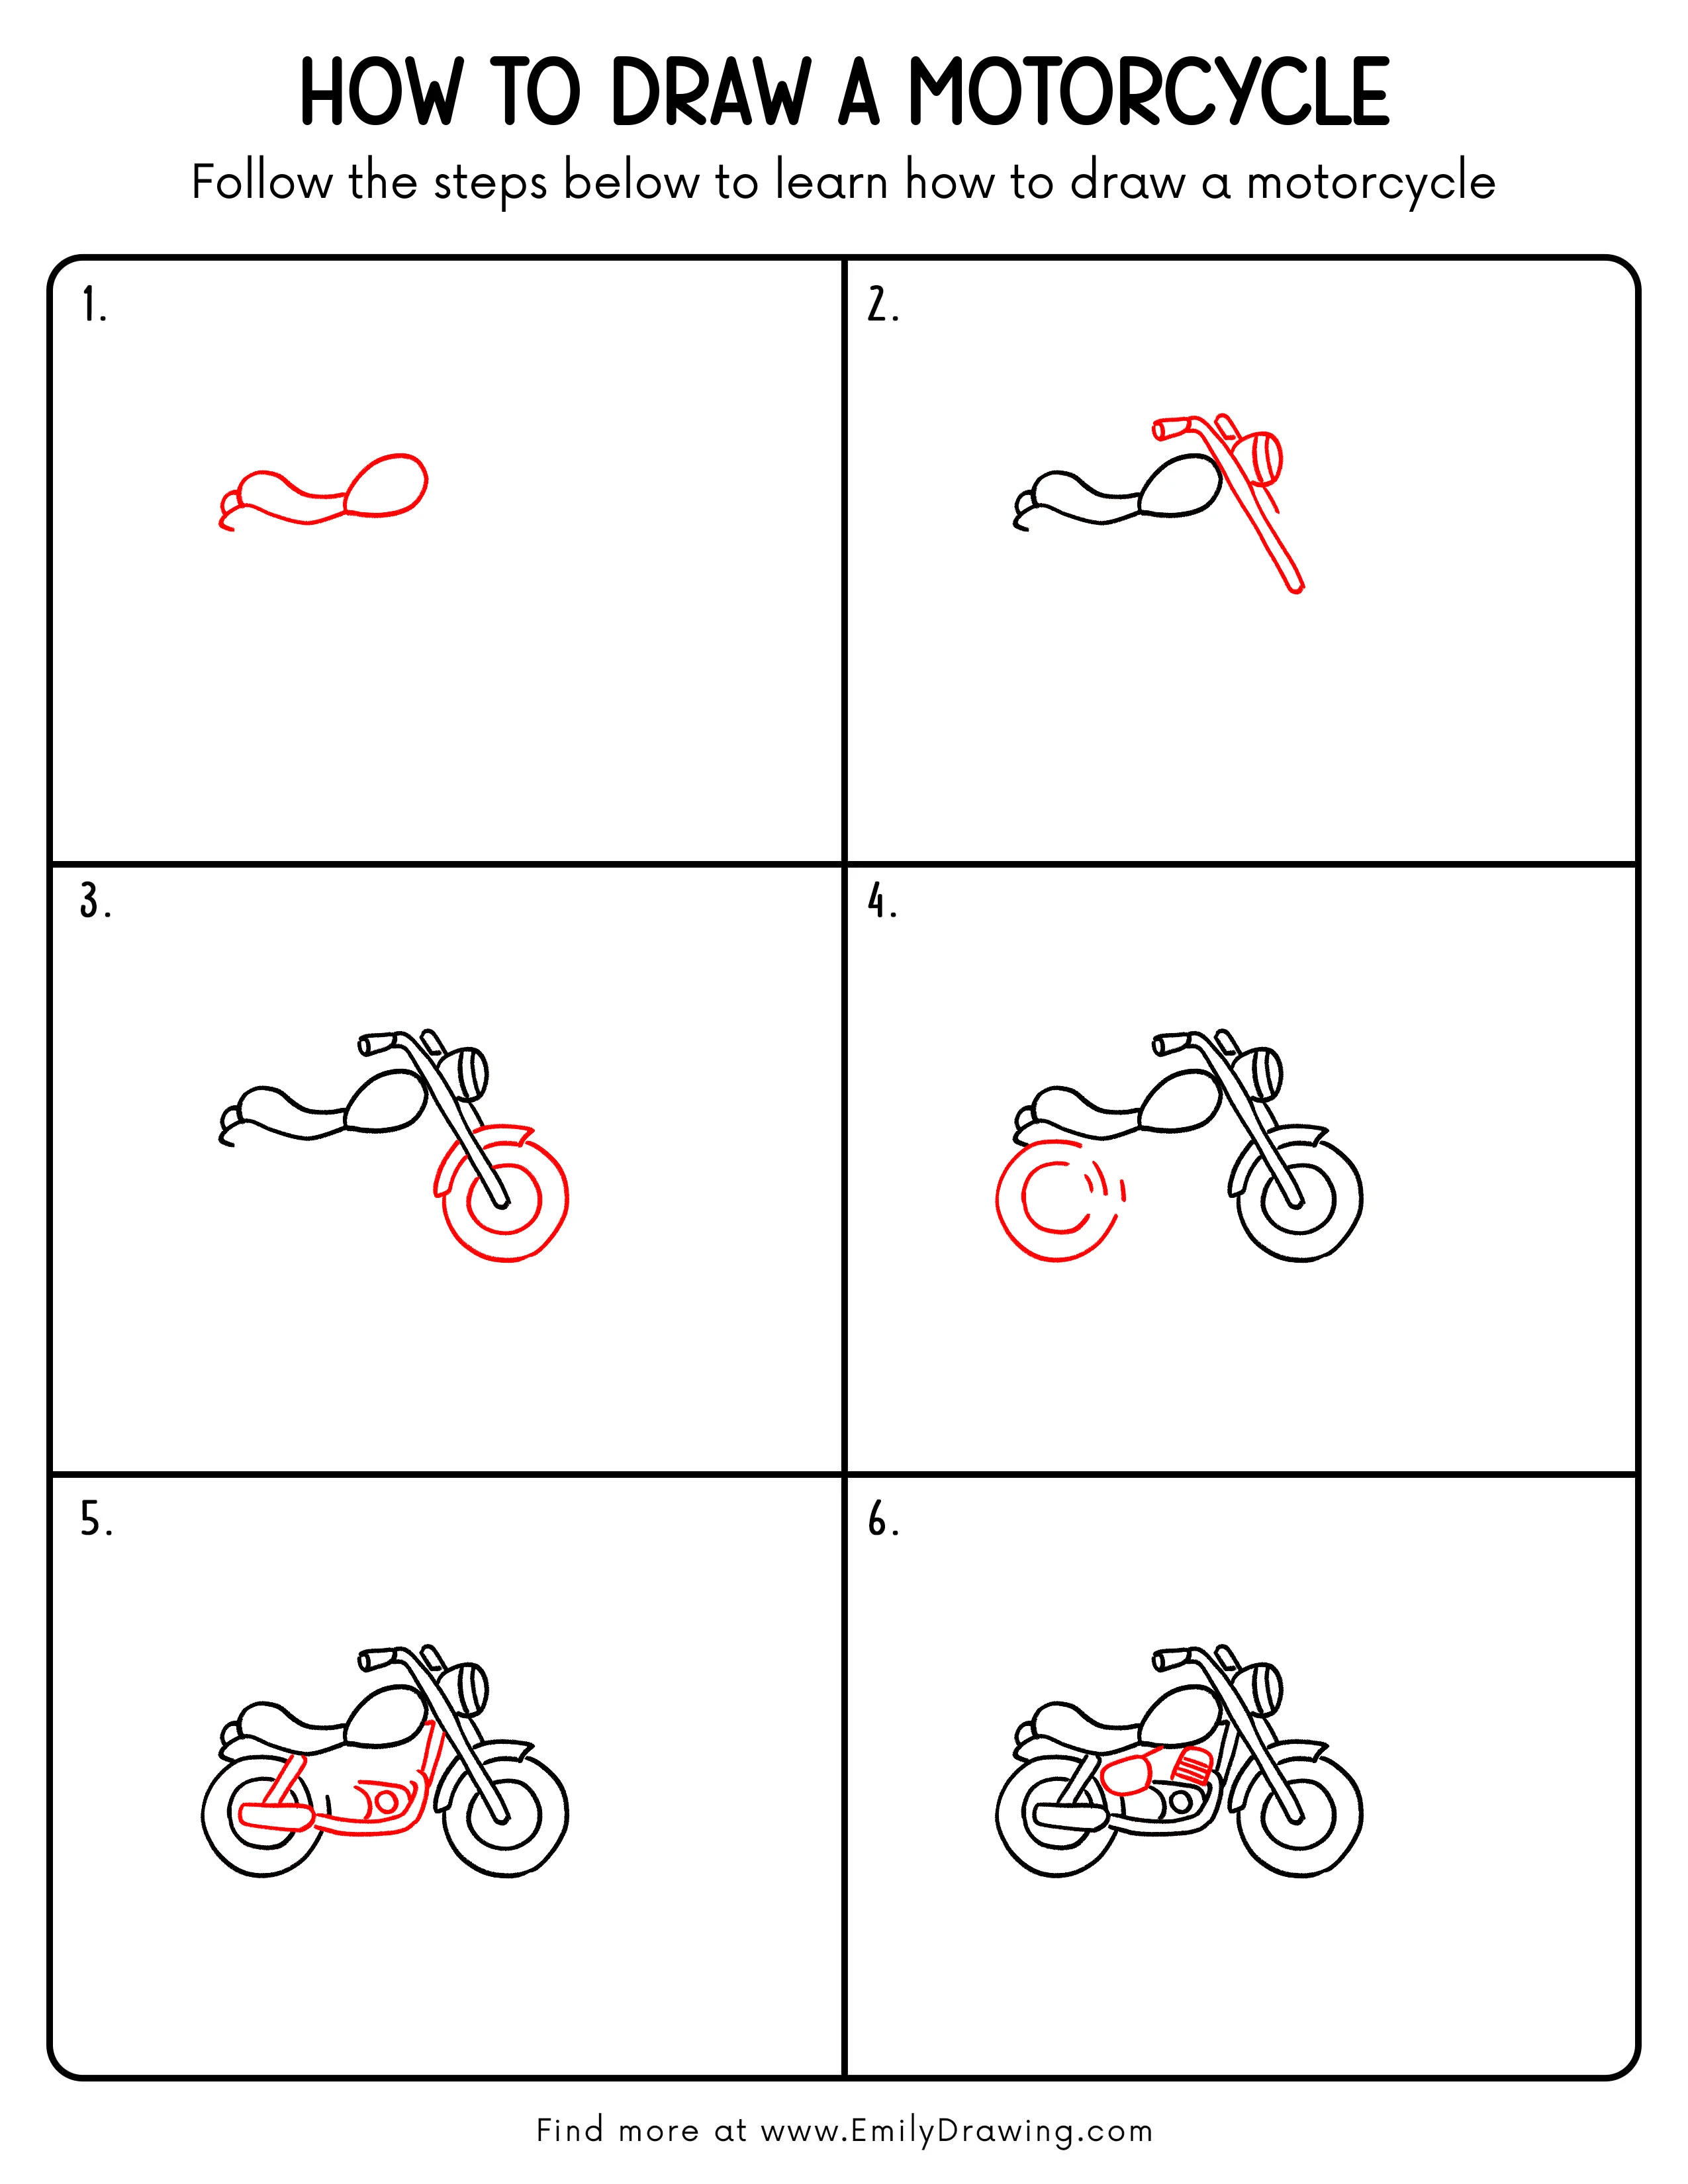
Step 1: Draw the Basic Motorcycle Outline
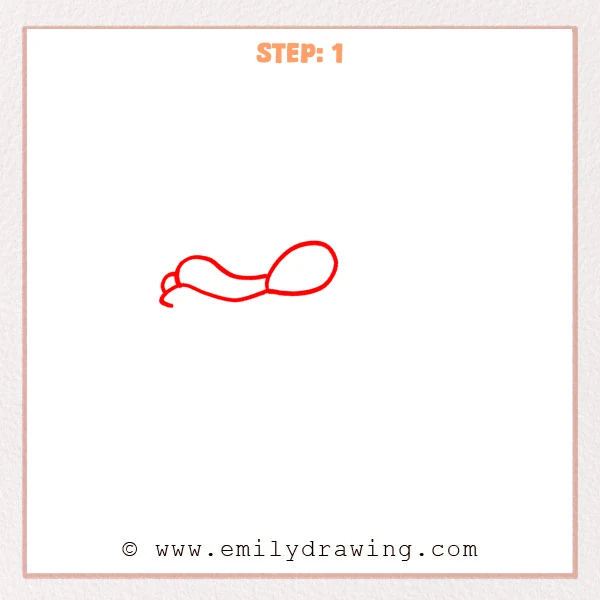
Start with a smooth, long curved line to set the top flow of the motorcycle body. Add a large oval on the right as the base for the rear wheel or back section. Use small curved lines on the left for the front connection, keeping the sketch loose and simple.
Pro Tip: Focus on the overall proportion first, and do not rush the small details.
Step 2: Add the Handlebar and Front Fork
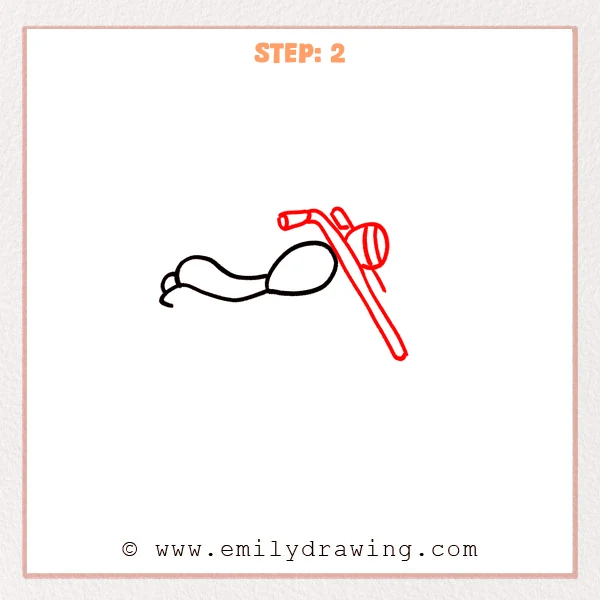
Draw a long slanted front fork above the right side of the body. Add a curved handlebar at the top with a small cylinder-shaped grip. Then draw a round headlight on the right, using a few curved lines to show its form.
Pro Tip: Keep the front fork leaning in one clear direction so the motorcycle feels stable.
Step 3: Draw the Front Wheel and Fender
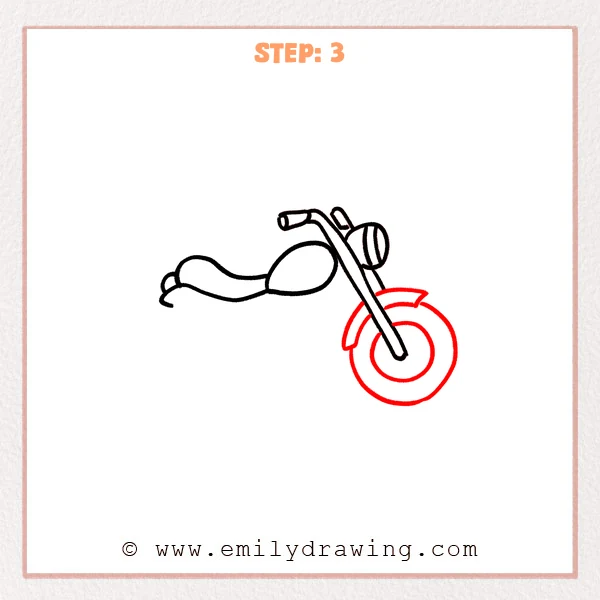
Add a large circle below the front fork to form the motorcycle’s front wheel. Draw a smaller circle inside it so the tire looks more complete. Then add two curved fender pieces above the wheel, following the wheel’s round shape.
Pro Tip: Move your wrist gently while drawing the wheel to keep the circle smooth.
Step 4: Add the Rear Wheel Structure
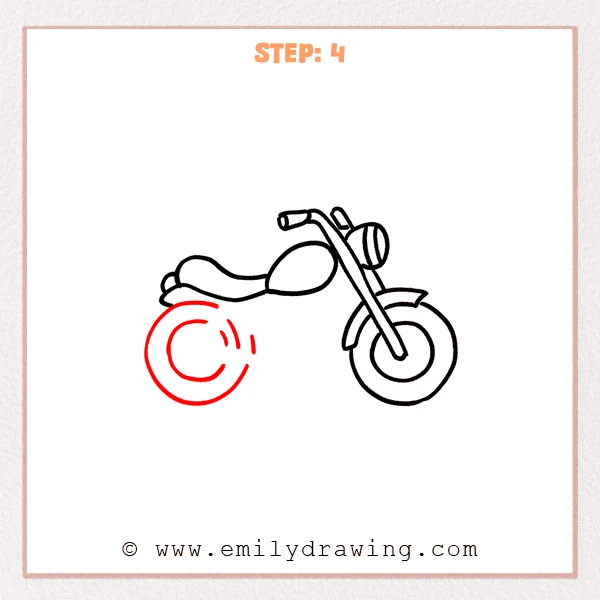
Draw a large circle below the left side of the body to form the motorcycle’s rear wheel. Add a smaller curved ring inside it to show the inner tire structure. Then draw a few short curved lines near the center, giving the rear wheel more depth.
Pro Tip: Keep the rear wheel close in size to the front wheel so the motorcycle looks balanced.
Step 5: Add the Frame and Engine Details
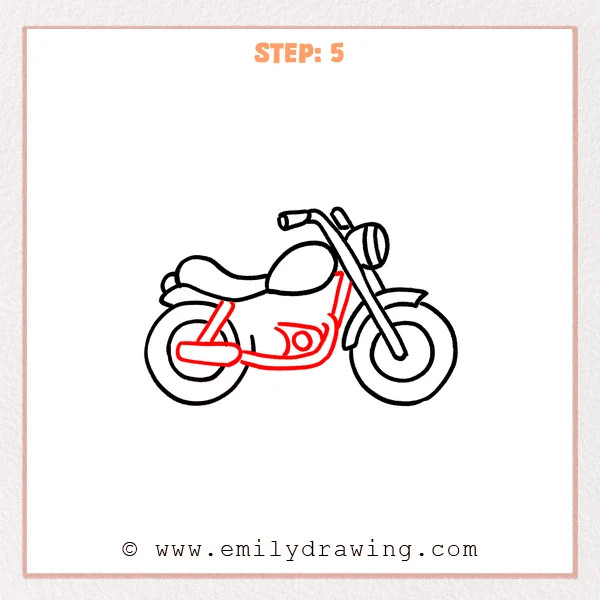
Draw a curved frame line under the body to connect the front and rear sections. Add the engine casing in the middle, using a circle and curved lines to show the mechanical shape. Then draw a long oval exhaust pipe in front of the rear wheel and add two slanted support bars to complete the motorcycle.
Pro Tip: Draw the big frame and engine shapes first, then add the smaller parts more easily.
Step 6: Refine the Side Cover and Engine Texture
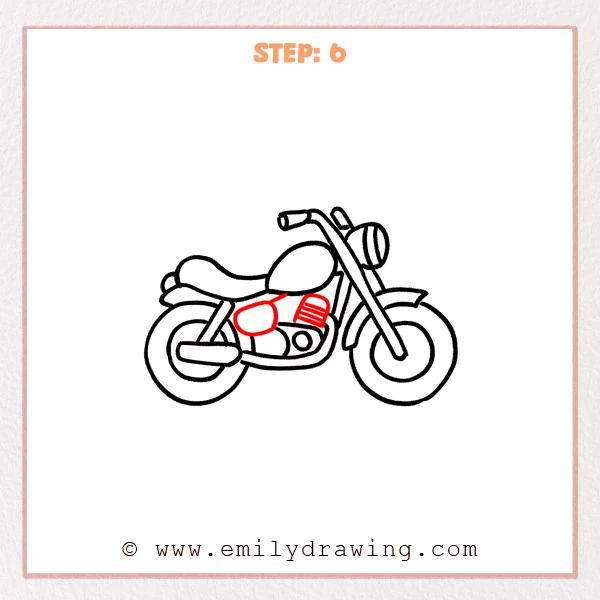
Add a rounded side cover in the middle of the motorcycle body. Draw the engine cooling fins on the right with several short horizontal lines for mechanical detail. Then add a short connecting line to link the side cover, engine, and body smoothly.
Pro Tip: Keep small details aligned with the body direction so the drawing looks neat.
Step 7: Color in your drawing!
Fun Facts
- Motorcycles are lighter than cars, so they can move quickly and turn easily.
- The round headlight helps riders see the road clearly at night.
- Many motorcycles have visible engines, which makes them fun for drawing for beginners.
- Wheels, fenders, handlebars, and frames are common parts in many motorcycle designs.
Pin it now, Draw later!
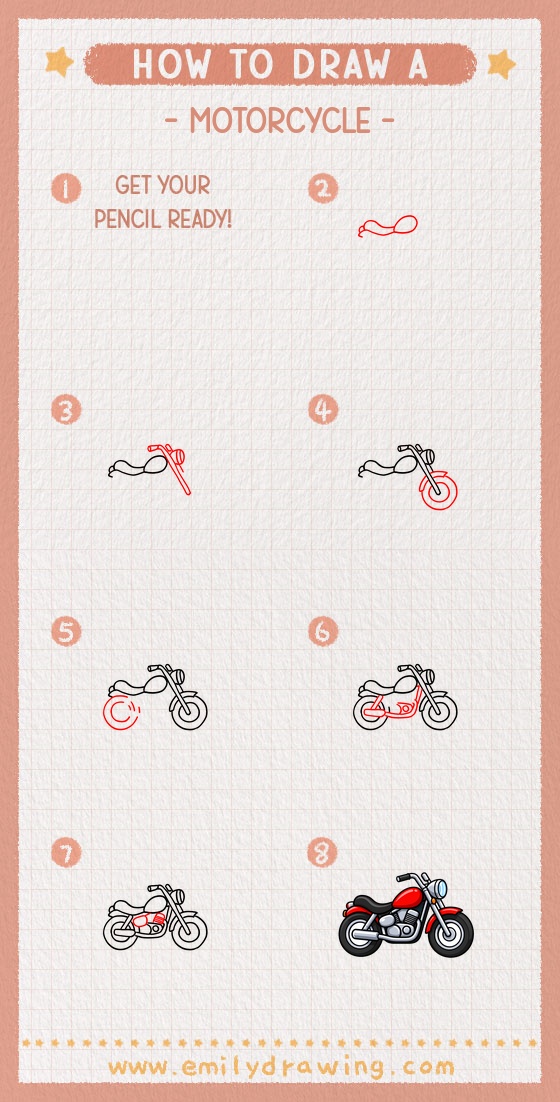
Now your motorcycle drawing has a body, wheels, handlebars, front fork, headlight, frame, engine, and exhaust pipe. You can trace the final lines darker and erase any extra sketch marks. For a finished look, color the body, tires, lights, and engine parts with your favorite colors.
Keep practicing this step by step drawing, and try changing the shape of the seat or headlight next time.
Get the FREE Printable Drawing Guide
FREE Download Printable Motorcycle Drawing Tutorial
Frequently Asked Questions
Is this motorcycle drawing good for beginners?
Yes. This easy drawing tutorial uses simple circles, ovals, curves, and rounded shapes, making it friendly for beginners.
How can I make the wheels look more even?
Draw the outer circles slowly and lightly first. Then add the inner circles once the wheel size feels balanced.
Can I color the motorcycle after drawing it?
Yes. You can color the body brightly, make the tires dark, and add gray or silver tones to the engine and frame.



