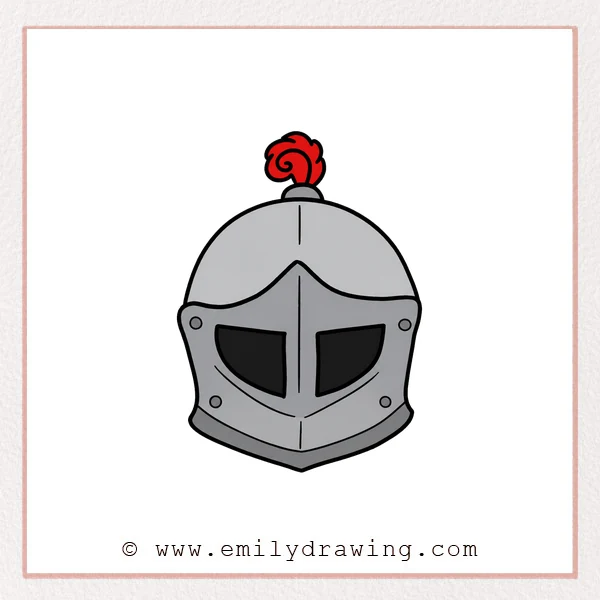
In this easy drawing tutorial, you will learn how to draw a knight’s helmet step by step.
This guide is designed for beginners, using simple curves, points, and shapes to build the helmet slowly.
Take your time with each part, and let the details make your drawing feel strong and heroic.
What You Will Need
- Pencil
- Eraser
- Black marker or pen
- Paper
- Coloring tools, if you want to finish with color
Here are my RECOMMENDED Art Supplies!
- Crayola Coloring Set (140 Pieces – Mega Value!)
- 24 Colored Crayon Set
- A4 Printer Paper
- Crayola Coloring Pencils
- HP Home Printer with Instant Ink!
Time needed:
10 minutes.
Step-by-Step Drawing Guide
Step 1: Draw the Top Helmet Outline
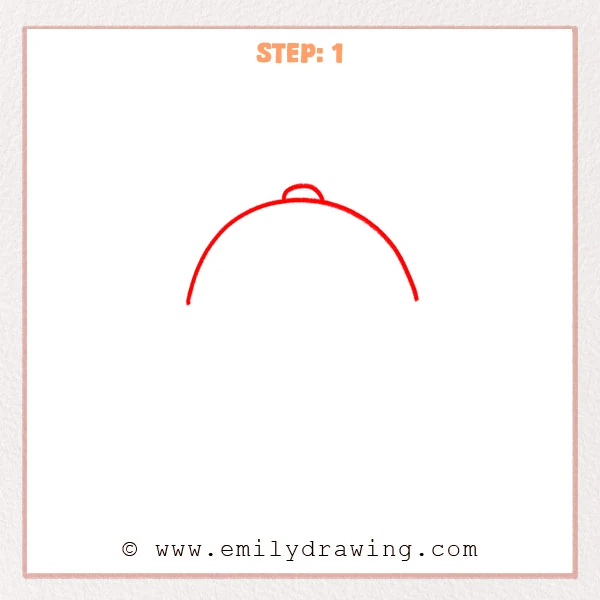
Start with a wide curved line for the upper outer shape of the knight’s helmet.
Add a smaller half-circle bump on top, like a small decorative crest loop.
Pro Tip: Keep both sides of the large curve balanced so the helmet looks sturdy.
[Alt Text: A beginner sketch of a knight’s helmet starting with a wide top curve and a small rounded crest on top.]
Step 2: Add the Feather Plume
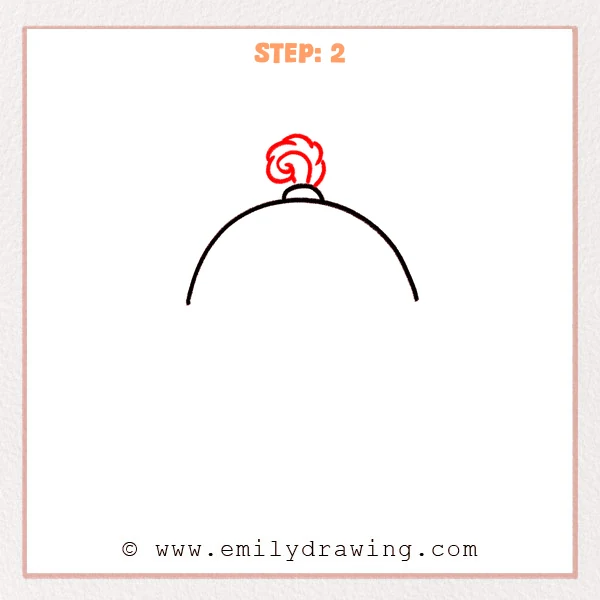
Change the small top half-circle into a dark outline, making it look like the base holding the plume.
Draw a curled feather shape above it, using curved lines and a spiral to show soft decoration.
Pro Tip: Make the plume taller than the base, but not too wide, for a graceful proportion.
[Alt Text: A knight’s helmet sketch refined with a dark top outline and a curled feather plume added above the crest.]
Step 3: Draw the Visor Edge
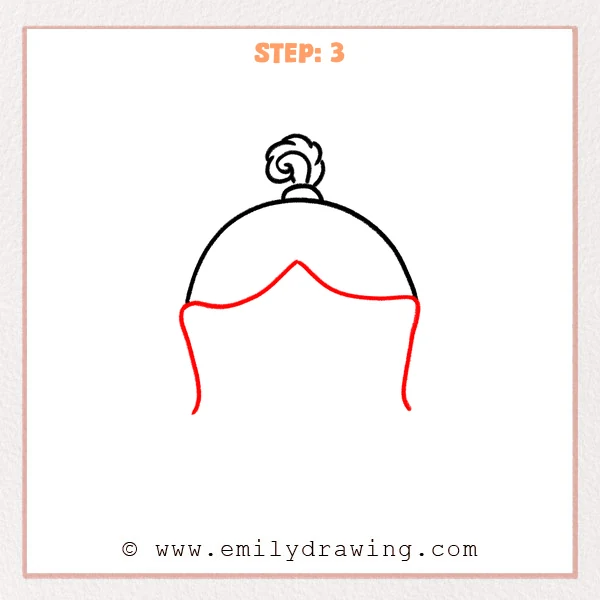
Add a wavy upper visor line below the helmet, rising to a point in the middle.
Draw long outer side edges downward on both sides, so the visor begins to cover the face area.
Pro Tip: Align the center point with the helmet’s middle so the visor looks symmetrical.
[Alt Text: A knight’s helmet sketch with a plume and a newly added wavy visor edge extending down both sides.]
Step 4: Close the Bottom of the Visor
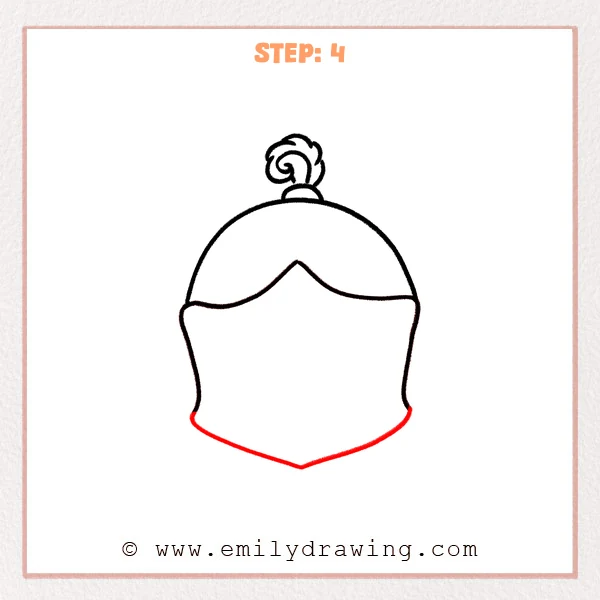
Draw a lower edge that slopes down to a point, connecting the two sides of the visor.
Form a small point in the center bottom to complete the front outline of the helmet.
Pro Tip: Place the bottom point on the center line so the whole visor looks even.
[Alt Text: A knight’s helmet drawing with the visor bottom closed into a pointed shape, completing the main front outline.]
Step 5: Add the Eye Openings
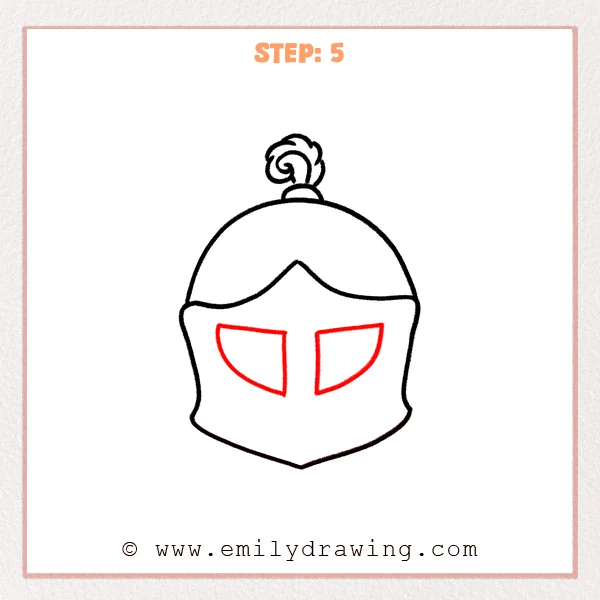
Draw two matching eye openings in the middle of the visor, one on each side.
Leave a straight metal bar between them, making the helmet look stronger.
Pro Tip: Keep both eye openings at a similar height so the expression feels balanced.
[Alt Text: A knight’s helmet drawing refined with two symmetrical eye openings and a center metal bar on the visor.]
Step 6: Add Metal Detail Lines
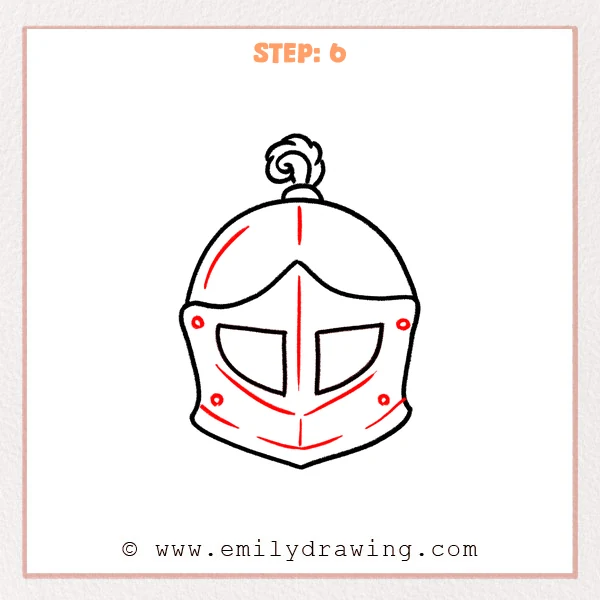
Add vertical lines, curved lines, and small circles on the front to show rivets and metal sections.
Draw curved trim below the eye openings, giving the visor more layered detail.
Pro Tip: Match the rivet positions on both sides to make the helmet look neat.
[Alt Text: A knight’s helmet drawing refined with rivets, vertical metal lines, and curved decorative trim on the visor.]
Step 7: Color in your drawing!
Fun Facts
- Knights often wore helmets to protect their heads during battles and tournaments.
- Some helmets had decorative plumes or crests to show rank, style, or identity.
- Medieval armor was often shaped carefully so weapons could slide off its curved surfaces.
Pin it now, Draw later!
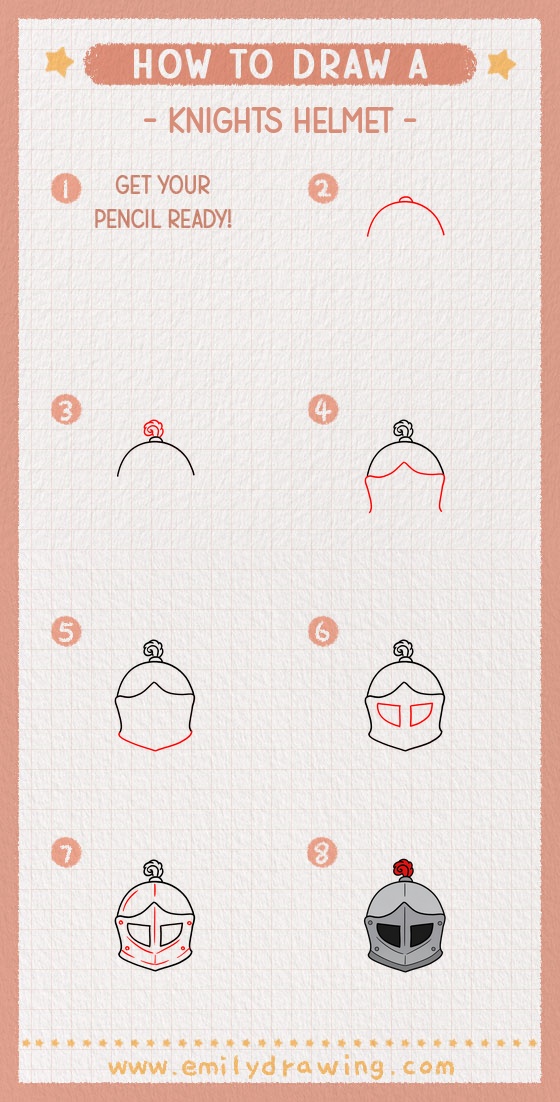
Now you know how to draw a knight’s helmet using a clear step by step drawing process.
Trace your final lines with a black marker, then erase any extra pencil marks.
You can color the helmet silver, gray, gold, or any bold color you like.
For a polished finish, add soft shadows inside the eye openings and around the metal trim.
Keep practicing this drawing for beginners, and try designing your own helmet decorations next.
Get the FREE Printable Drawing Guide
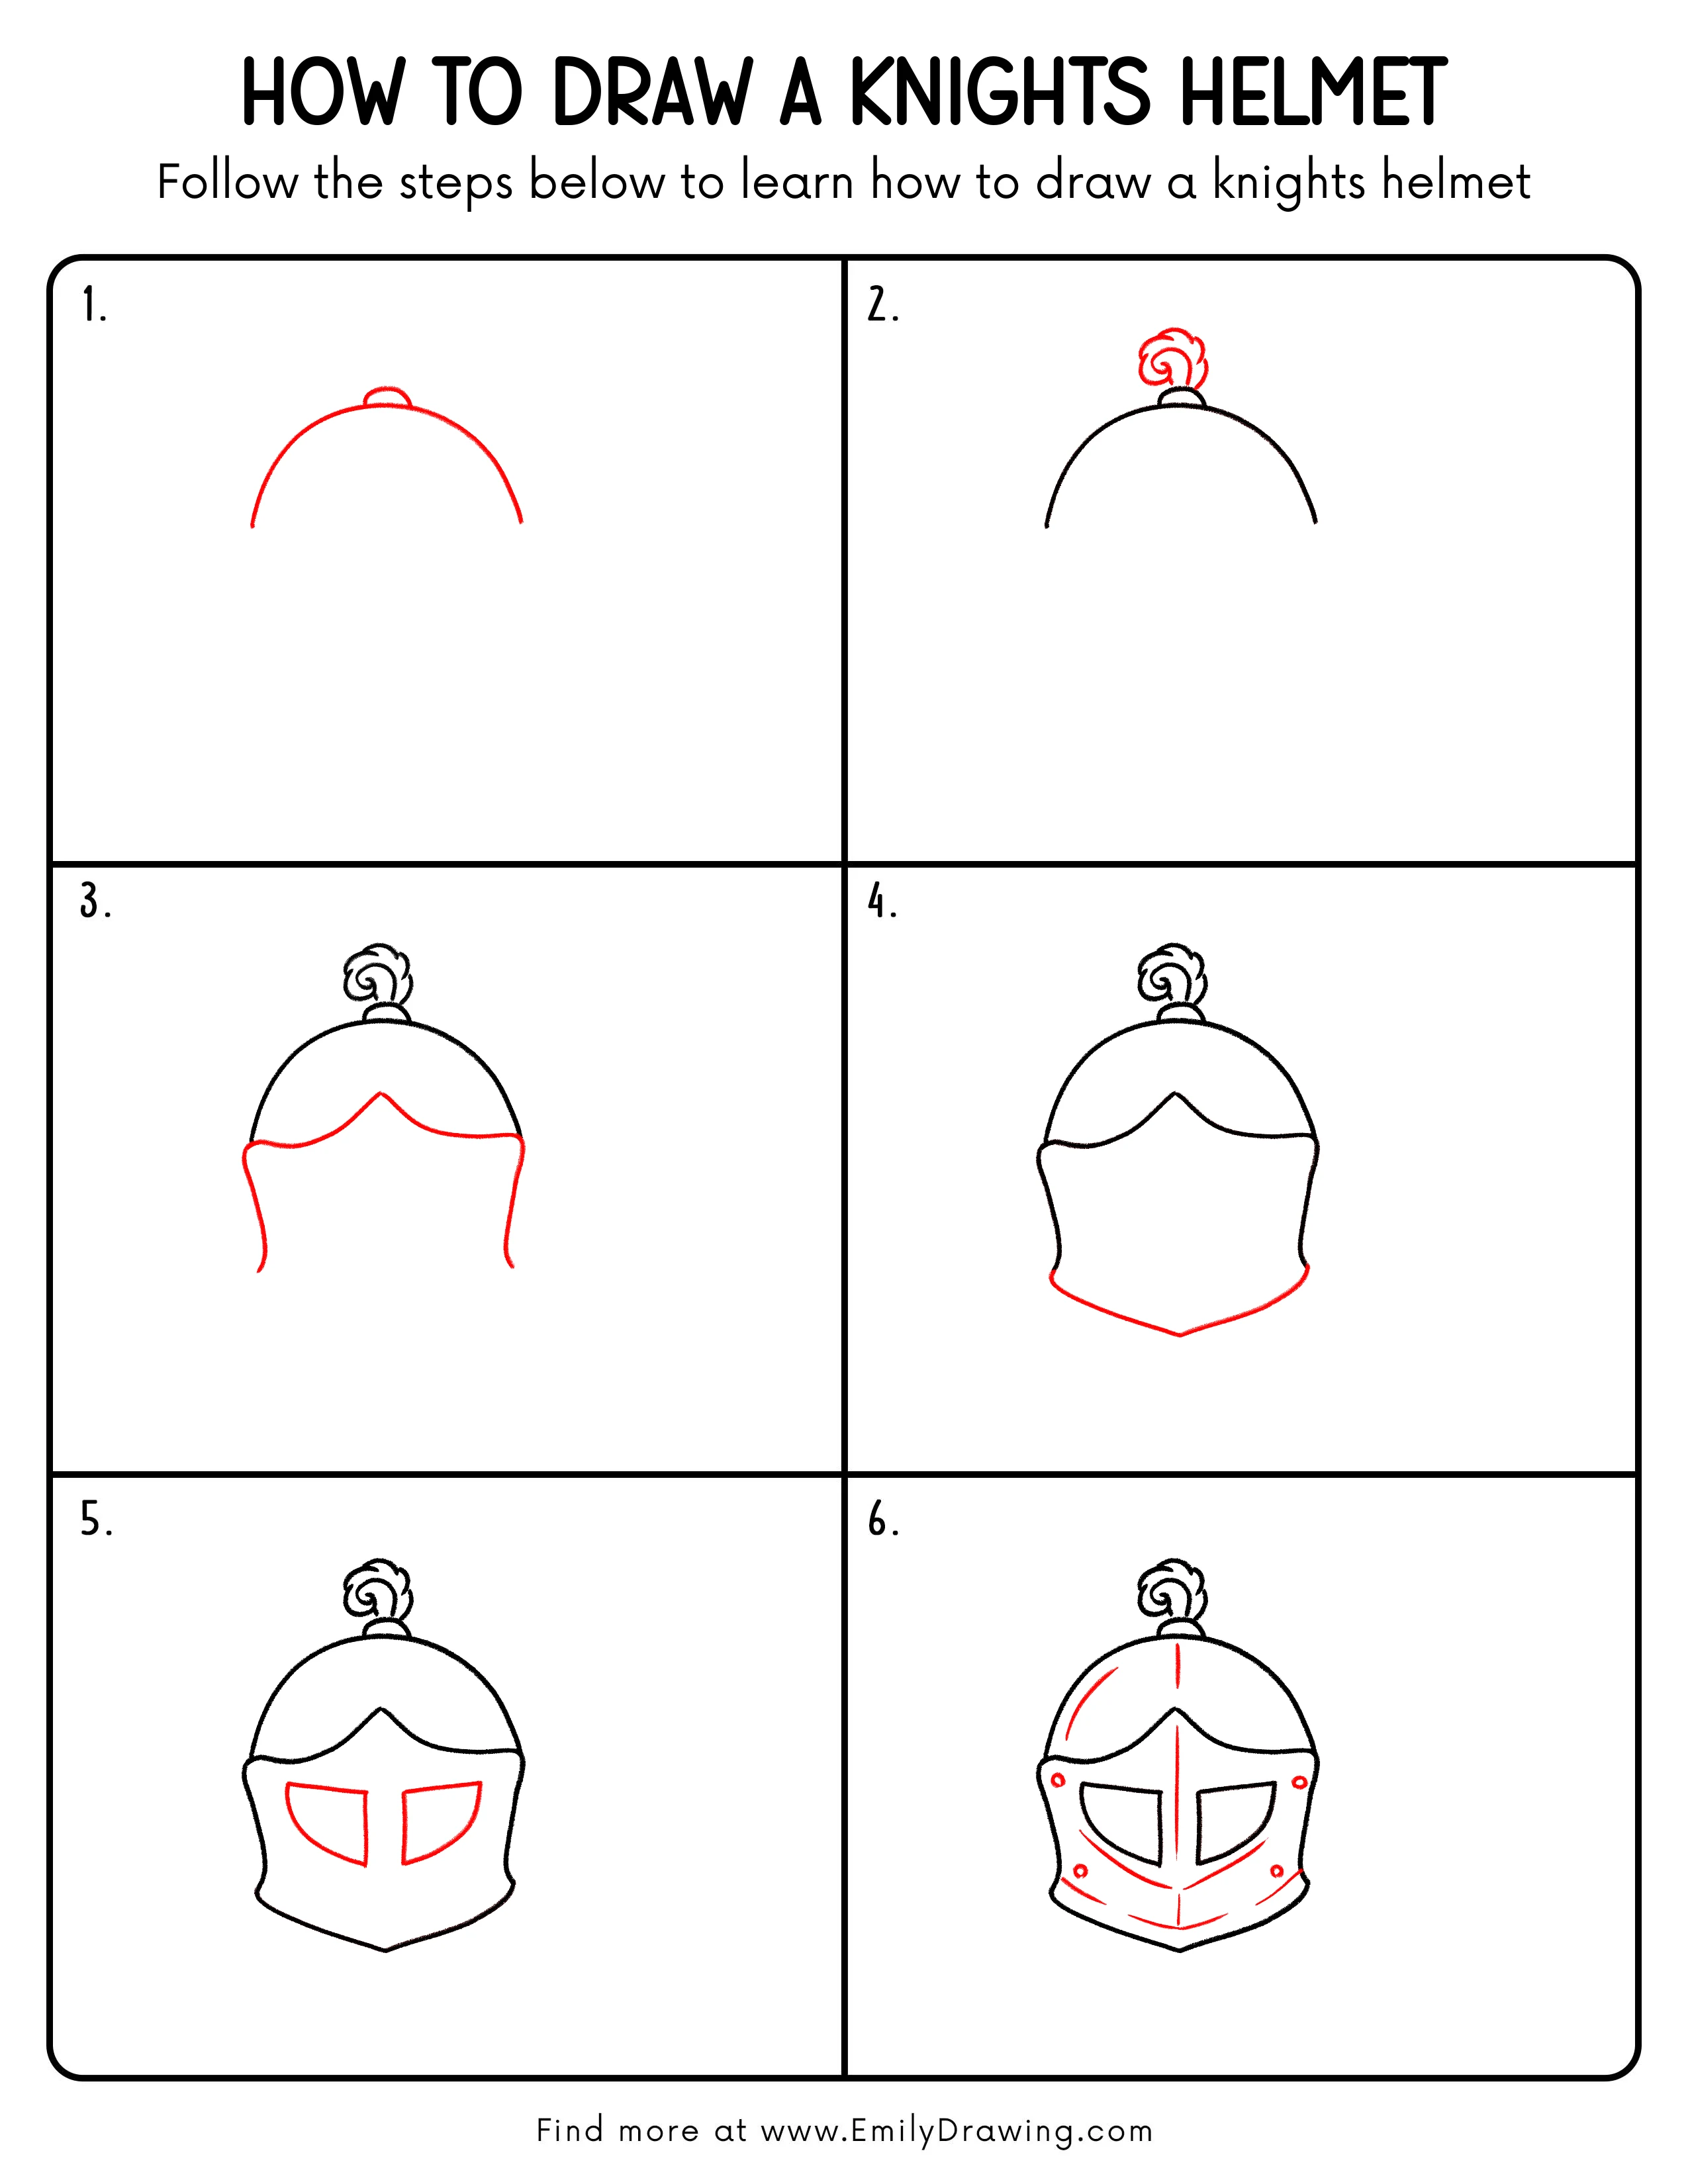
FREE Download Printable Knights Helmet Drawing Tutorial
Frequently Asked Questions
Is this knight’s helmet drawing good for beginners?
Yes. This easy drawing tutorial uses simple curves, points, and repeated shapes, making it friendly for beginners.
How can I make the helmet look more realistic?
Add small shadows under the visor, inside the eye openings, and along the curved metal edges.
Can I change the feather plume?
Yes. You can make the plume taller, shorter, smoother, or spikier to create your own knight helmet design.