In this easy drawing tutorial, you will learn how to draw jeans step by step. This guide is made for beginners, using simple shapes, smooth lines, and small clothing details.
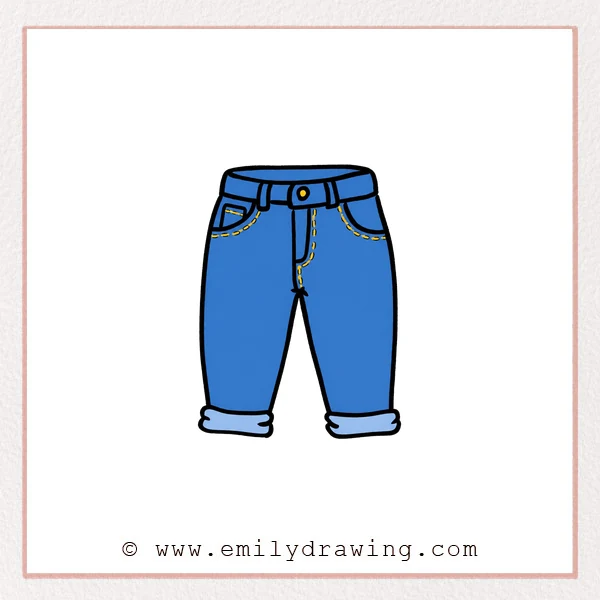
Take your time with each part of the jeans. The waistband, pockets, stitching, and rolled cuffs will help the drawing look complete.
What You Will Need
- A pencil
- An eraser
- Drawing paper
- A black marker or pen
- Colored pencils or crayons, if you want to color your jeans
Here are my RECOMMENDED Art Supplies!
- Crayola Coloring Set (140 Pieces – Mega Value!)
- 24 Colored Crayon Set
- A4 Printer Paper
- Crayola Coloring Pencils
- HP Home Printer with Instant Ink!
Time needed:
10 minutes.
Step-by-Step Drawing Guide
Step 1: Draw the Jeans Waistband
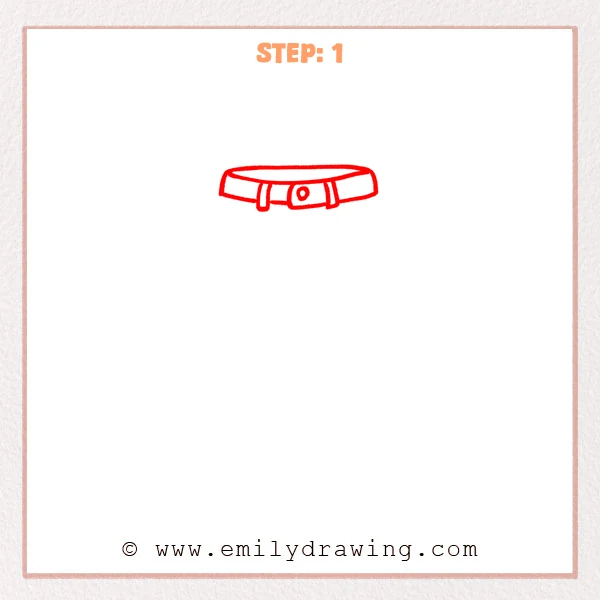
Start with a flat oval shape for the waist opening. Then add a wide waistband below it, with a few small belt loops and a center button tab.
Pro Tip: Keep both sides of the oval balanced so the waistband looks steady.
[Alt Text: A beginner sketch of jeans starting with the waistband, belt loops, and center button detail.]
Step 2: Draw the Outer Leg Lines
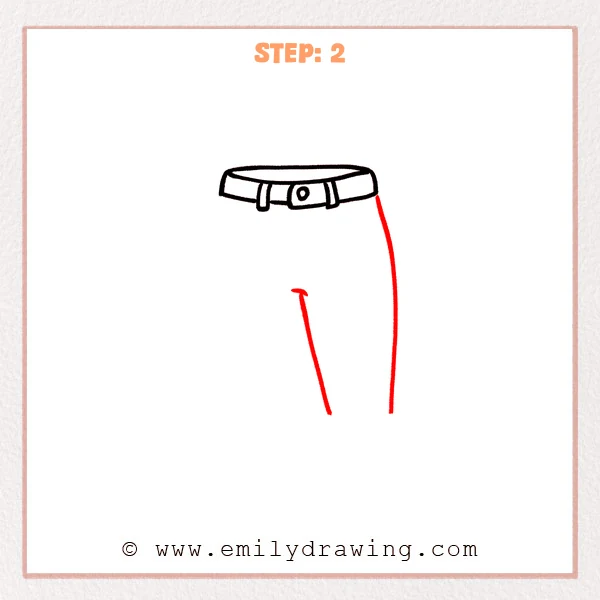
From the right side of the waistband, draw a long curved line downward for the outer edge of the jeans. Then add a slanted line near the middle to begin showing the inner leg direction.
Pro Tip: Let the outer line curve outward slightly so the pant leg looks natural.
[Alt Text: A beginner sketch of jeans refined with long leg guide lines added below the waistband.]
Step 3: Complete the Other Leg Lines
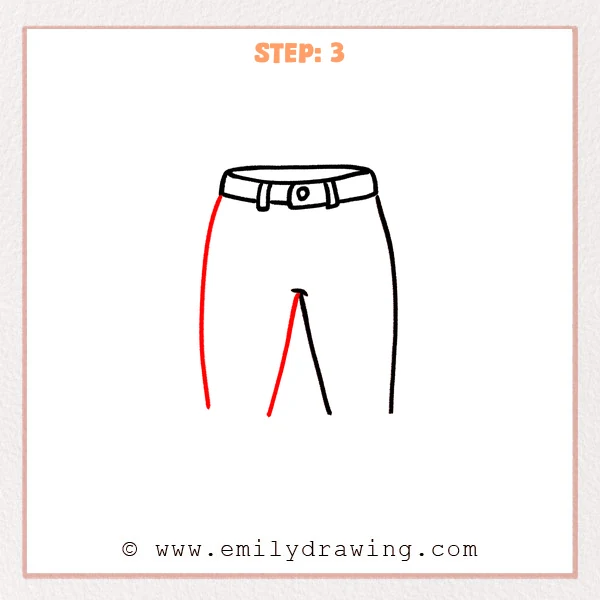
From the left side of the waistband, draw a long curved line downward for the outer edge of the left leg. Then add a slanted line from the crotch area to make the leg separation clearer.
Pro Tip: Keep the two outer lines close in length so the jeans look balanced.
[Alt Text: A beginner sketch of jeans refined with the second outer leg line and clearer inner leg separation.]
Step 4: Add the Pockets and Fly Details

Draw curved front pockets under the waistband on both sides, using dashed lines for stitching. Then add the zipper fly in the center with small dashed stitches to give the jeans more detail.
Pro Tip: Keep the pocket curves close under the waistband so they look like real jeans.
[Alt Text: A beginner sketch of jeans refined with front pockets, dashed stitching, and a center zipper fly detail.]
Step 5: Draw the Rolled Cuff on the Left Leg
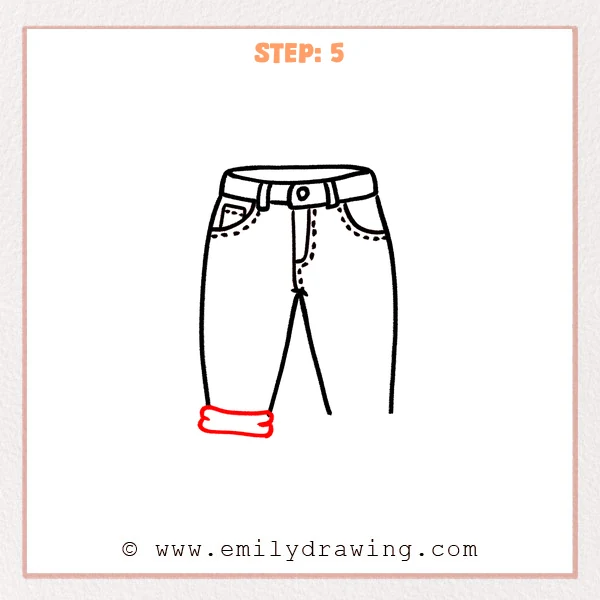
At the bottom of the left pant leg, draw a rounded horizontal band for the rolled cuff. Add small curved folds at both ends so the fabric looks gently turned up.
Pro Tip: Make the cuff slightly wider than the leg so the rolled edge stands out.
[Alt Text: A beginner sketch of jeans refined with a rolled cuff added to the bottom of the left pant leg.]
Step 6: Draw the Rolled Cuff on the Right Leg
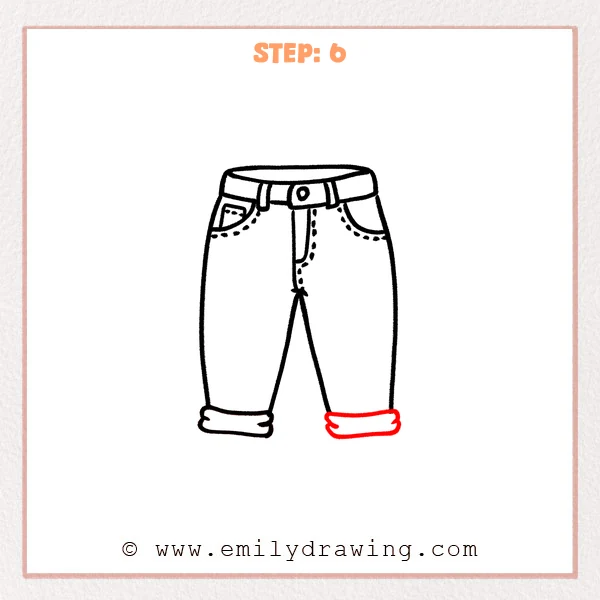
At the bottom of the right pant leg, draw another rounded horizontal band to match the left cuff. Add small curved folds at both ends so the right fabric also looks turned up.
Pro Tip: Keep both cuffs at a similar height so the jeans look neat overall.
[Alt Text: A beginner sketch of jeans refined with matching rolled cuffs on both pant legs.]
Step 7: Color in your drawing!
Fun Facts
- Jeans were first made as strong work pants because denim is a durable fabric.
- The small pocket inside many jeans is often called a coin pocket.
- Stitching is an important part of jeans because it helps hold the fabric together and adds style.
Pin it now, Draw later!
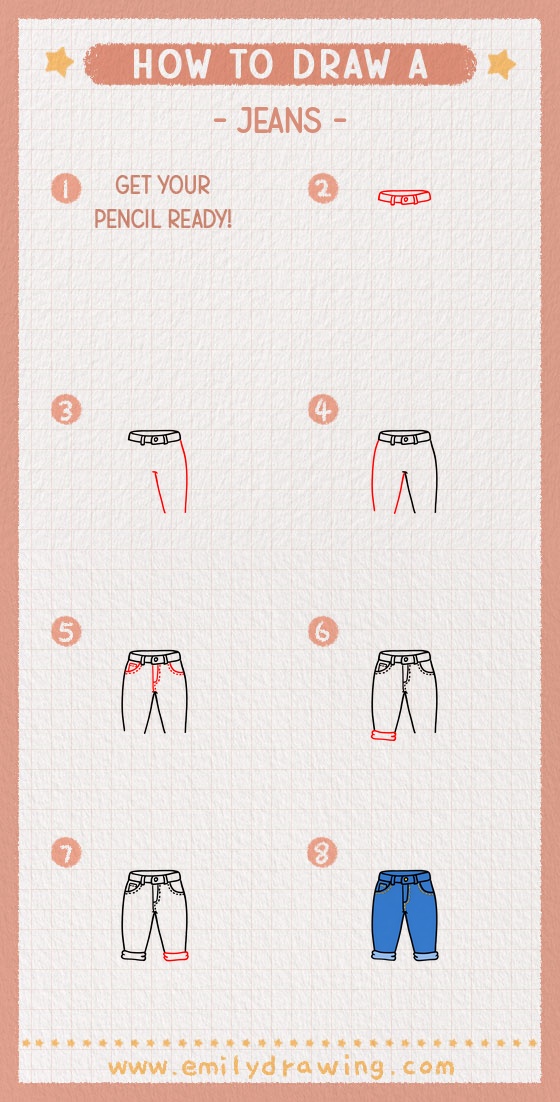
Now you know how to draw jeans using a simple step by step drawing process. You started with the waistband, shaped the legs, added pockets and stitching, then finished with rolled cuffs.
To complete your drawing, trace the final lines with a marker and erase any extra pencil marks. You can color the jeans blue, black, gray, or any fun denim shade you like.
Keep practicing this drawing for beginners, and try changing the pocket shapes or cuff size next time.
Get the FREE Printable Drawing Guide

FREE Download Printable Jeans Drawing Tutorial
Frequently Asked Questions
Is this jeans drawing tutorial good for beginners?
Yes. This easy drawing tutorial uses basic lines, curves, and simple clothing details, making it friendly for beginners.
How can I make my jeans drawing look more realistic?
Add small dashed stitches, curved pocket lines, and gentle folds near the cuffs. These details help the jeans look more like real denim.
What color should I use for the jeans?
Blue is a classic choice, but you can also use black, gray, light blue, or any color you like.