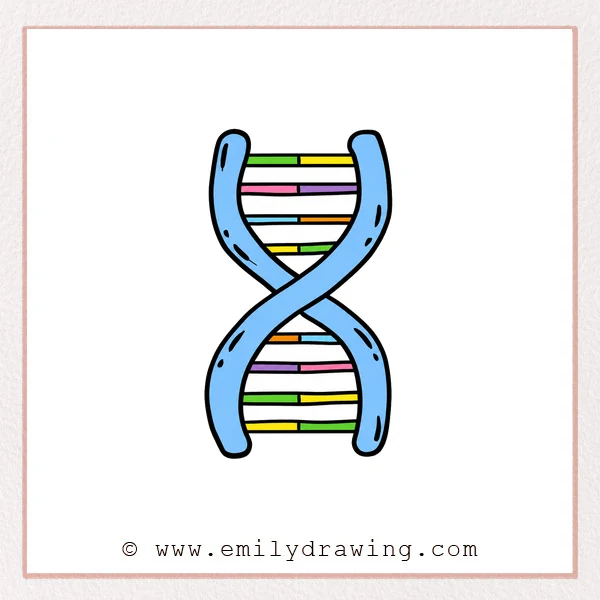
Learn how to draw DNA as a clear twisting double helix. This drawing for beginners uses smooth ribbon shapes and evenly spaced connecting base pairs.
What You Will Need
- Drawing paper
- Pencil and eraser
- Black pen or marker
Here are my RECOMMENDED Art Supplies!
- Crayola Coloring Set (140 Pieces – Mega Value!)
- 24 Colored Crayon Set
- A4 Printer Paper
- Crayola Coloring Pencils
- HP Home Printer with Instant Ink!
Time needed:
19 minutes.
Step-by-Step Drawing Guide
Step 1: Start the Left Strand
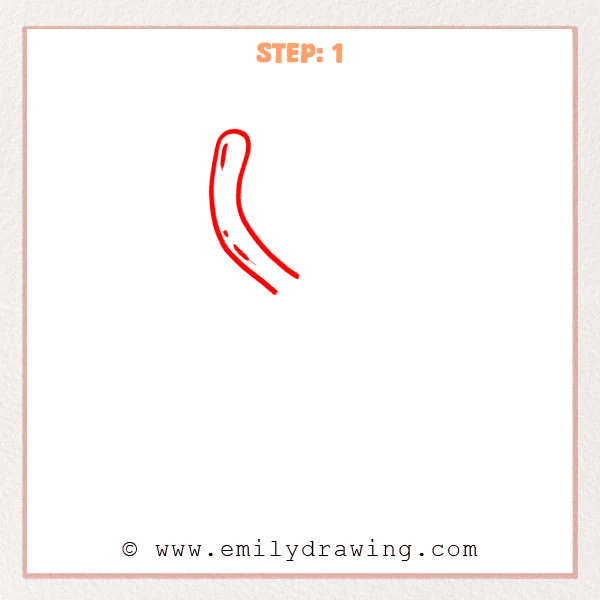
Draw a thick curved ribbon beginning at the upper left. Round its top and sweep both edges diagonally toward the center.
Pro Tip: Keep both ribbon edges parallel for consistent thickness.
Step 2: Add the Upper Right Strand
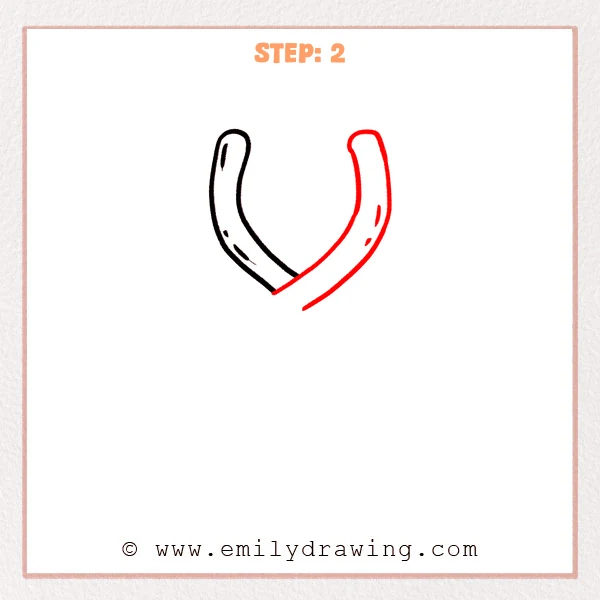
Draw a matching ribbon rising from the central crossing toward the upper right. Round its top and add a few small highlight marks.
Pro Tip: Match the height and width of both upper ribbon ends.
Step 3: Extend the First Strand Downward
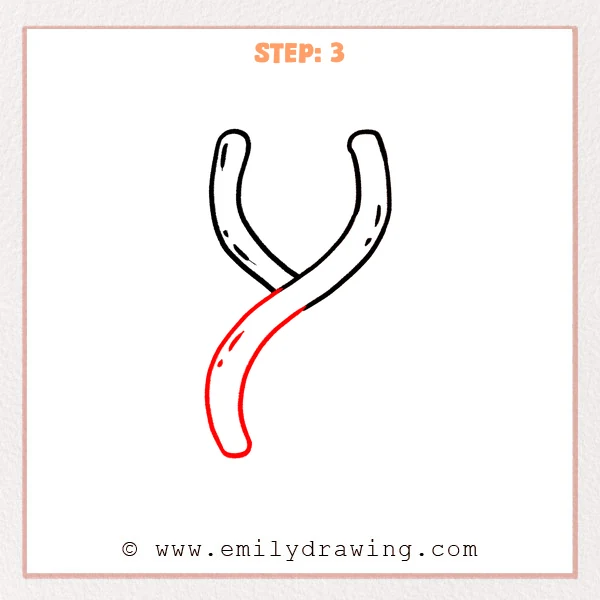
Continue the right upper strand across the center and toward the lower left. Curve it outward before rounding its bottom end.
Pro Tip: Make the central overlap narrow and clearly defined.
Step 4: Complete the Second Strand
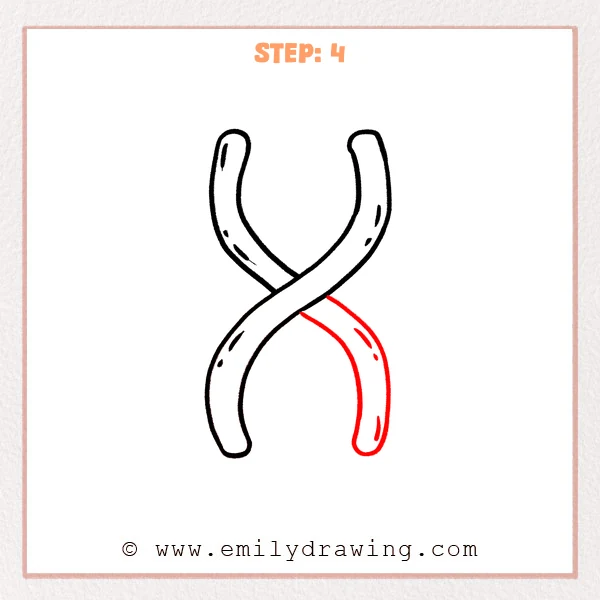
Continue the remaining strand across the center toward the lower right. Round its bottom and preserve the same ribbon thickness.
Pro Tip: Balance the lower curves with the open shapes above them.
Step 5: Add the Upper Base Pairs
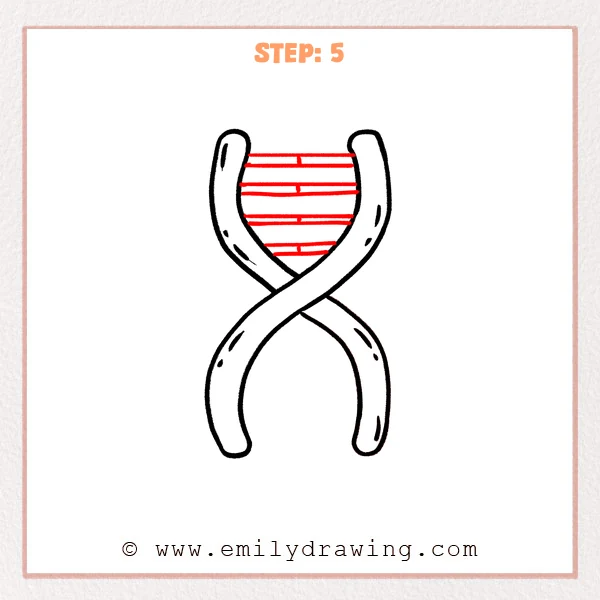
Connect the upper strands with several pairs of horizontal lines. Divide each narrow rung near its center with a short vertical mark.
Pro Tip: Shorten the rungs gradually as the strand gap narrows.
Step 6: Finish the Lower Base Pairs
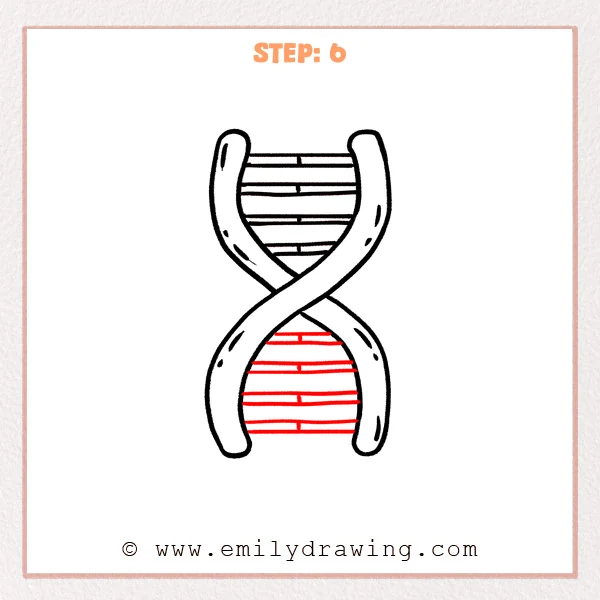
Fill the lower opening with more paired horizontal rungs. Add a small center divider to each one and follow the changing width.
Pro Tip: Space the lower rungs as evenly as those above.
Step 7: Color in your drawing!
Fun Facts
- DNA stands for deoxyribonucleic acid.
- Its double-helix structure resembles a twisted ladder.
- DNA stores genetic instructions used by living organisms.
Pin it now, Draw later!
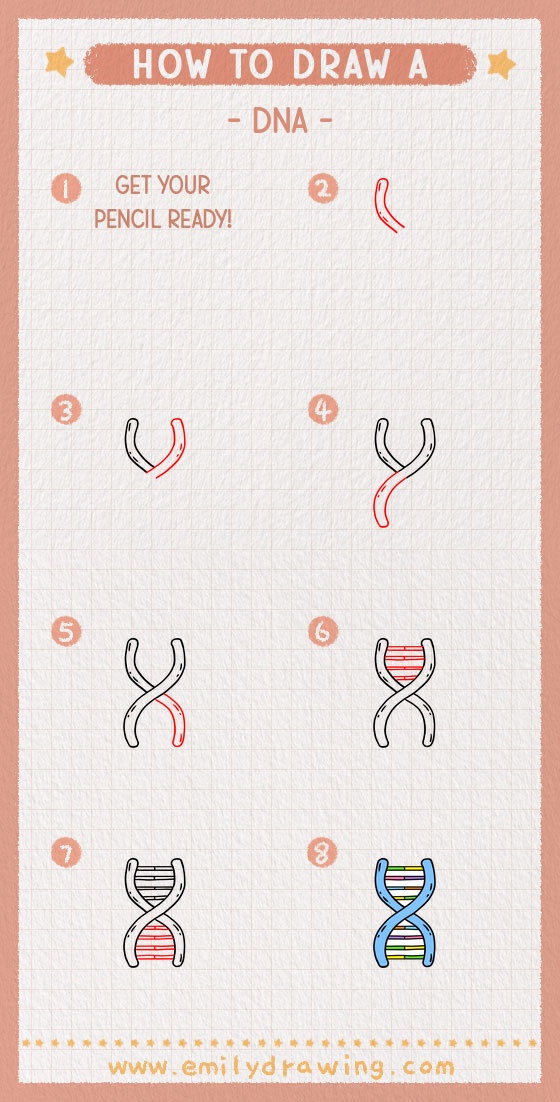
Erase hidden overlap lines and strengthen the outer ribbons and rungs. Your easy DNA drawing is complete, so add contrasting colors to distinguish the two strands and base pairs.
Get the FREE Printable Drawing Guide
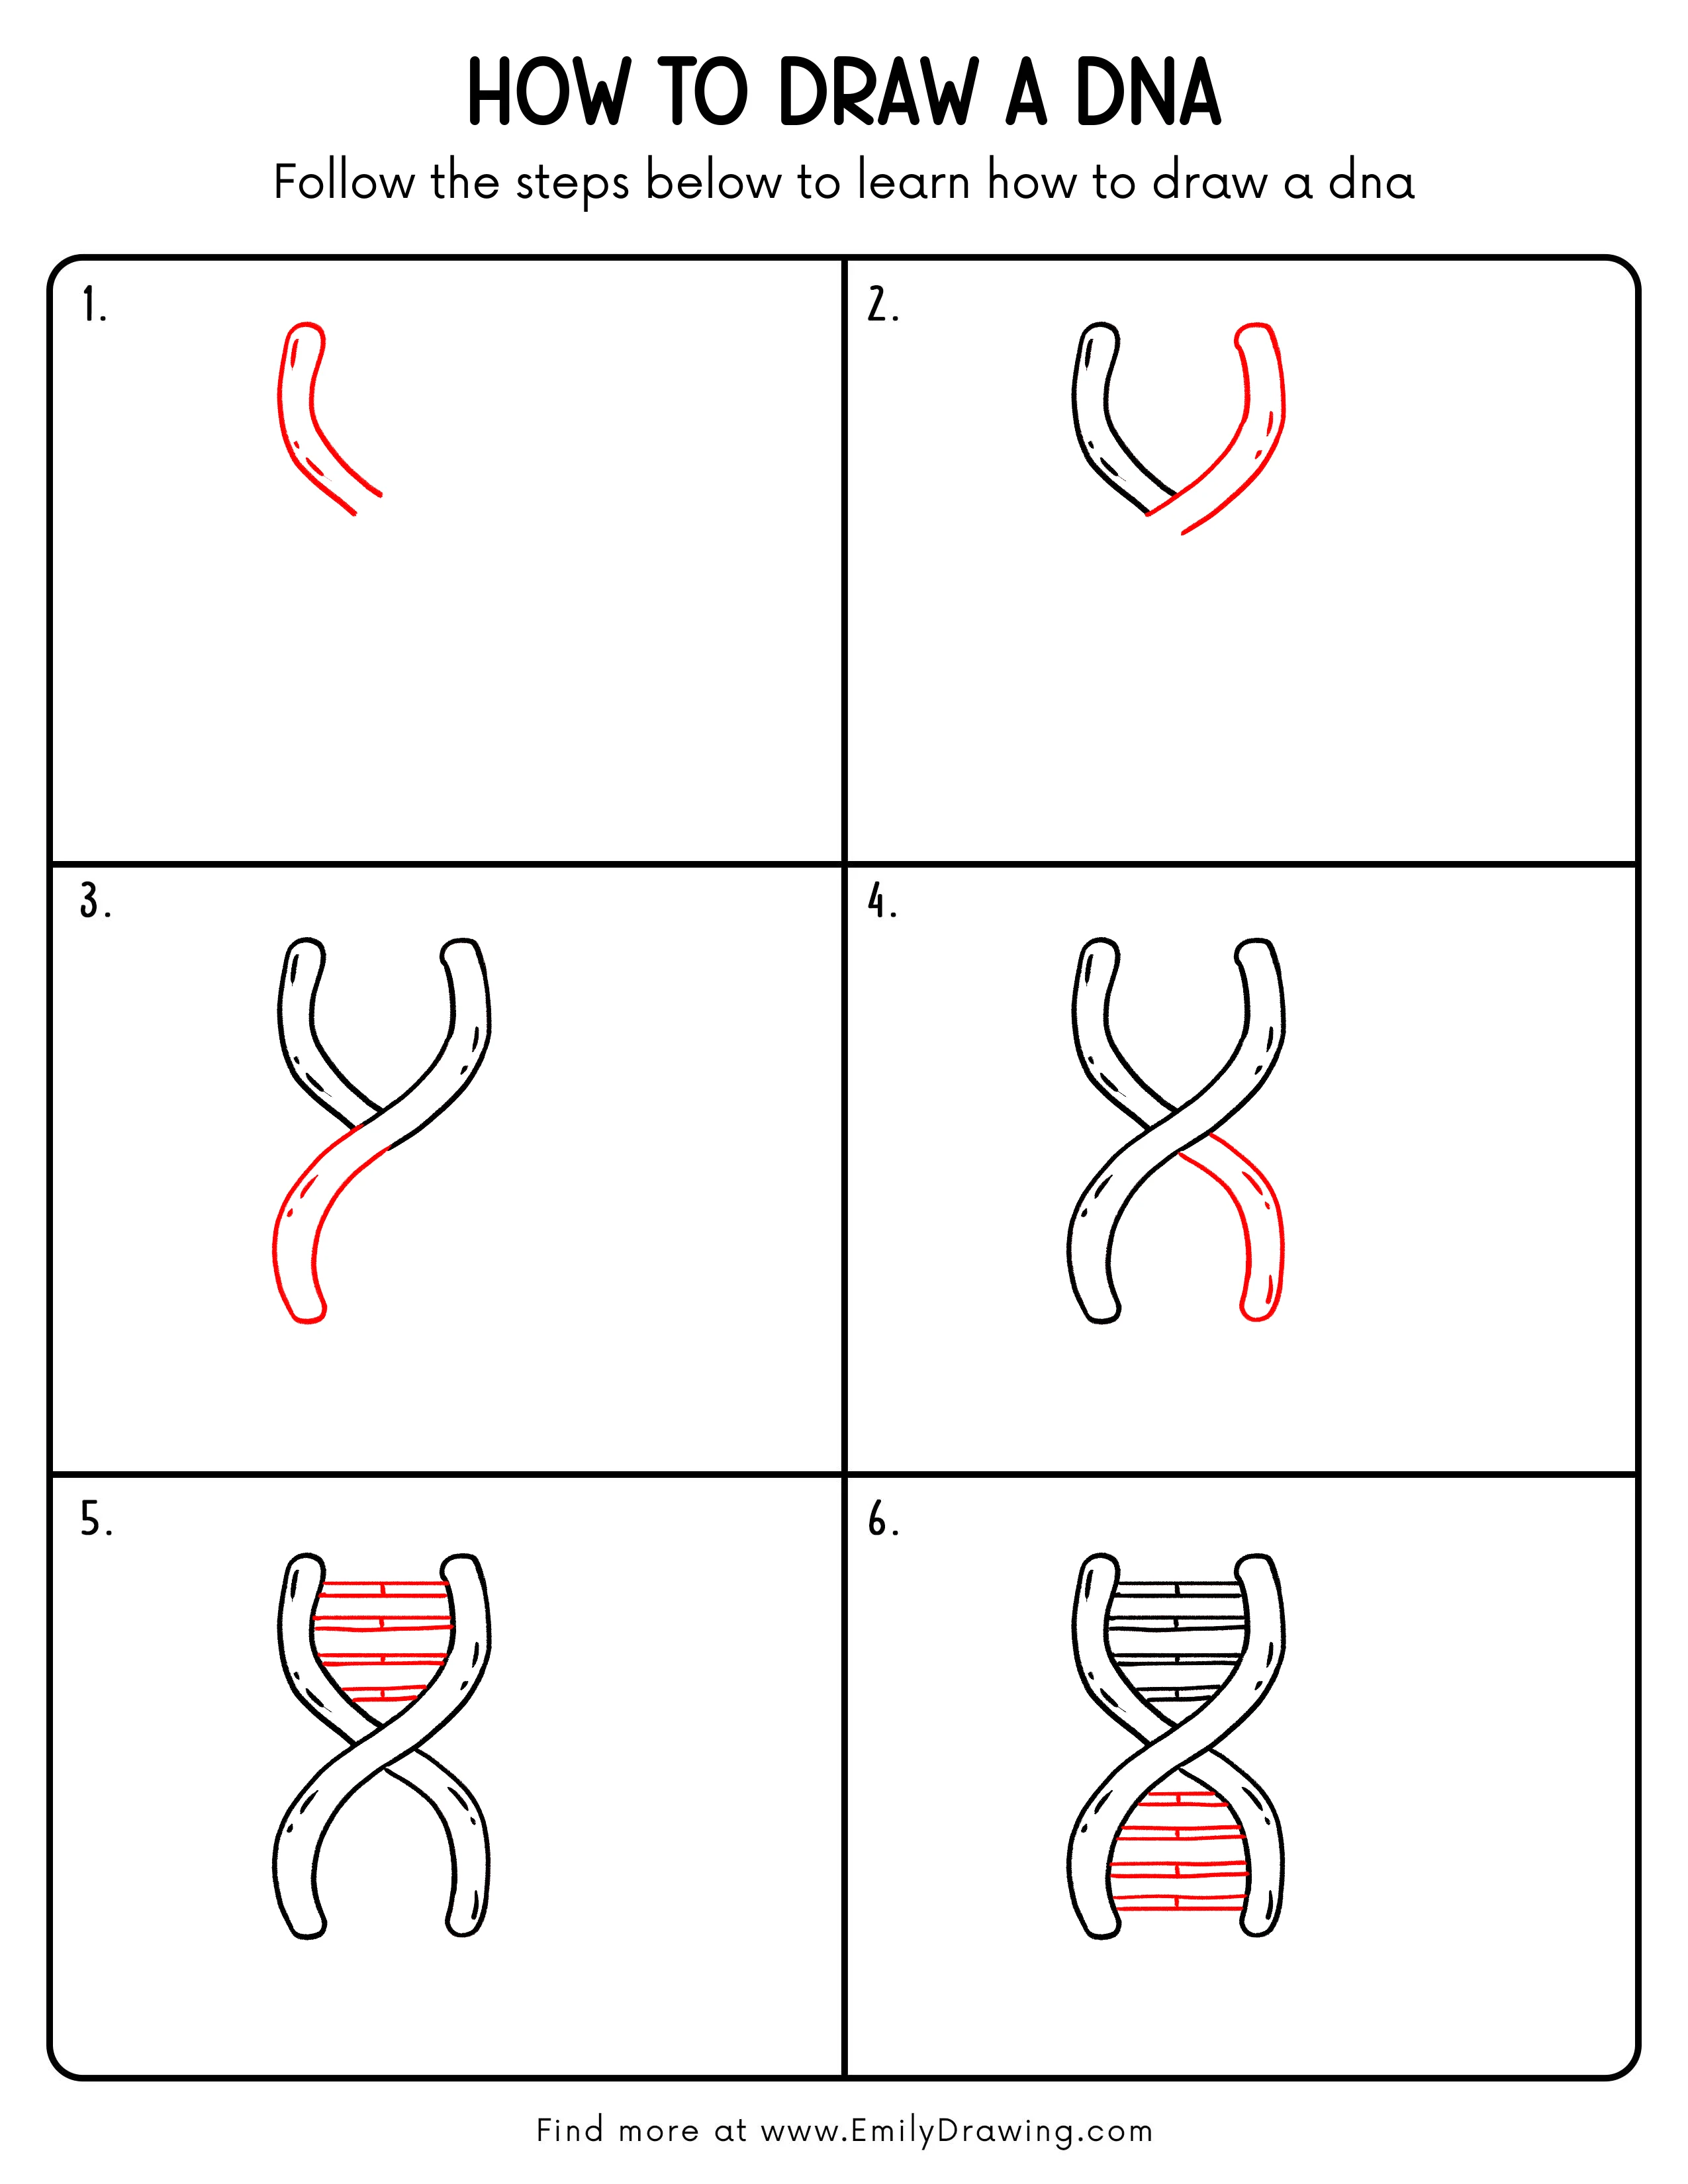
FREE Download Printable Dna Drawing Tutorial
Frequently Asked Questions
How do I keep both strands equally thick?
Draw one edge first, then follow it at a consistent distance.
Why do the horizontal rungs change length?
The visible gap narrows and widens as the helix twists.
Can I use different colors for the base pairs?
Yes, varied colors can make the repeating pairs easier to see.