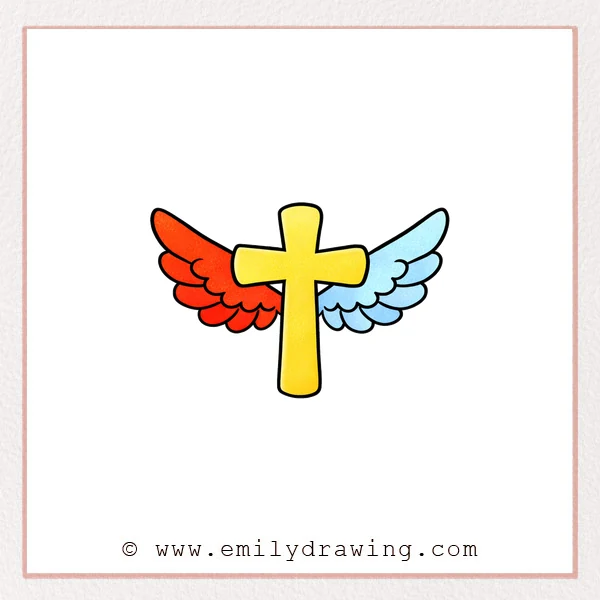
This easy drawing tutorial shows how to draw a cross with wings step by step. It is a calm, simple drawing for beginners, using rounded shapes that are easy to correct.
What You Will Need
- Pencil
- Eraser
- Black marker or pen
- Paper
- Colored pencils or markers (optional)
Here are my RECOMMENDED Art Supplies!
- Crayola Coloring Set (140 Pieces – Mega Value!)
- 24 Colored Crayon Set
- A4 Printer Paper
- Crayola Coloring Pencils
- HP Home Printer with Instant Ink!
Time needed:
27 minutes.
Step-by-Step Drawing Guide
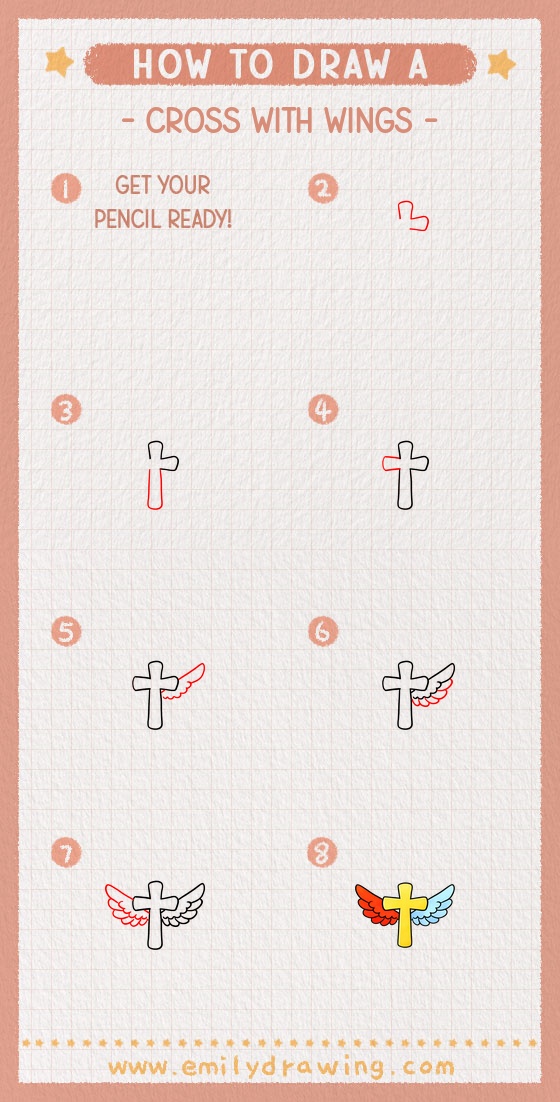
Step 1: Sketch the Basic Cross Shape
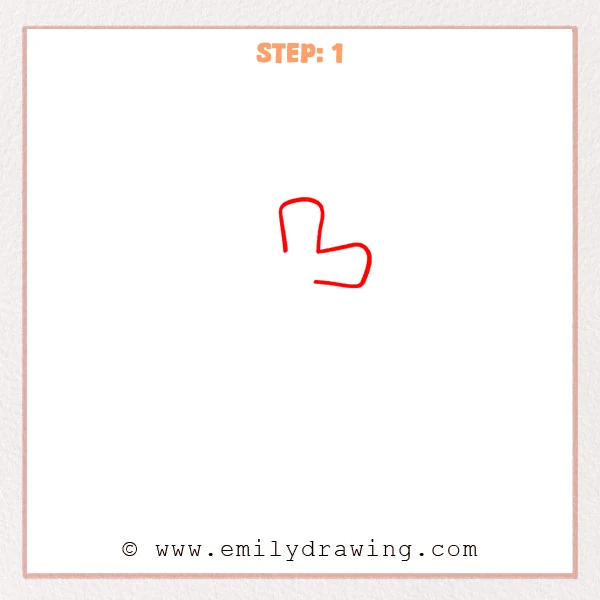
Start with one rounded outline to form a simple cross. Make the top arm taller, and let the right arm extend outward a bit, keeping all corners soft and curved.
Pro Tip: Draw lightly first—rounded corners feel gentle and are easier to adjust.
Step 2: Extend the Vertical Arm
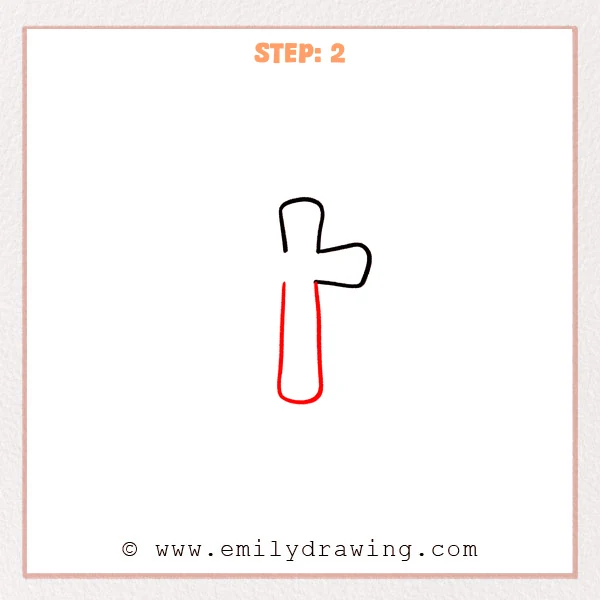
From just below the side arm, add two slightly inward lines going downward to lengthen the cross. Close the bottom with a smooth rounded curve, like the end of a capsule.
Pro Tip: Keep both sides symmetrical and the bottom curve smooth for a steady shape.
Step 3: Add the Left Arm and Match the Proportions
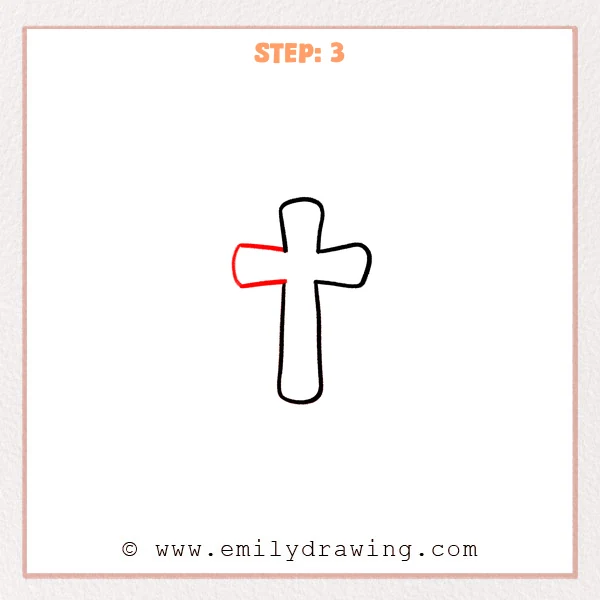
On the left side of the center, add a rounded horizontal arm to match the thickness of the right one. Close the left end with a soft curve, keeping the length moderate for a balanced look.
Pro Tip: Compare the width to the right arm before drawing so both sides match.
Step 4: Add a Wing on the Right Side
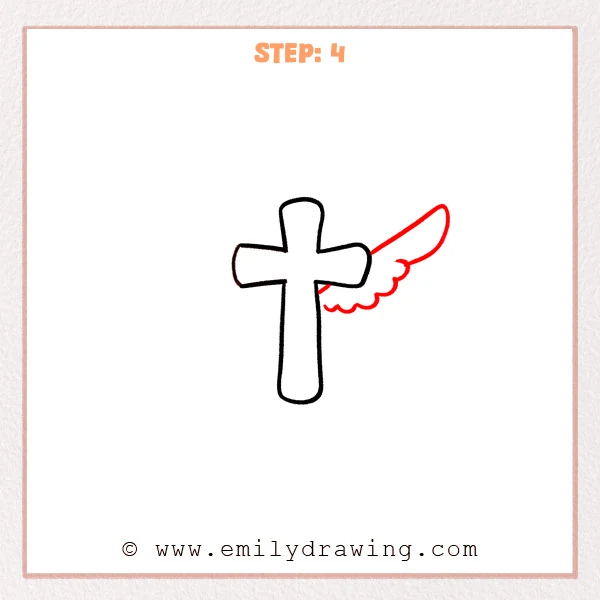
Starting at the outer edge of the right arm, draw a long curved line sweeping up and outward to form the wing’s outline. Along the lower edge, add small scalloped bumps for layered feathers, then place a small inner curve near the base for a second feather layer.
Pro Tip: Keep the wing’s base close to the cross so it feels attached.
Step 5: Add a Second Layer of Feathers
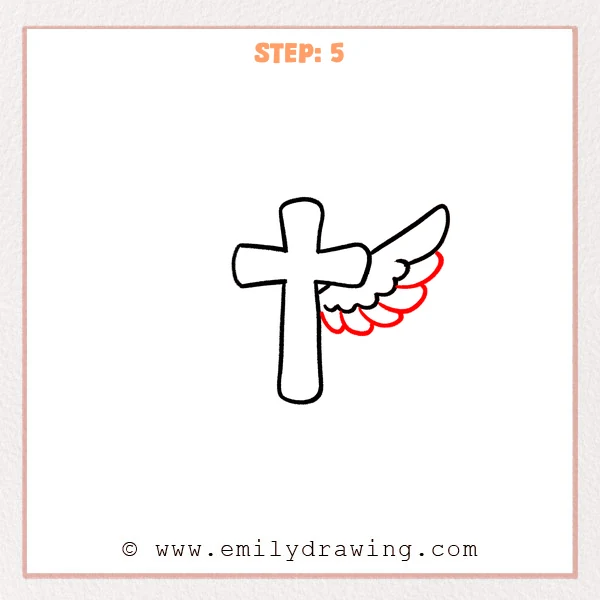
Under the wing, add a row of larger rounded bumps, like scallops, to build a thicker feather layer. Then place a few curved divider lines inside the upper feathers, following the wing’s direction to show depth.
Pro Tip: Keep the scallops similar in size so the feather layer looks neat.
Step 6: Draw the Matching Wing on the Left
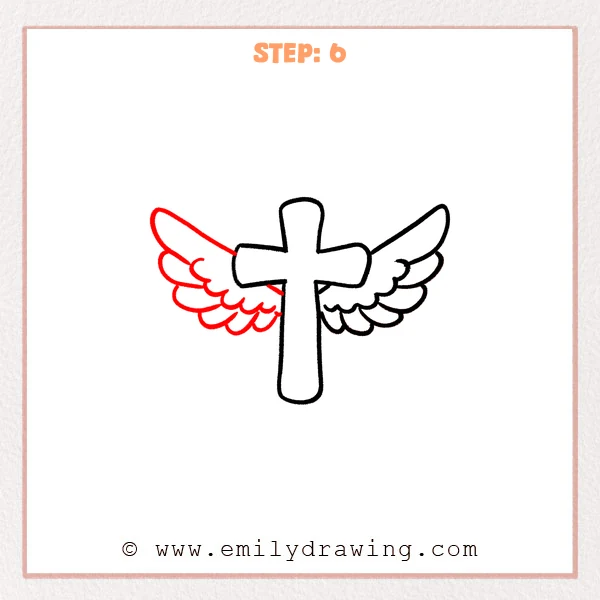
From the outer edge of the left arm, sketch a long curved outline sweeping up and outward, similar in size to the right wing. Add the same scalloped feather bumps along the bottom, then place a few curved divider lines to match the layered look.
Pro Tip: Mark the highest point first, then connect back to the base for symmetry.
Step 7: Color in your drawing!
Fun Facts
- Wings in art often symbolize protection, hope, or guidance.
- A simple wing shape can look detailed just by adding layered feather curves.
- Rounded corners make symbols feel softer and more friendly to draw.
Pin it now, Draw later!
You now have a clean, balanced winged cross with layered feathers. Try tracing the final outline with a black pen, then erase any extra pencil marks for a crisp finish. For coloring, shade the underside of each feather slightly darker, and keep the top edges lighter to show a gentle glow.
A common beginner mistake is making one wing much higher or longer than the other. If that happens, lightly adjust the tallest point first, then smooth the outer curve to match.
Keep practicing this step by step drawing, and try changing wing sizes or feather counts next time. If you would like, draw another symbol in the same rounded style to build confidence.
Get the FREE Printable Drawing Guide
FREE Download Printable Cross With Wings Drawing Tutorial
Frequently Asked Questions
How do I keep both wings the same size?
Lightly mark the highest point of each wing first, then match the length before you darken lines.
What if my feathers look messy?
Use fewer, larger scallops at first, and keep each curve smooth and simple.
Can I make this an easy drawing for beginners with color?
Yes—use two shades for the wings, and add a soft shadow on one side of the cross.