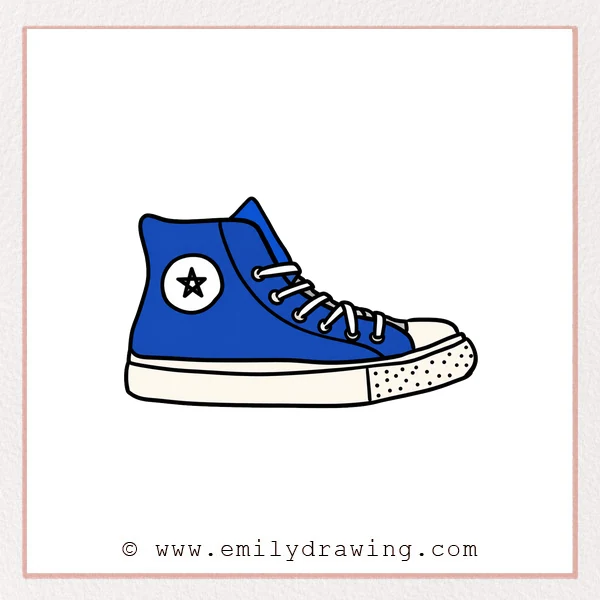
Learn how to draw a classic high-top converse sneaker with laces, a star patch, and a thick rubber sole. This easy tutorial helps beginners practice curved outlines, overlapping lines, small circular details, and simple textures.
What You Will Need
- Drawing paper
- Pencil and eraser
- Black marker or colored pencils
Here are my RECOMMENDED Art Supplies!
- Crayola Coloring Set (140 Pieces – Mega Value!)
- 24 Colored Crayon Set
- A4 Printer Paper
- Crayola Coloring Pencils
- HP Home Printer with Instant Ink!
Time needed:
20 minutes.
Step-by-Step Drawing Guide
Step 1: Sketch the Shoe Outline
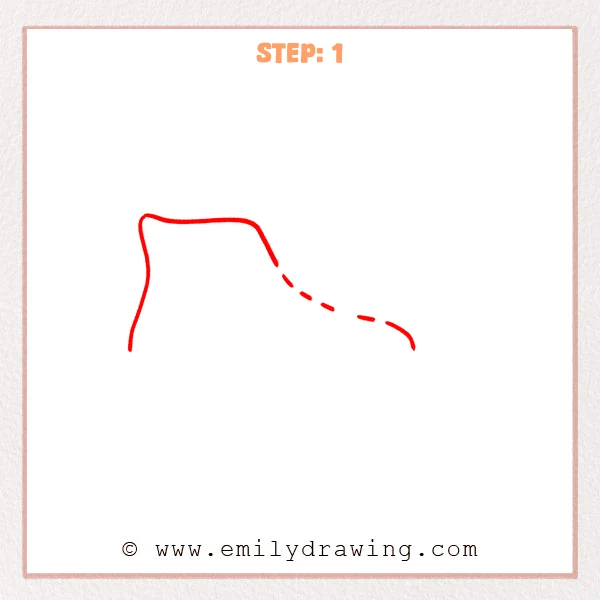
Draw the tall back and gently curved top edge of the high-top shoe. Continue with a sloping front edge, using short guide marks to place the instep and rounded toe.
Pro Tip: Make the back taller than the toe so the high-top shape is immediately clear.
Step 2: Add the Tongue and Laces
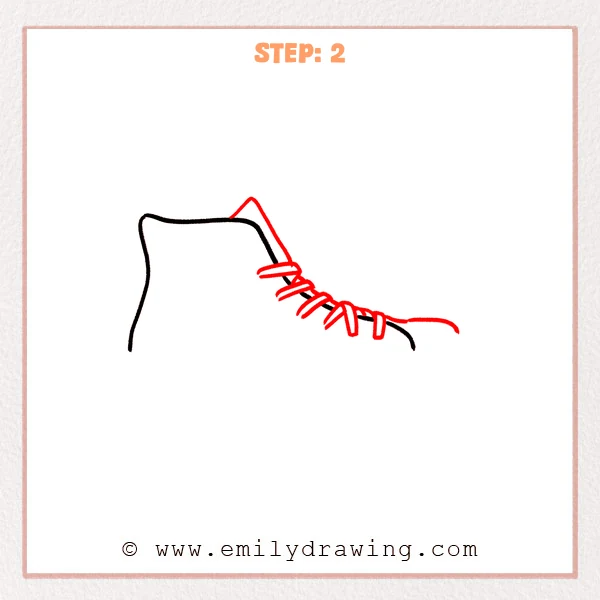
Draw a long narrow tongue rising behind the front of the shoe. Add several pairs of crossing lace bands down the sloped opening, finishing with two short hanging ends near the toe.
Pro Tip: Space the lace crossings evenly and make them gradually smaller toward the toe.
Step 3: Draw the Eyelets and Side Seam
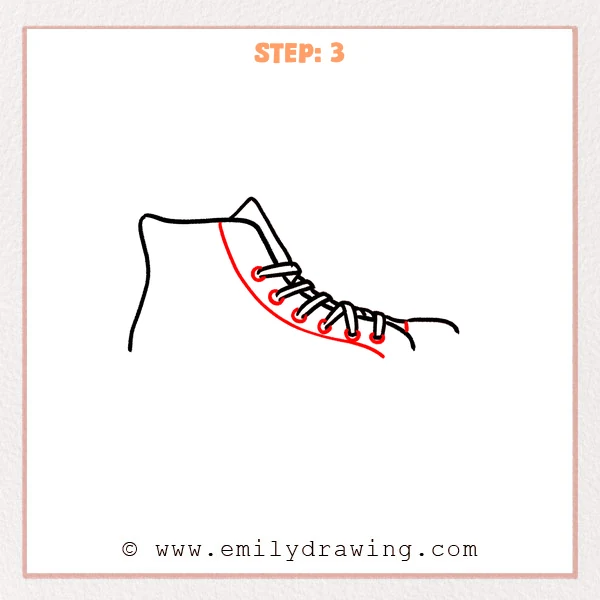
Place a small curved eyelet around each point where a lace enters the shoe. Add a long curved seam from the upper edge toward the toe to separate the side panel from the lace panel.
Pro Tip: Center every lace end inside its eyelet so the fastening looks believable.
Step 4: Add the Star Patch
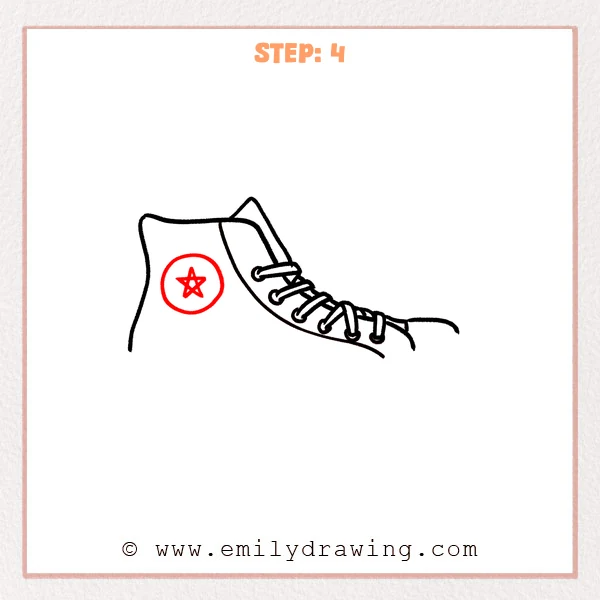
Draw a large circle on the ankle area of the shoe. Place a simple five-point star in the middle of the circle.
Pro Tip: Sketch the star lightly before tracing it so all five points fit inside the patch.
Step 5: Build the Rubber Sole
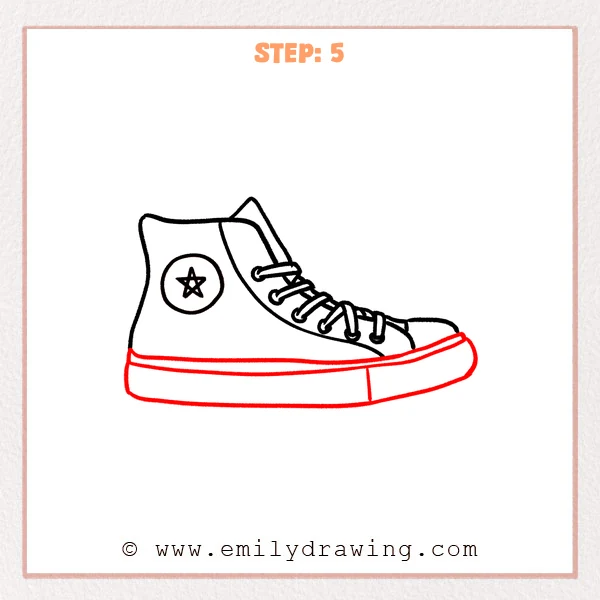
Draw a long curved line beneath the entire shoe, rounding it upward around the toe and closing it at the heel. Add a parallel stripe near the top of the sole and a short divider line across the toe section.
Pro Tip: Keep the sole an even thickness from heel to toe for a sturdy appearance.
Step 6: Texture the Toe Bumper
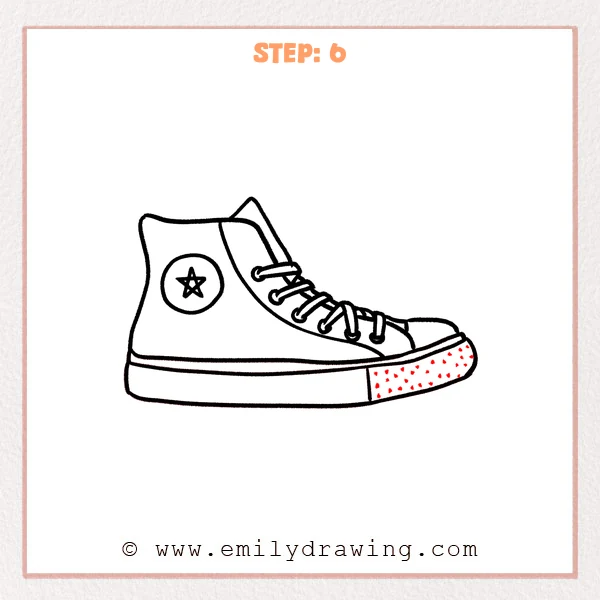
Fill the front section of the rubber sole with many tiny irregular dots. Leave small gaps between the marks so the textured area remains easy to read.
Pro Tip: Vary the dot positions while keeping them inside the toe bumper outline.
Step 7: Color in your drawing!
Fun Facts
- High-top sneakers extend above the ankle and were originally designed to provide extra support.
- Metal eyelets protect the fabric holes through which shoelaces pass.
- Rubber toe caps and soles help protect canvas shoes from wear.
Pin it now, Draw later!
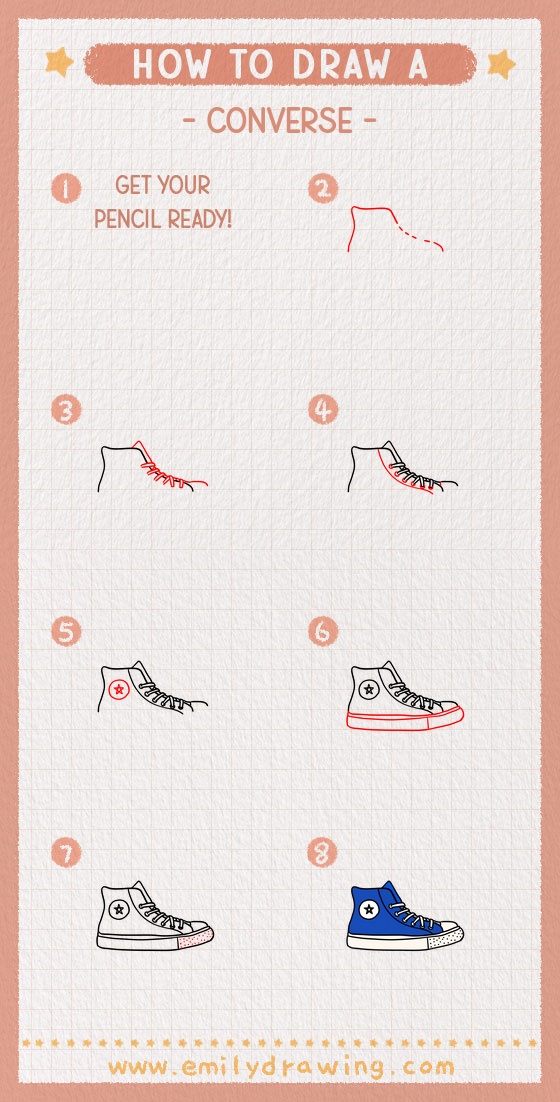
Erase unused guides, darken the clean outline, and color the canvas upper while leaving the rubber sole lighter. Your converse drawing is complete, so try creating a second shoe or adding your own pattern to the side panels.
Get the FREE Printable Drawing Guide
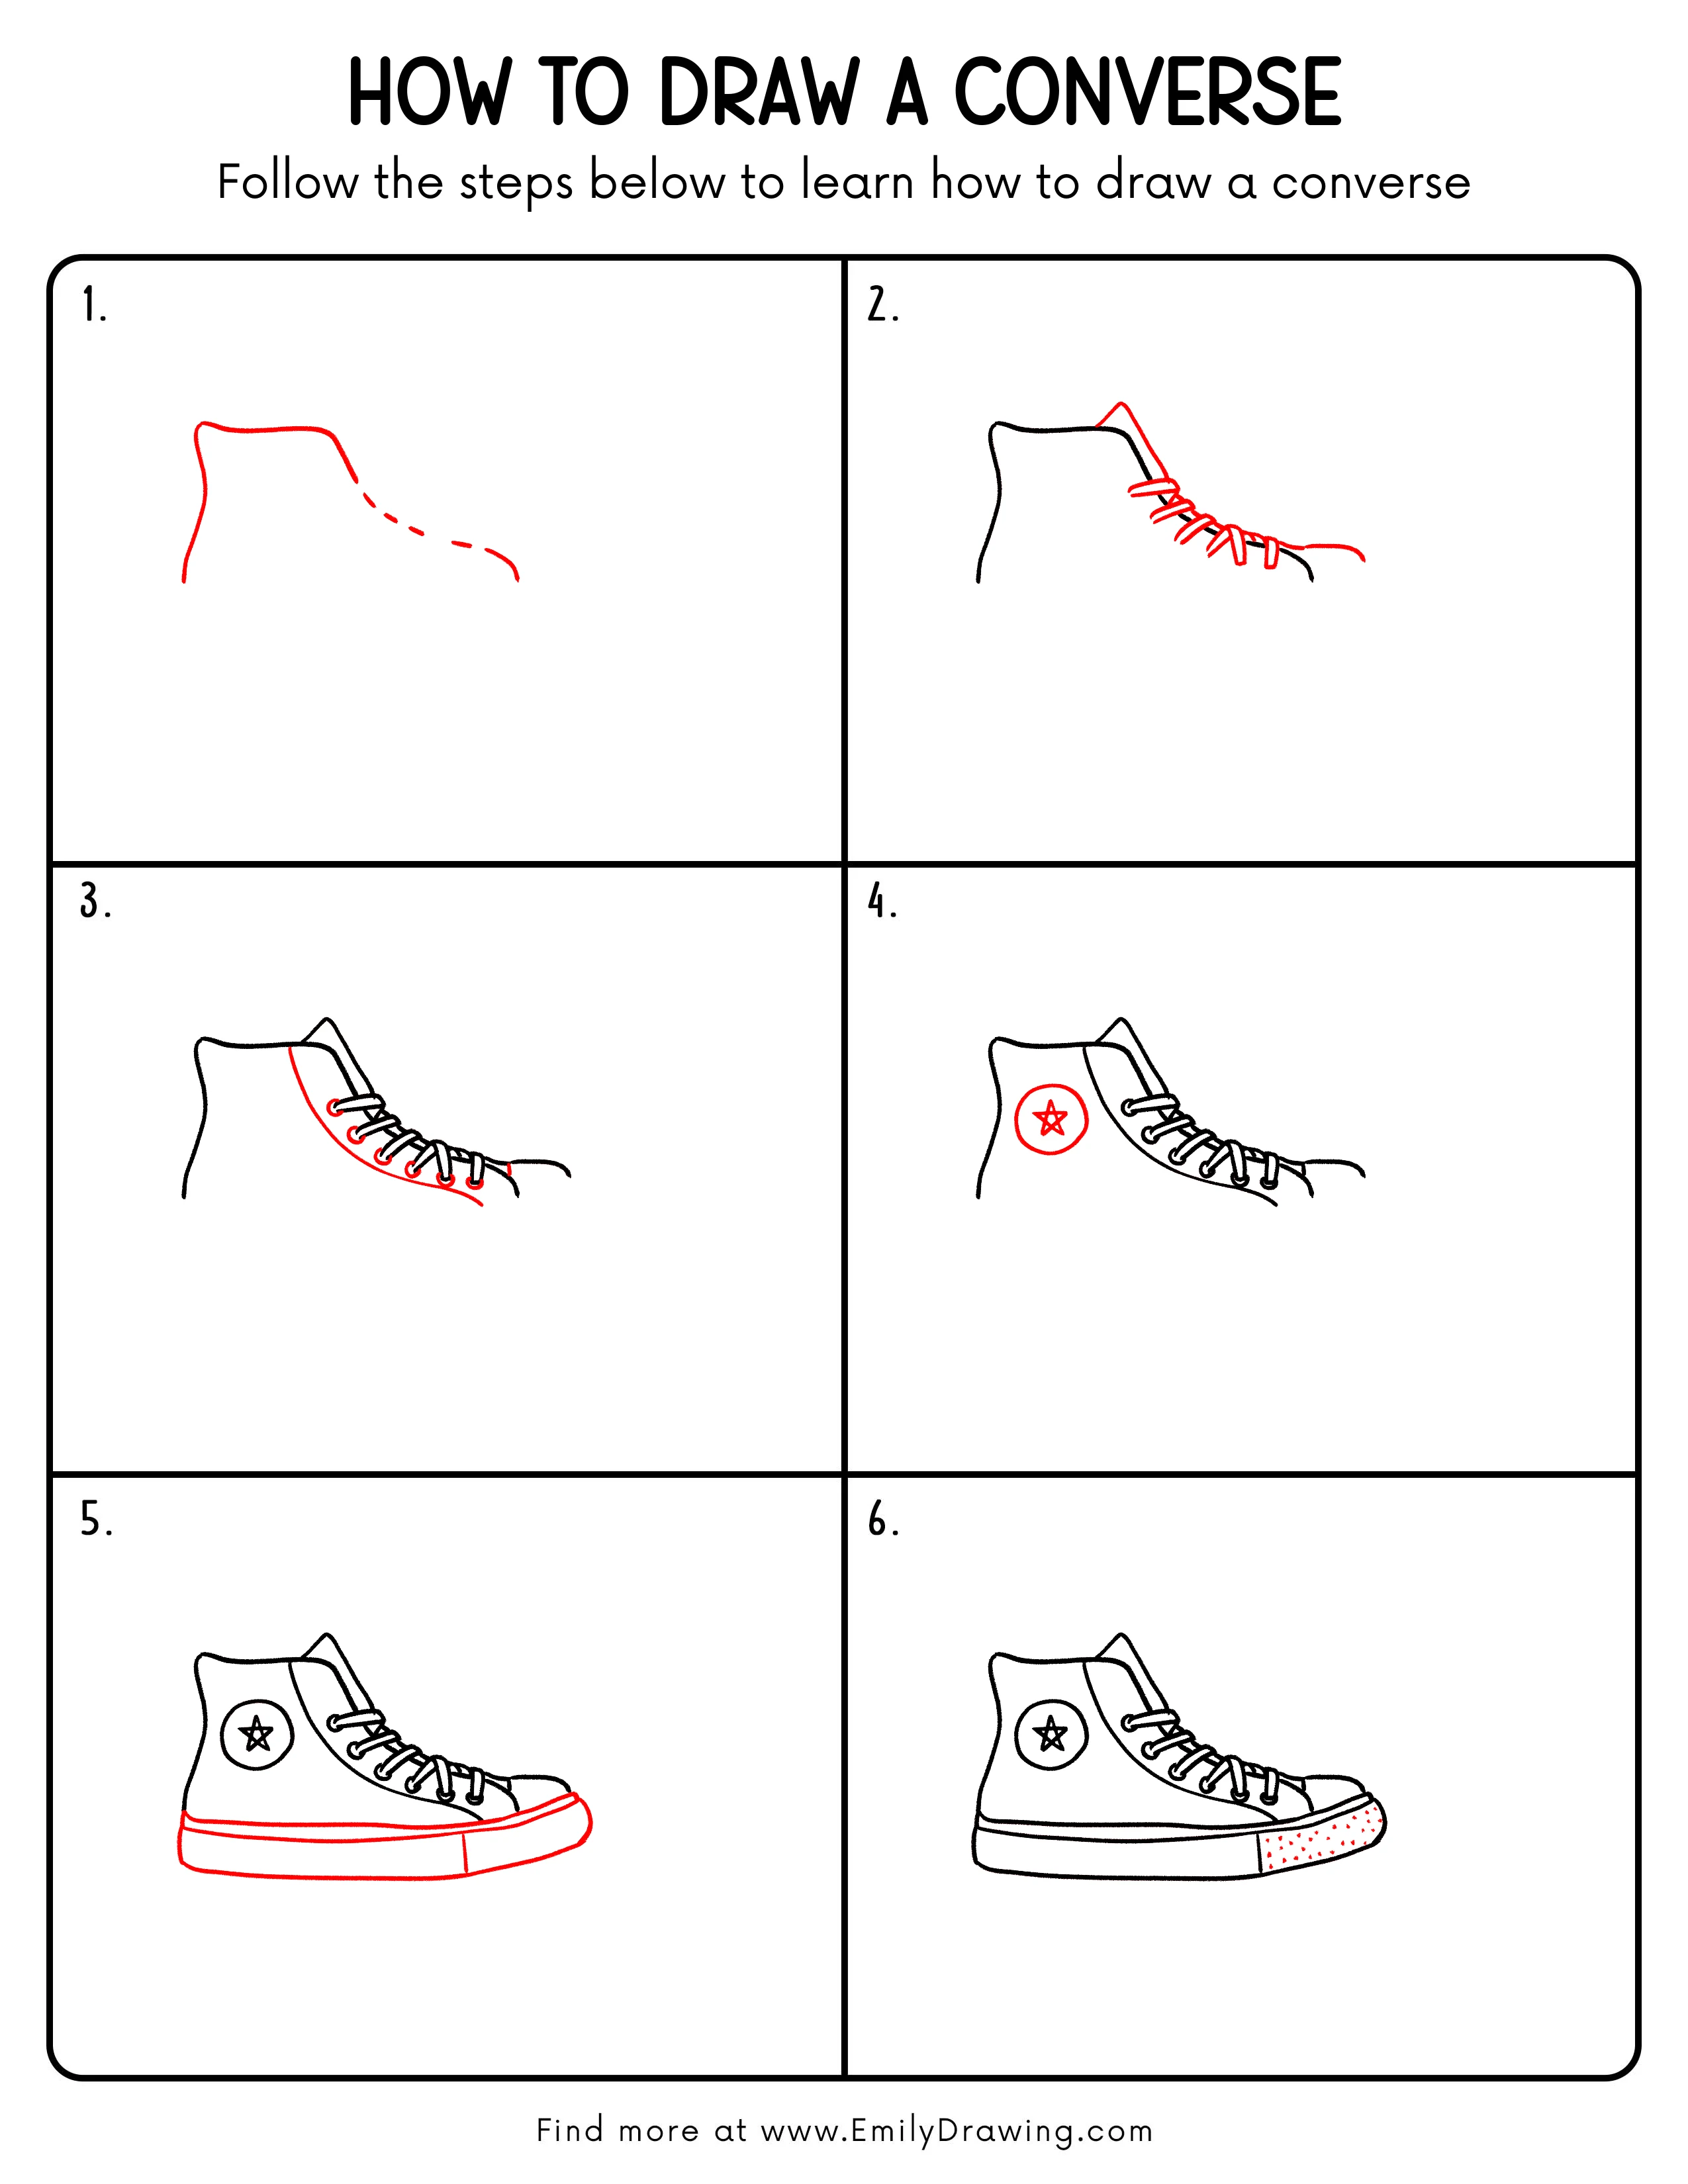
FREE Download Printable Converse Drawing Tutorial
Frequently Asked Questions
How can I make the laces look woven?
At each crossing, erase a tiny section of the lower lace so the upper lace appears to pass over it.
Why does the sole look uneven?
Draw the upper and lower sole edges as parallel curves before closing the heel and toe.
Can I change the star patch?
Yes, replace it with a simple circle, letter, or original symbol while keeping it centered on the ankle panel.