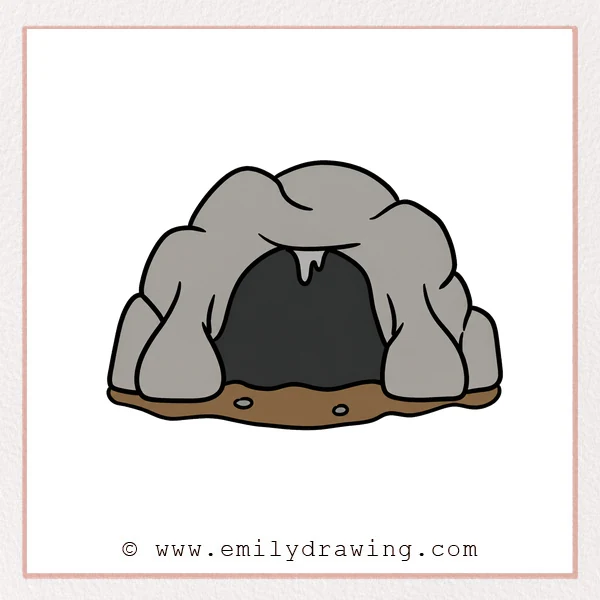
Learn how to draw a simple rocky cave with a wide entrance, layered boulders, and a few small ground details. This easy drawing tutorial helps beginners practice overlapping curves, natural rock shapes, and open negative space.
What You Will Need
- Drawing paper
- Pencil and eraser
- Black marker or colored pencils
Here are my RECOMMENDED Art Supplies!
- Crayola Coloring Set (140 Pieces – Mega Value!)
- 24 Colored Crayon Set
- A4 Printer Paper
- Crayola Coloring Pencils
- HP Home Printer with Instant Ink!
Time needed:
15 minutes.
Step-by-Step Drawing Guide
Step 1: Start the Rock Arch
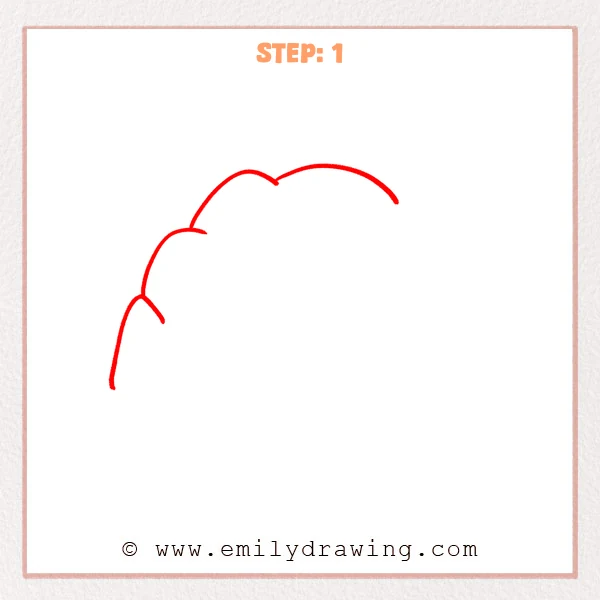
Draw several broad connected curves to form the left side and top of the cave. Let each curve overlap slightly so the outline looks like a pile of large rounded rocks.
Pro Tip: Change the height and width of each curve to avoid a perfectly even arch.
Step 2: Complete the Outer Rocks
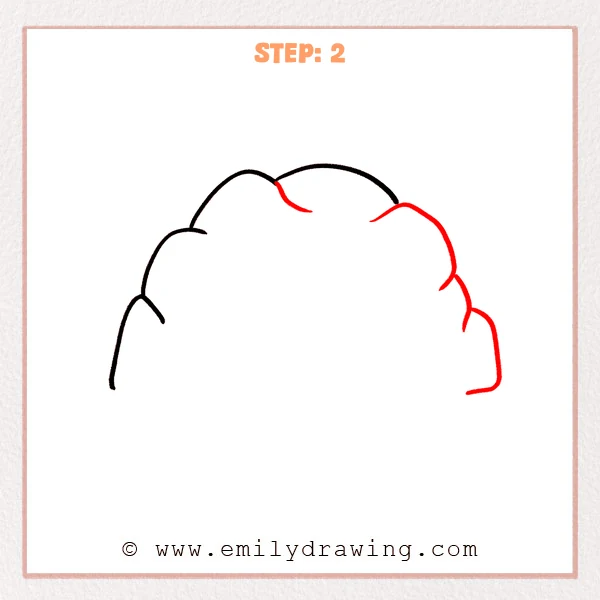
Continue the bumpy outline down the right side with several more rounded rock sections. Add a few short inward curves where the large stones meet.
Pro Tip: Keep the bottom open because the entrance and ground will be added later.
Step 3: Draw the Left Entrance
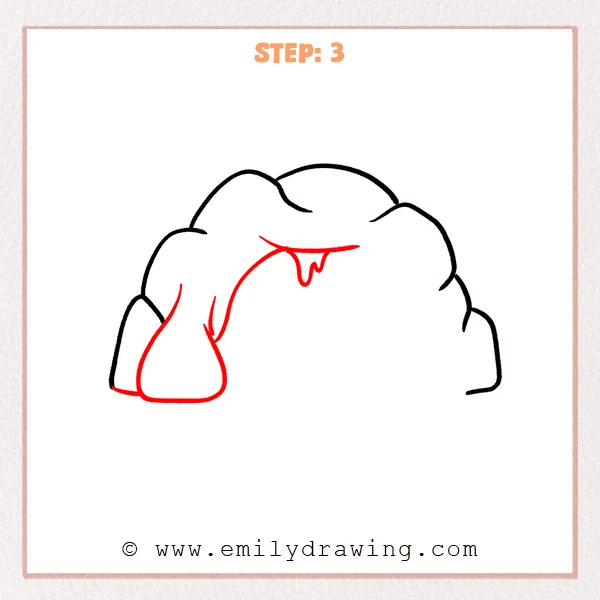
Inside the arch, draw a tall curved line that sweeps down into a wide rounded boulder on the left. Add a horizontal ceiling line and one short pointed stalactite hanging from it.
Pro Tip: Leave a large blank area in the center to make the cave opening feel spacious.
Step 4: Add the Right Entrance
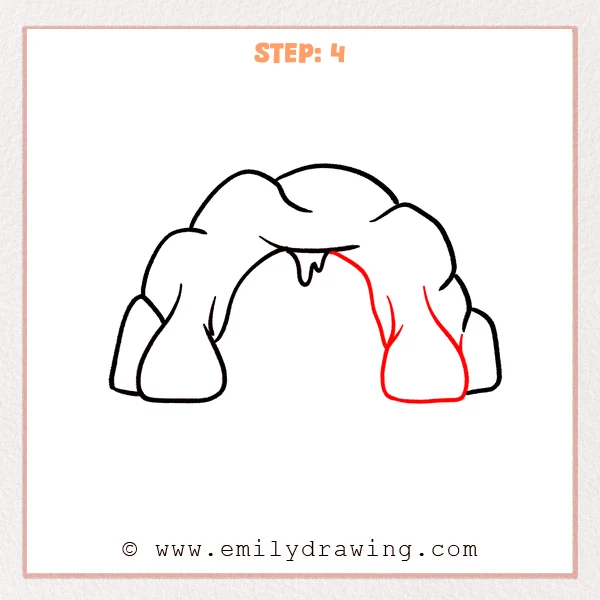
Draw a matching curved wall down the right side of the opening and finish it with another broad rounded boulder. Add short inner contour lines to both entrance rocks for extra shape.
Pro Tip: Make the two entrance boulders slightly different so the cave looks natural.
Step 5: Draw the Cave Floor
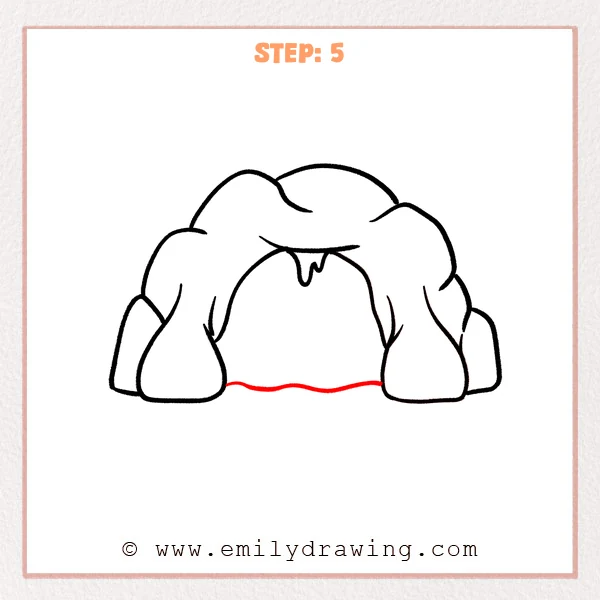
Connect the two front boulders with a gently wavy horizontal line. This line marks the uneven ground just inside the dark cave opening.
Pro Tip: Use only a few shallow waves so the floor does not distract from the entrance.
Step 6: Finish the Ground
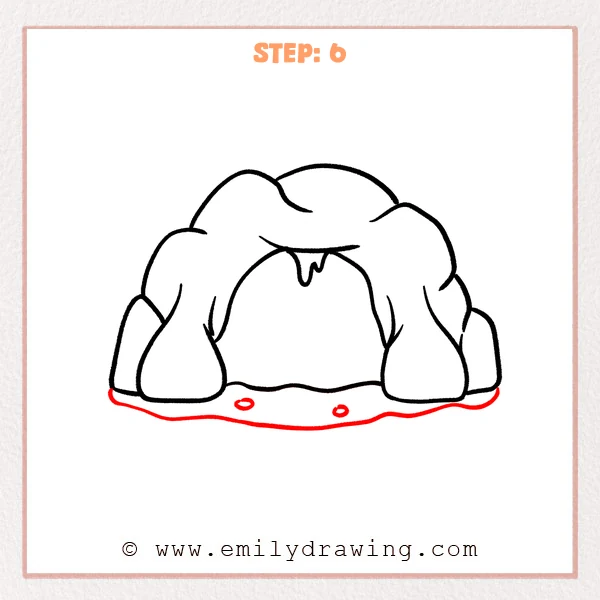
Draw a wide irregular ground shape beneath the entire cave. Add two small oval stones near the front to give the rocky setting a final detail.
Pro Tip: Extend the ground beyond both sides of the cave to anchor it on the page.
Step 7: Color in your drawing!
Fun Facts
- Many caves form when groundwater slowly dissolves limestone over thousands of years.
- Stalactites hang from cave ceilings, while stalagmites grow upward from cave floors.
- Some caves contain underground rivers, rare minerals, and animals adapted to darkness.
Pin it now, Draw later!
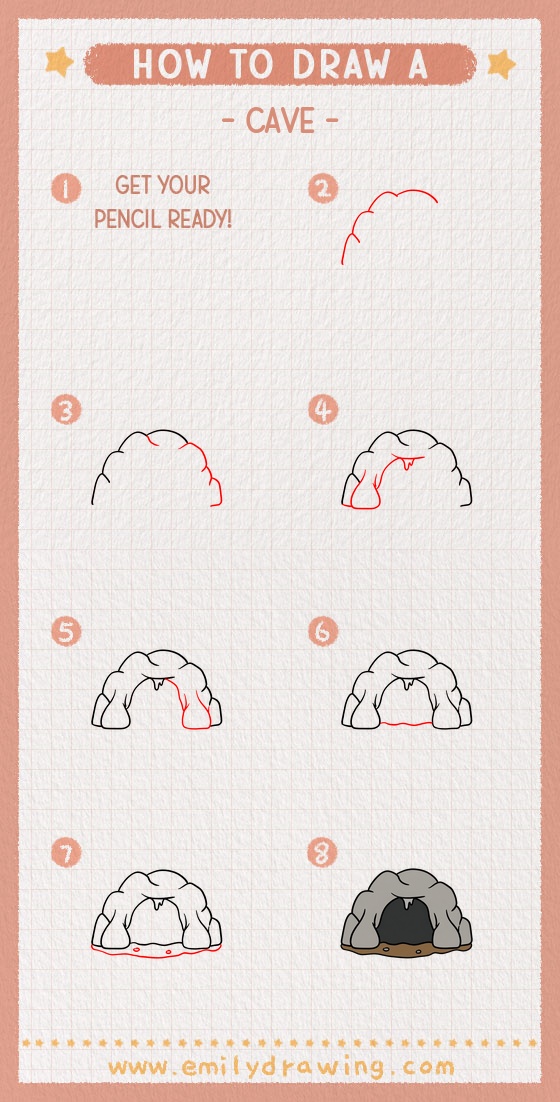
Erase hidden guides, darken the rock outlines, and shade the opening much darker than the outer stones. Your cave drawing is complete, so try adding moss, a campfire, crystals, or a mysterious creature inside.
Get the FREE Printable Drawing Guide
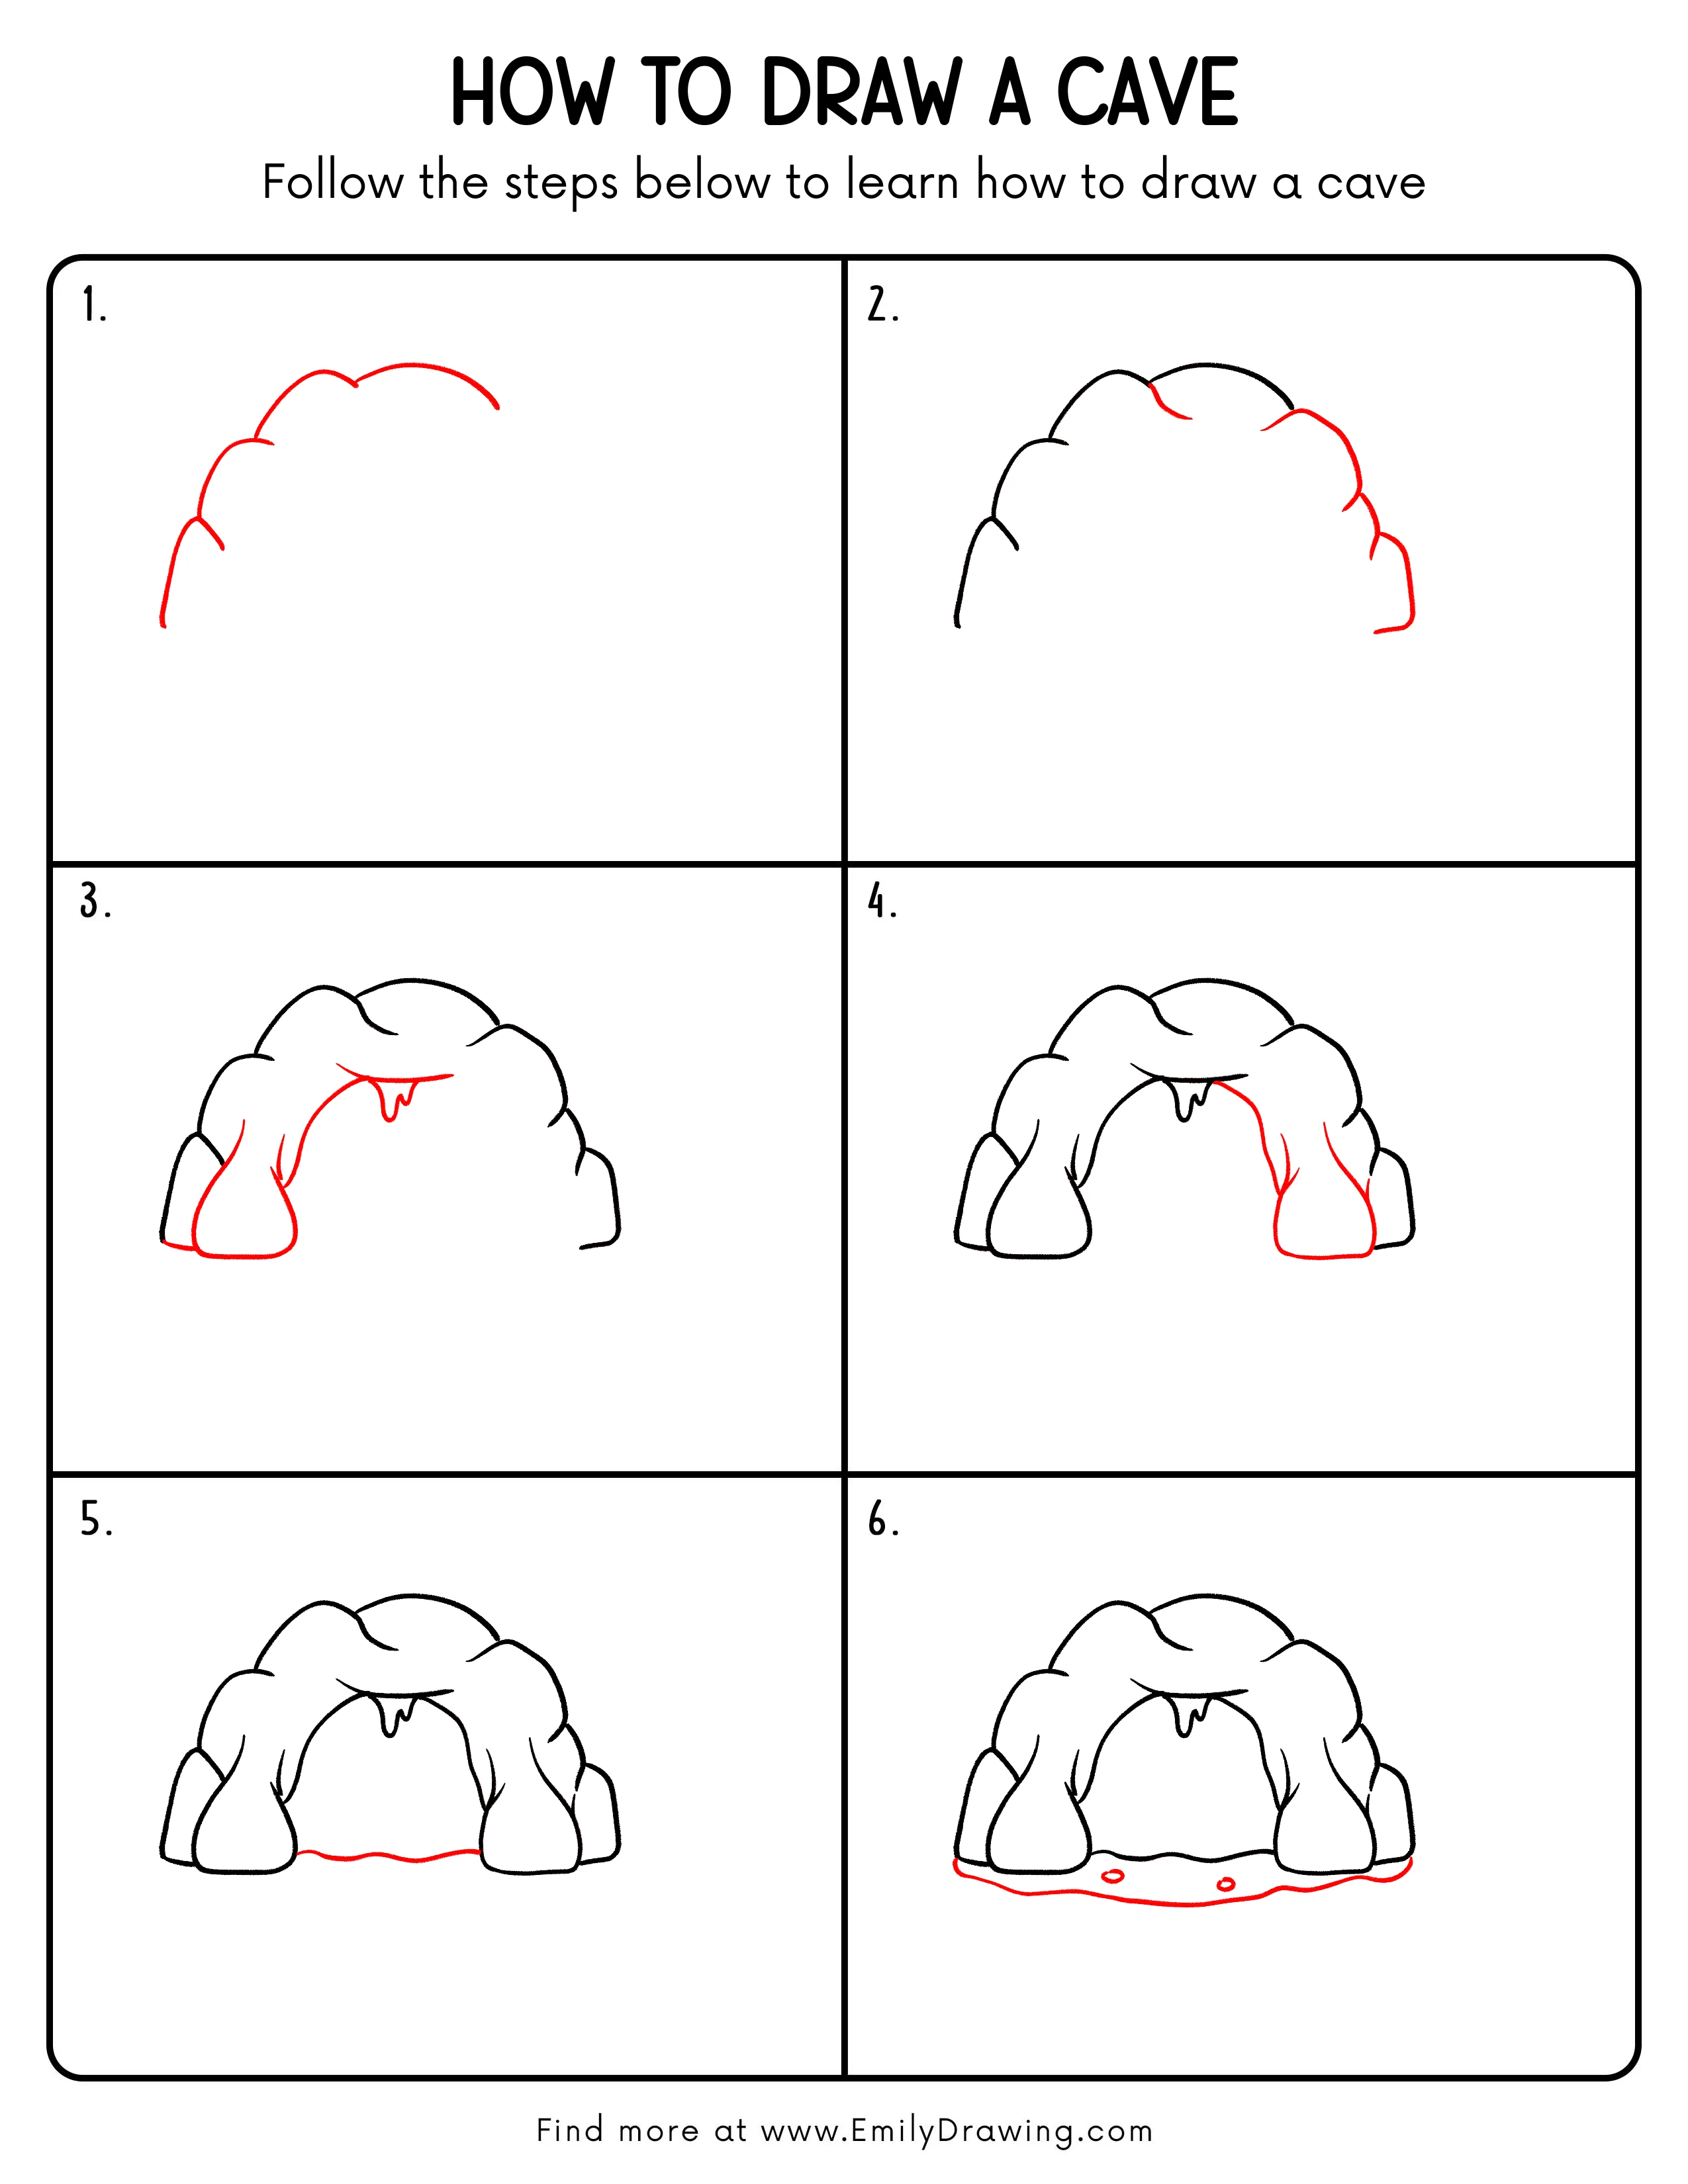
FREE Download Printable Cave Drawing Tutorial
Frequently Asked Questions
How can I make the cave look deeper?
Fill the opening with a dark value and leave the front rocks lighter.
Do the rocks need to match?
No, varied sizes and uneven curves make the formation look more natural.
Can I add more stalactites?
Yes, draw several tapered points hanging from the ceiling at different lengths.