
This easy drawing tutorial shows how to draw a cat face step by step.
We will build simple shapes first, then add cute details for expression.
Take your time, and keep your lines light until you like the placement.
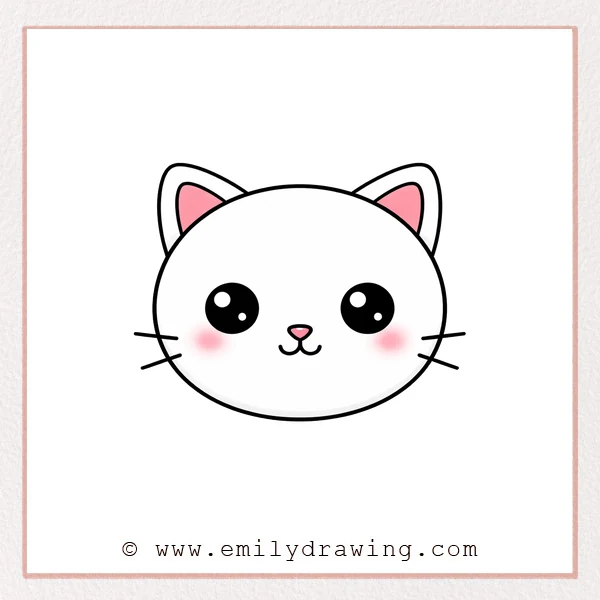
What You Will Need
- Pencil (or a drawing app brush)
- Eraser
- Black pen or darker marker (optional)
- Paper or a tablet
Here are my RECOMMENDED Art Supplies!
- Crayola Coloring Set (140 Pieces – Mega Value!)
- 24 Colored Crayon Set
- A4 Printer Paper
- Crayola Coloring Pencils
- HP Home Printer with Instant Ink!
Time needed:
14 minutes.
Step-by-Step Drawing Guide
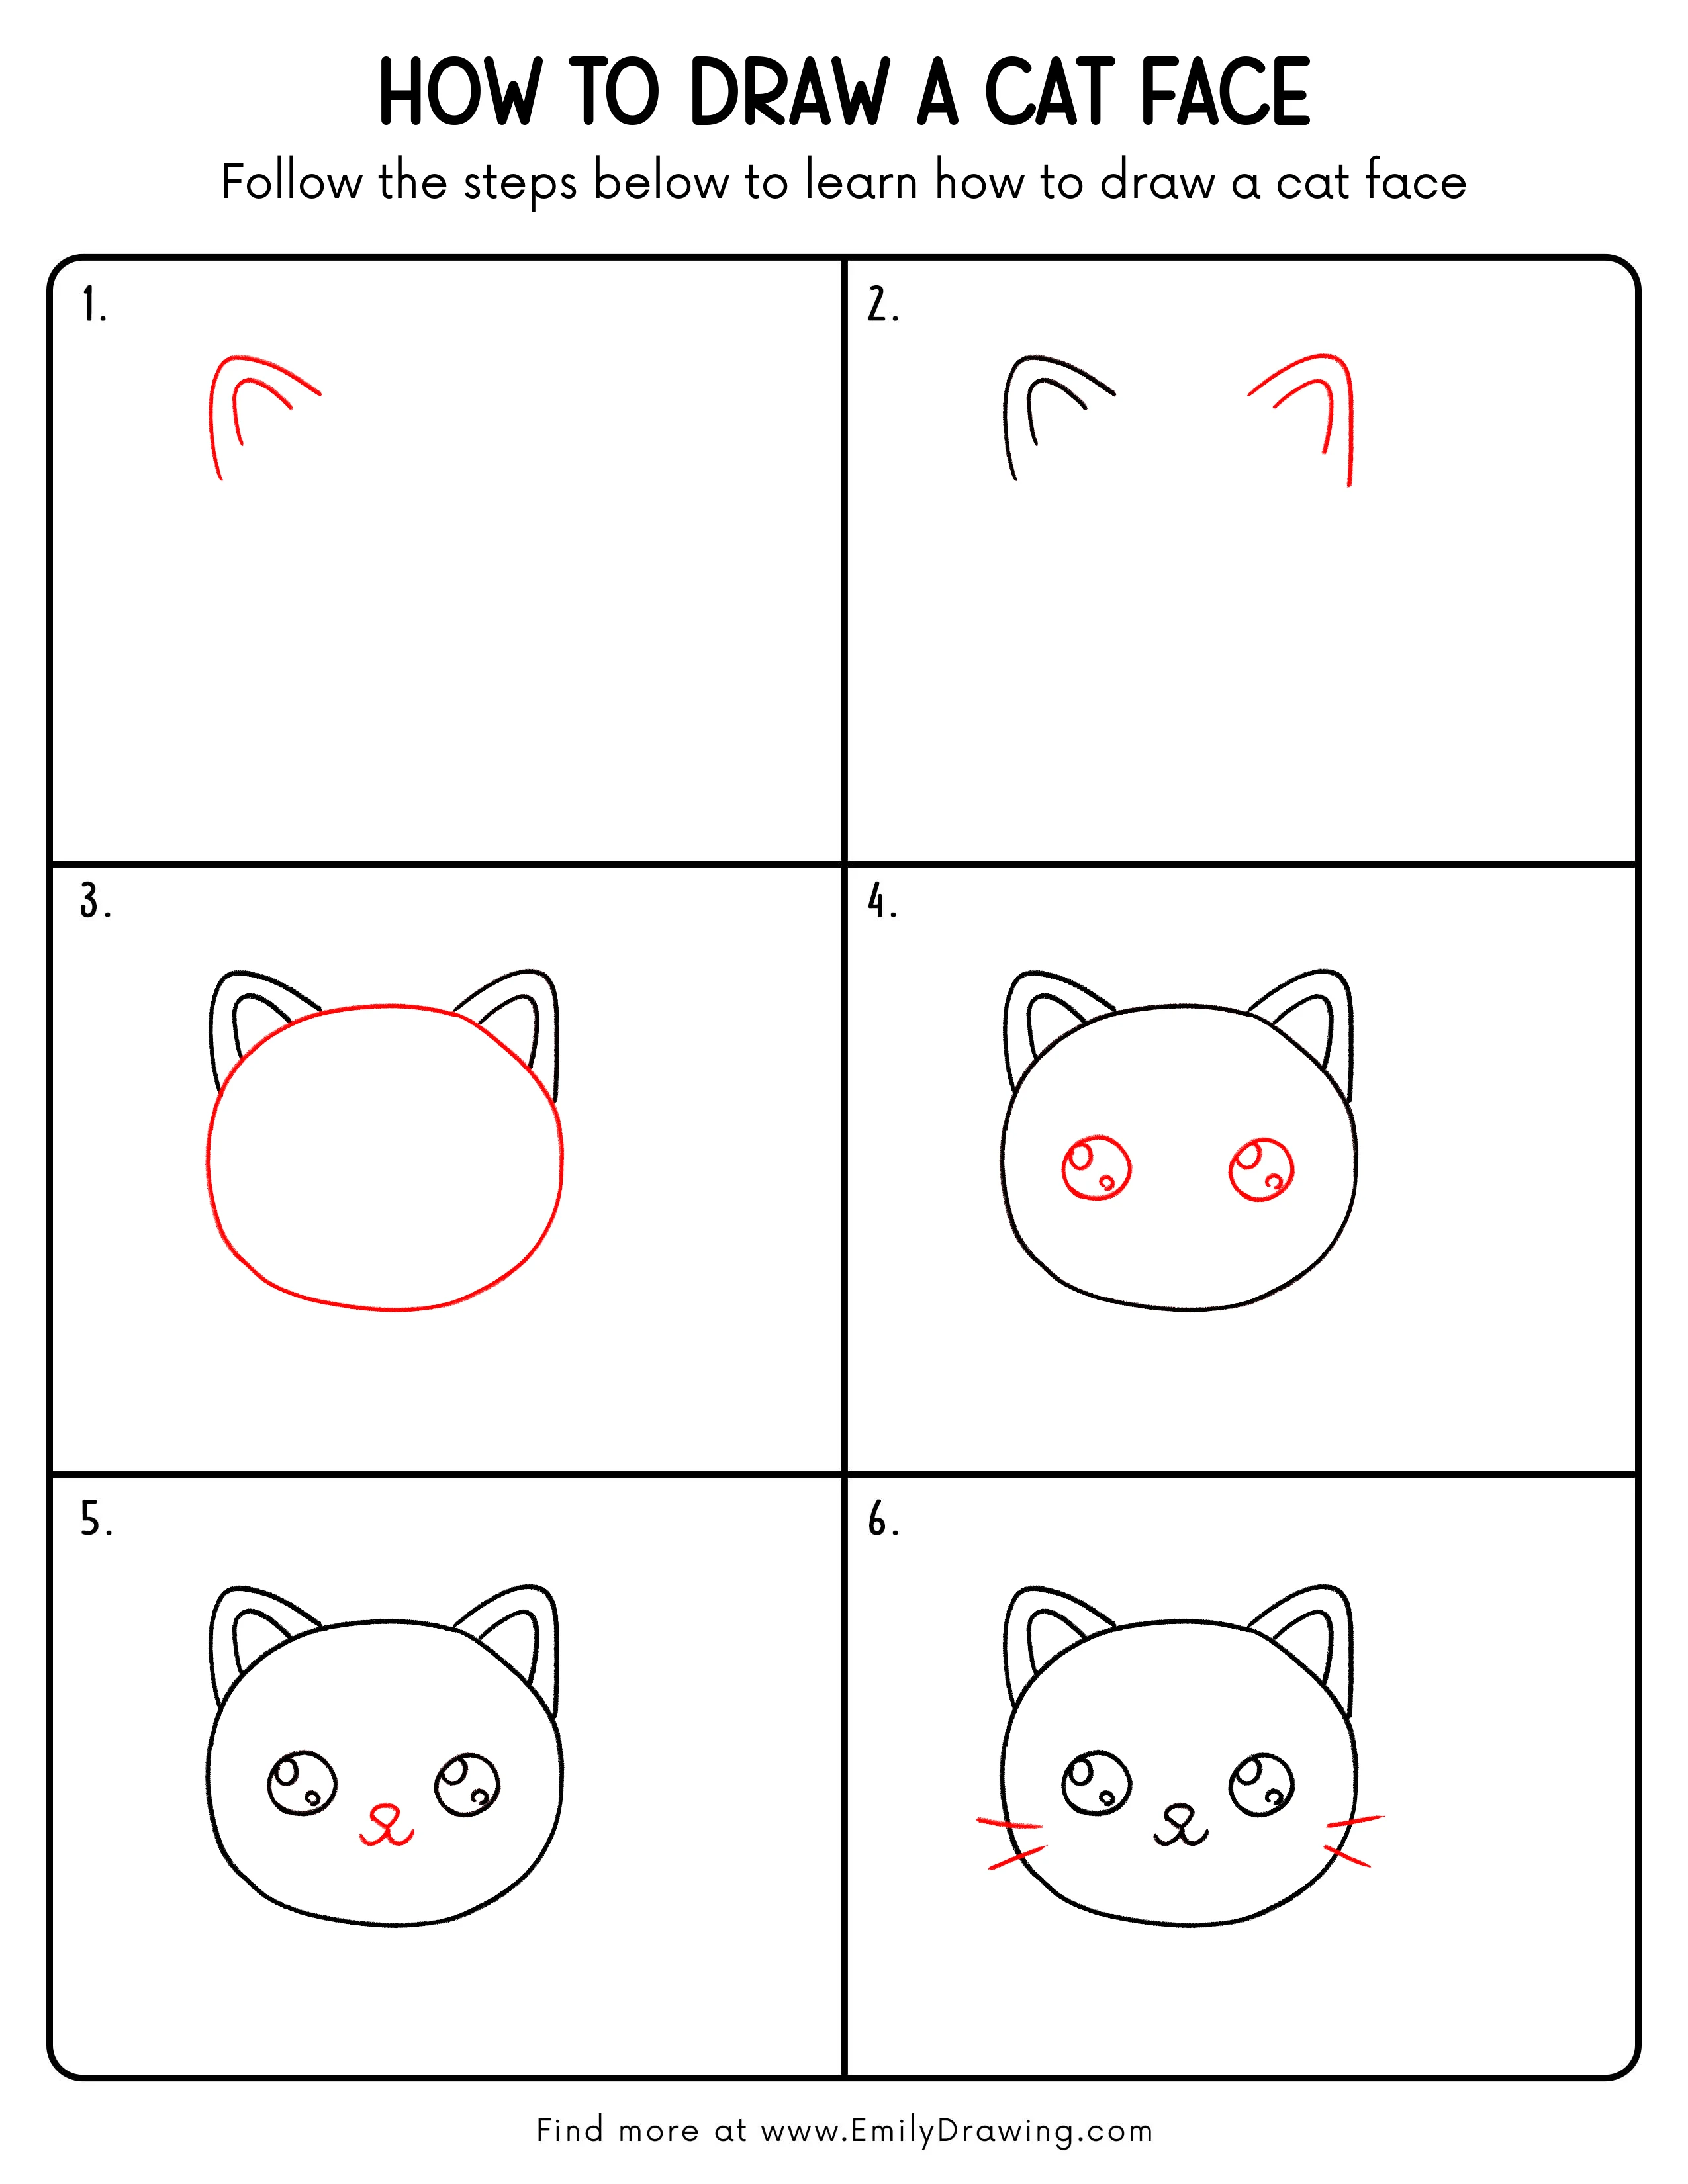
Step 1: Draw the First Ear
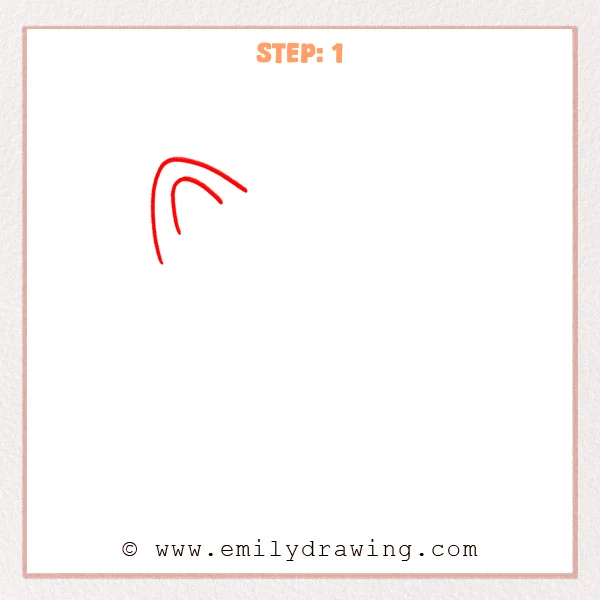
Near the upper left, draw a rounded pointed curve to form the outer ear shape.
Inside it, add a shorter curve to show the inner ear detail.
Keep the shape open and smooth so it feels soft and cute.
Pro Tip: Keep the ear’s outer curve rounded rather than sharp for a friendly look.
Step 2: Add the Other Ear
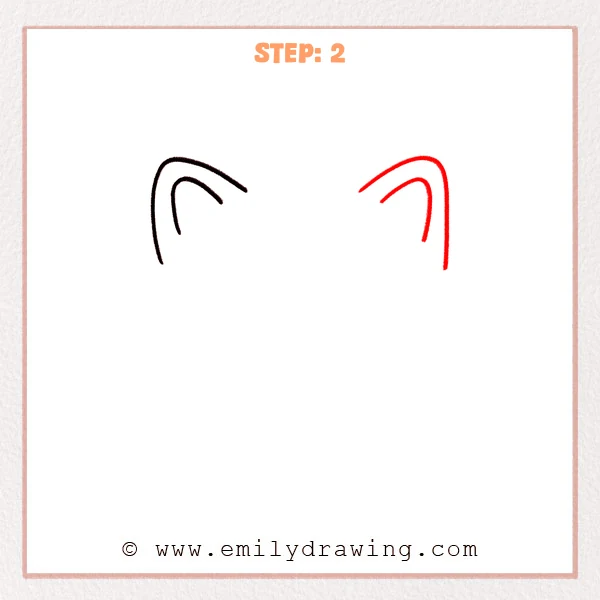
On the right side, draw a matching ear with a long outer curve.
Add a shorter inner curve inside it to show the ear detail.
Try to keep both ears the same height and tilt.
Pro Tip: Compare the ear tips’ height first, then adjust the curves to match.
Step 3: Draw the Round Face Shape
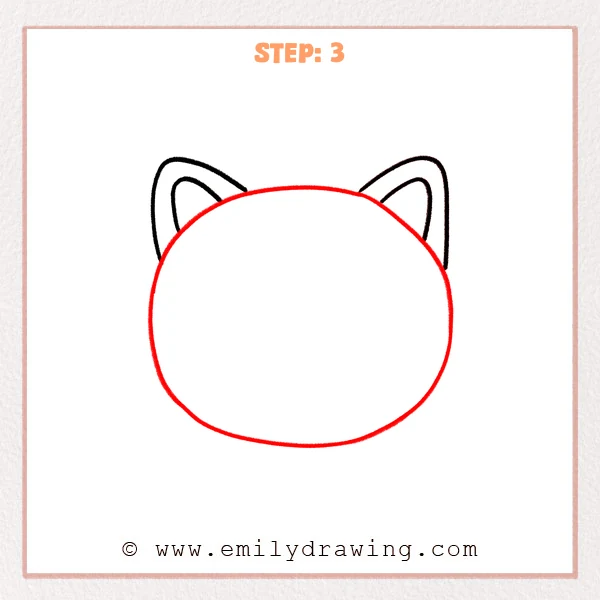
Start just below the space between the ears and draw a big rounded curve down and around.
Bring the line back up to connect under the other ear, forming the head outline.
Aim for a smooth, even circle-like shape.
Pro Tip: Sketch the big circle lightly first, then trace it more confidently once it looks right.
Step 4: Add Two Big Eyes
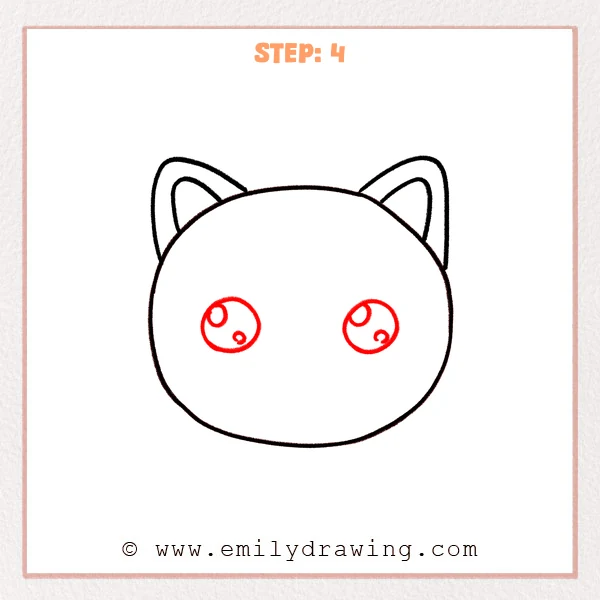
Draw two matching round eyes in the lower middle area of the face.
Leave an even gap between them so the face looks balanced.
Add two small highlight circles inside each eye for sparkle.
Pro Tip: Mark the center points first, then draw the circles to keep both eyes symmetrical.
Step 5: Draw the Nose and Mouth
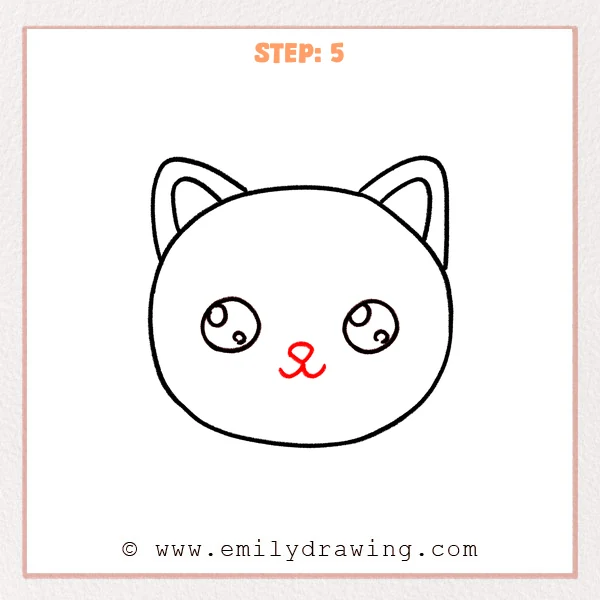
Add a tiny rounded triangle or teardrop shape between the eyes, slightly lower, for the nose.
From the bottom of the nose, draw a short curve down.
Then add two small curves left and right to form a simple “w” mouth.
Pro Tip: Keep the nose small and close to the center line to make the cat face look cute.
Step 6: Add the Whiskers
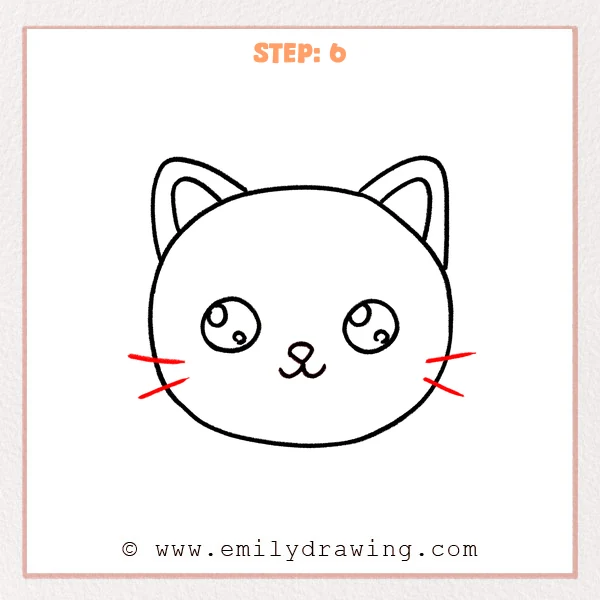
On the left cheek, draw two short angled lines pointing outward.
Repeat on the right cheek with two matching lines.
Keep the whiskers neat and lightly slanted.
Pro Tip: Start whiskers near the mid-cheek area and keep them short for better balance.
Step 7: Color in your drawing!
Fun Facts
- Cats use whiskers to sense nearby objects, even in the dark.
- A cat’s whiskers are roughly as wide as its body, helping it judge tight spaces.
- Many cats blink slowly to show they feel calm and safe.
Pin it now, Draw later!
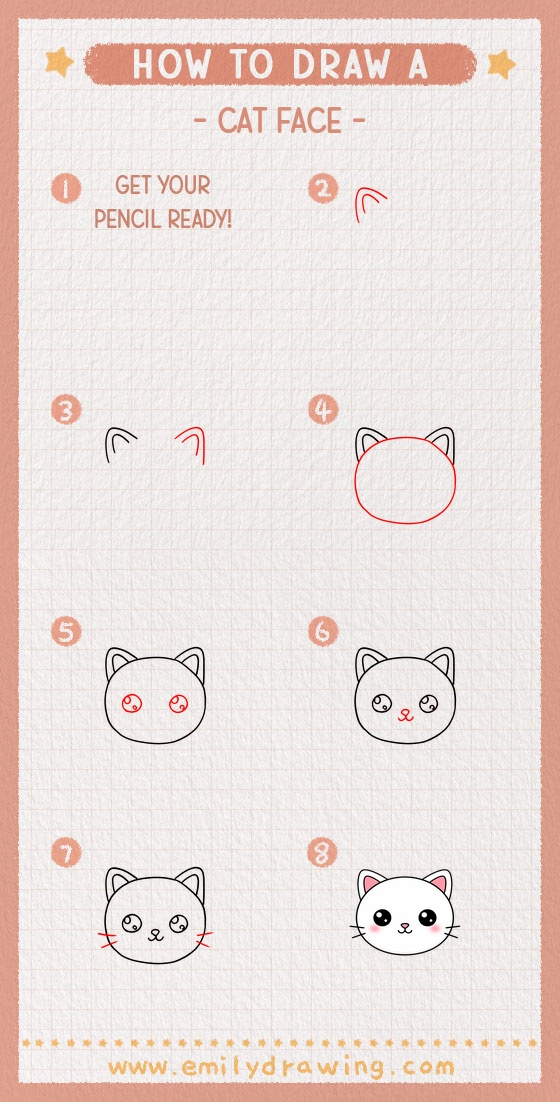
If you want, darken the final lines and erase extra sketch marks.
You can add soft blush dots, tiny eyelashes, or a little shading inside the ears.
Now you have a cute cat face—try drawing different expressions to practice more.
Get the FREE Printable Drawing Guide
FREE Download Printable Cat Face Drawing Tutorial
Frequently Asked Questions
How do I make the cat face look more symmetrical?
Lightly mark a center line and place the eyes the same distance from it.
What if my circle looks uneven?
Draw it lightly in small strokes, then smooth it with a darker final line.
How can I change the expression easily?
Adjust the mouth curve and the eye highlights to make it happy, sleepy, or surprised.



