
This easy drawing tutorial shows you how to draw a cartoon tree with a fluffy canopy. We will build the shapes slowly, then add simple details for a friendly look. Take your time and keep your lines smooth and relaxed.
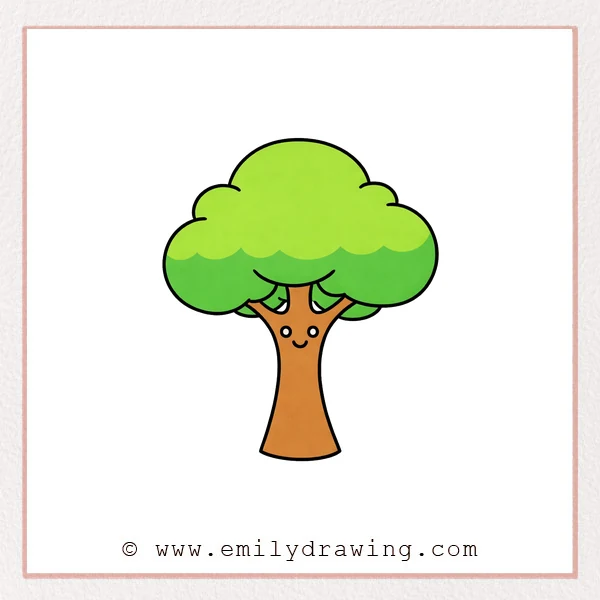
What You Will Need
- Pencil
- Eraser
- Black marker or pen
- Paper
- Optional: colored pencils or crayons
Here are my RECOMMENDED Art Supplies!
- Crayola Coloring Set (140 Pieces – Mega Value!)
- 24 Colored Crayon Set
- A4 Printer Paper
- Crayola Coloring Pencils
- HP Home Printer with Instant Ink!
Time needed:
19 minutes.
Step-by-Step Drawing Guide
Step 1: Outline the Treetop Canopy
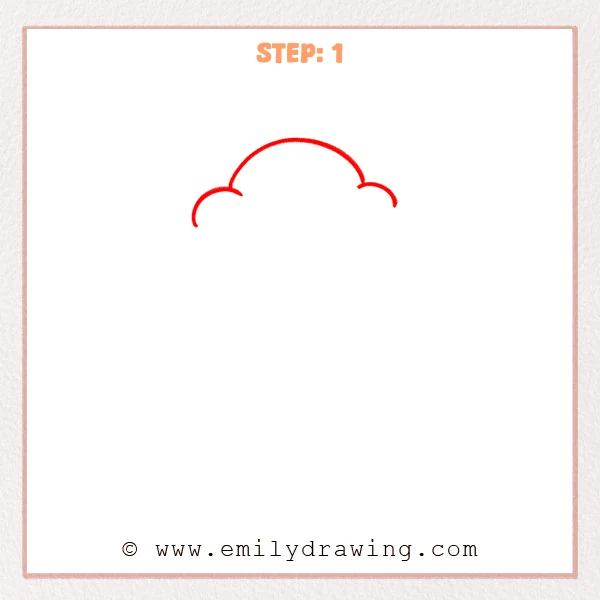
Start near the top of the page and draw a wide, smooth arch like an upside-down bowl. Add one small rounded bump on each side to make a fluffy, cloud-like canopy.
Pro Tip: Keep both sides balanced, but allow small uneven bumps for a natural look.
Step 2: Complete a Fluffier Tree Canopy
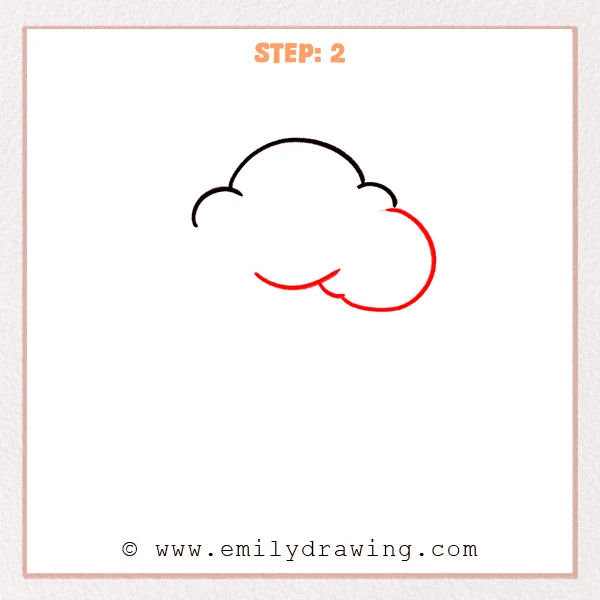
Add a larger rounded bump on the right to widen the canopy. Draw a curved line along the bottom and include one small bump to connect the canopy shape.
Pro Tip: Make the right bump slightly bigger than the left for a cute cartoon tree look.
Step 3: Add the Left Canopy and Leave a Trunk Gap
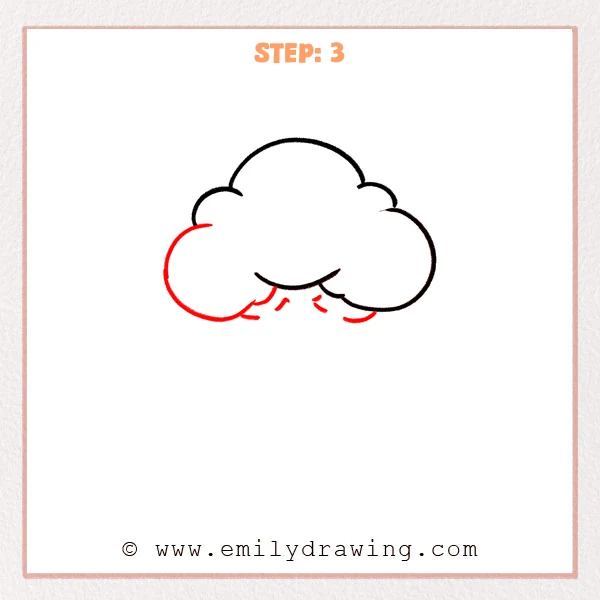
Draw a larger rounded bump on the left to widen the canopy that way. Add a few short curved marks under the middle to create a small notched area for the trunk connection.
Pro Tip: Keep the left big bump close in size to the right so the canopy feels balanced.
Step 4: Draw a Slim Tree Trunk
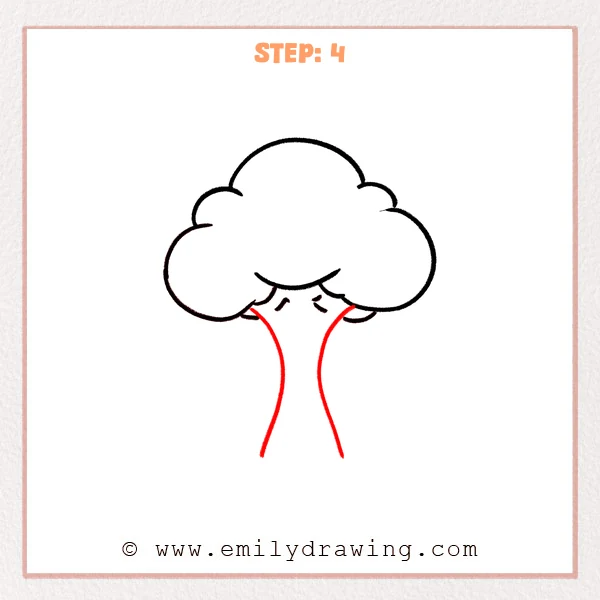
From the small notch under the canopy, draw two long curved lines downward for the trunk sides. Keep the trunk narrower near the top and a bit wider near the bottom, leaving the base open for later.
Pro Tip: Make the two trunk lines echo each other so the curves feel evenly matched.
Step 5: Close the Trunk Base and Add Inner Split Lines
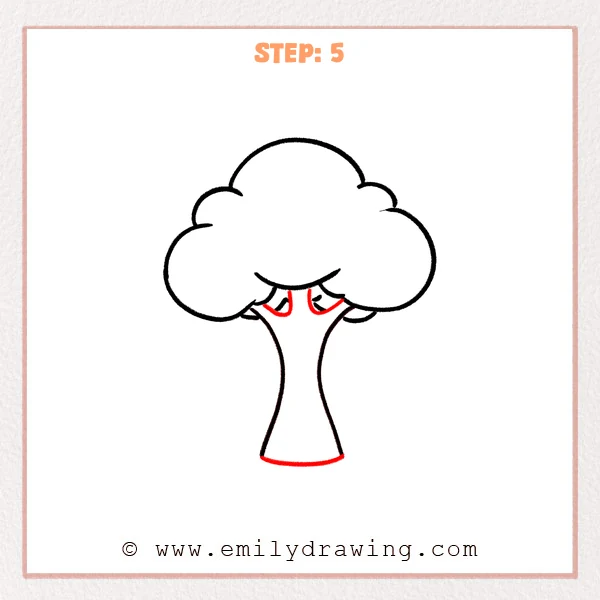
Draw a curved line across the bottom to connect both trunk sides and form a rounded base. Inside the top of the trunk, add two short curved lines to suggest small branch splits.
Pro Tip: Let the bottom curve flow smoothly into the trunk sides without sharp corners.
Step 6: Add a Cute Face on the Trunk
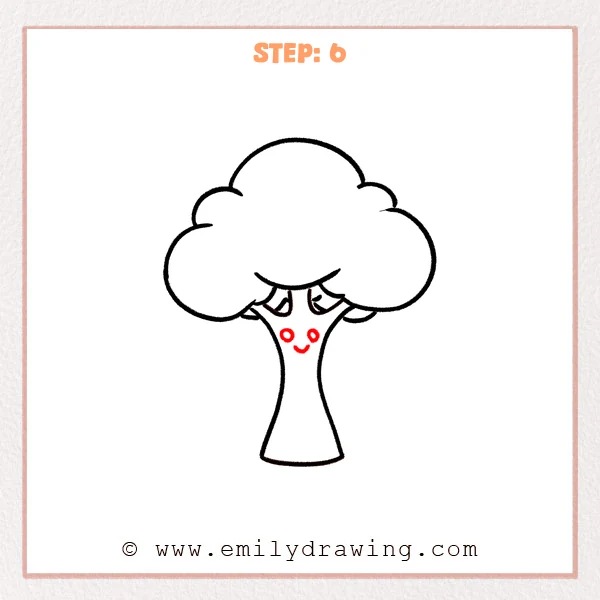
Draw two small circles for eyes on the upper middle of the trunk, placed evenly left and right. Add a short curved smile under the eyes to give the tree a friendly expression.
Pro Tip: Keep the space between the eyes about one eye-width for a balanced look.
Step 7: Color in your drawing!
Fun Facts
- Some trees can communicate by sending chemical signals through their roots.
- The fluffy “cloud” canopy style is a common cartoon shortcut for leaves.
- Trees help cool the air by providing shade and releasing water vapor.
Pin it now, Draw later!
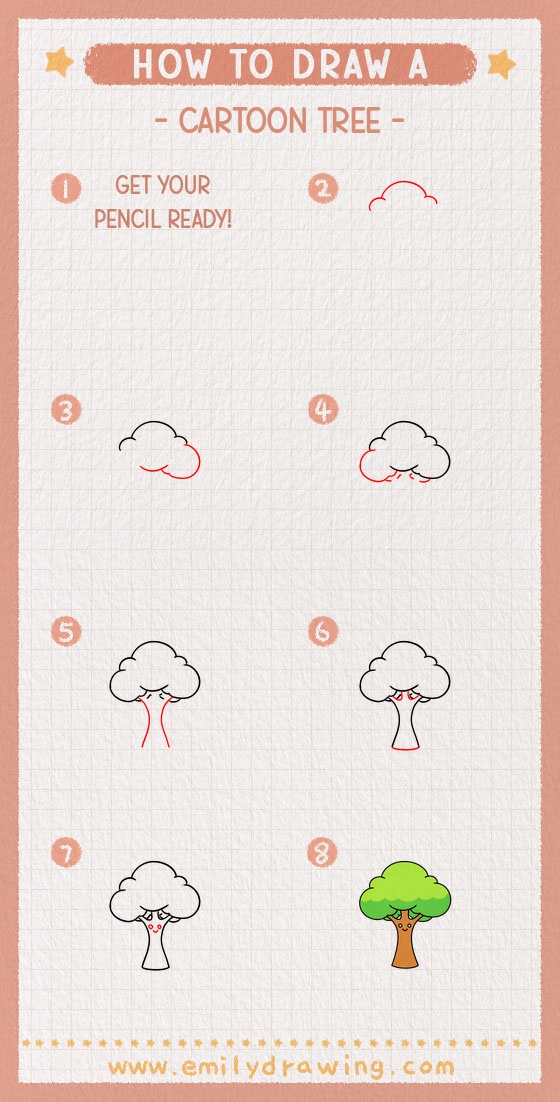
Trace your final lines with a pen, then erase any extra pencil marks. You can add grass, small roots, or a few tiny leaf bumps to make your cartoon tree feel grounded. If you like, color the canopy green and the trunk brown for a classic look. Try drawing a whole forest of different shapes to practice!
Get the FREE Printable Drawing Guide
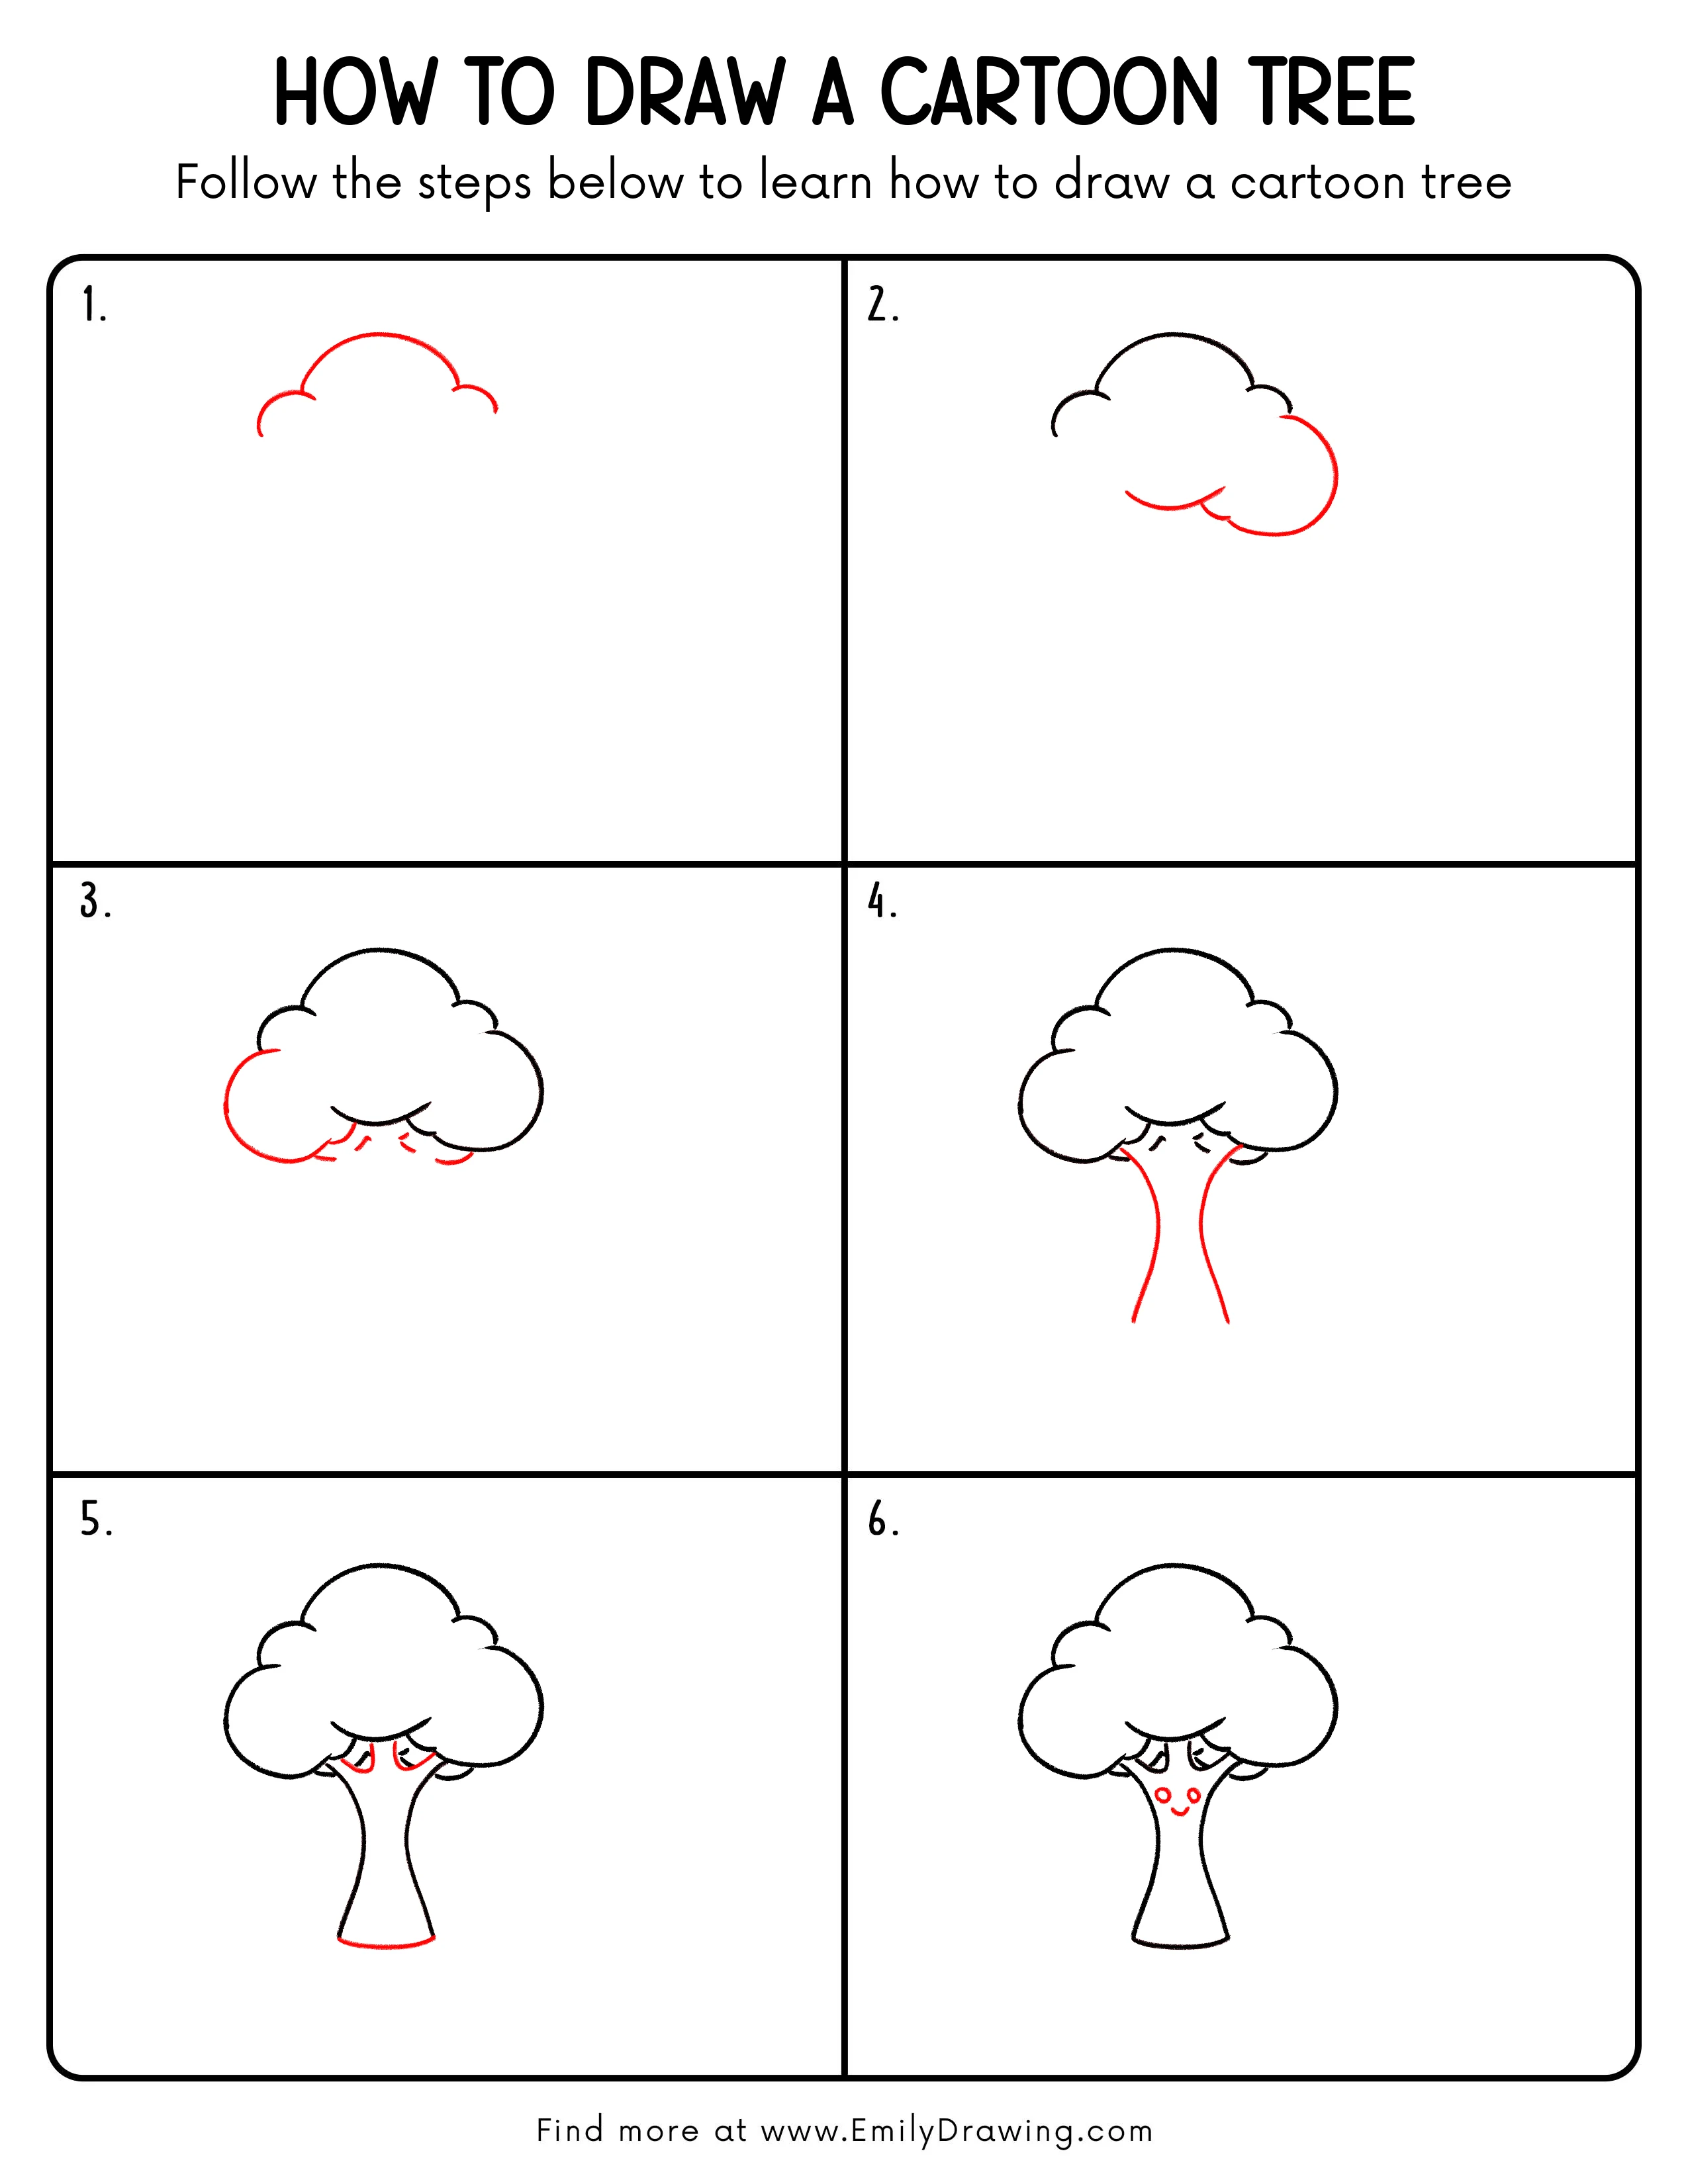
FREE Download Printable Cartoon Tree Drawing Tutorial
Frequently Asked Questions
1) How do I make the canopy look more fluffy?
Add a few more rounded bumps, and vary their sizes slightly.
2) What if my trunk looks uneven?
Lightly sketch both sides first, then adjust the curves to match.
3) Can I draw a thicker tree?
Yes—space the trunk lines farther apart and widen the base a little more.



