This easy drawing tutorial shows you how to draw a cartoon volleyball with clean panel seams.
You will build the round shape first, then add details for a fun finish.
Take your time with the curves, and keep your lines smooth.
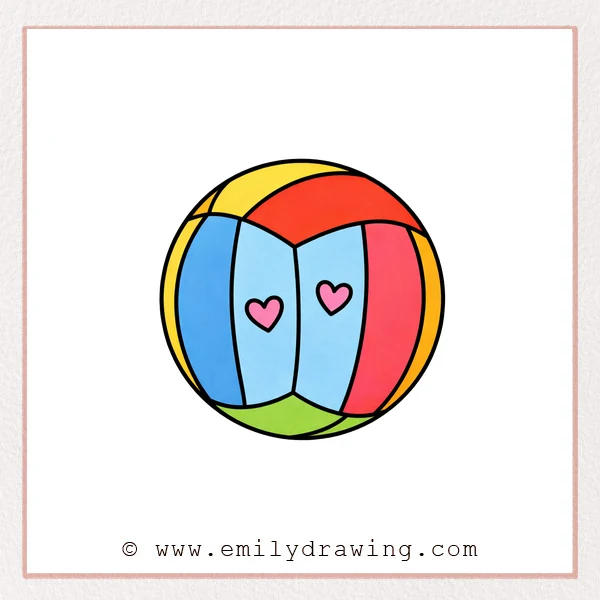
What You Will Need
- Pencil (or a drawing tablet stylus)
- Eraser
- Black pen or marker for final lines
- Red pen or colored pencil for optional decorations
- Plain paper
Here are my RECOMMENDED Art Supplies!
- Crayola Coloring Set (140 Pieces – Mega Value!)
- 24 Colored Crayon Set
- A4 Printer Paper
- Crayola Coloring Pencils
- HP Home Printer with Instant Ink!
Time needed:
21 minutes.
Step-by-Step Drawing Guide
Step 1: Sketch the Curved Top Shape
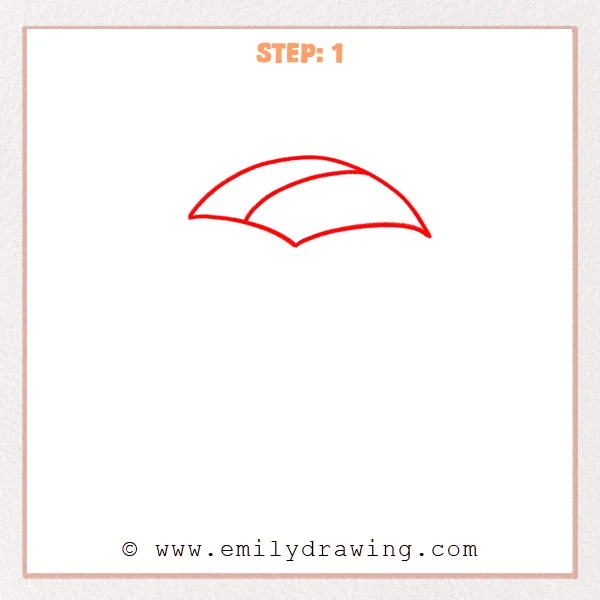
Draw one wide arc to form the domed top of the volleyball.
Add a second, closer arc inside it, then make a small point dipping down in the center to start the panel split.
Keep these lines light so you can adjust the curve easily.
Pro Tip: Keep both ends of the arcs level so the ball feels round.
Step 2: Build the Main Ball Outline
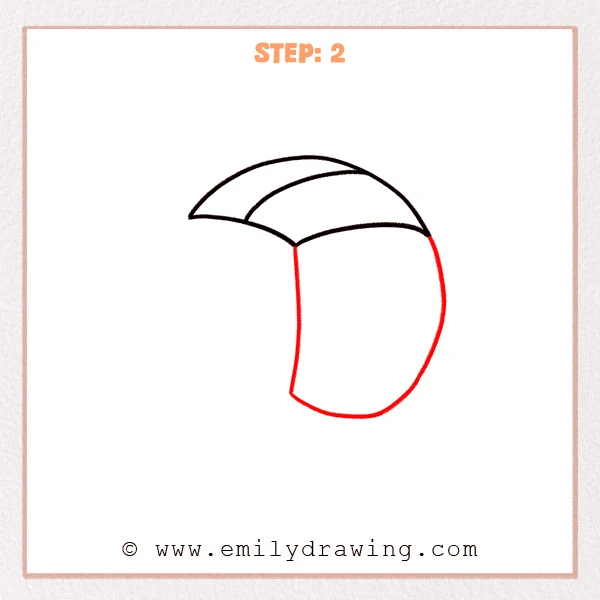
From the small center point, draw a long curved line downward to guide the ball’s form.
Then draw the outer right edge sweeping down and around into a rounded bottom to complete the big body shape.
Aim for a soft, circular base instead of a sharp point.
Pro Tip: Make the bottom curve more circular so the volleyball doesn’t look teardrop-shaped.
Step 3: Add the Left Panel Boundaries
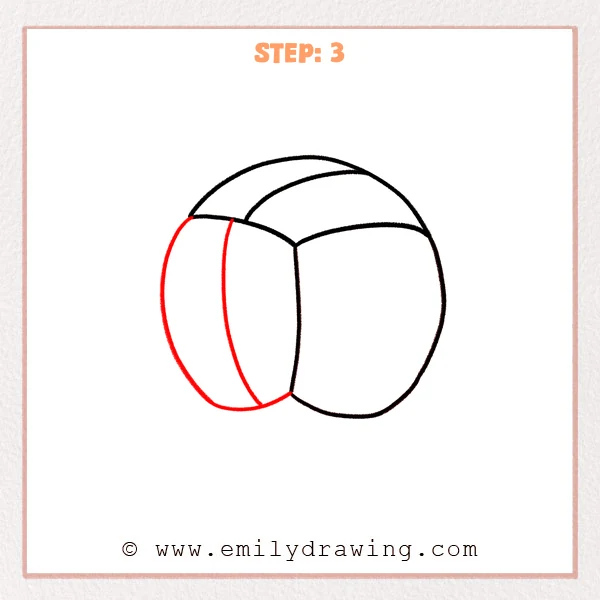
Draw a big curved edge on the left side, sweeping from the top down to the bottom.
Add a second, narrower curve inside it to create a clear seam between volleyball panels.
These curves should follow the ball’s roundness.
Pro Tip: Keep the two left curves feeling parallel so the panel looks natural.
Step 4: Add Two Seams on the Right Panel
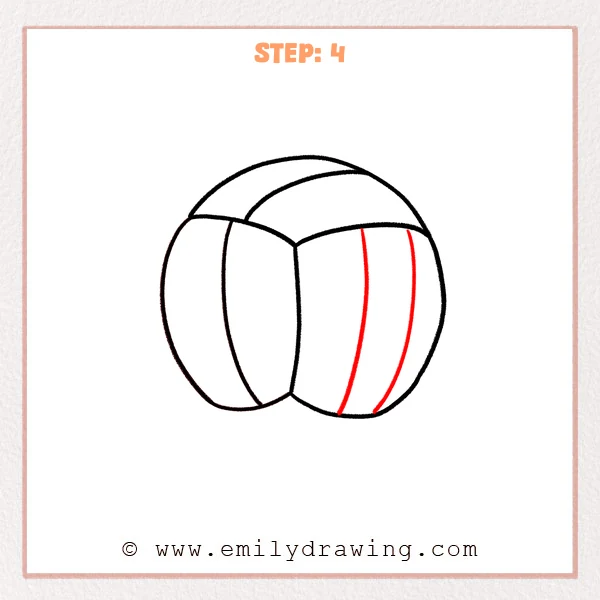
Inside the blank right panel, draw two long curved seam lines from top to bottom.
Curve them gently to match the ball’s round shape, and let them follow the bottom arc.
This makes the panel pattern look consistent across the ball.
Pro Tip: Keep the spacing even between the two seams for a cleaner panel.
Step 5: Finish the Bottom Curve
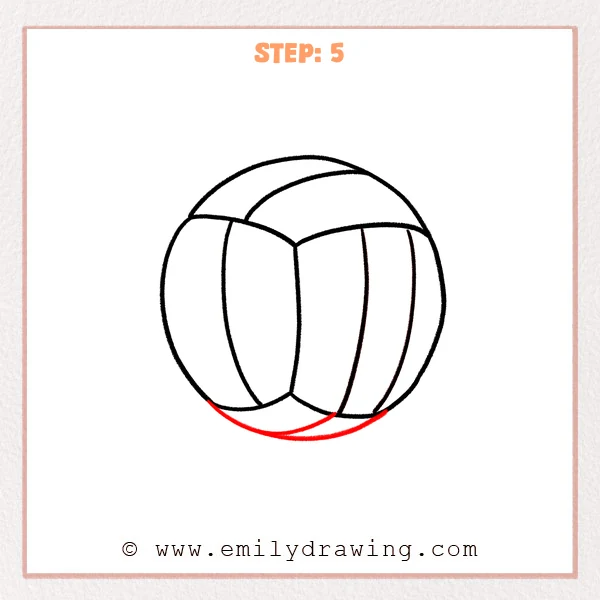
Draw a wide curved line along the very bottom to connect the left and right outer edges.
Let this curve sit slightly below the panel seams so the volleyball feels more round and full.
Check that the bottom edge looks smooth from side to side.
Pro Tip: Avoid a pointy bottom curve—smooth and round looks more realistic.
Step 6: Add Cute Heart Decorations
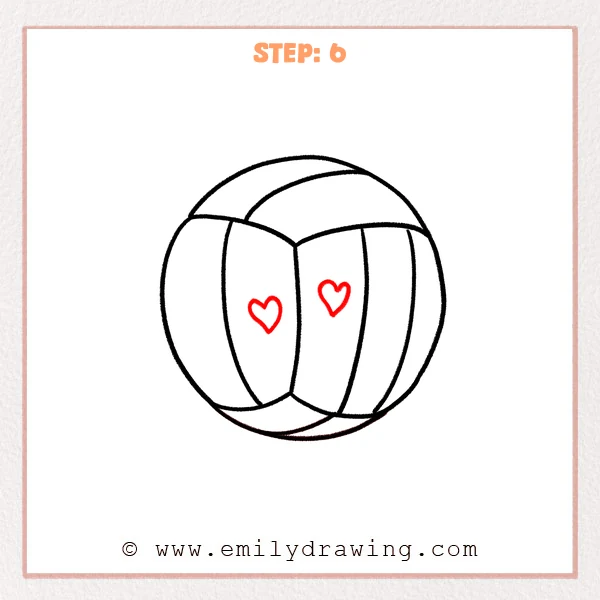
Draw one small heart inside each of the two middle panels as a design detail.
Keep the hearts centered and similar in size so the decoration feels balanced.
You can leave them as outlines or color them in for a pop of style.
Pro Tip: Sketch the two top bumps first, then add the bottom point for symmetry.
Step 7: Color in your drawing!
Fun Facts
- A volleyball is usually made from synthetic leather with an inner rubber bladder.
- Modern indoor volleyballs use a panel design that helps grip and control.
- The curved seams in a drawing help the ball look round, even without shading.
Pin it now, Draw later!
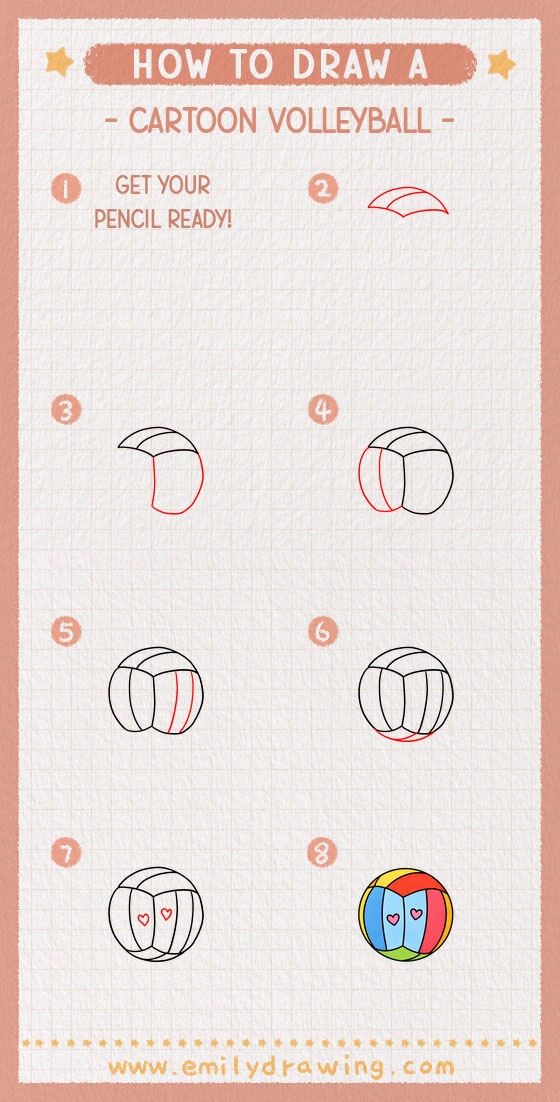
Trace your final lines with a pen, then erase any extra sketch marks.
If you want more depth, add a tiny shadow under the ball or thicken one outer edge slightly.
Now you know how to draw a cartoon volleyball step by step—try making a whole set with different patterns and colors.
Get the FREE Printable Drawing Guide
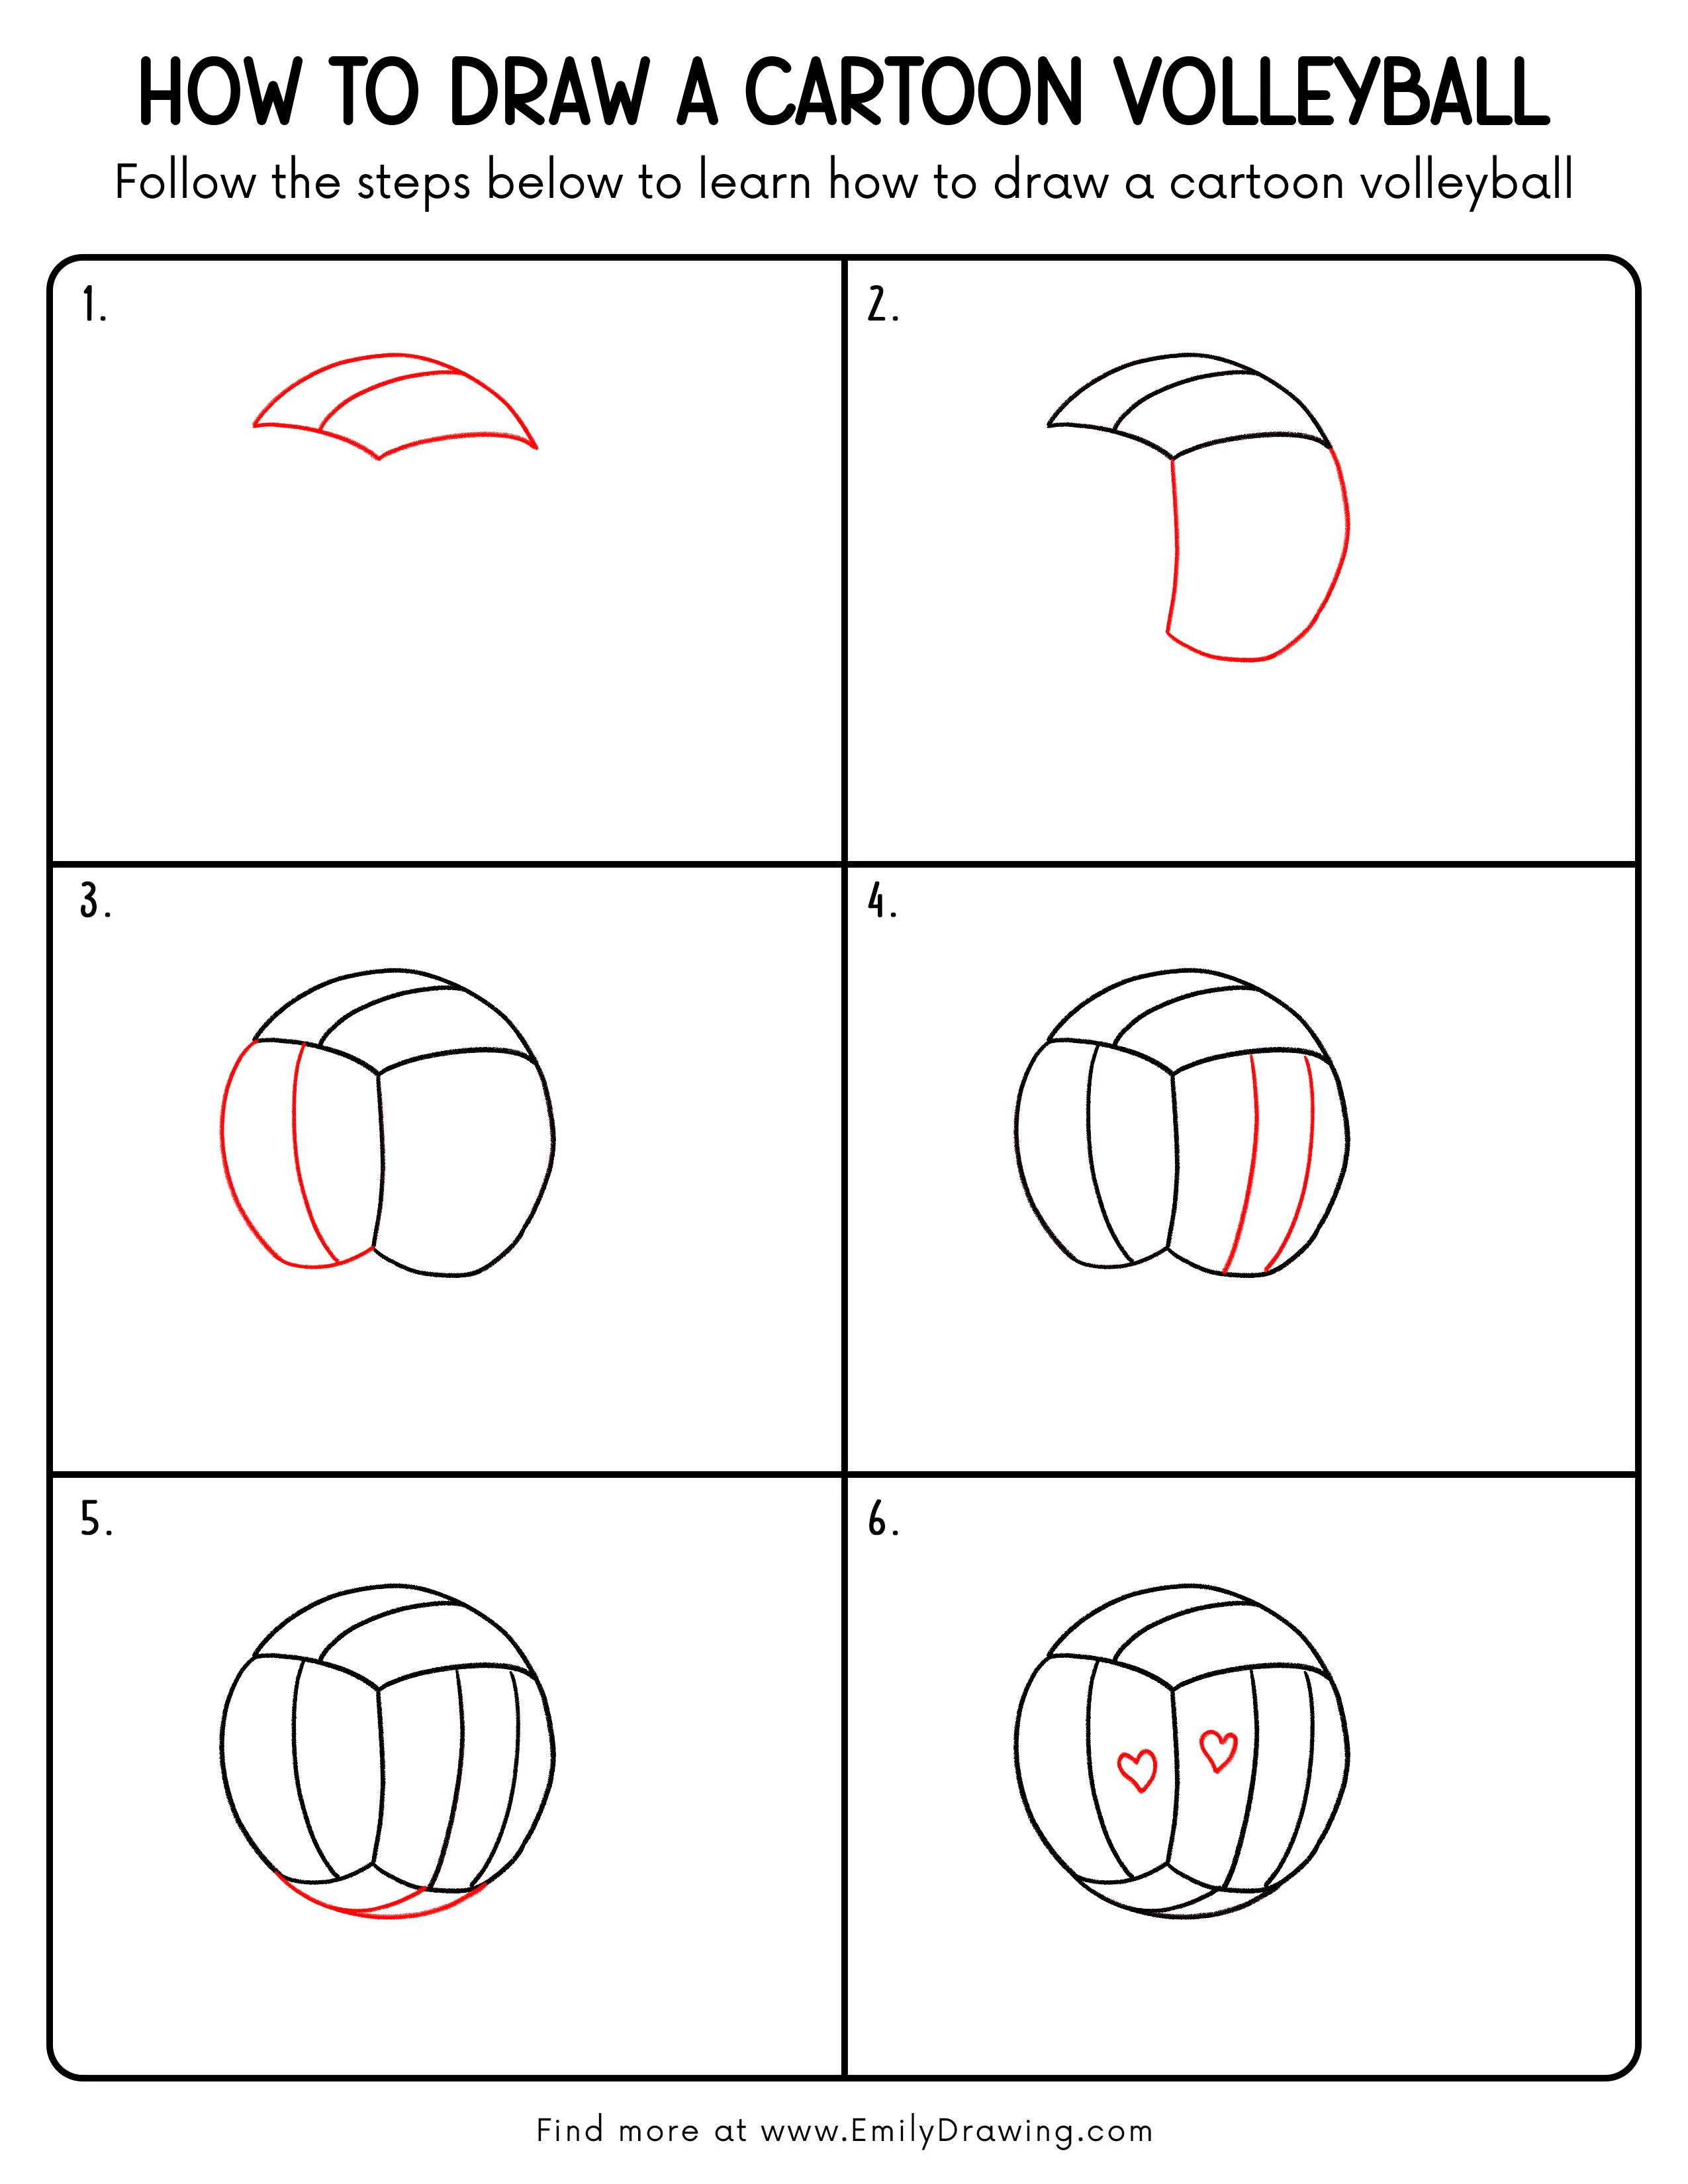
FREE Download Printable Cartoon Volleyball Drawing Tutorial
Frequently Asked Questions
How do I make the volleyball look more round?
Use smooth arcs that follow the same curve direction, and avoid flat or pointy edges at the bottom.
What if my panel seams look uneven?
Lightly redraw the seams so they stay evenly spaced and gently curved, like they wrap around a sphere.
Can I color this cartoon volleyball?
Yes, use flat colors for each panel and keep the seams visible so the pattern stays clear.