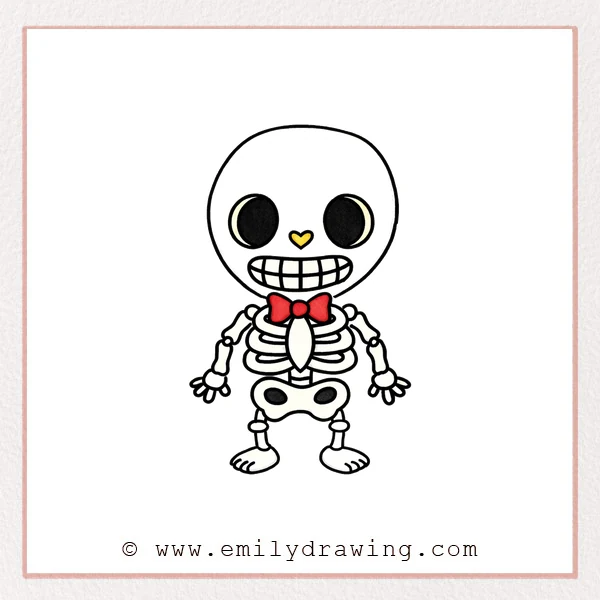
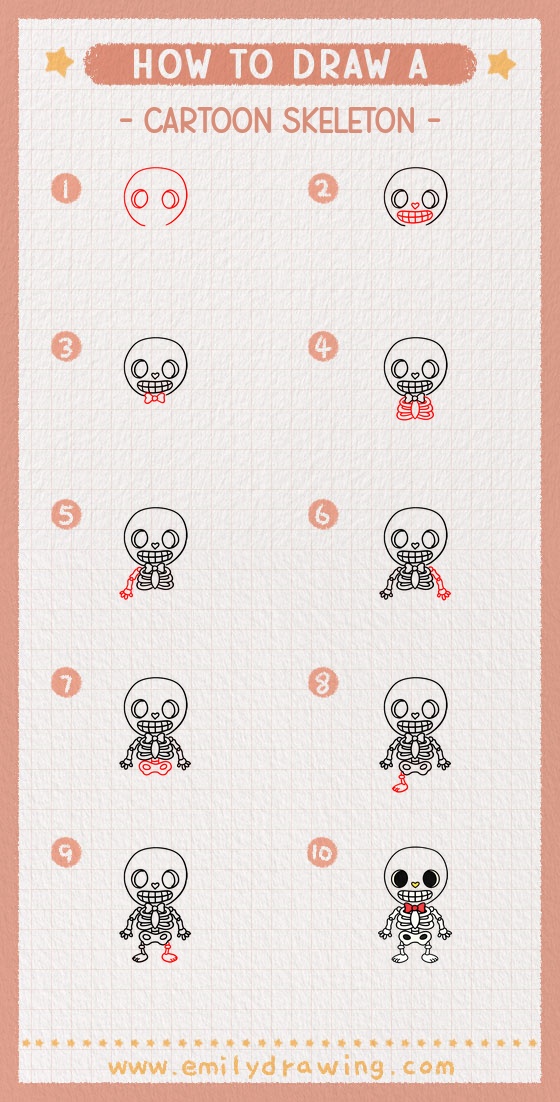
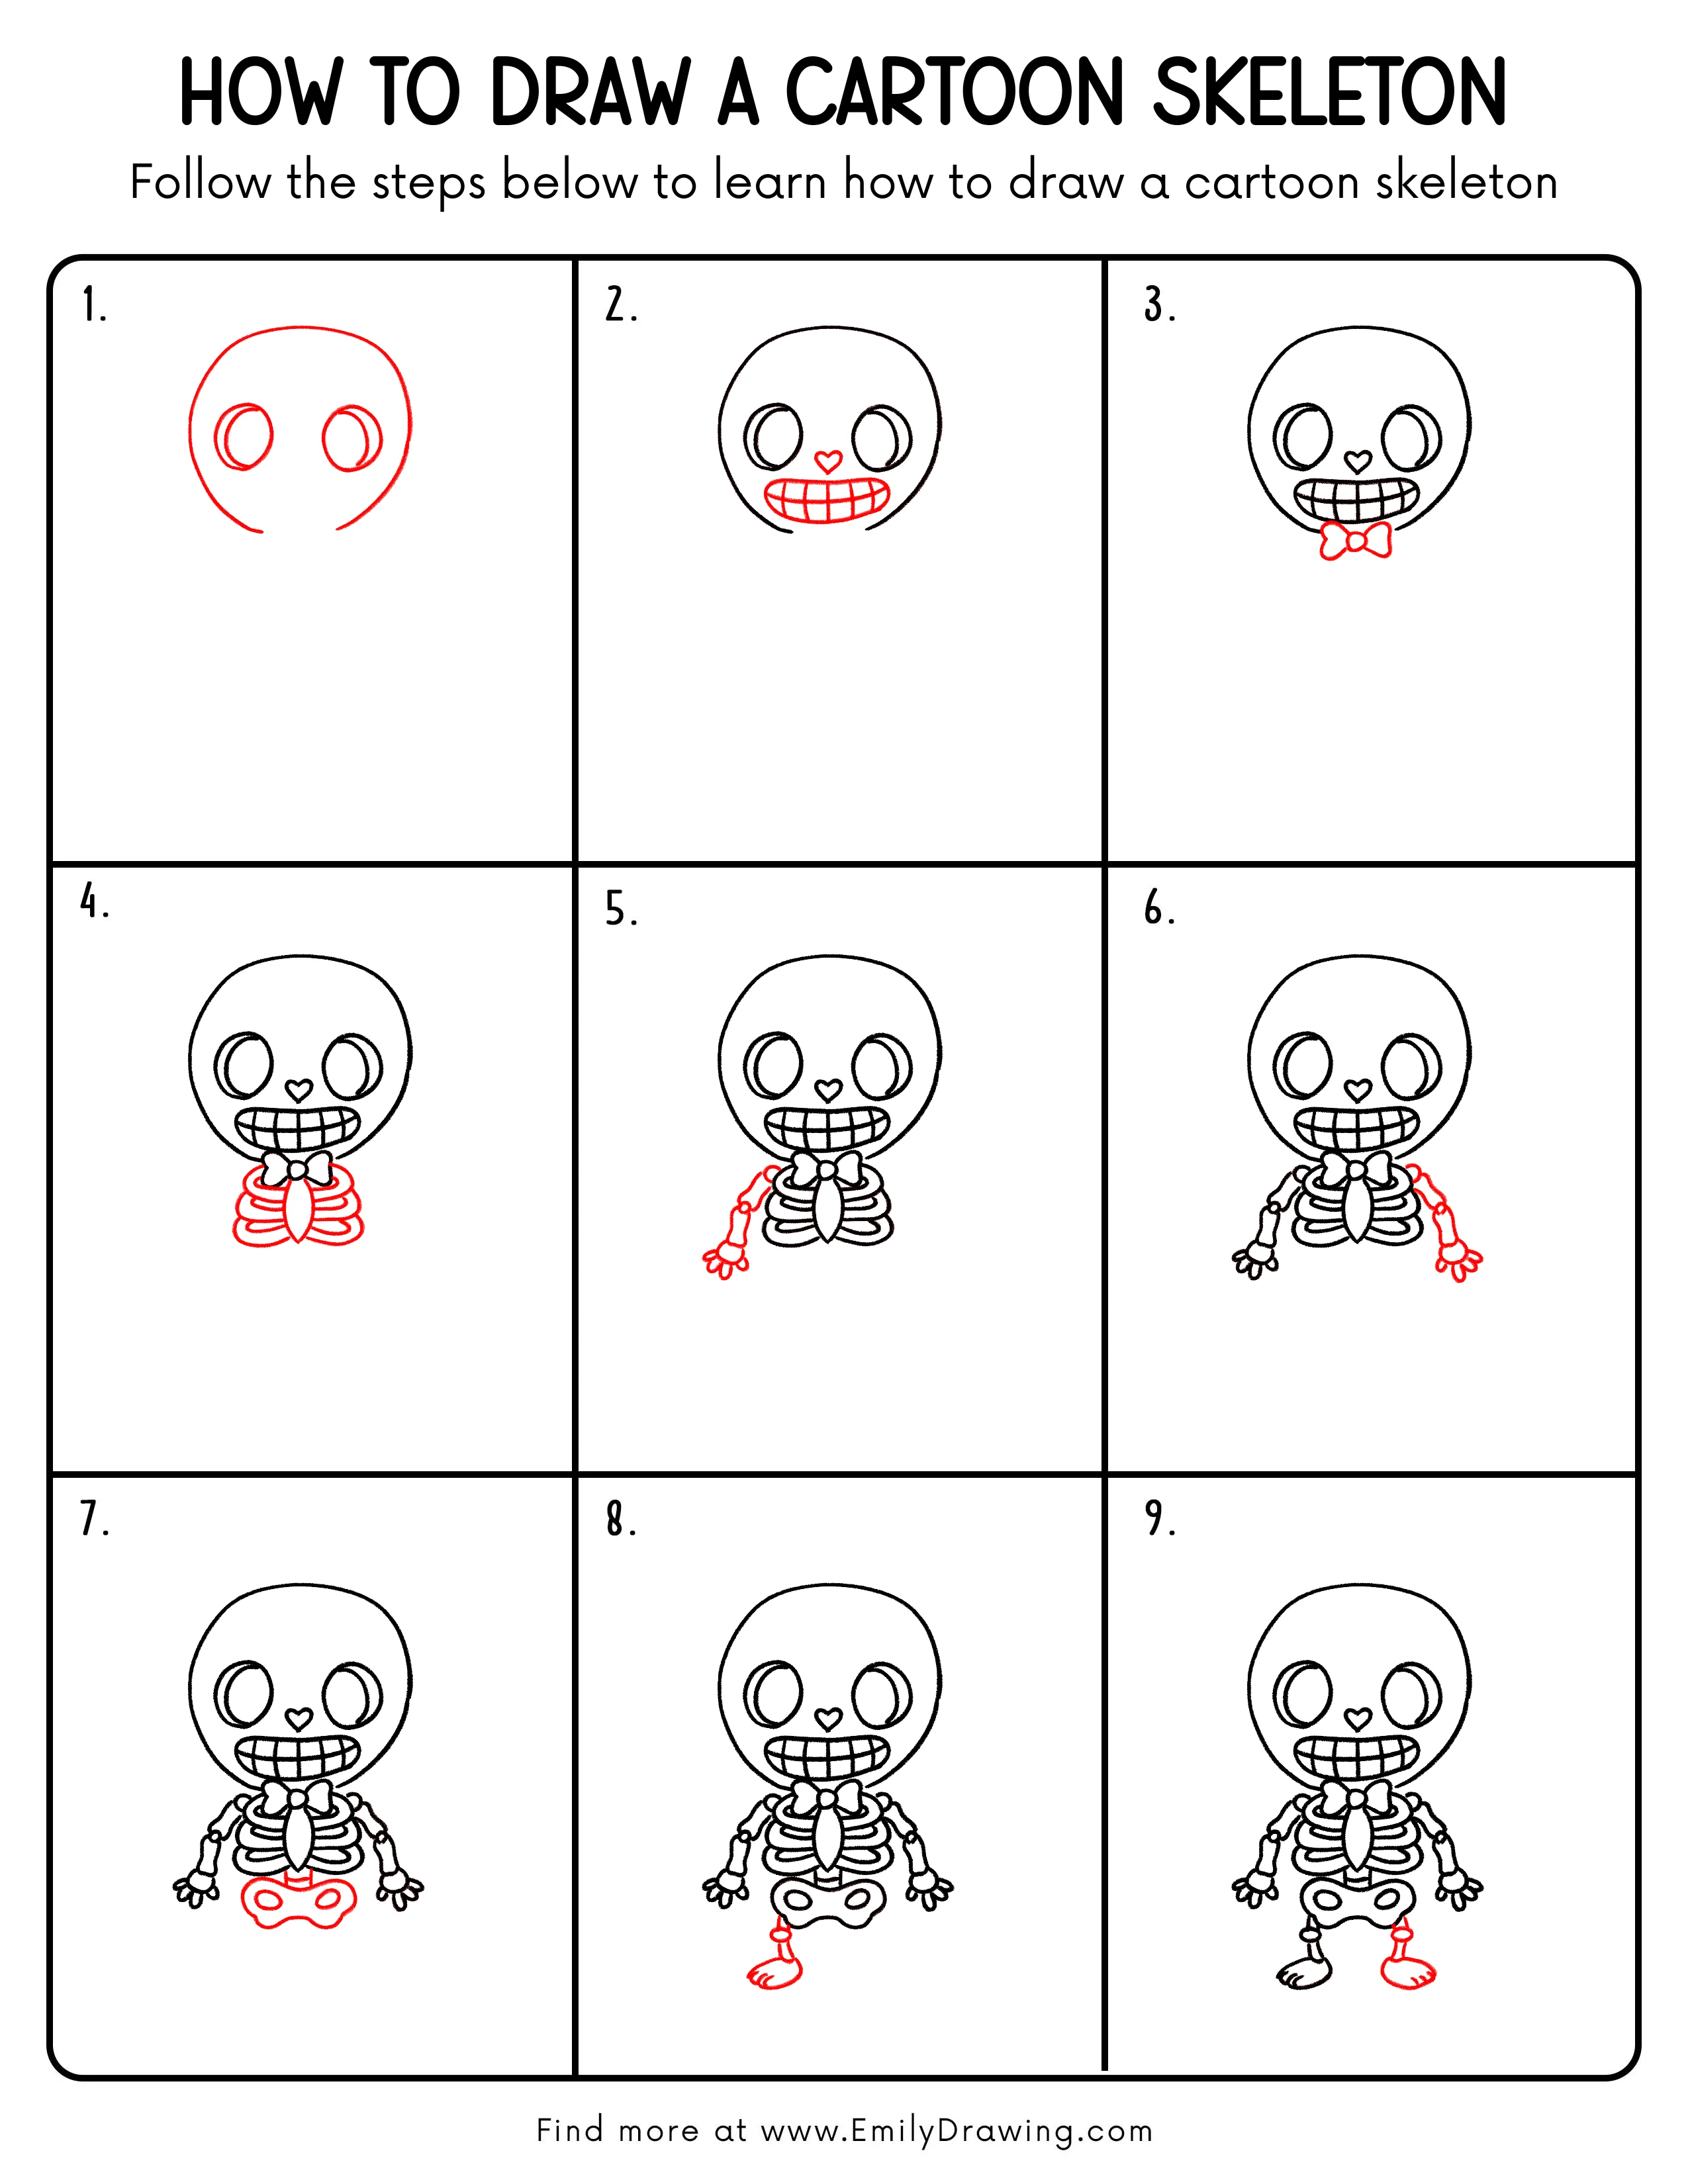
This easy drawing tutorial shows how to draw a cartoon skeleton step by step.
We will build the skull, ribs, and bones using simple shapes that beginners can follow.
What You Will Need
- Pencil
- Eraser
- Black marker or pen
- Coloring tools (optional)
Here are my RECOMMENDED Art Supplies!
- Crayola Coloring Set (140 Pieces – Mega Value!)
- 24 Colored Crayon Set
- A4 Printer Paper
- Crayola Coloring Pencils
- HP Home Printer with Instant Ink!
Time needed:
24 minutes.
Step-by-Step Drawing Guide
Step 1: Sketch the Skull and Eye Sockets
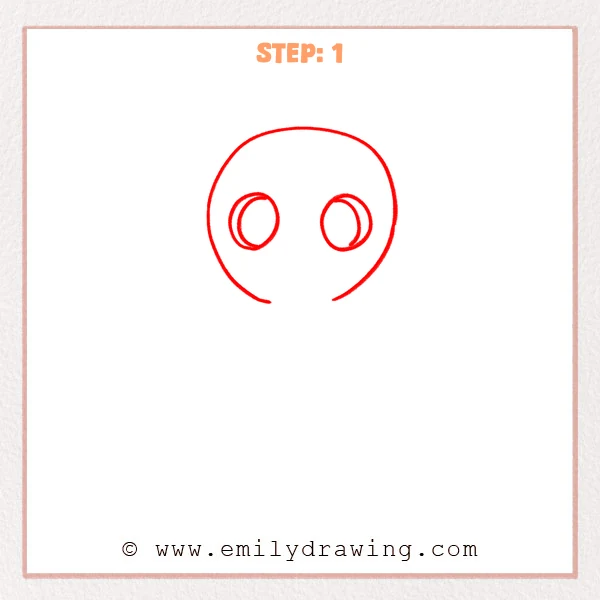
Start with one large, rounded arc to form the top of the skull, and leave two small gaps at the bottom instead of closing it.
Add two vertical oval eye sockets in the upper middle area, keeping them evenly spaced.
Pro Tip: Make the eye sockets slightly large for a cuter cartoon skeleton look.
Step 2: Add the Nose and a Big Grin
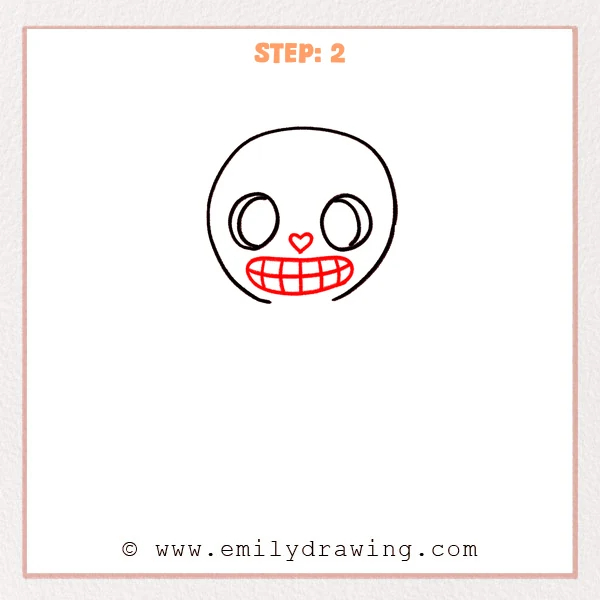
Draw a small heart-shaped nose just below the space between the eye sockets.
Then add a wide curved mouth, and divide it with a few vertical and horizontal lines to create neat, blocky teeth.
Pro Tip: Keep the tooth grid balanced so both sides look equally sized.
Step 3: Add a Bow Tie Under the Chin
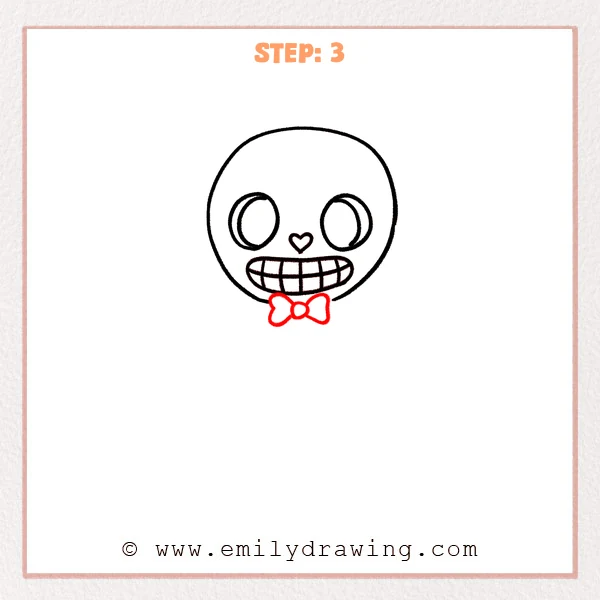
Draw a small circle centered just below the skull for the knot.
On each side, add a rounded bow shape that looks like a soft triangle, keeping both sides similar in size.
Pro Tip: Round the outer edges of the bow for a softer cartoon style.
Step 4: Add a Small Ribcage and a Tie-Like Bone
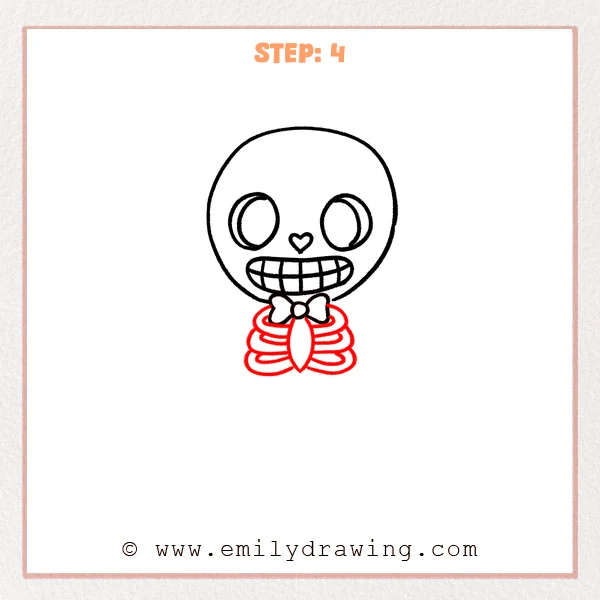
Under the bow tie, sketch a long teardrop shape that hangs down like a little tie.
Then stack a few curved horizontal bands on both sides, so they look like rounded ribs wrapping around the center.
Pro Tip: Keep the rib curves similar so the chest looks tidy and even.
Step 5: Add the Left Arm and Little Hand
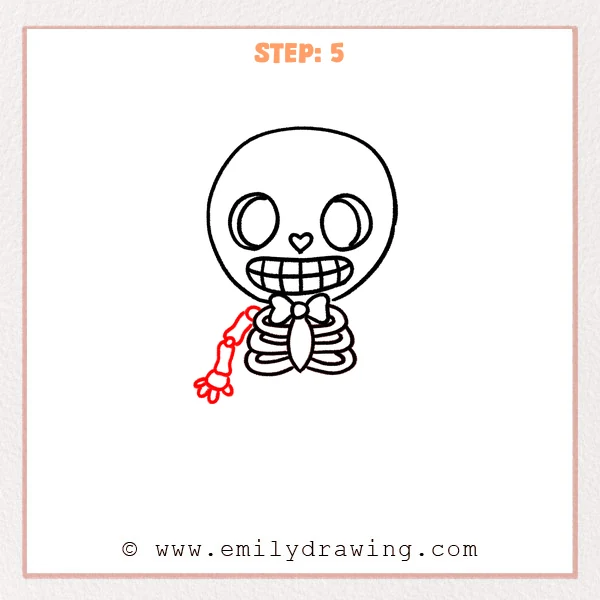
From the left side of the ribcage, draw a curved arm made from a few short, rounded bone segments.
Finish with a small wrist ring, then add several short finger bones that spread out like soft petals.
Pro Tip: Leave tiny gaps between bone segments so the arm feels more skeleton-like.
Step 6: Add the Right Arm and Match the Hand
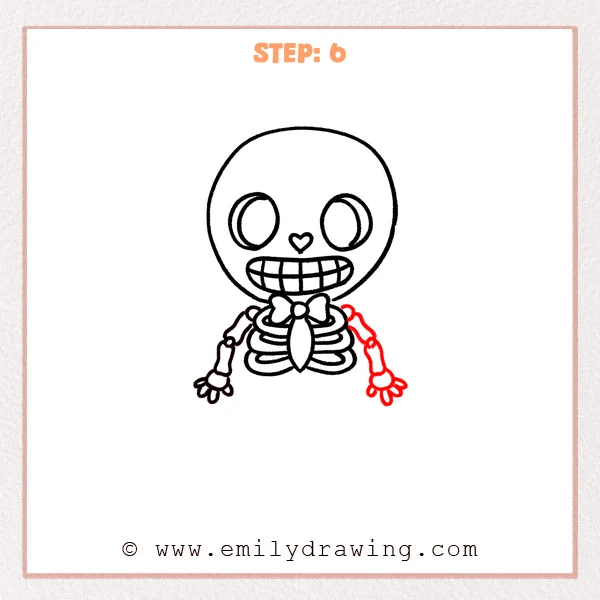
On the right side of the ribcage, sketch a curved arm using the same short, rounded bone segments.
Add a small wrist ring, then draw several short finger bones, keeping the spread similar to the left hand.
Pro Tip: Check that both elbows sit at a similar height before drawing the hand.
Step 7: Add the Pelvis and a Small Spine
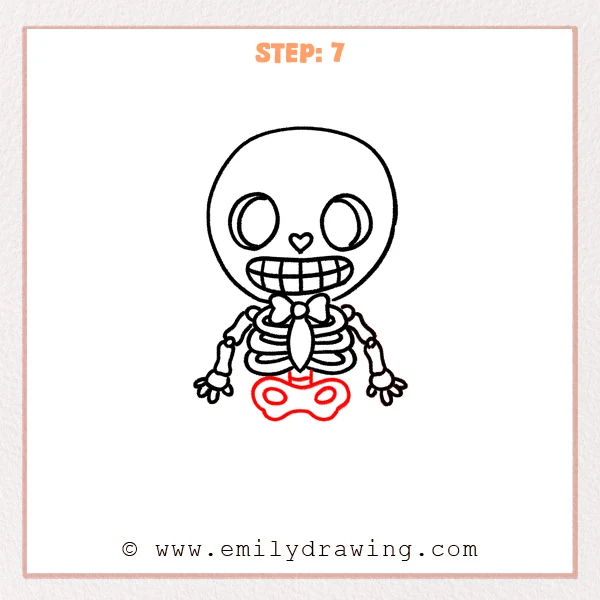
Just below the ribcage, add two or three short vertical blocks to form a tiny spine.
Then draw a rounded bean-like pelvis shape, and place an oval opening on each side for the hip sockets.
Pro Tip: Keep both hip openings the same size and height for a balanced look.
Step 8: Add the Left Leg Segments and Toes

From the lower left side of the pelvis, add a short leg bone, then place a small circle for the knee joint.
Add a shorter lower leg, then draw a rounded foot and mark three small curved toe lines at the front.
Pro Tip: Keep the knee circle small so the leg feels light and neat.
Step 9: Add the Right Leg and Foot
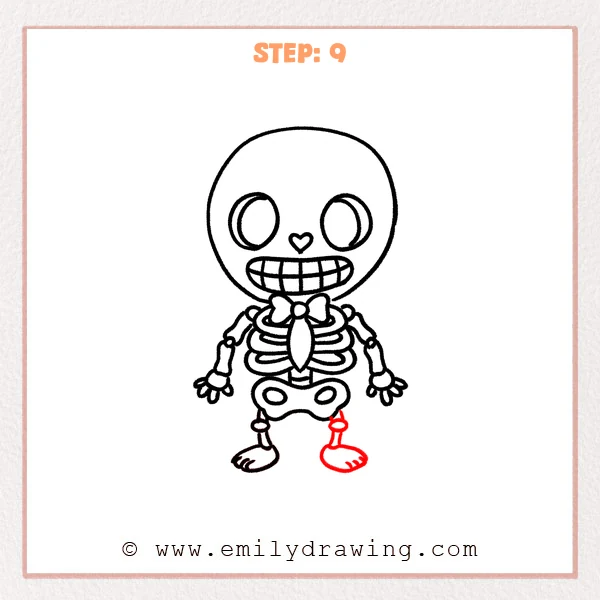
From the lower right side of the pelvis, add the other short leg using rounded segments and a small knee.
Finish with a chunky foot shape, then add a couple of short curved toe lines, matching the size and angle of the left foot.
Pro Tip: Place both soles at the same height so the character stands firmly.
Step 10: Color in your drawing!
Fun Facts
- Human bodies have more than 200 bones, but cartoon skeletons can be much simpler.
- The ribcage protects important organs, so it is often drawn as a strong center shape.
- Many artists use big eyes and a wide grin to make a skeleton look friendly.
Pin it now, Draw later!
Go over your final lines with a darker pen, then erase any sketchy pencil marks.
For coloring, try light gray shading under the ribs, jaw, and knee joints to add depth.
A common beginner mistake is making one leg longer than the other, so check both sides before you ink.
Practice this step by step drawing a few times, and try changing the bow tie or expression for new looks.
Get the FREE Printable Drawing Guide
FREE Download Printable Cartoon Skeleton Drawing Tutorial
Frequently Asked Questions
How do I make the cartoon skeleton look cuter?
Use larger eye sockets, rounder bones, and a softer smile shape.
What if my teeth grid looks uneven?
Lightly draw a center line first, then add matching tooth lines on both sides.
How can I add simple shading without making it messy?
Shade with very light strokes on one side only, and keep the darkest areas small.