
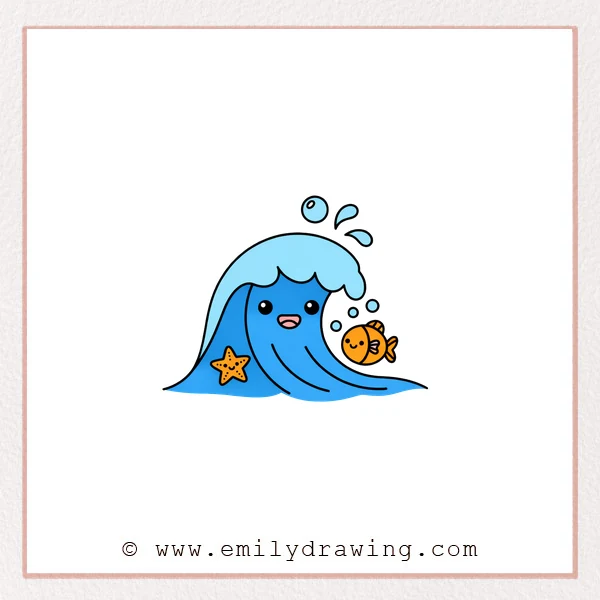
In this easy drawing tutorial, you will create a cute cartoon ocean scene.
We will draw a friendly wave, then add small ocean details for extra charm.
Take your time, and keep your lines light until you like the shapes.
What You Will Need
- Pencil (or a light sketch pen)
- Eraser
- Black fineliner or marker
- Paper
- Optional: colored pencils or markers
Here are my RECOMMENDED Art Supplies!
- Crayola Coloring Set (140 Pieces – Mega Value!)
- 24 Colored Crayon Set
- A4 Printer Paper
- Crayola Coloring Pencils
- HP Home Printer with Instant Ink!
Time needed:
19 minutes.
Step-by-Step Drawing Guide
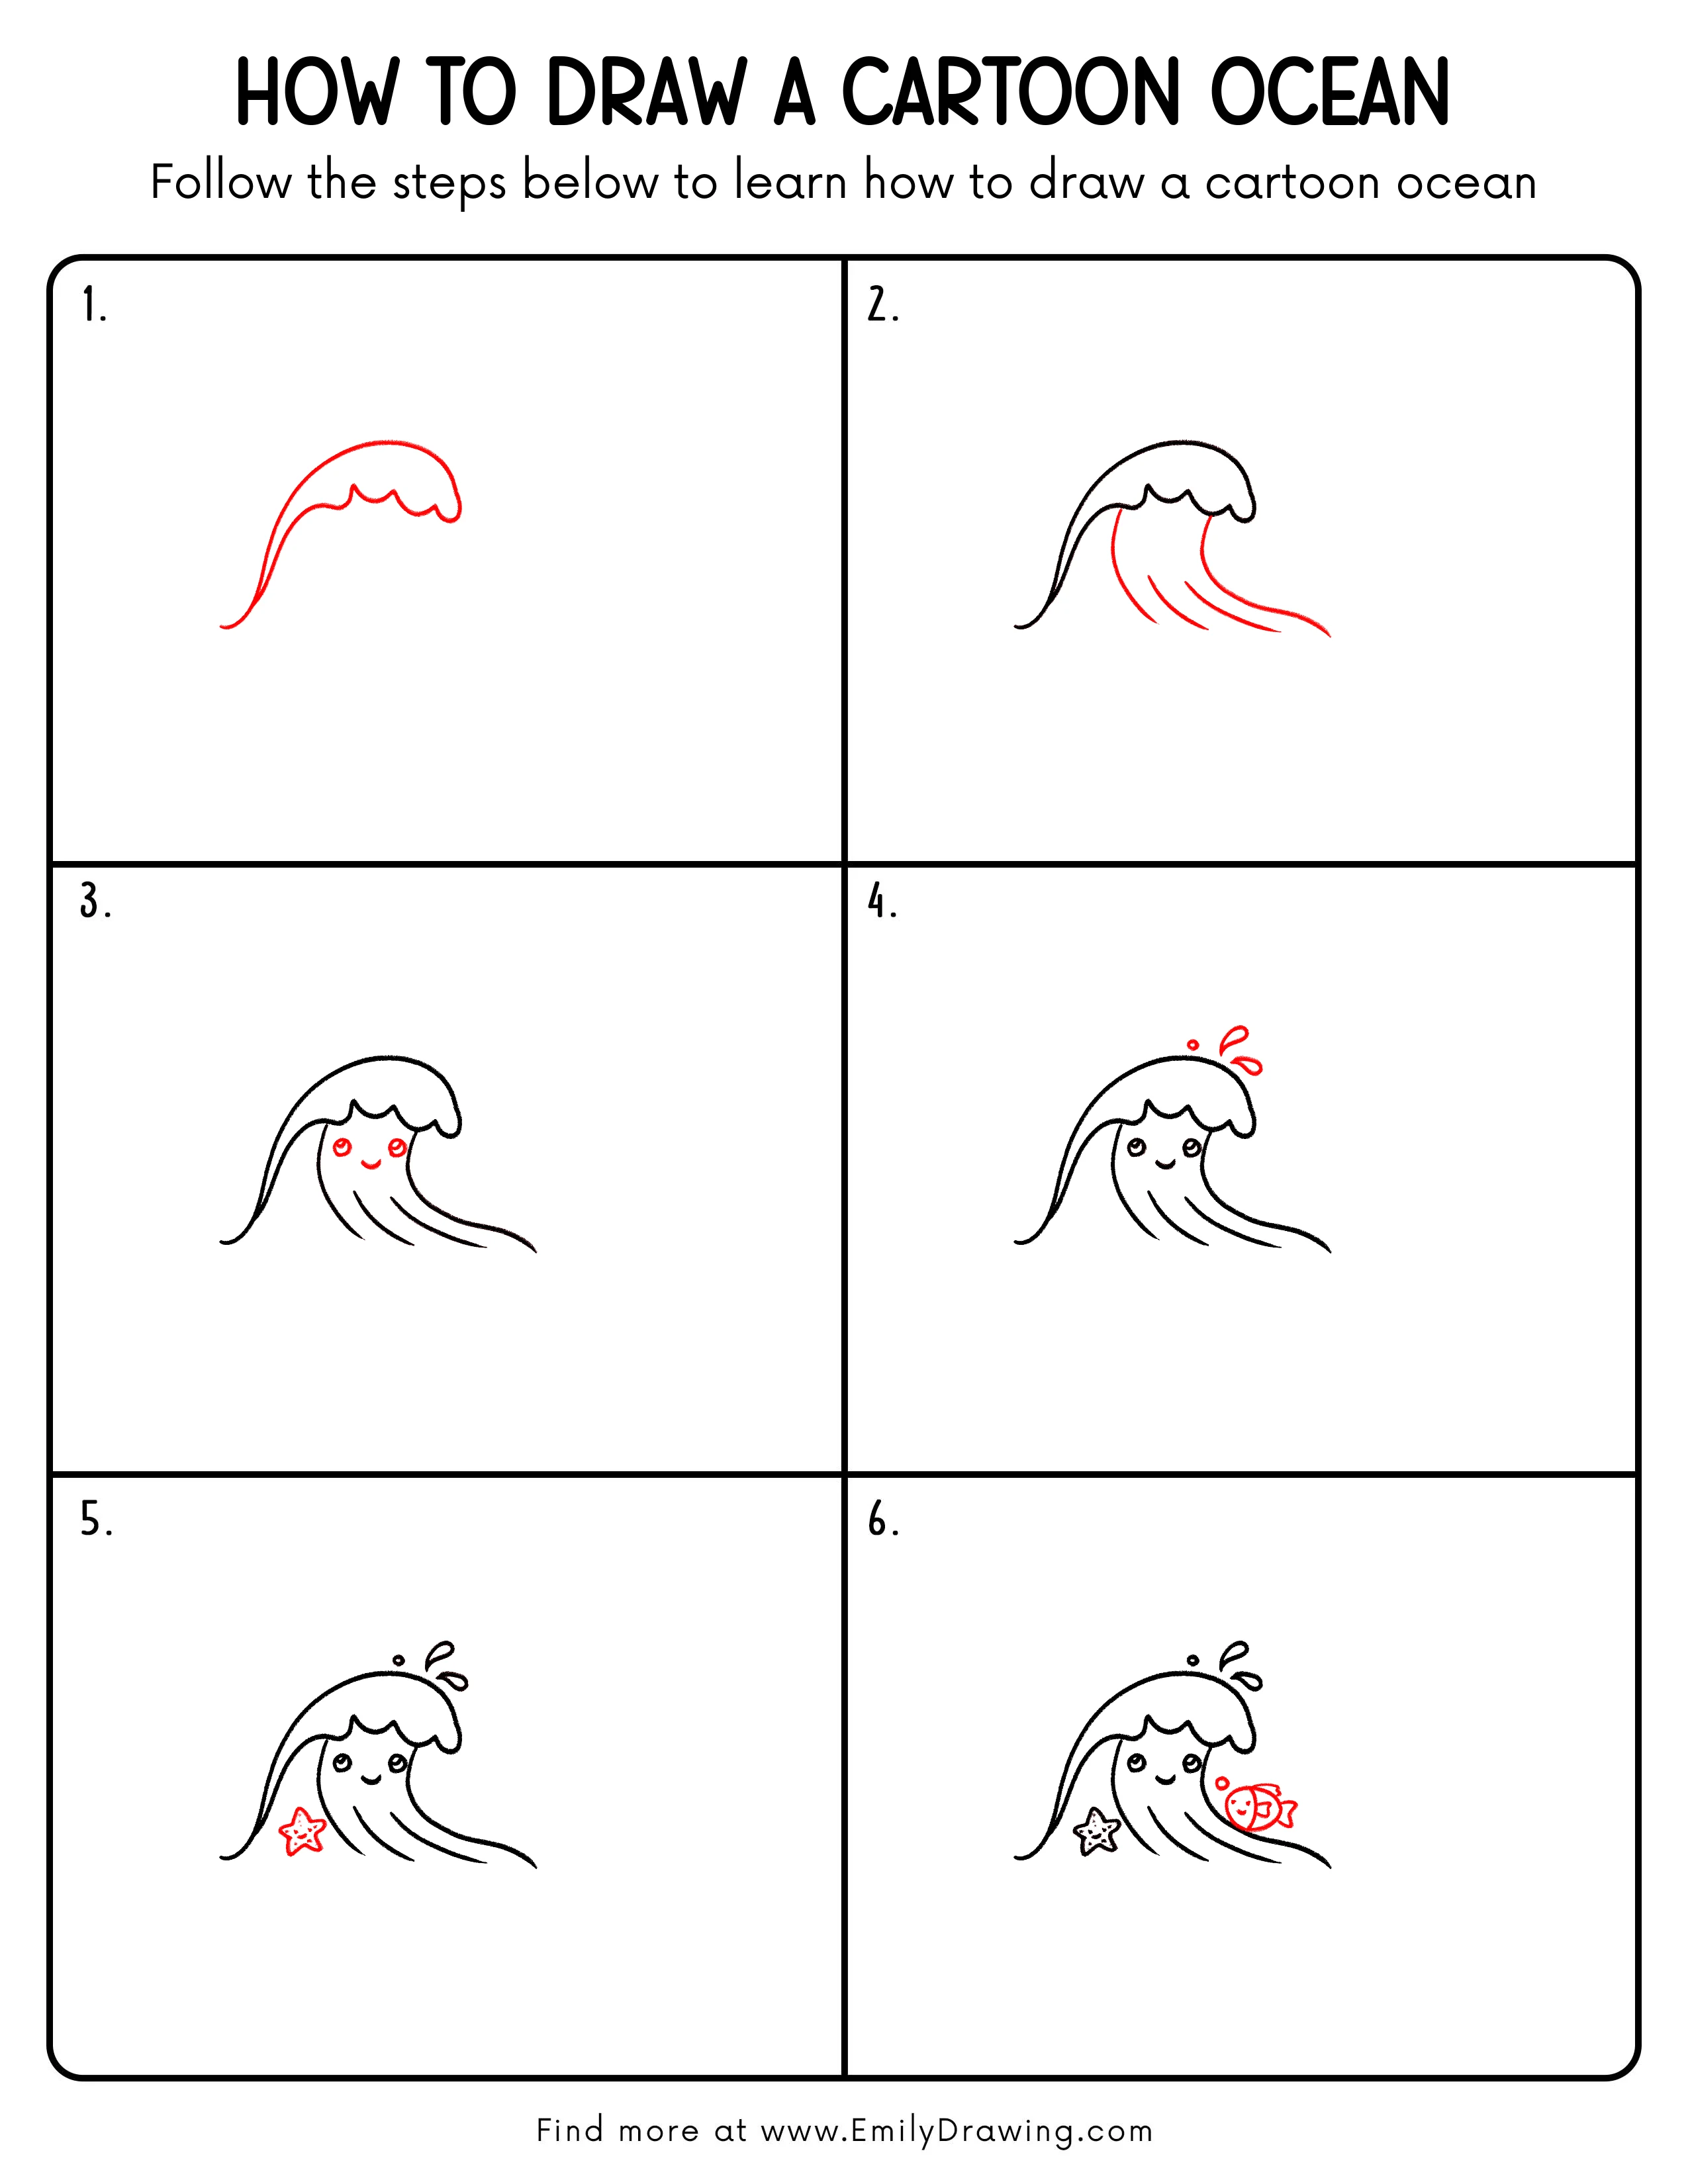
Step 1: Draw the Main Wave Outline
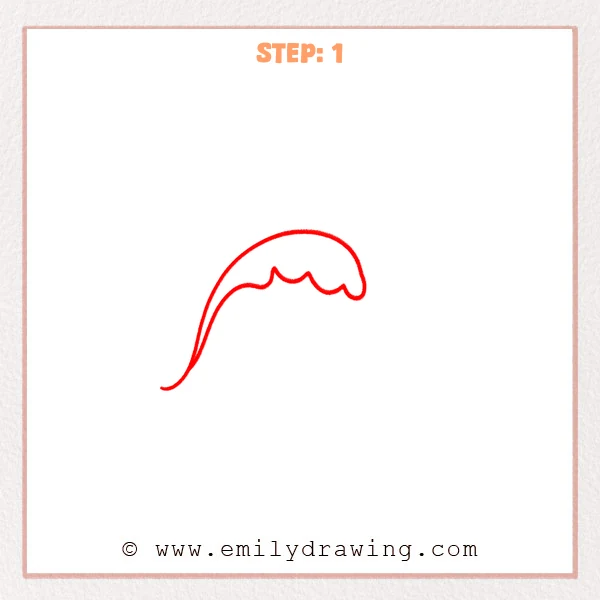
Start with one long curved arc for the top of the wave, sweeping up and over.
Add a row of rounded bumps underneath to form the cartoon wave crest.
On the left, taper the tail downward so the wave feels like it’s flowing.
Pro Tip: Keep the top arc big and smooth so the crest bumps look cute and strong.
Step 2: Add the Falling Wave Body
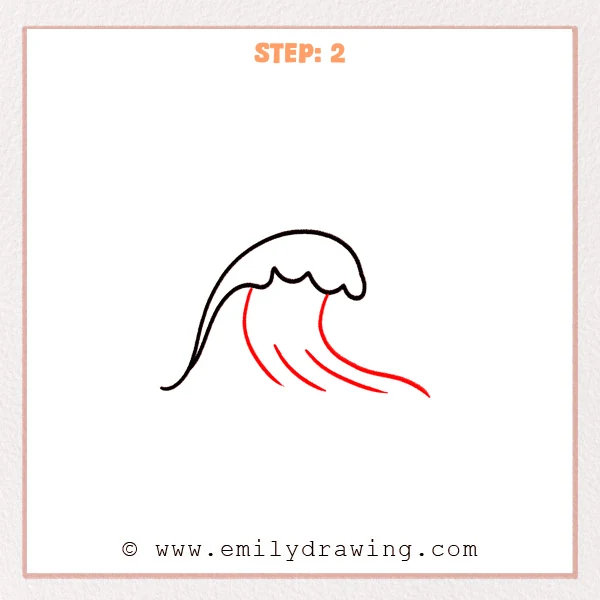
Draw a big curved line dropping down from under the crest to form the wave body.
Inside the wave, add three flowing motion lines that follow the same direction.
Let the lines stretch longer and thinner toward the right to show speed.
Pro Tip: Match the smooth curve of the body to the crest arc so the wave feels cohesive.
Step 3: Add a Cute Face
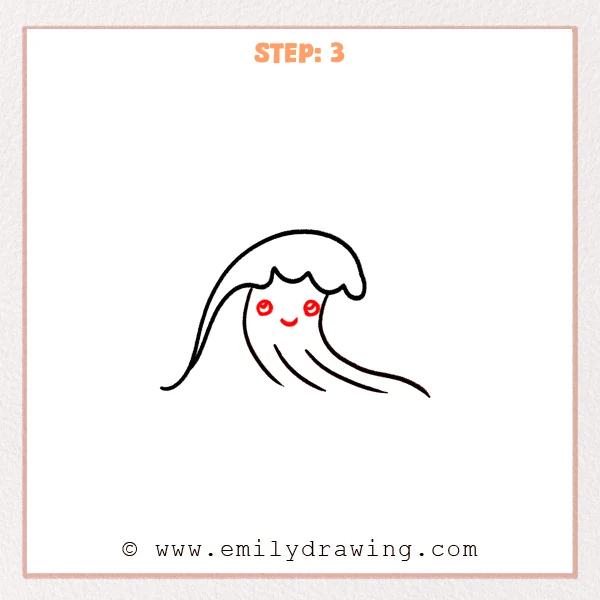
Draw two round eyes on the upper middle of the wave body, each with a small highlight circle.
Add a tiny curved smile under the eyes to give the wave a friendly look.
Place the face where the body is widest so it feels balanced.
Pro Tip: Keep both eyes the same size and height for a neat, cute expression.
Step 4: Add Splash Droplets
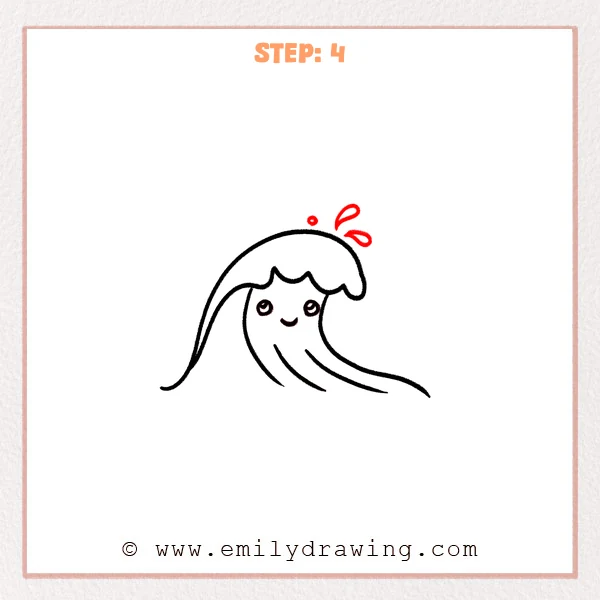
Draw a small dot above the crest to show a tiny water bead.
Add two or three teardrop splashes nearby, with the points facing outward.
Vary the droplet sizes a little to make the wave feel lively.
Pro Tip: Don’t line the droplets up perfectly; a slight stagger looks more natural.
Step 5: Add a Starfish Decoration
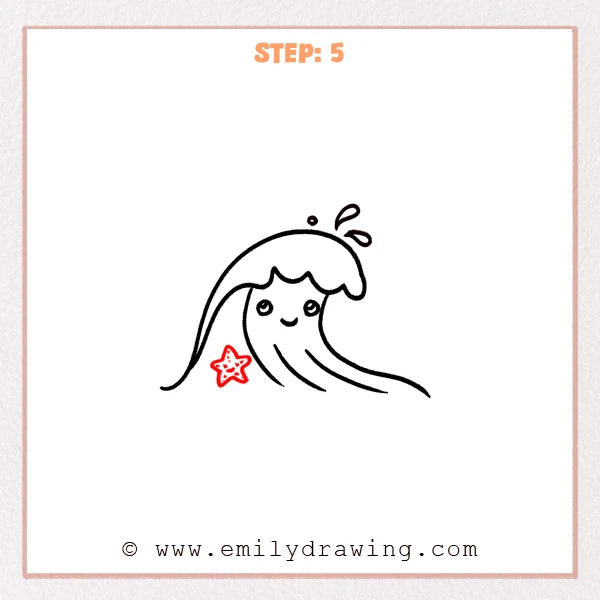
Draw a simple five-point starfish on the left empty area, with rounded points.
Add a few tiny dots or short marks inside for a cute texture.
Keep a small gap from the wave outline so everything stays clean.
Pro Tip: Make the five points similar in size so the starfish looks balanced.
Step 6: Draw a Little Fish Friend
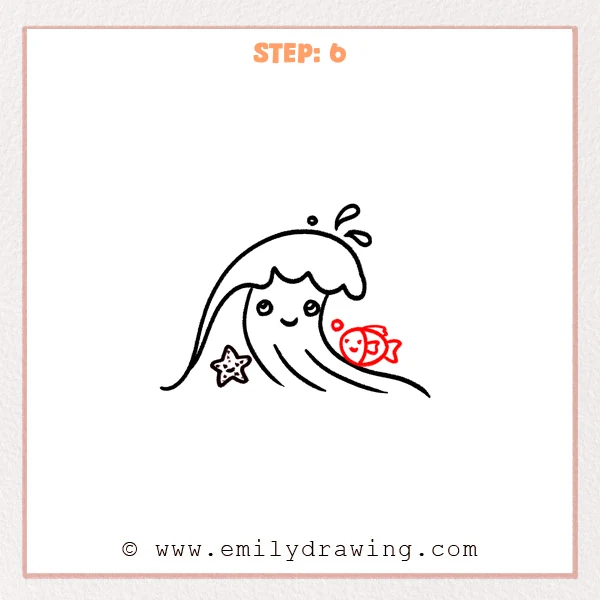
Draw a small oval on the right side to form the fish body.
Add a simple triangle tail and a few curved stripes across the body.
Give the fish a tiny eye and smile, then add a small bubble nearby.
Pro Tip: Keep the fish much smaller than the wave so it feels like a cute side detail.
Step 7: Color in your drawing!
Fun Facts
- Ocean waves form when wind transfers energy to the water’s surface.
- Starfish are not fish; they are echinoderms related to sea urchins.
- Many fish release bubbles when they move quickly near the surface.
Pin it now, Draw later!
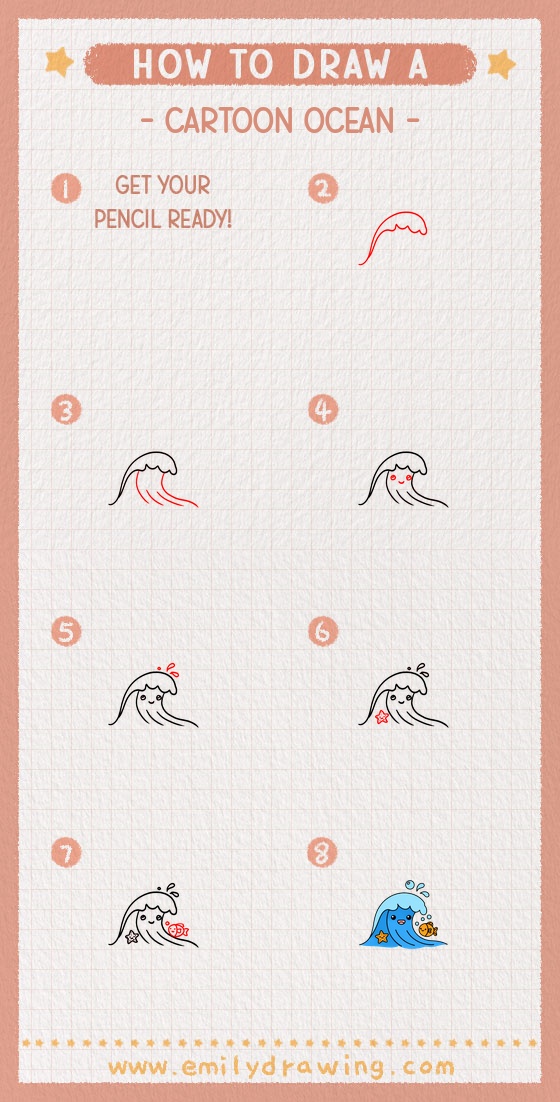
Trace your favorite lines with a clean black outline, then erase any extra sketch marks.
If you add color, try a light blue wave and warm accents on the starfish and fish.
You now know how to draw cartoon ocean step by step—try making a whole series of waves next.
Get the FREE Printable Drawing Guide
FREE Download Printable Cartoon Ocean Drawing Tutorial
Frequently Asked Questions
How can I make the wave look more dynamic?
Make the top arc bigger and tilt the crest slightly forward.
What if my wave looks too stiff?
Round your corners more and redraw the long arcs in one smooth motion.
Can I change the ocean details?
Yes, swap the starfish and fish for shells, a crab, or more splashes.



