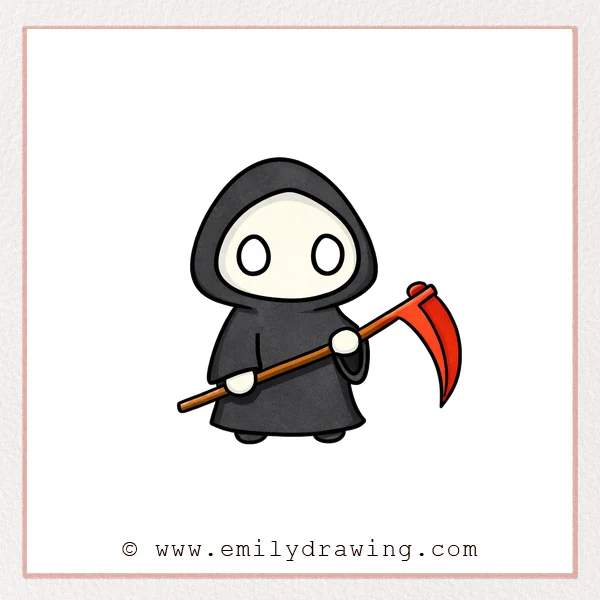
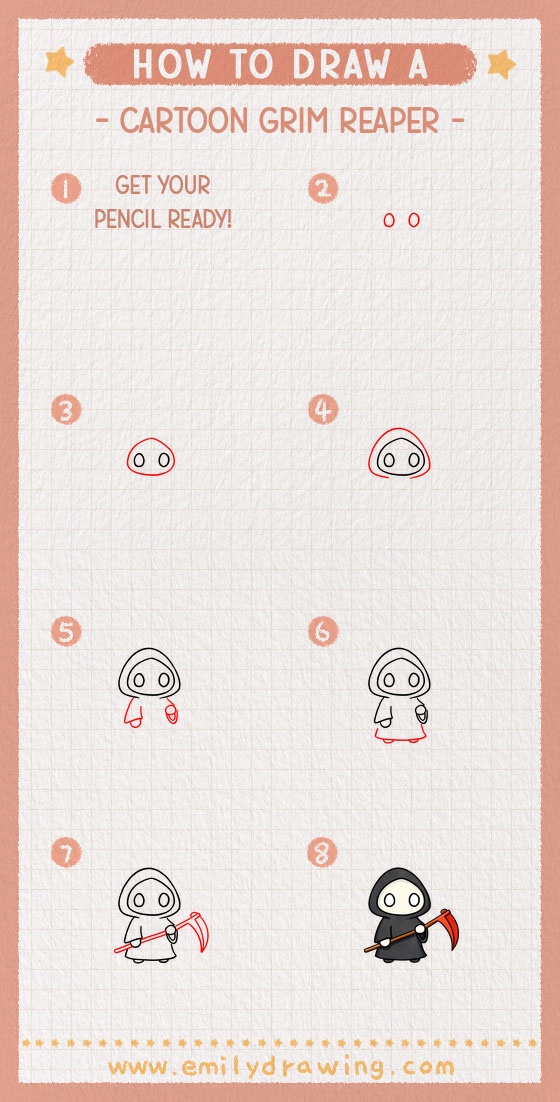
This easy drawing tutorial shows how to draw a cartoon grim reaper step by step. We will build a simple hooded character using clear shapes, so it feels calm and doable for drawing for beginners.
What You Will Need
- Pencil
- Eraser
- Black marker or pen
- Red colored pencil (optional, for planning lines)
- Paper
Here are my RECOMMENDED Art Supplies!
- Crayola Coloring Set (140 Pieces – Mega Value!)
- 24 Colored Crayon Set
- A4 Printer Paper
- Crayola Coloring Pencils
- HP Home Printer with Instant Ink!
Time needed:
25 minutes.
Step-by-Step Drawing Guide
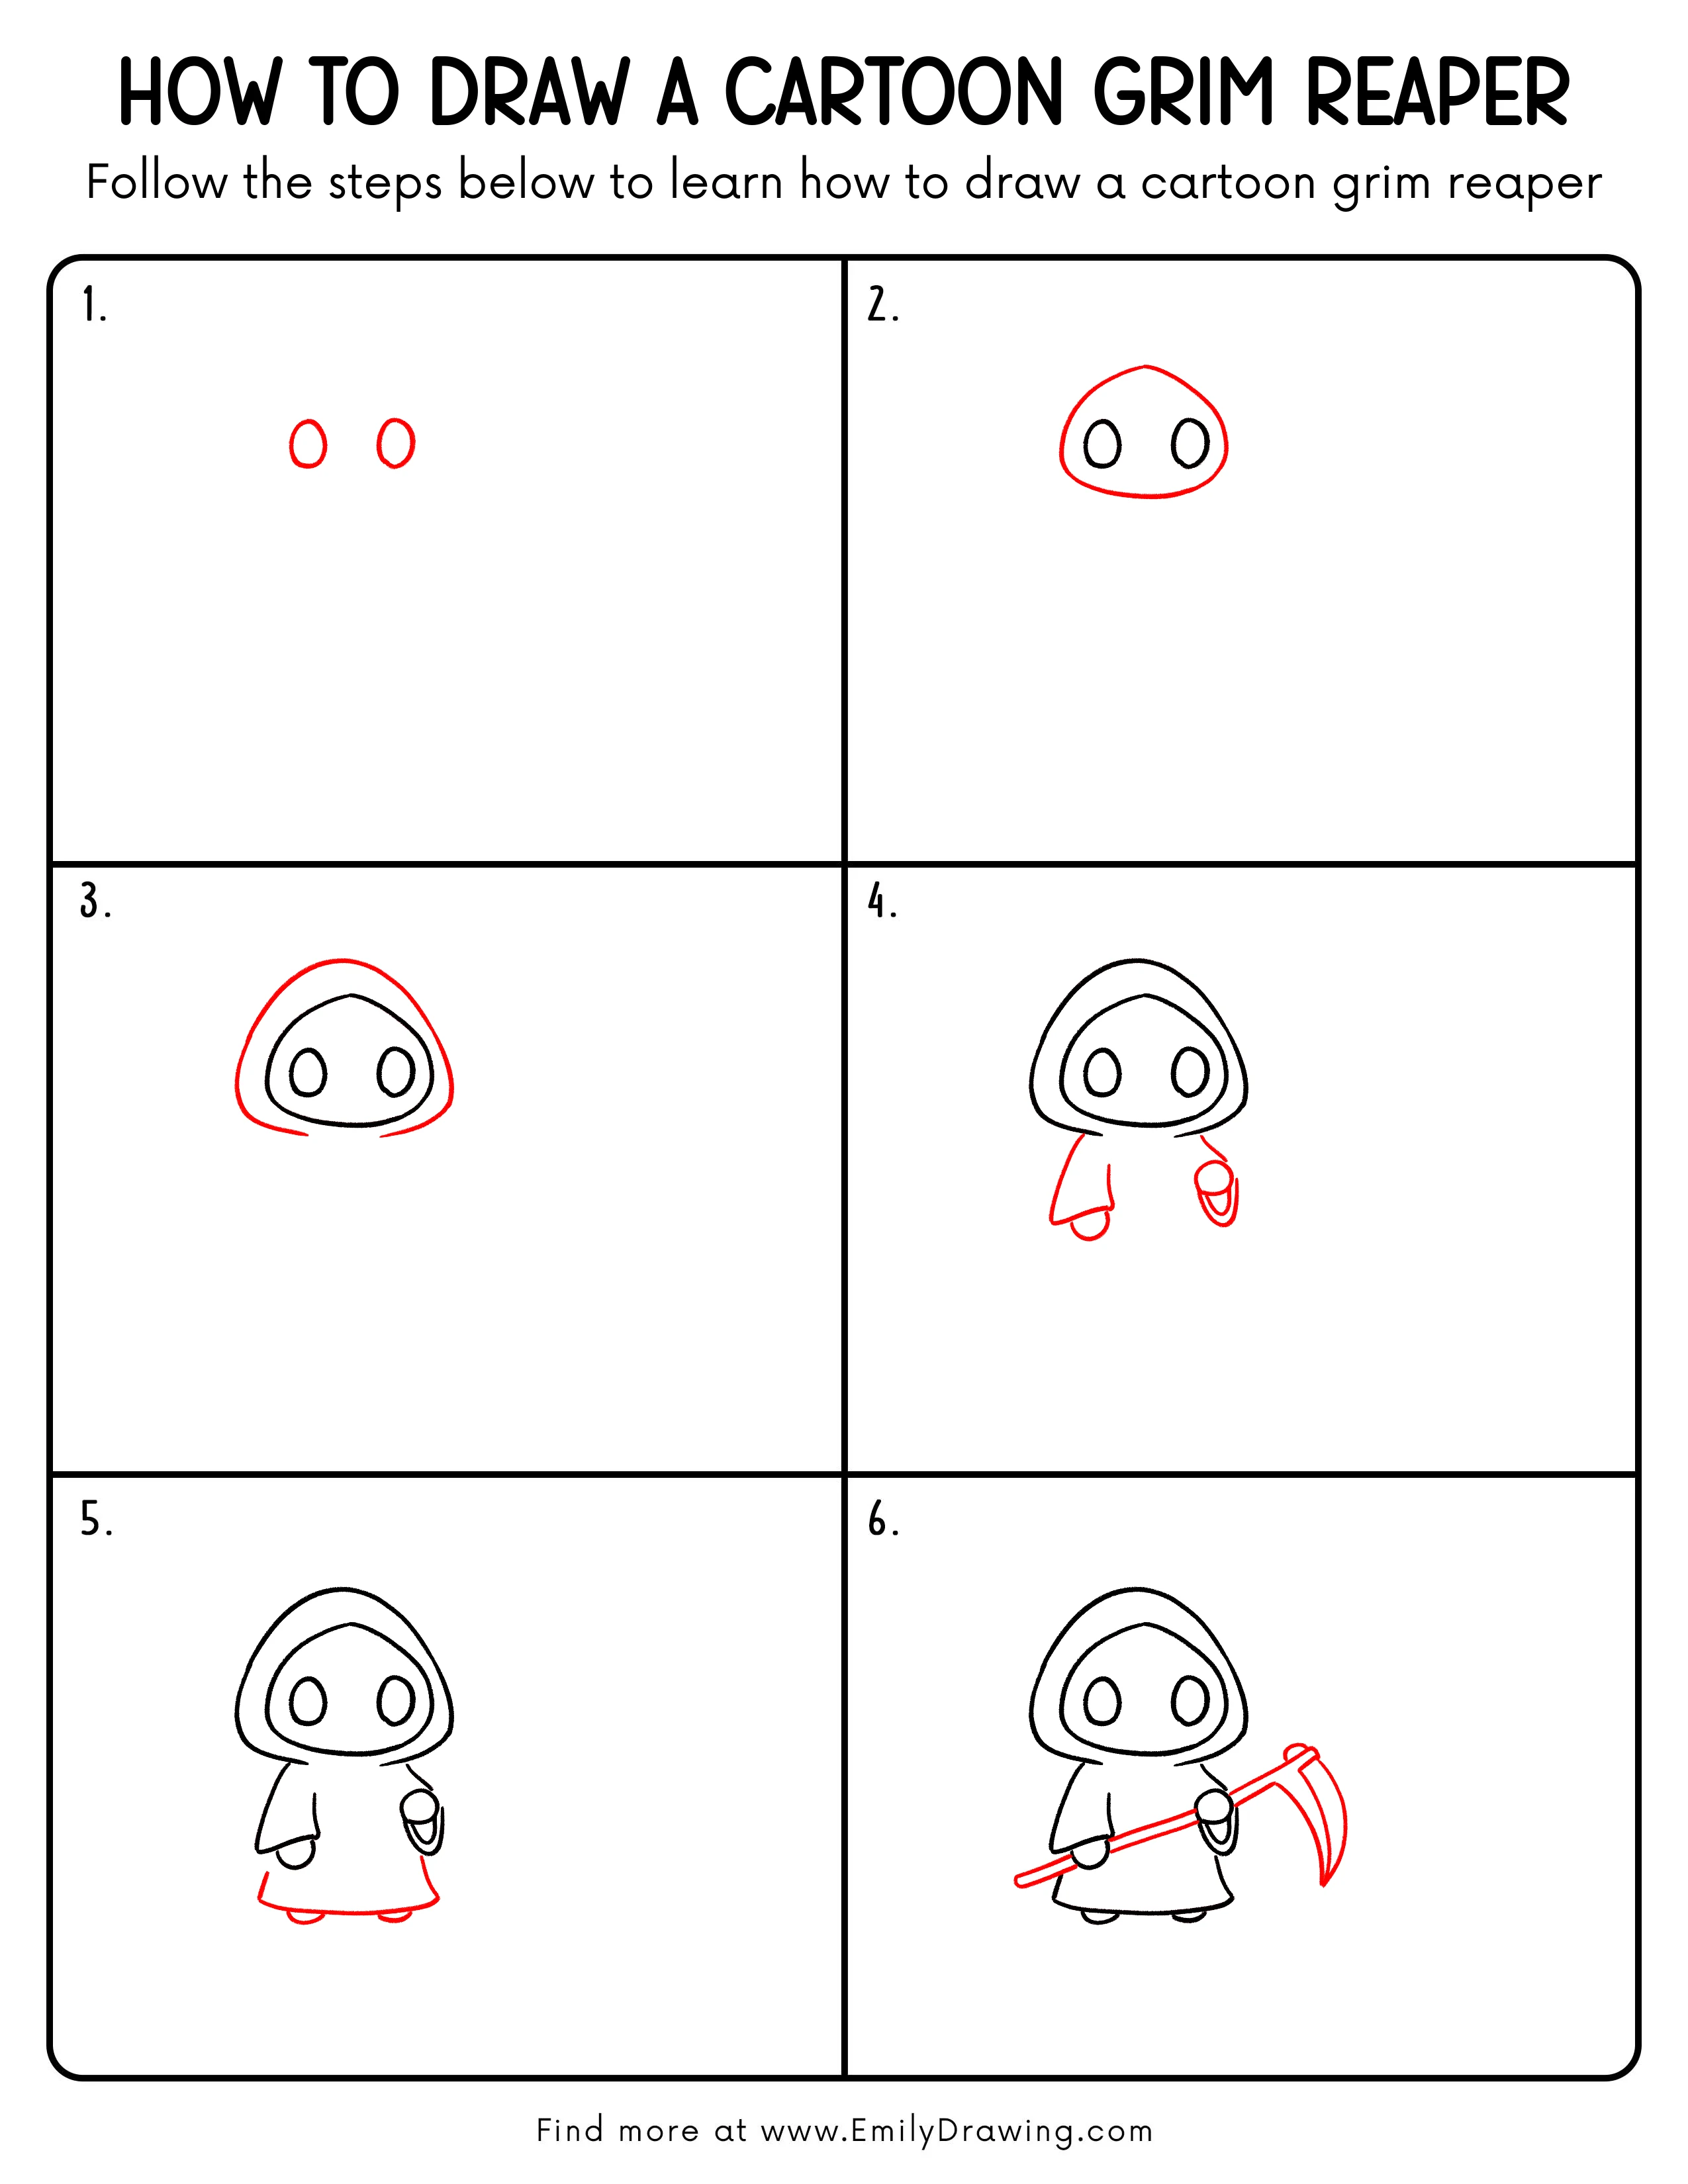
Step 1: Sketch Two Oval Eye Sockets
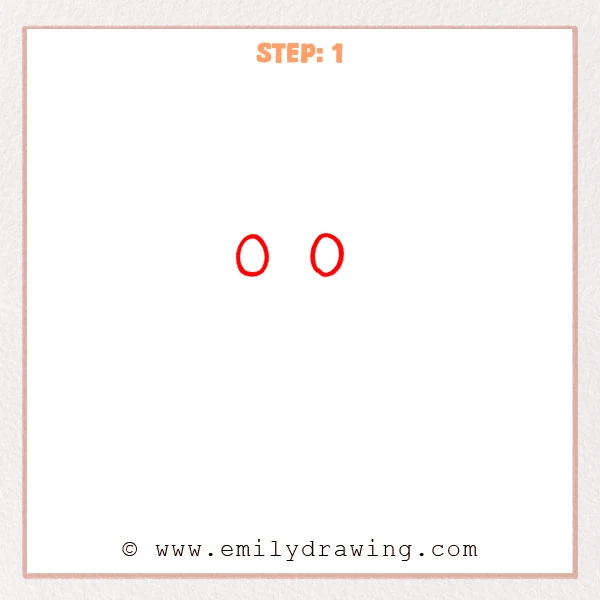
Start by drawing two vertical ovals near the upper center of the page. Keep them similar in size and leave a small gap between them, like empty eye holes.
Pro Tip: Keep both ovals the same height so the face feels balanced.
Step 2: Add the Hood Outline
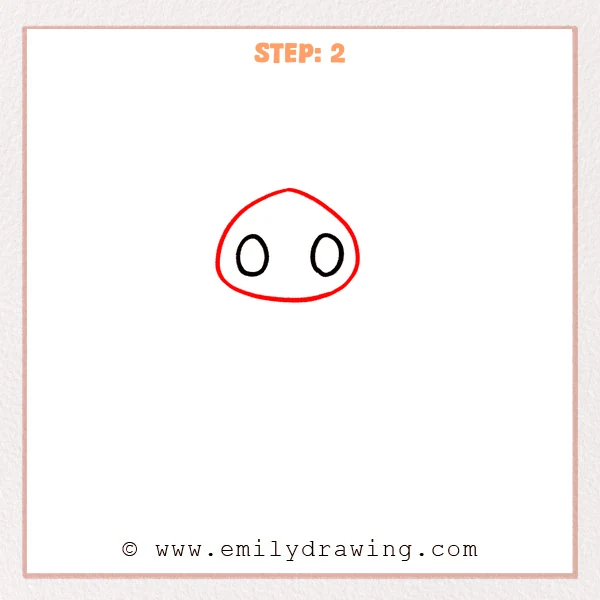
Around the two eye sockets, draw a large curved line to wrap over the top. Then close it with a softer curve along the bottom, forming a rounded hood shape that frames the face.
Pro Tip: Keep the bottom curve a bit flatter so it reads as a hood, not a ball.
Step 3: Add the Inner Hood Rim and Opening
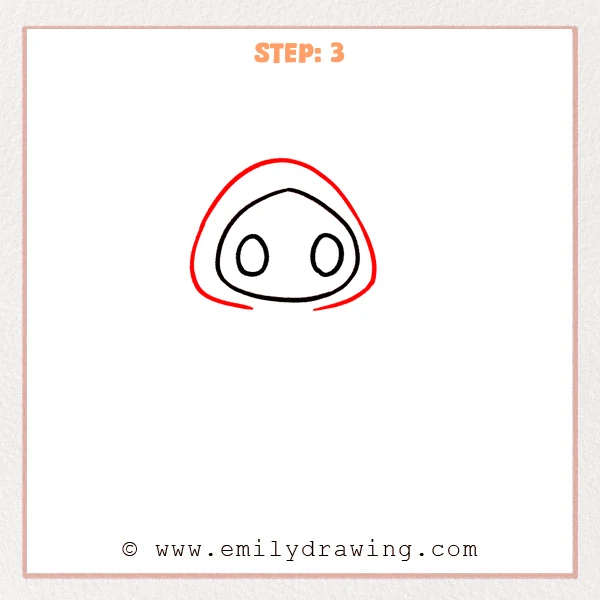
Draw a second curved outline just inside the hood to create the inner rim that frames the face. Leave a small gap at the bottom instead of closing it, so the cloak feels open and draping downward.
Pro Tip: Keep an even gap between the inner rim and outer hood for a clean look.
Step 4: Add the Cloak Body and Two Sleeves
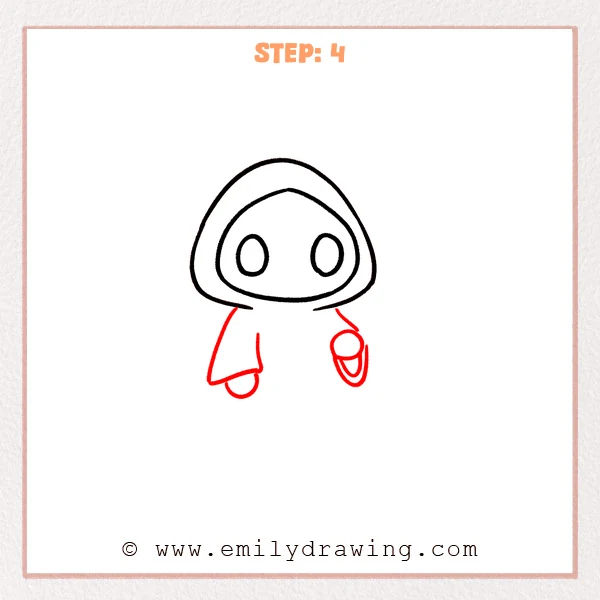
From the hood opening, pull the cloak down with simple lines, making a wide, curved triangle on the left with a slightly flipped hem. On the right, add a raised sleeve by sketching a small oval for the hand, then wrap it with a curved sleeve shape.
Pro Tip: Keep the hand oval small so the sleeve feels puffy and cute.
Step 5: Finish the Hem and Add Tiny Feet
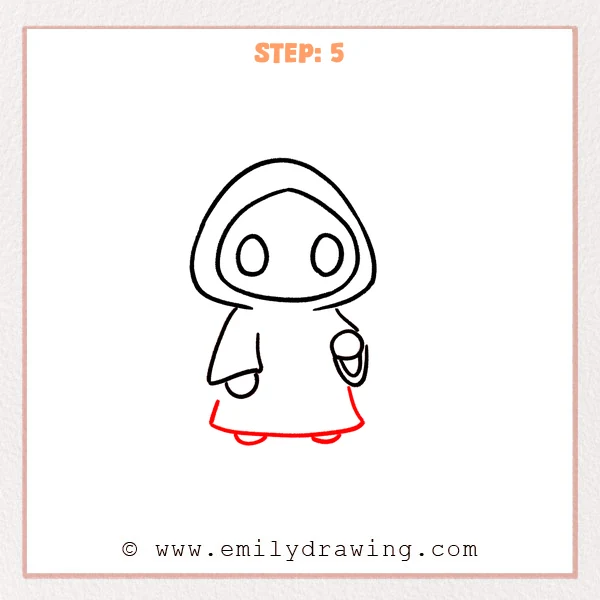
Smooth out the bottom curve to close the cloak’s hem, letting both corners flare slightly outward. Under the hem, add two small half-ovals to show tiny feet peeking out.
Pro Tip: Keep the feet very small and leave more white space for a cute look.
Step 6: Add the Scythe Handle and Blade
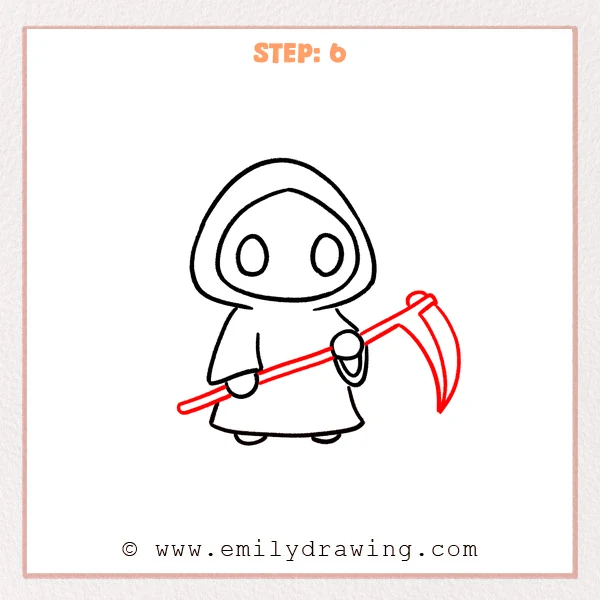
Draw a long handle slanting up from the lower left to the upper right, passing through both hands as if it is being held. Attach a large crescent-shaped blade on the right end, then add an inner curved line to show thickness and a sharp edge.
Pro Tip: Make the outer curve wider and the inner curve tighter so the blade feels strong.
Step 7: Color in your drawing!
Fun Facts
- A “grim reaper” is often shown wearing a hooded cloak to feel mysterious.
- A scythe is a real farming tool used for cutting grass or crops.
- Cartoon versions use round shapes to look friendly instead of scary.
Pin it now, Draw later!
You have built a complete cartoon grim reaper by stacking simple shapes: eye ovals, a hood frame, a cloak, and a scythe. For shading, darken the inside of the hood and add a soft shadow under the hem to help the character pop. If you add color, try a deep gray cloak and keep the face area lighter for contrast.
A common beginner mistake is making the scythe blade too thin, so it looks like a ribbon instead of metal. Keep the blade thick enough to show its curved edge.
Now try drawing the same character with a different pose or a longer cloak, and practice this step by step drawing again to build confidence. If you want more drawing for beginners, pick another simple character and repeat the same shape-by-shape method.
Get the FREE Printable Drawing Guide
FREE Download Printable Cartoon Grim Reaper Drawing Tutorial
Frequently Asked Questions
How do I make the cartoon grim reaper look less scary?
Use rounder curves, keep the eyes large, and avoid sharp angles on the cloak.
What if my hood looks uneven on both sides?
Lightly erase and redraw the outer curve, matching the left and right height.
How can I hold the scythe correctly in the hands?
Let the handle pass through both hand shapes, then clean the overlaps with your eraser.