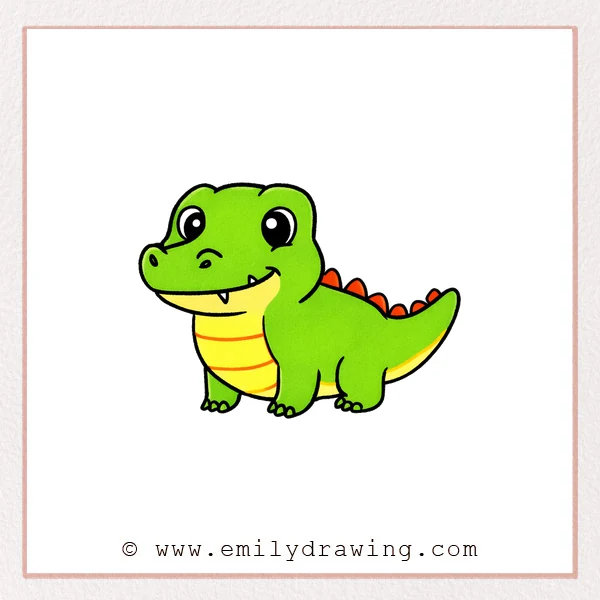
This easy drawing tutorial shows how to draw a cartoon alligator step by step. We will build a friendly alligator using simple curves and a few small details. Take your time, and let each line stay smooth and relaxed.
What You Will Need
- Pencil
- Eraser
- Black marker or pen (optional, for outlining)
- Colored pencils or crayons (optional)
Here are my RECOMMENDED Art Supplies!
- Crayola Coloring Set (140 Pieces – Mega Value!)
- 24 Colored Crayon Set
- A4 Printer Paper
- Crayola Coloring Pencils
- HP Home Printer with Instant Ink!
Time needed:
17 minutes.
Step-by-Step Drawing Guide
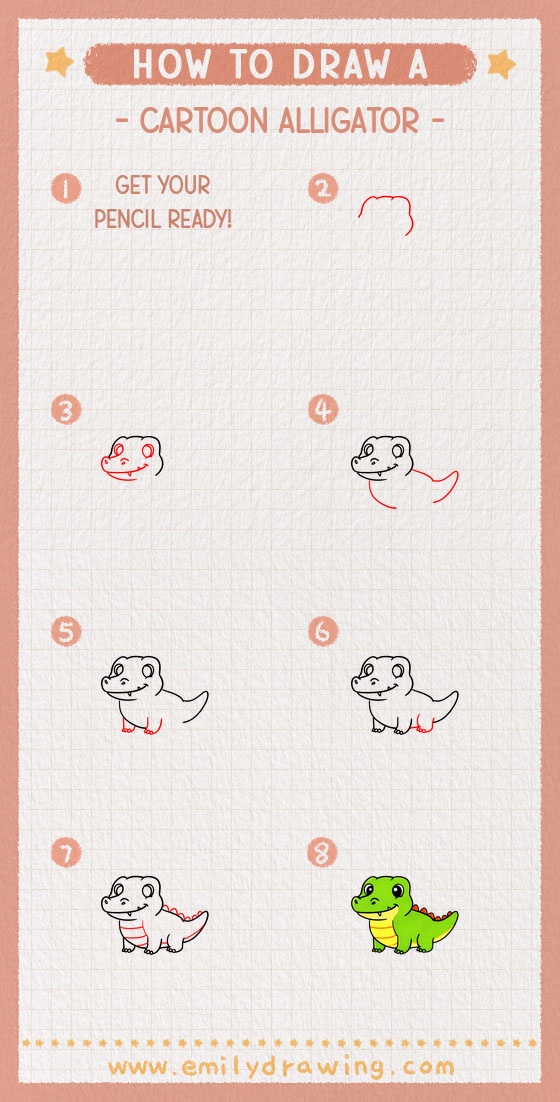
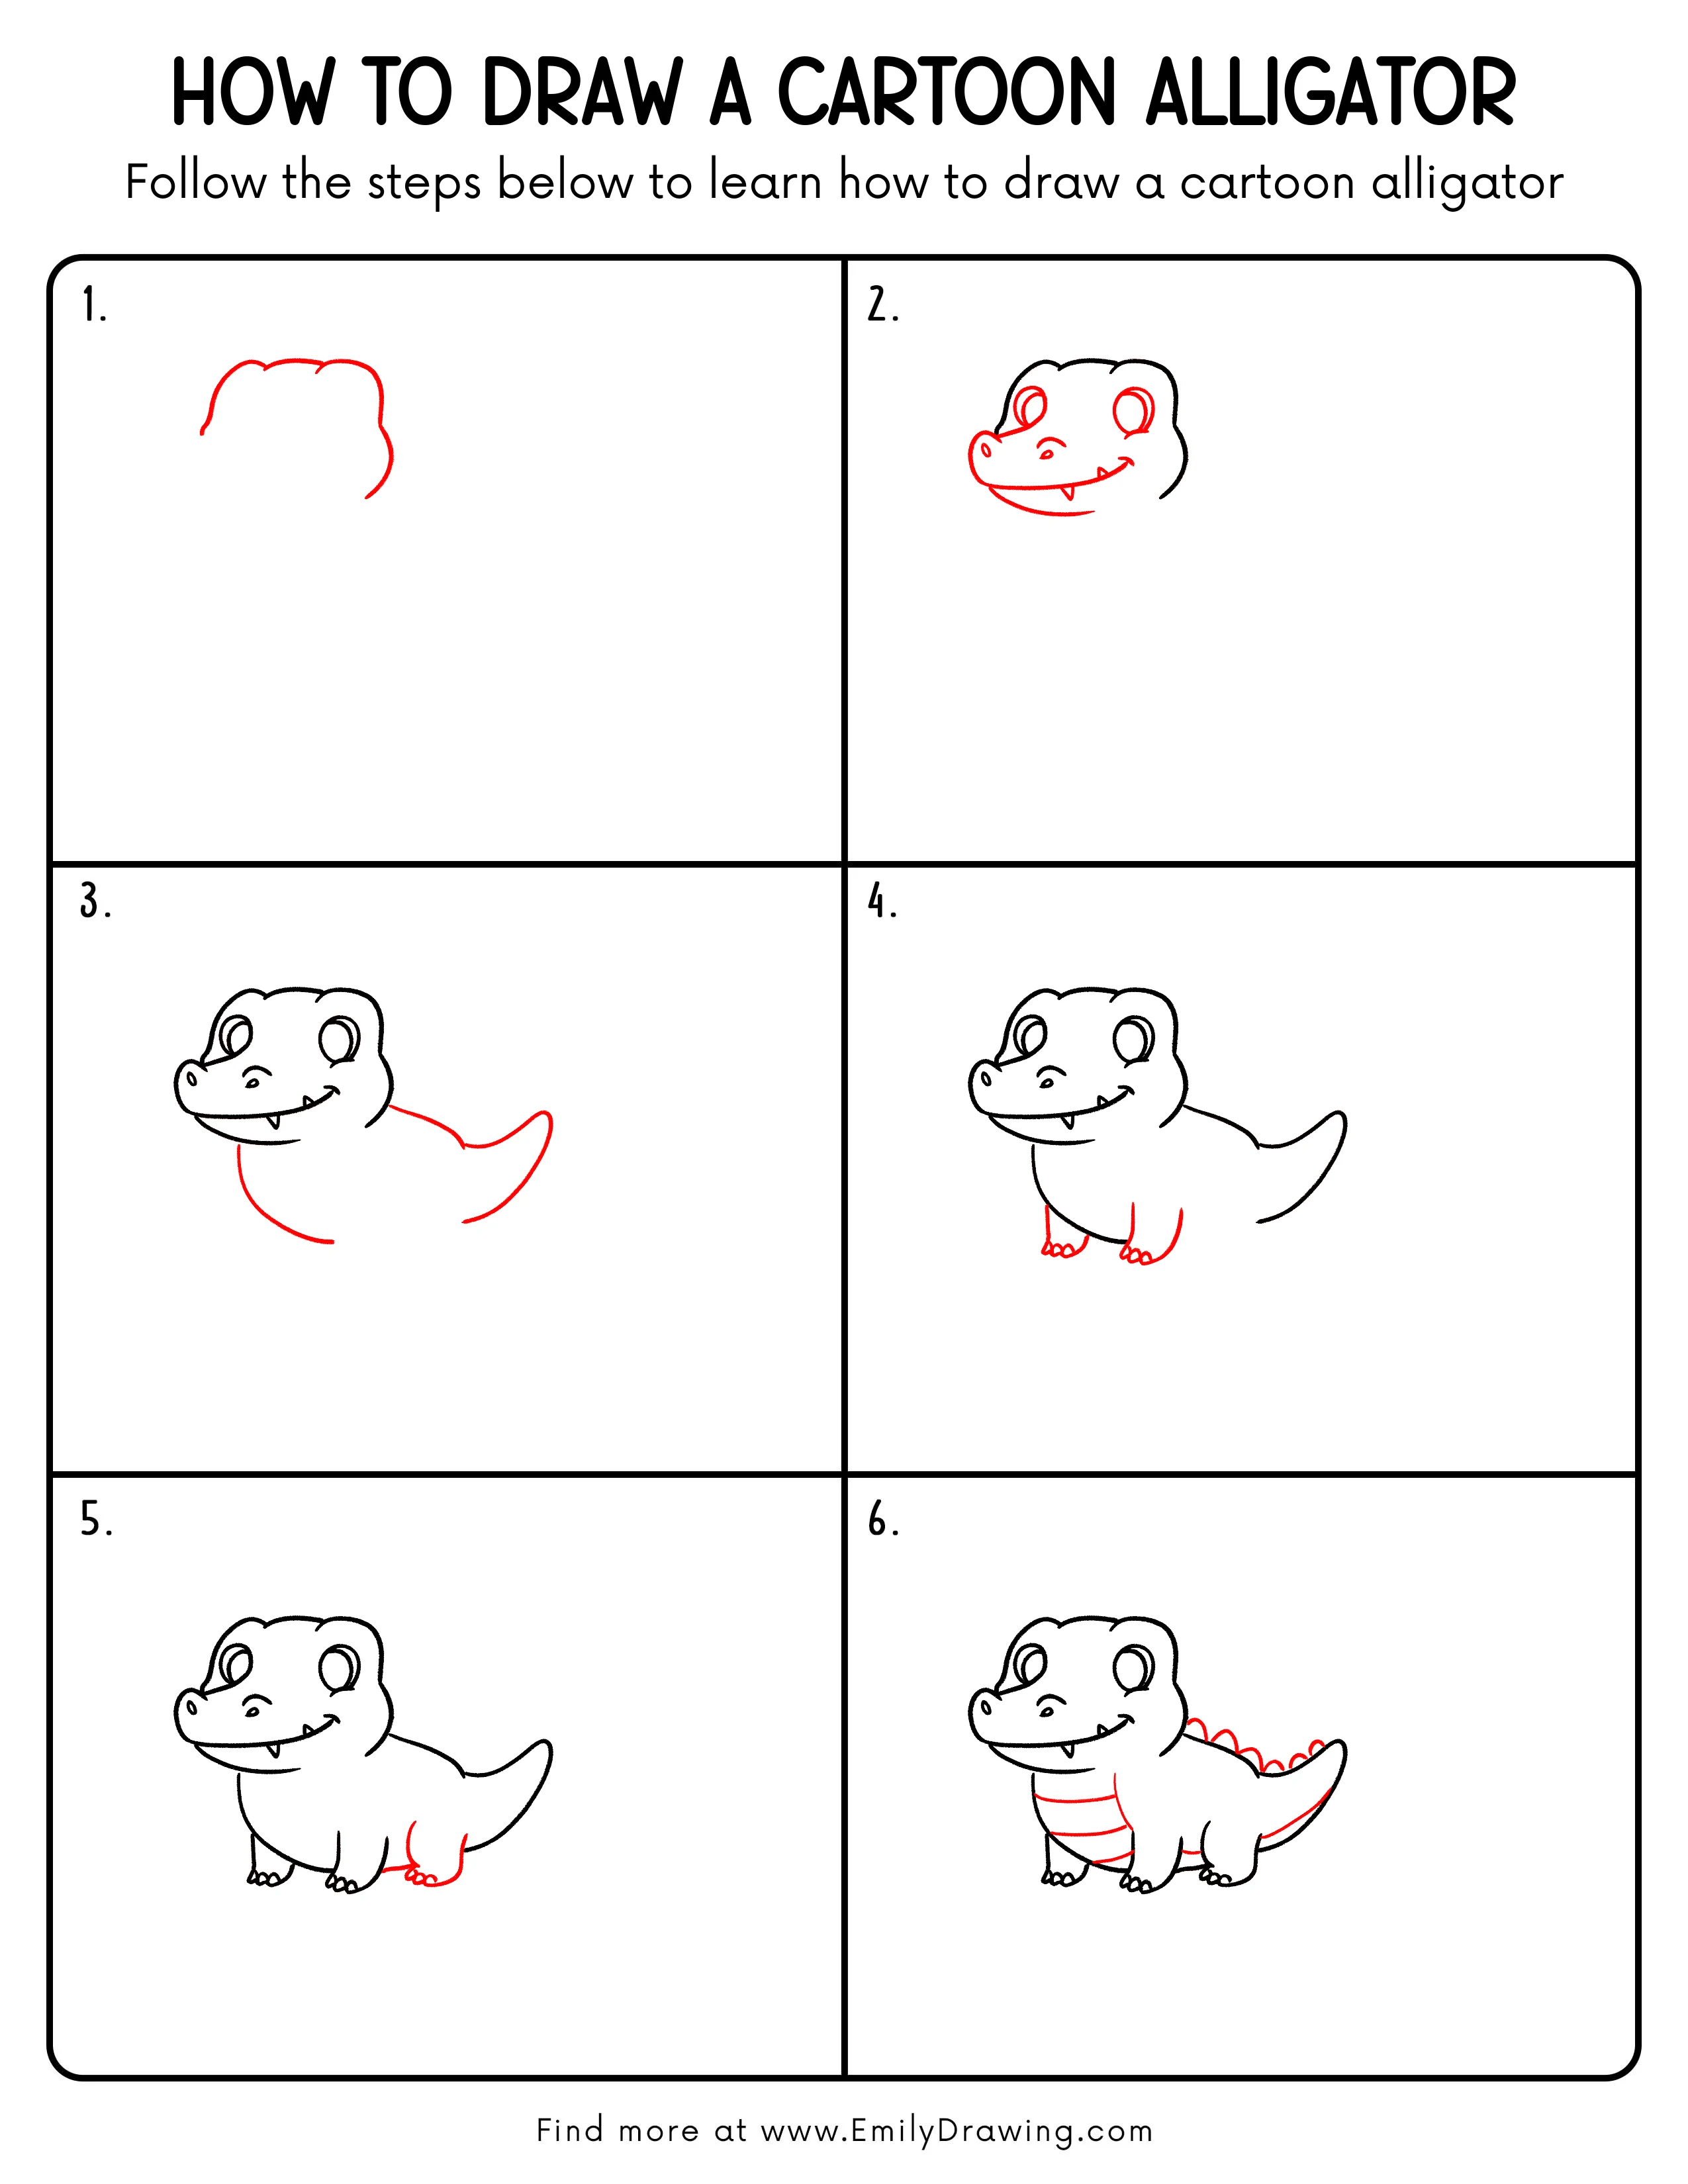
Step 1: Draw the Curved Top Outline
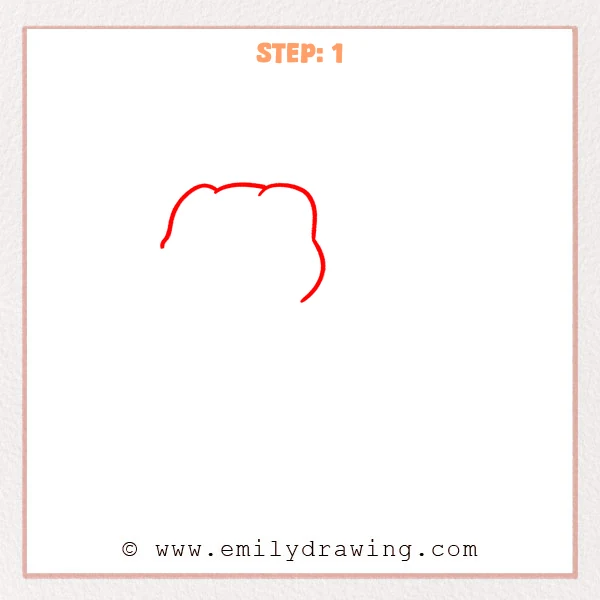
Start near the top of the page and sketch one long curved line for the top of the head and back. Add three small rounded bumps along the curve to keep the cartoon alligator look. Let the line drop down a little on both sides, and keep the shape open for now.
Pro Tip: Keep the bumps rounded and evenly spaced for a cuter look.
Step 2: Add the Eyes, Snout, and a Smiling Mouth
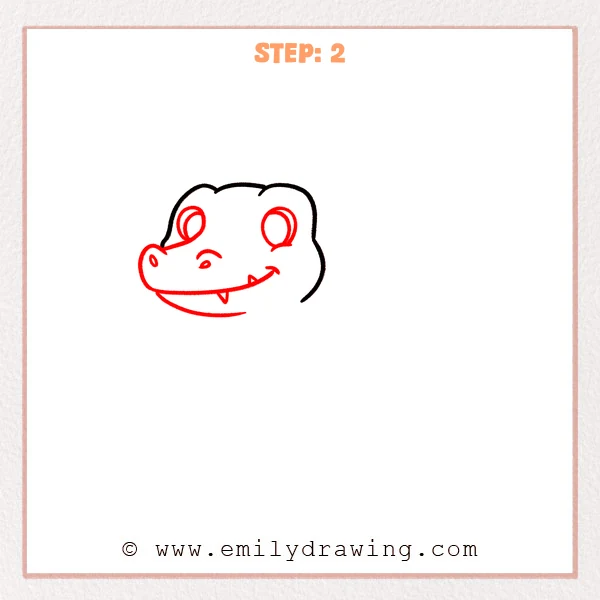
Draw two large oval eye shapes under the top bumps, keeping the centers open for now. On the left, add a rounded snout that sticks out, then place two small oval nostrils and a tiny curved bridge mark. Sketch a long curved smile line, then add one small triangle tooth near the corner and one tiny fang below.
Pro Tip: Keep both eyes at the same height, and let the smile curve gently upward.
Step 3: Connect the Body and a Curving Tail
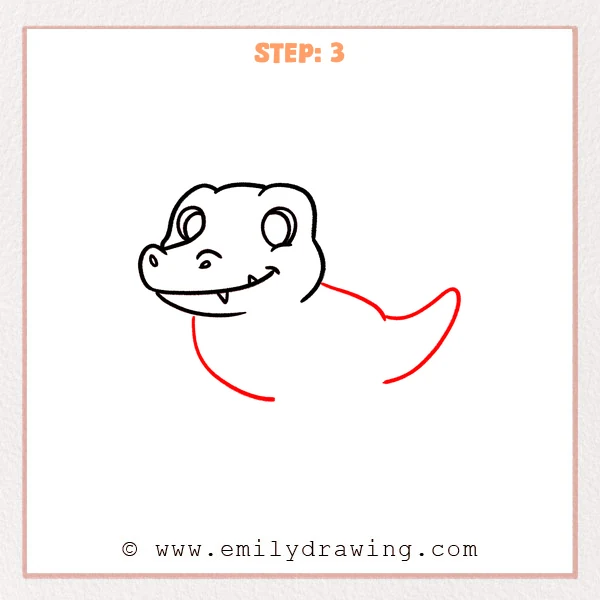
Start under the right side of the head and sweep a long curved back line to the right, lifting it slightly before narrowing into a pointy tail. Then draw a smooth belly curve down from near the chin and carry it toward the right, keeping the shape open. The body should feel like a soft bean shape behind the head.
Pro Tip: Keep the tail tip small, and let the body curves stay smooth.
Step 4: Add Two Short Legs with Little Toes
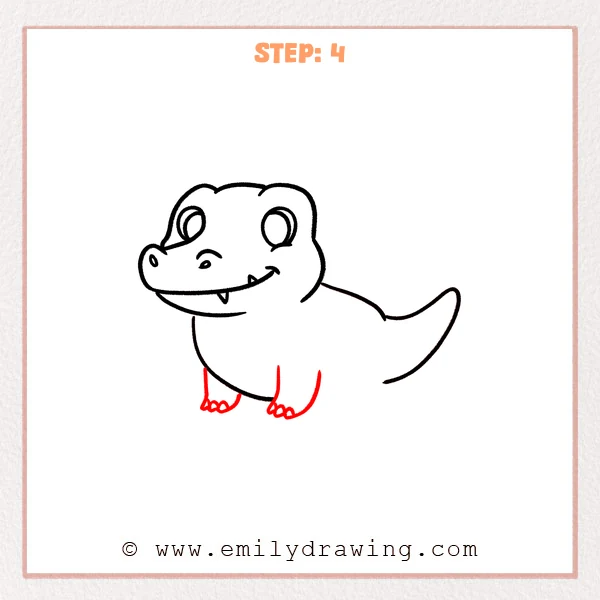
Under the belly, add two short leg shapes that drop down like small posts. At the bottom of each leg, draw three tiny rounded bumps for toes to make the feet feel soft. Place the second leg a bit farther back, and keep both feet similar in size.
Pro Tip: Connect the toes with small rounded curves, not sharp points.
Step 5: Add the Back Leg and a Short Belly Connection
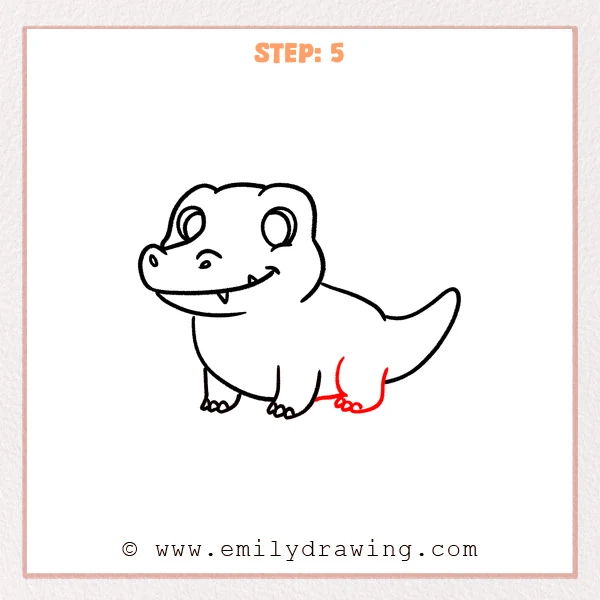
Near the back underside of the body, add one more short leg dropping down from the belly area. Give it three rounded toes, with a slightly wider foot for balance. Then draw a short curved line to gently connect the belly edge near the middle leg.
Pro Tip: Make the back foot slightly larger so the alligator feels supported.
Step 6: Add Small Back Spikes and Belly Stripes
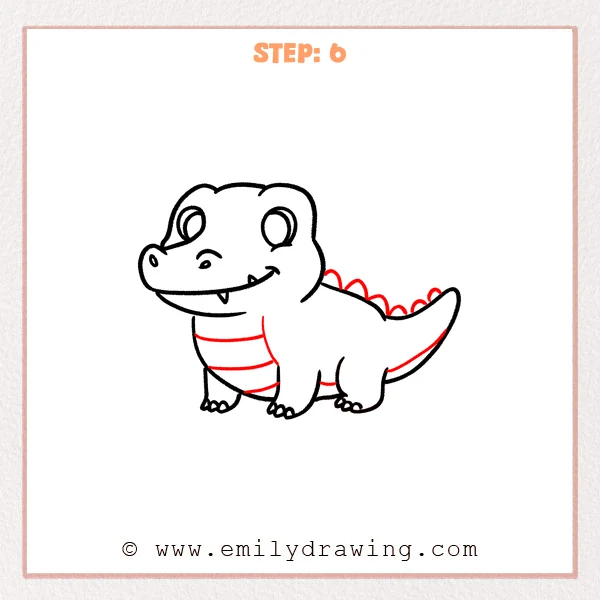
Along the back near the rear, draw a row of small rounded spikes that continues onto the tail. On the front part of the belly, add a few curved horizontal stripes that follow the tummy’s shape. Finish by adding a short curve under the tail to show its thickness.
Pro Tip: Let the spikes gradually get smaller for a smoother transition.
Step 7: Color in your drawing!
Fun Facts
- Alligators have powerful tails that help them swim quickly.
- Their eyes and nostrils sit high on the head, so they can peek above water.
- Baby alligators make tiny squeaks to call their parent.
Pin it now, Draw later!
You now have a full cartoon alligator with a big smile, short legs, and a curved tail. Try outlining your final lines with a darker pen, then erase any extra sketch marks. For coloring, use light green for the body and a lighter yellow-green for the belly stripes, and add a soft shadow under the belly for depth. A common beginner mistake is making the legs too long, so keep them short and sturdy. Practice this step by step drawing a few times, and then try drawing your alligator in a new pose or with a fun background.
Get the FREE Printable Drawing Guide
FREE Download Printable Cartoon Alligator Drawing Tutorial
Frequently Asked Questions
How do I make my cartoon alligator look friendlier?
Make the smile curve a little more and keep the teeth small.
What if my tail looks too thin?
Add a gentle underside line and widen the tail near the base.
How can I add more details without making it messy?
Use just a few simple stripes and small back spikes, and leave plenty of open space.