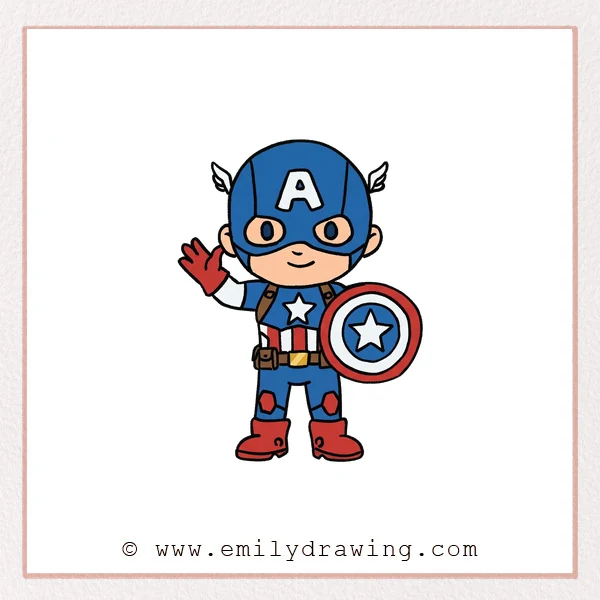
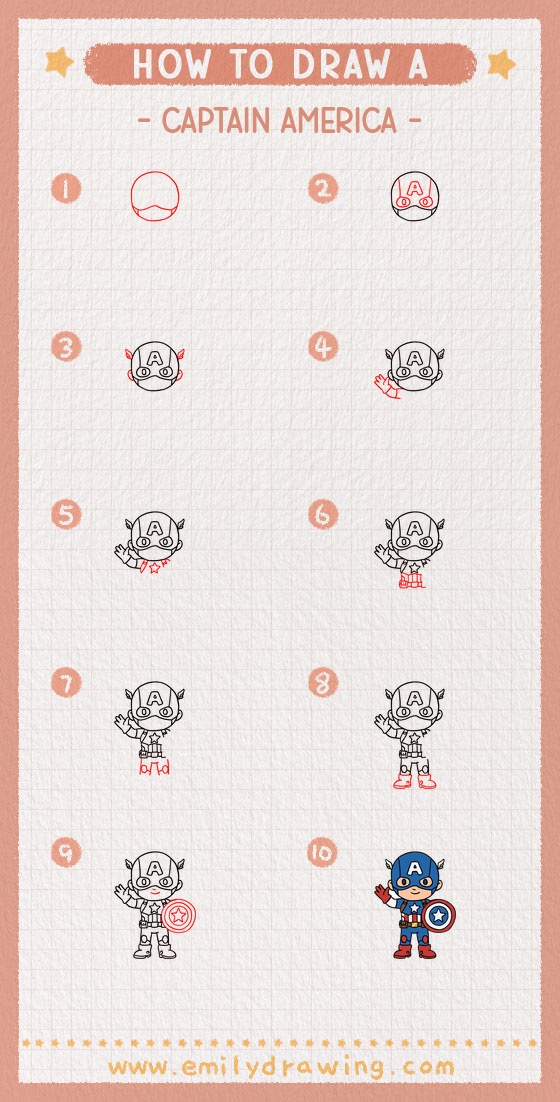
This easy drawing tutorial shows how to draw Captain America step by step in a cute, chibi style. We will build the helmet, suit details, and shield using simple shapes. Take your time and enjoy this drawing for beginners.
What You Will Need
- Pencil
- Eraser
- Black pen or marker
- Paper
- Coloring tools (colored pencils, crayons, or markers)
Here are my RECOMMENDED Art Supplies!
- Crayola Coloring Set (140 Pieces – Mega Value!)
- 24 Colored Crayon Set
- A4 Printer Paper
- Crayola Coloring Pencils
- HP Home Printer with Instant Ink!
Time needed:
10 minutes.
Step-by-Step Drawing Guide
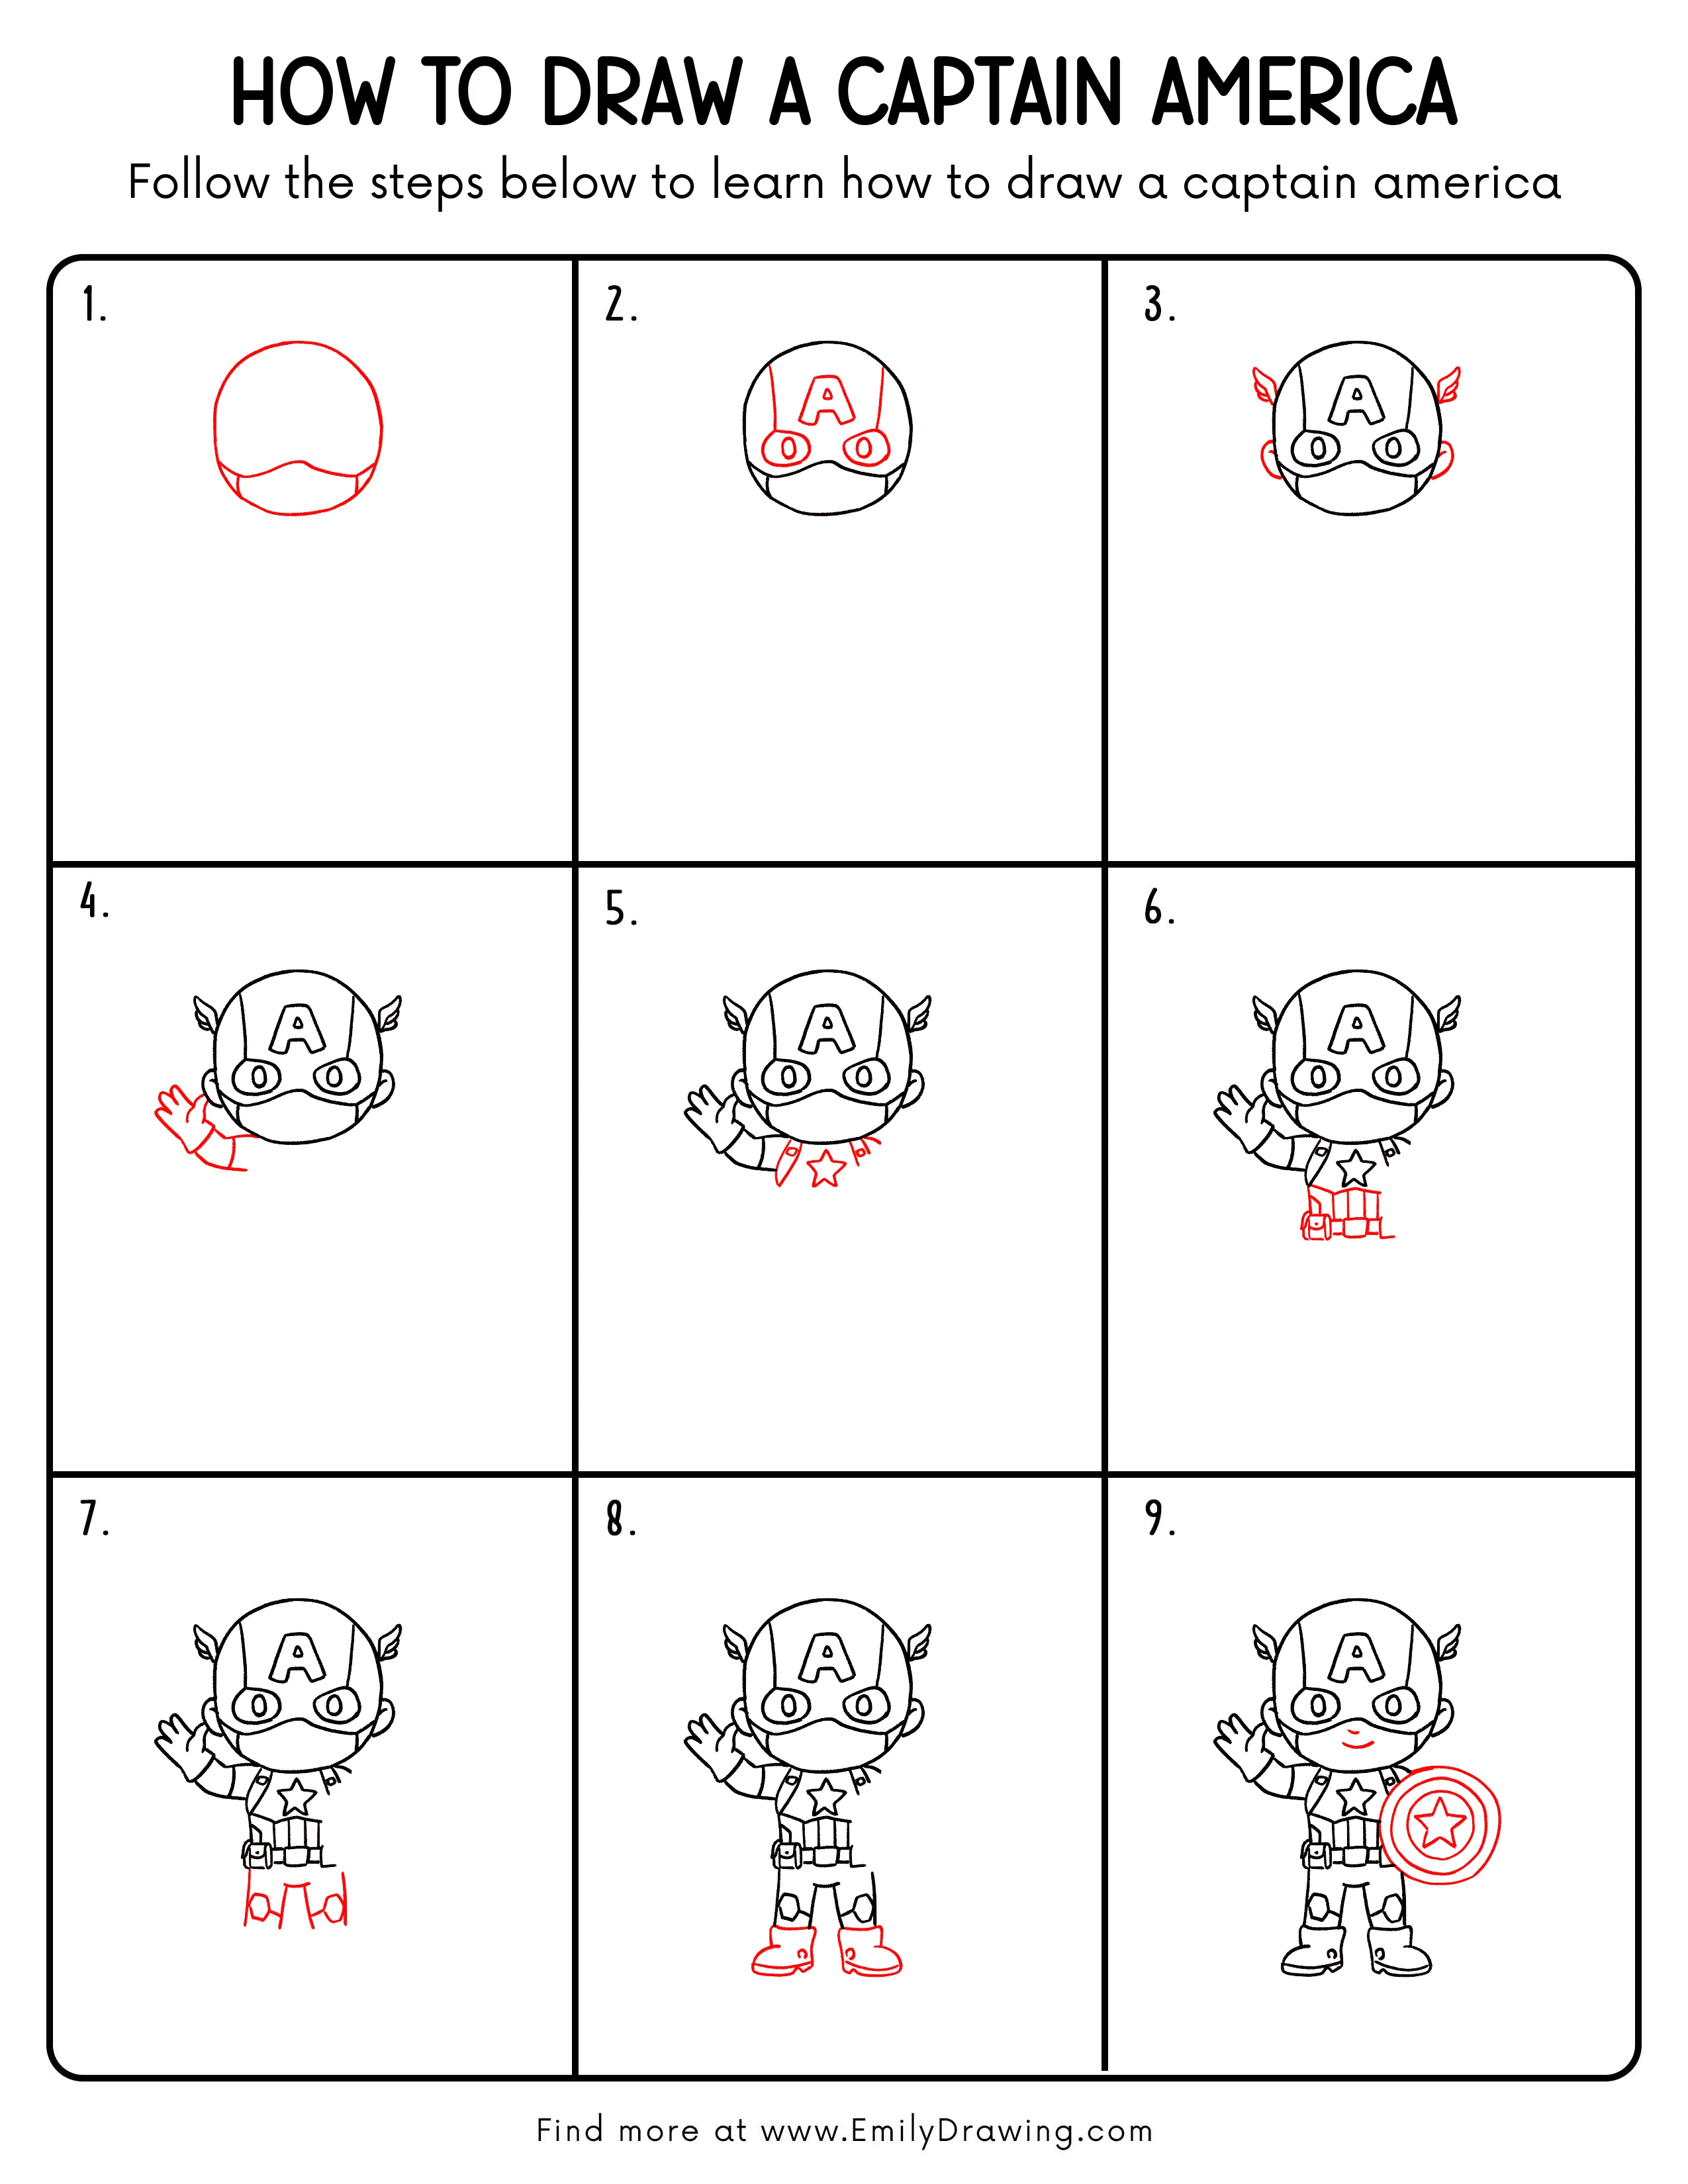
Step 1: Sketch the Head Shape and Chin Guard
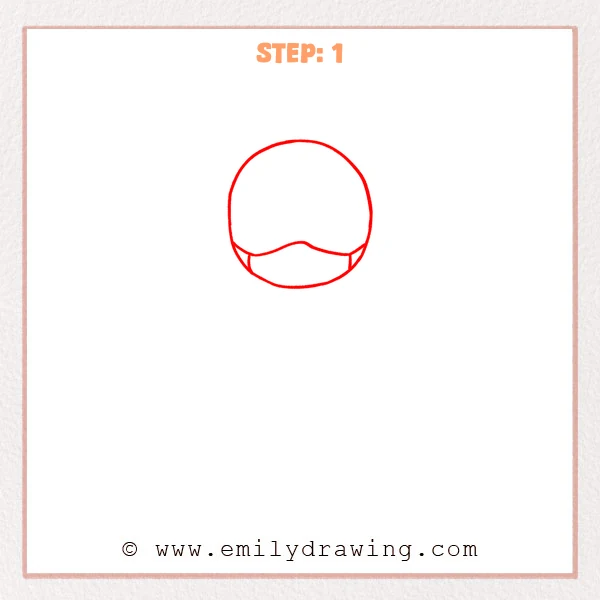
Start with a large circle for the head. Add a gently wavy curve across the lower part to form the mask’s lower edge. Then place short vertical lines on both sides to show the chin guard thickness.
Pro Tip: Keep the lower curve a bit low so the face area feels roomy like Captain America.
Step 2: Add the Mask Emblem and Eye Openings
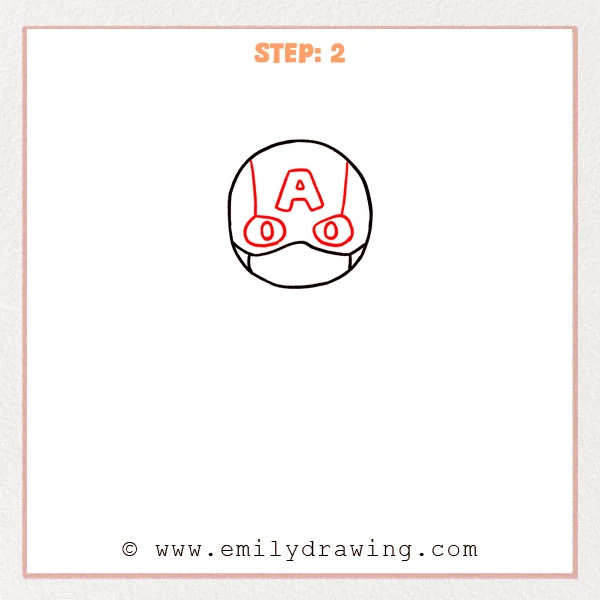
Place a bold capital “A” in the center of the forehead area. Build the mask section across the face, then add two oval eye openings with smaller ovals inside for simple pupils. Finish by drawing two vertical panel lines from the top to suggest the helmet seams.
Pro Tip: Keep both eyes the same height and size for a confident look.
Step 3: Add the Small Wings and Ear Shapes
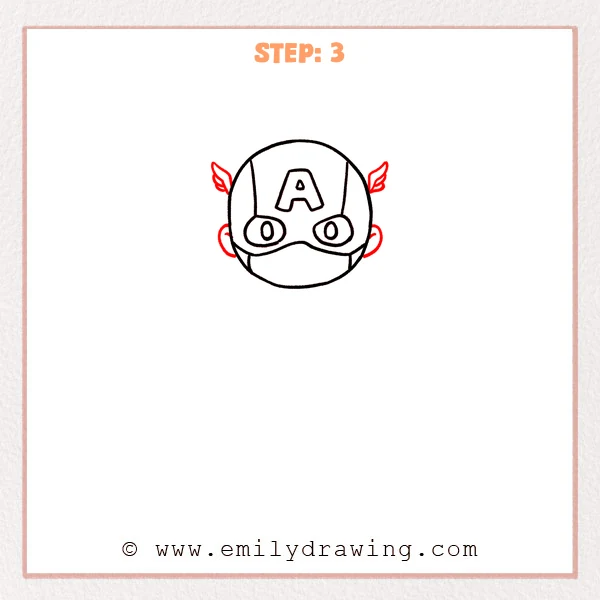
On each upper side of the helmet, add a small wing shape with a few short curved lines for feather layers. Then draw a rounded ear on both sides, letting each ear hug the head outline.
Pro Tip: Keep both wings level and similar in size for a balanced look.
Step 4: Draw the Waving Hand and Arm
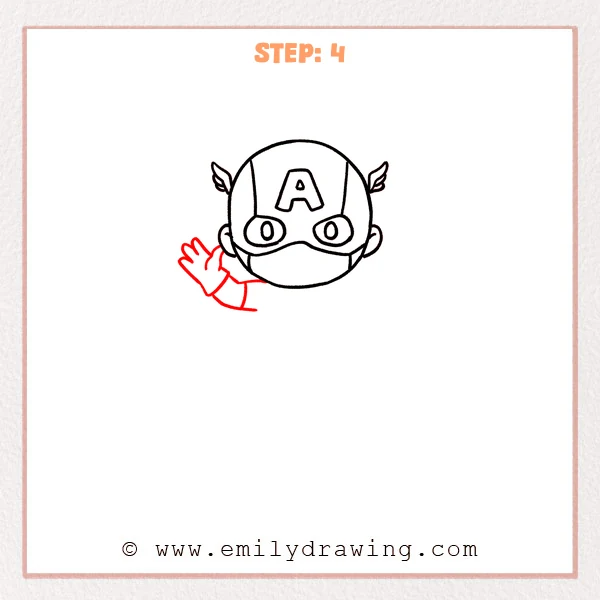
Below the left side of the head, add an open gloved hand using a rounded palm shape, then sketch three to four short curved fingers. Connect a gently bent forearm behind it, and add a cuff line at the wrist to finish the wave.
Pro Tip: Vary the finger lengths slightly so the wave feels natural.
Step 5: Add the Upper Body, Straps, and Chest Star
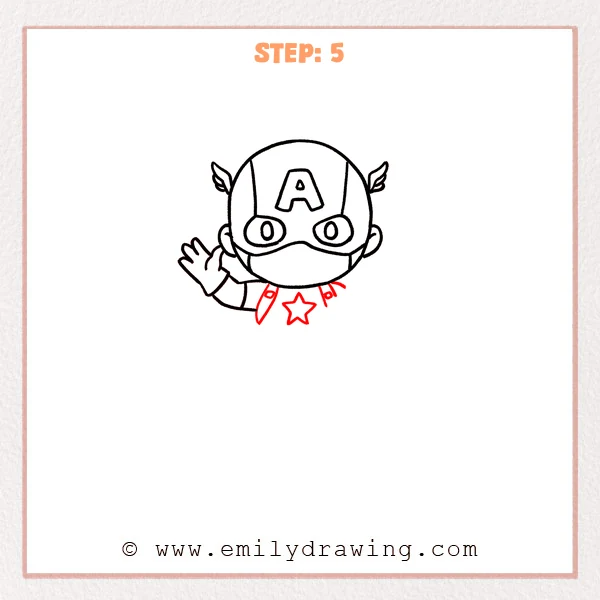
Sketch short shoulder lines and a simple collar under the head so the body begins to appear. Draw a five-point star in the center of the chest, then add two hanging strap shapes on each side with small circle buttons for detail.
Pro Tip: Center the star and keep both straps evenly spaced for a neat look.
Step 6: Add the Belt, Pants Stripes, and a Small Pouch
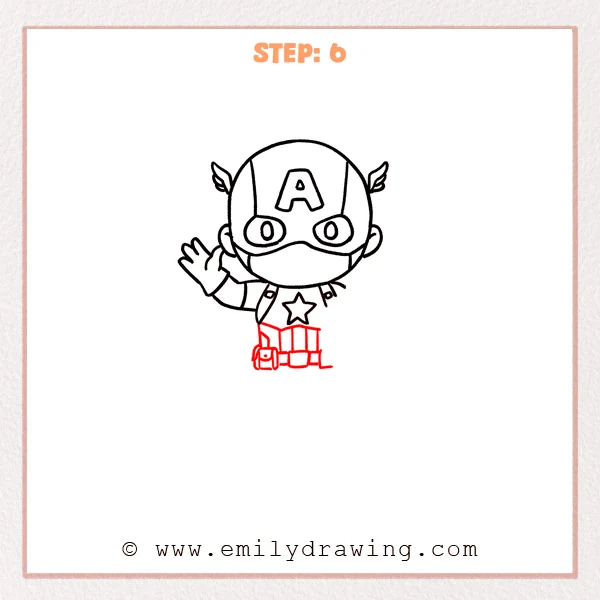
Extend a short body under the star and draw a belt line to separate the outfit. Build a boxy pants shape, add a few vertical stripes, and use short horizontal lines to split the pant cuffs. Finish by placing a small square pouch on the outside of the left leg with a tiny button on the flap.
Pro Tip: Keep the stripe spacing similar so the pants look tidy.
Step 7: Draw the Legs and Knee Pads
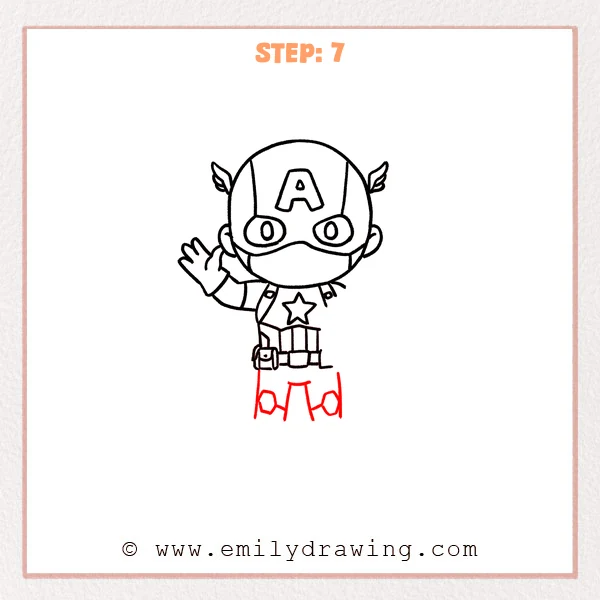
Extend two legs down from under the belt, keeping the right leg straighter and letting the left leg angle outward a little. Add a rounded knee pad on each lower leg, then separate it from the pant leg with a small curved line.
Pro Tip: Keep both knee pads similar in size, but vary the angles slightly.
Step 8: Add the Big Boots and Finish the Feet
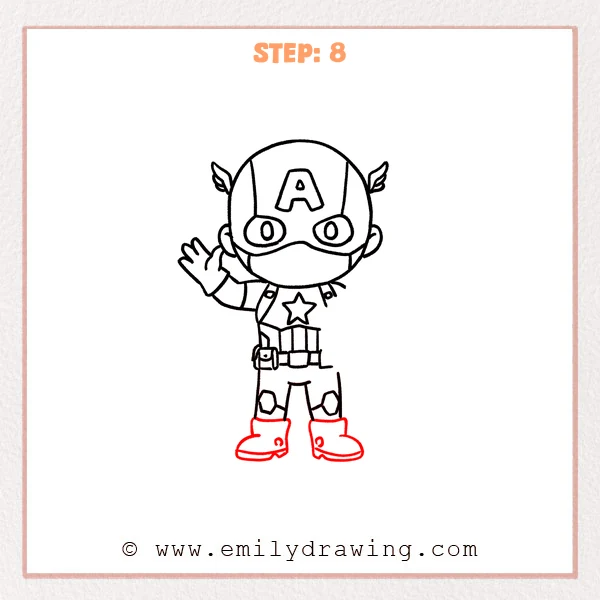
At the bottom of each leg, draw a large boot with a rounded toe, then build a wide boot shaft above it. Add a curved sole line under each boot, and place a small circle or short mark on the side for extra detail.
Pro Tip: Keep both soles on the same level so the stance feels steady.
Step 9: Add the Smile and the Shield Details
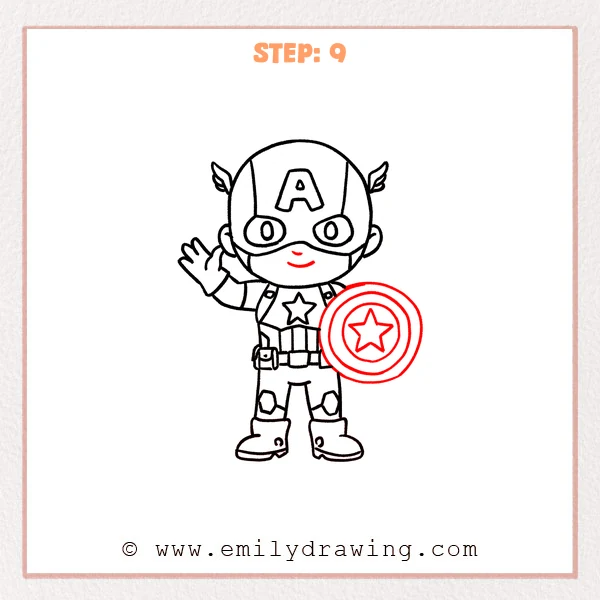
On the face area under the mask, add a small curved smile, then a shorter curve above it for a gentle lip shape. Draw a large round shield on the character’s right side, and add two to three concentric rings inside the outer edge. Finish with a centered star in the middle so the shield feels bold and balanced.
Pro Tip: Keep the ring spacing even so the shield looks smooth and round.
Step 10: Color in your drawing!
Fun Facts
- Captain America’s shield is most often shown as a round, star-centered symbol of protection.
- The “A” on the helmet helps make the character recognizable, even in simple cartoons.
- Chibi style uses a big head and small body to feel friendly and easy to draw.
Pin it now, Draw later!
You now have a full chibi Captain America, complete with his helmet wings and shield. For coloring, try a deep blue for the helmet and suit, bright red for accents, and a clean white for stars and stripes. Add gentle shading under the chin guard, beneath the shield, and along the boots to give the drawing more depth.
A common beginner mistake is making the shield rings uneven, which can make the circle look wobbly. Slow down and redraw the rings lightly before inking.
Keep practicing this step by step drawing, and try drawing Captain America in a new pose next time. If you enjoyed this easy drawing tutorial, sketch another superhero and build your own collection.
Get the FREE Printable Drawing Guide
FREE Download Printable Captain America Drawing Tutorial
Frequently Asked Questions
How do I make the shield look perfectly round?
Lightly sketch a big circle first, then draw the rings inside with the same center point. Turning the paper as you draw can help your curve stay smooth.
What if my eyes look uneven?
Erase one eye and redraw it using the other as a guide. It also helps to place both eyes on the same invisible horizontal line.
Can I draw Captain America without the small wings?
Yes, you can keep the helmet simple and leave them out. The “A” and the shield will still make the character clear and recognizable.