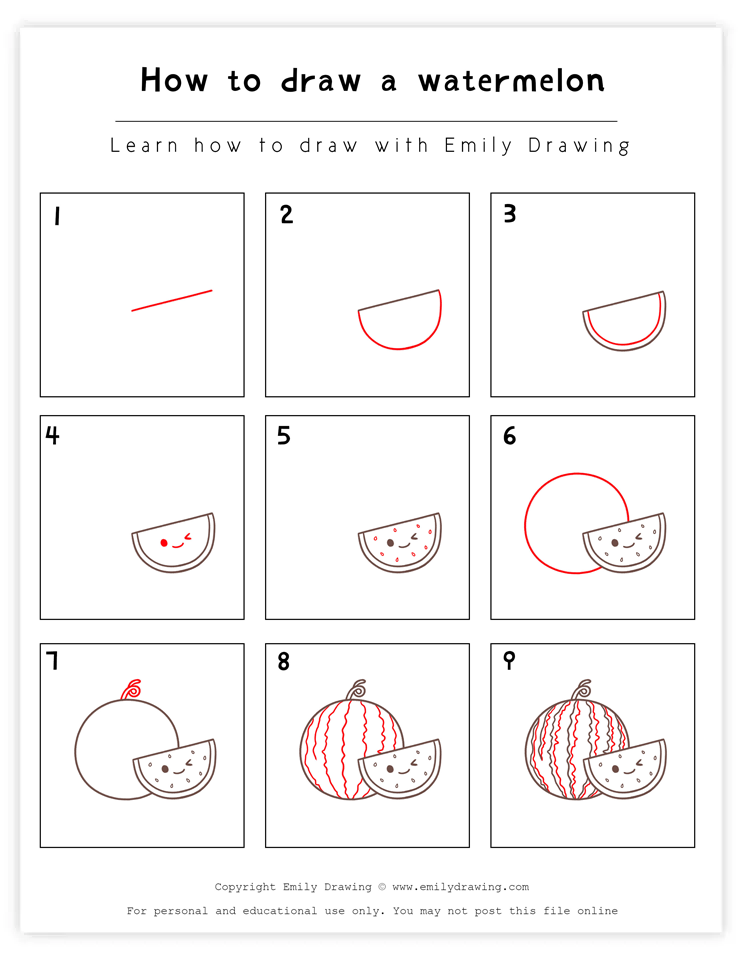
Hello and welcome to another fun tutorial! In ten easy steps, we are going to learn how to draw a watermelon together.
Watermelons are delicious foods. Have you ever tried one? With around 92% water, they are both sweet and hydrating. And there are over 1000 varieties of watermelons!
Like many fruits, watermelons ripen over time, but it’s easier to visually determine the ripeness of other fruits like strawberries. To determine the ripeness of a watermelon, you can lift it (ripe watermelons should be heavier) or sniff it (a ripe watermelon will be sweet smelling).
Alright, with all that said—find some of your favorite drawing materials and let’s get moving with this tutorial. Keep reading below for our step-by-step watermelon drawing guide!
If you enjoy drawing fruit tutorials, you might also like How to Draw a Strawberry or How to Draw a Pineapple.
Materials:
- a piece of paper
- a pencil for the guiding lines and sketching
- an eraser
- a black sharpie or a pen for the outlines
- markers or colored pencils for coloring
- our printable drawing guide (Join my Email List below to get this Tutorial)
Here are my RECOMMENDED Art Supplies!
- Crayola Coloring Set (140 Pieces – Mega Value!)
- 24 Colored Crayon Set
- A4 Printer Paper
- Crayola Coloring Pencils
- HP Home Printer with Instant Ink!
Time needed:
13 minutes.
How to Draw a Watermelon — Let’s get started!
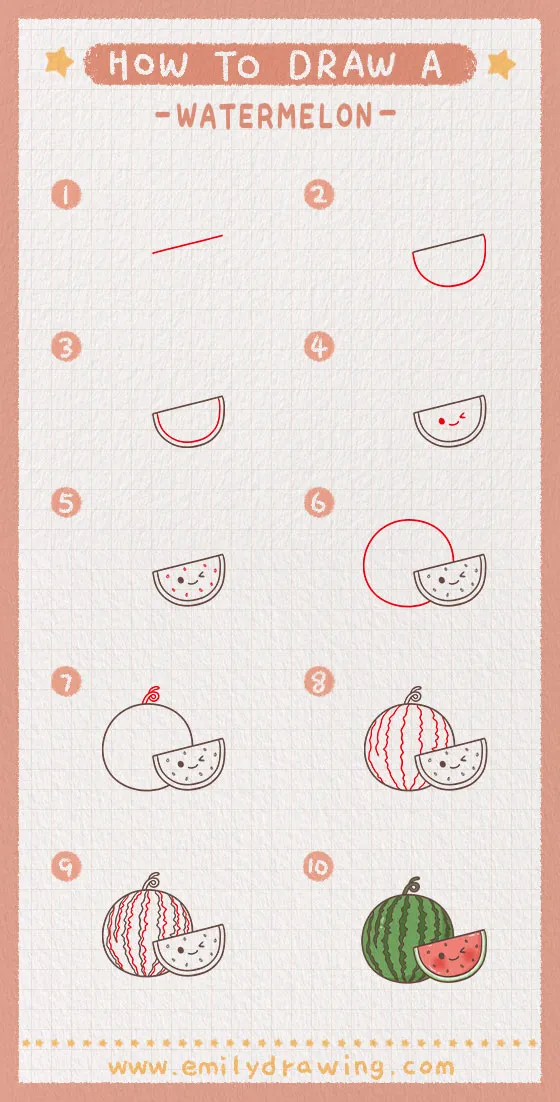
Step 1 – Draw a slanted line.
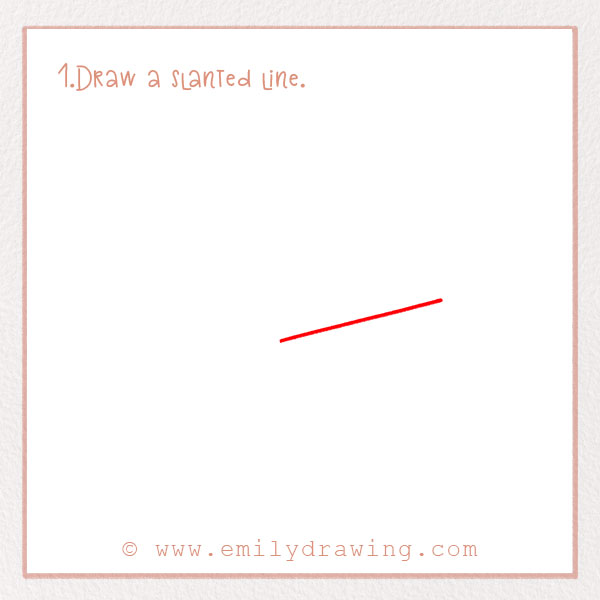
Let’s start with the basic shape of the watermelon. In the middle-right of the page, draw a slightly slanted line. This is the middle of the first watermelon slice drawing. It should be going slightly upwards to the right, but leave space around it for the rest of the drawing! Good job!
Step 2 – Draw the bottom of the slice.
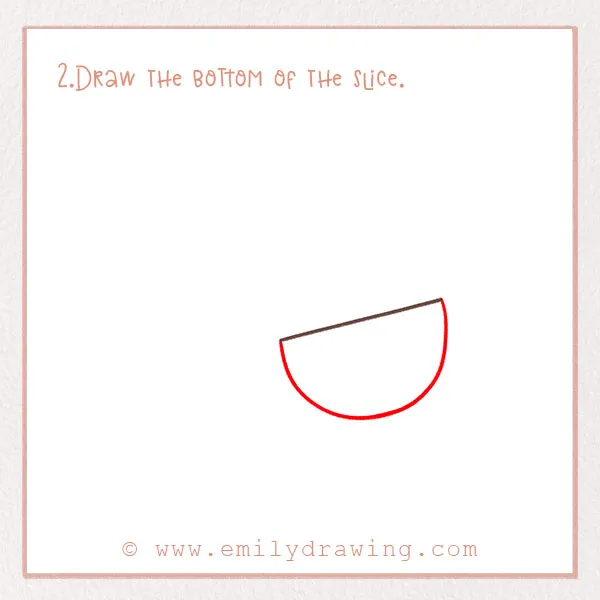
Right below the line we just drew, draw a large curve. You should have a semi-circle. Now, you have the basic shape of the whole slice. Good job!
Step 3 – Add more detail to the slice.
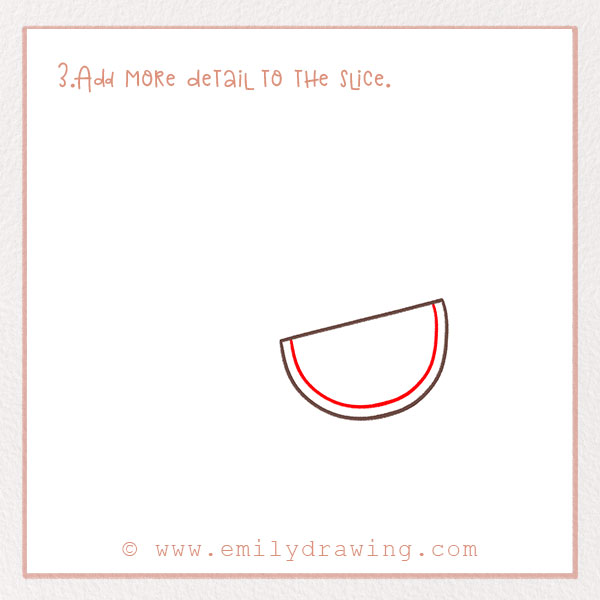
Let’s add some more detail.
Right next the curve you just drew, add another one. This represents the edge of the watermelon slice. It is a small layer that is still fleshy fruit, but rather than light pink of the rest of the slice, it is a light green closer to the skin. Leave just about a centimeter in between the two curves.
For more tutorials with geometric shapes, try How to Draw a Diamond or How to Draw a Popsicle.
Step 4 – Add a cute little face!

We want to add some personality to our cartoon watermelon drawing! To do this, let’s add a little face, complete with a smile. Draw a small upwards facing curve near the middle of the slice for the smile.
Next, add eyes. One eye should just be a dot, and the other should look like a wink. Good job!
Step 5 – Draw some seeds on the slice.
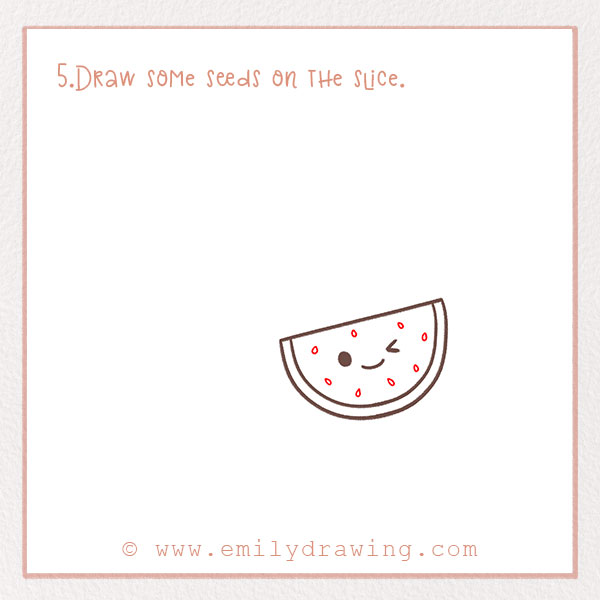
Watermelons always have seeds. Did you know that you can actually eat the seeds and the rinds of watermelons? In some countries, the seeds are eaten on New Year’s holiday.
So, let’s draw the tiny little seeds. Throughout the semicircle, add some tiny little circles, about evenly spaced apart on the slice, for the seeds. Good job!
For other tutorials involving fine details, consider How to Draw a Sunflower or How to Draw a Bee.
Step 6 – Add another watermelon in the background.
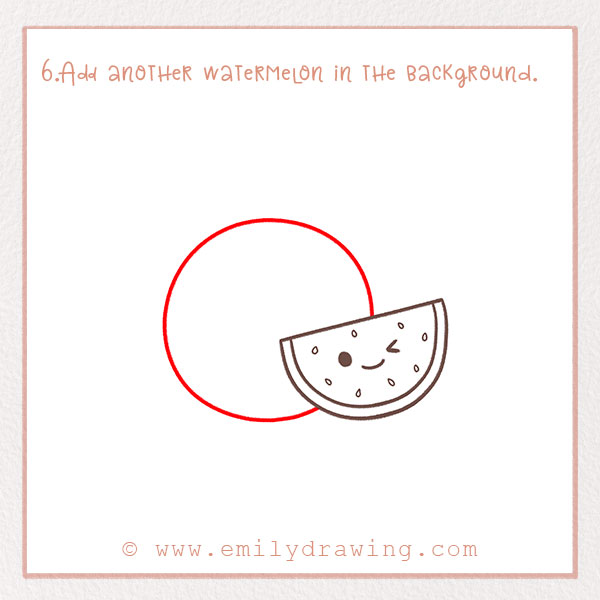
As part of our drawing, we are also going to draw an entire watermelon. Let’s do that now!
On the left side of the slice, draw a big curve, almost a circle. We’ll fill in the details later. Good job!
Step 7 – Draw a stem.
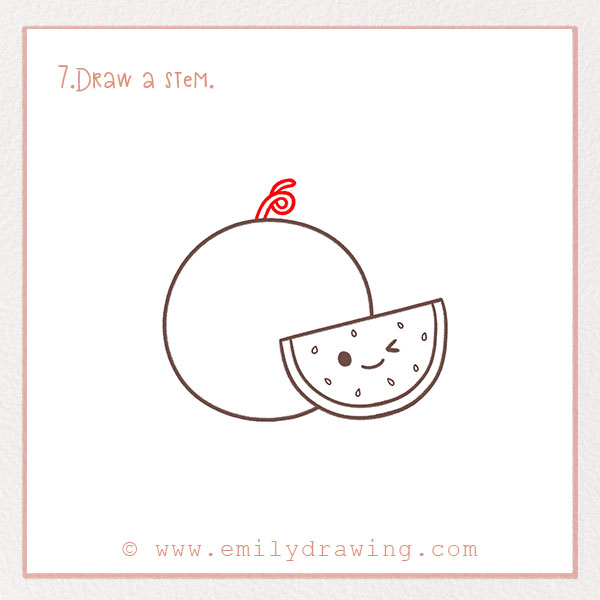
Watermelons also have stems, of course, because that’s how they are connected to the main plant before they’re picked! Watermelons grow all around the world, but China produces the highest number per year—in fact, 80% of watermelon comes from Asia!
On the curve you just drew, add a little curl. In the next step, we’ll add more detail about the melon.
Step 8 – Draw markings on the big watermelon.
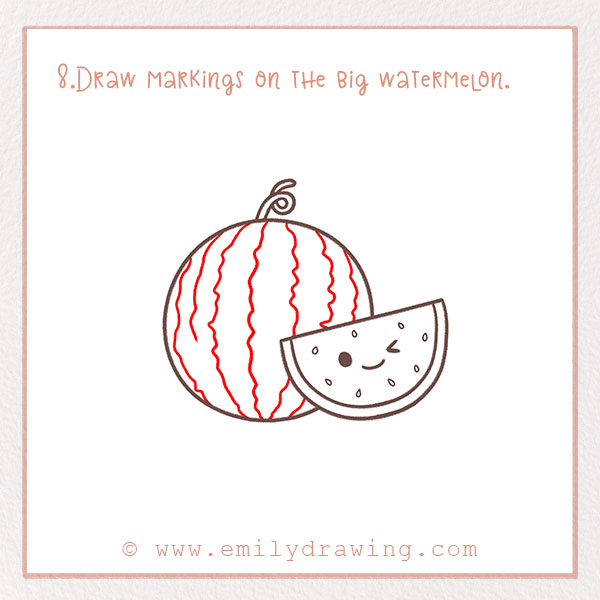
Have you ever looked at a watermelon closely and seen their pretty stripes? Usually, there is a variation in shades of green that fill the skin of the watermelon.
So, we want to add that to our melon, too! Throughout the whole melon, draw squiggly vertical lines. Make them mimic the overall shape of the watermelon, so that our drawing gives the illusion of a sphere. Refer to the photo to see what we mean!
Make about six of them, but it doesn’t have to be perfect—just make what looks good to you! Good job!
Step 9 – Add more detail to the markings.

This step is very similar to the last one—we are just going to add one more detail to the stripes of the watermelon. Next to the squiggly lines you just drew, add some more! Make them a little bit different than the first set so there is some great visual interest.
Good job! You’re almost done—just one more fun step.
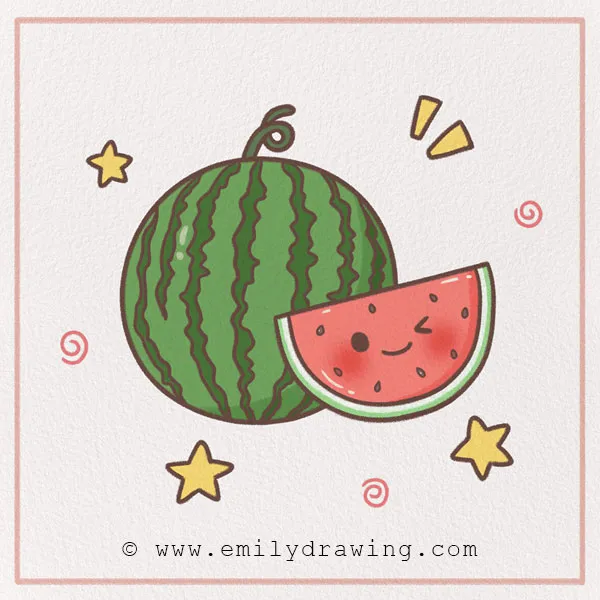
Step 10 – Color in the watermelons!
This is always our favorite step—color, color, color! Watermelons are normally a reddish pink with a green skin, but you do what you feel like. Find some coloring materials, whether it be markers, colored pencils, or crayons, and add some style to your drawing.
Good job! You’ve finished drawing a watermelon. How did it go?
Once you’ve finished your watermelon, try How to Draw an Ice Cream Cone or How to Draw a Cupcake.
If you enjoyed this tutorial, share it with your friends! You could print it out and give it to them, or you could share it online with the social media icons on this page. Thanks for drawing with us—browse our site for some more projects like this one, and as always, let us know if you have any suggestions in the comments! See you next time.
Pin it now, Draw later!
Get the FREE Printable Drawing Guide