Hello and welcome to another easy-to-follow 10-step tutorial — a perfect step-by-step hamburger drawing for beginners! Today, we’re going to learn how to draw a hamburger.
Hamburgers are thought to have originated in Connecticut, in the United States—in fact, the average American eats three hamburgers a week. That’s a lot of hamburgers! Even though they are popular meals nowadays in America, they weren’t all that popular until the 1904 World’s Fair. Now, they are popular around the world and are often served with fries.
Whether you prefer a hamburger, cheeseburger, or a veggie burger, we can all agree that these sandwiches are yummy and convenient, which is a big reason they’re so popular today. Have you ever had one?
With all that said, let’s get to this fun and easy burger drawing for kids! Find some materials, a comfy spot, and keep on reading for Step 1. Happy drawing!
If you enjoy drawing delicious treats, you might also like How to Draw French Fries or How to Draw a Cupcake.
Materials:
- a piece of paper
- a pencil for the guiding lines and sketching
- an eraser
- a black sharpie or a pen for the outlines
- markers or colored pencils for coloring
- our printable drawing guide (Join my Email List below to get this Tutorial)
Here are my RECOMMENDED Art Supplies!
- Crayola Coloring Set (140 Pieces – Mega Value!)
- 24 Colored Crayon Set
- A4 Printer Paper
- Crayola Coloring Pencils
- HP Home Printer with Instant Ink!
Time needed:
12 minutes.
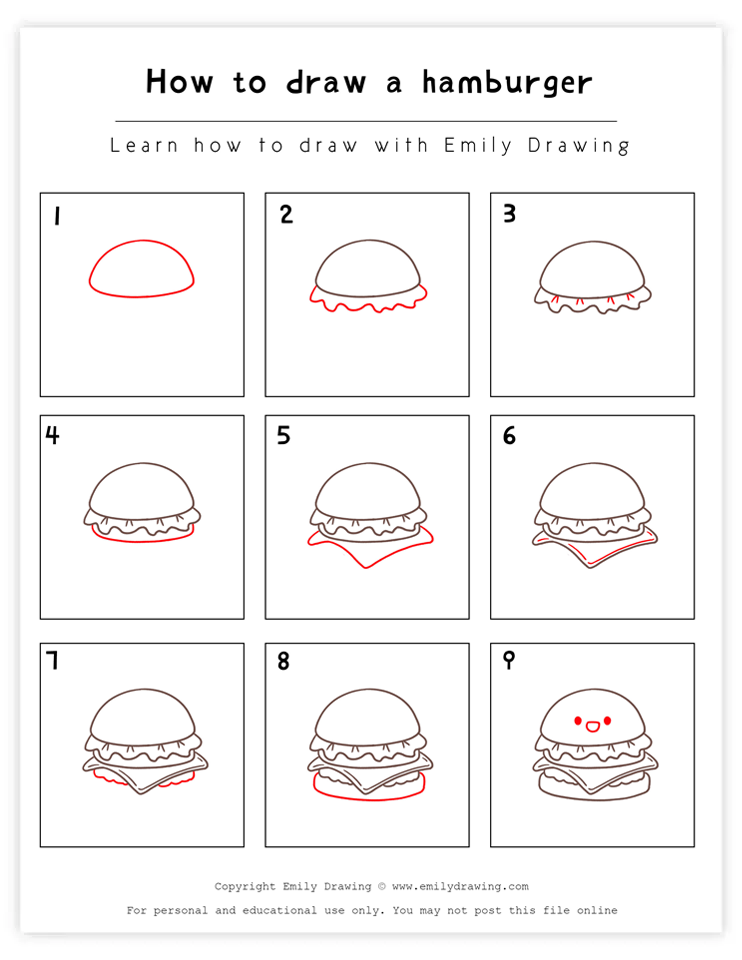
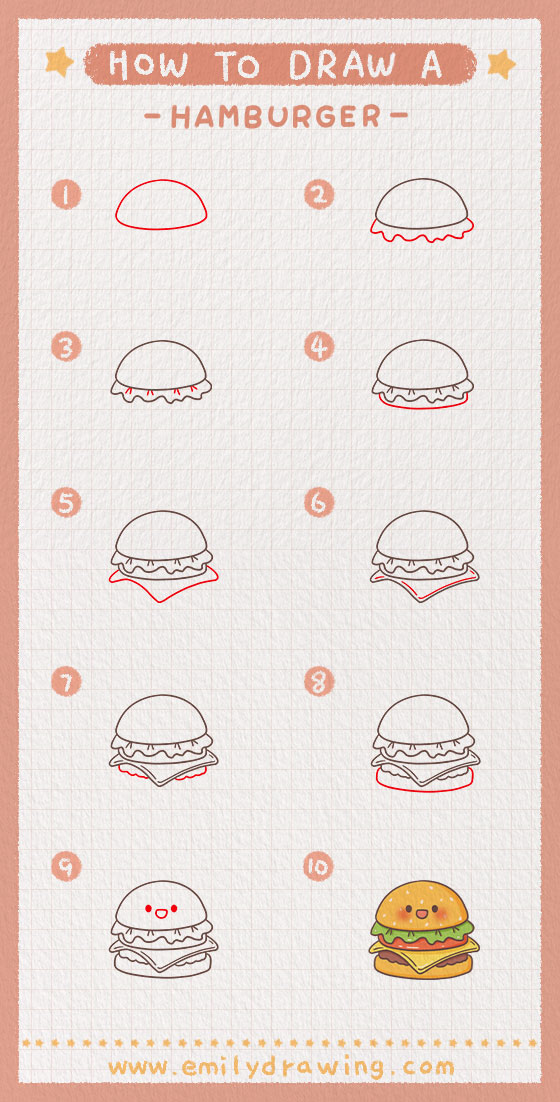
How to Draw a Hamburger — Let’s get started!
Step 1 – Draw the top bun.
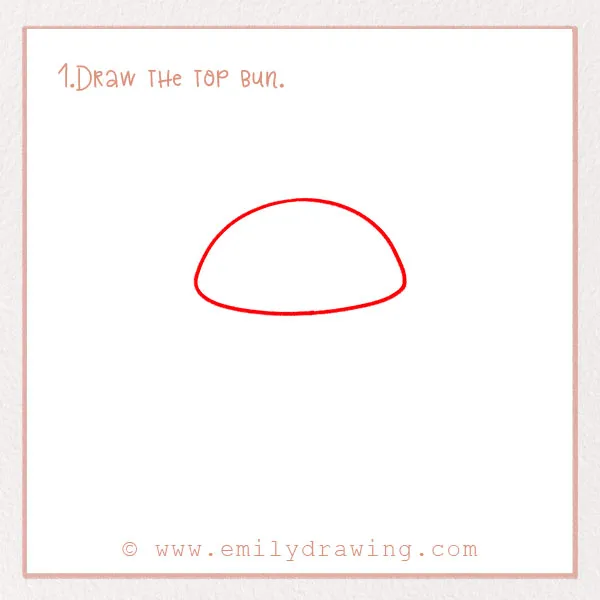
Of course, we have to have a big bun for the hamburger. This is partially what makes a hamburger a hamburger after all! About two-thirds of the way up the page, draw a semi-circle for the top bun. Make the corners a bit rounded. Good job!
Step 2 – Add lettuce to the hamburger.
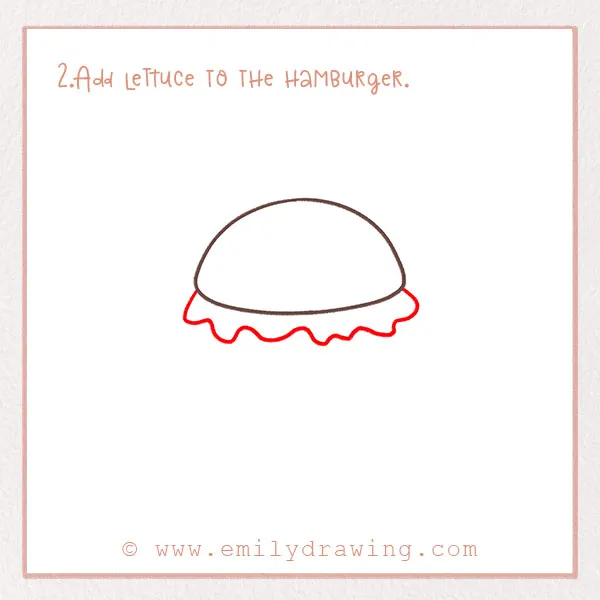
Part of what makes hamburgers so tasty is the variety of toppings you can add! Typical toppings include lettuce, tomato, onion, cheese, and sometimes even pickles! In this step, we’re going to add lettuce.
To draw a realistic burger, start by drawing a wavy line under the bun to represent the lettuce. Connect the edges back up to the bun. Make the wavy line a bit uneven to make it look realistic. Check out the photo!
Step 3 – Add detail to the lettuce.
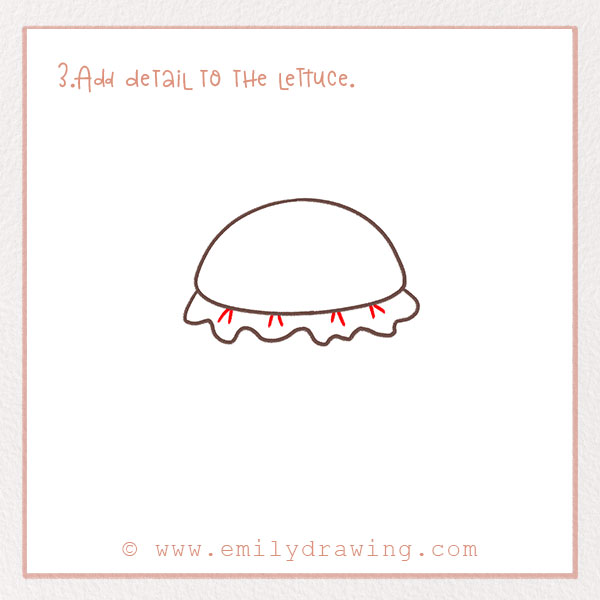
Let’s keep adding detail to the lettuce. Draw eight short lines, in pairs of two, on the lettuce. These show the folds of the soft leaf, making it look even more accurate to how lettuce looks in real life.
For more practice with structured and layered designs, check out How to Draw a Birthday Cake or How to Draw an Ice Cream Cone.
Step 4 – Add a tomato!

Next on the topping list is a tomato. Simply draw a horizontal line just under the lettuce, and curve the edges up to connect it to the rest of the sandwich. Good job!
Step 5 – Draw a slice of cheese.
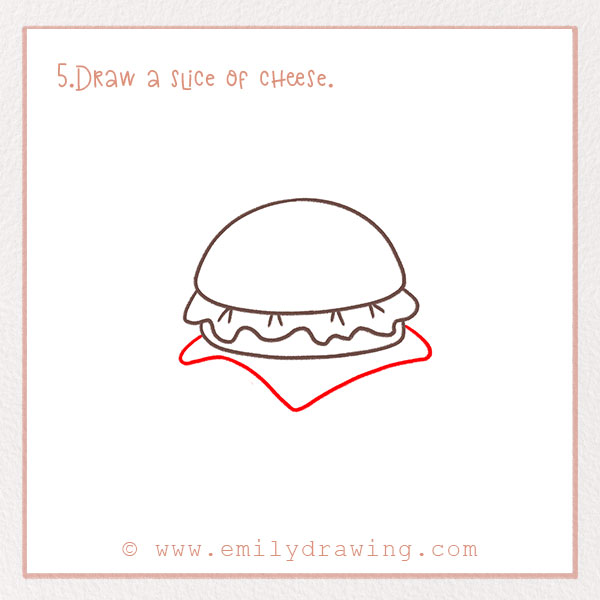
Cheese is a super popular topping—although technically, a hamburger with cheese is called a cheeseburger!
Refer to the photo for this step. You’re going to draw four lines, the middle two being very wide (almost forming a V), to show perspective for the slice of cheese. Good job!
For tutorials that emphasize details, try How to Draw a Watermelon or How to Draw a Strawberry.
Step 6 – Add detail to the cheese.
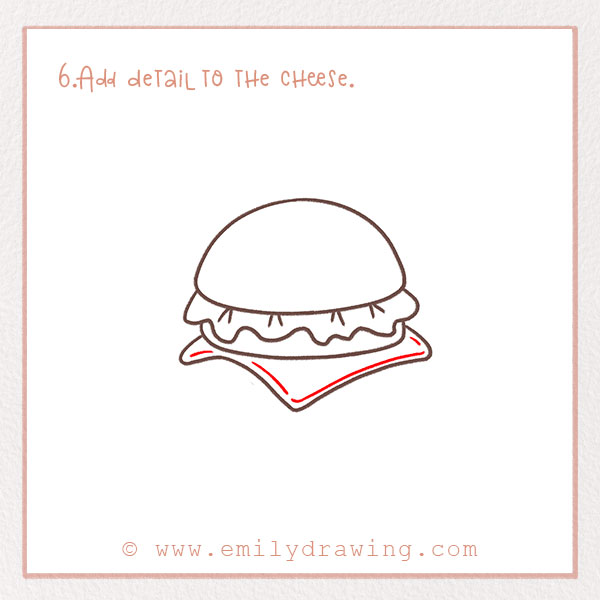
Inside the perimeter (outside edge) of the cheese, draw a few more lines. This just creates a bit more texture to the cheese. No need to be perfect!
Step 7 – Draw the hamburger patty.
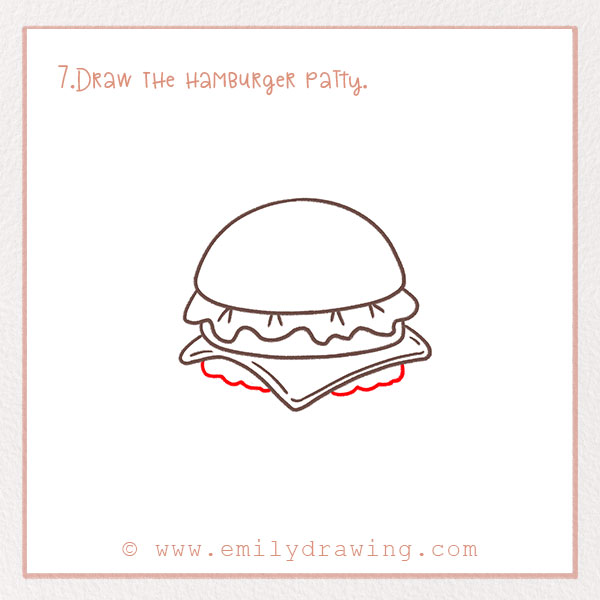
Of course, our hamburger has to actually have a hamburger patty on it! Underneath the cheese, draw two wavy lines. It should look like it is a bit cut off by the slice of cheese. Check out the photo to see what we mean.
Step 8 – Draw the bottom bun!
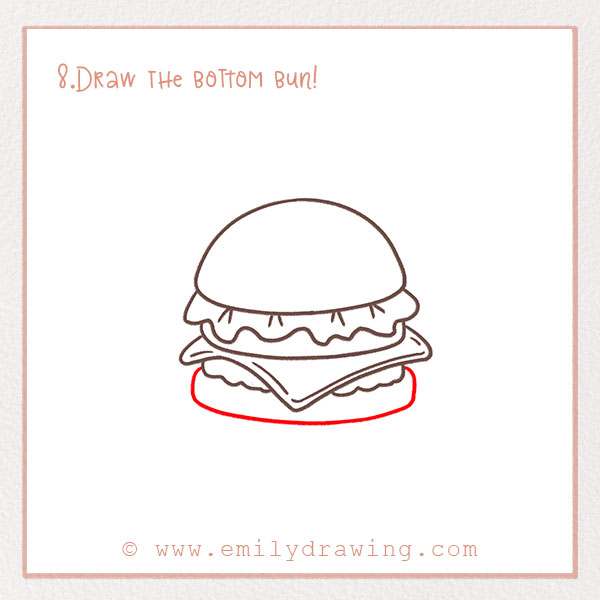
We are almost done with constructing our hamburger. We just need to add the bottom bun! Underneath everything, draw a horizontal line that curves up at the edges, connecting it to the rest of the sandwich.
Now all of our toppings are held together by the bun, making it easy to eat!
Step 9 – Add a cute face!
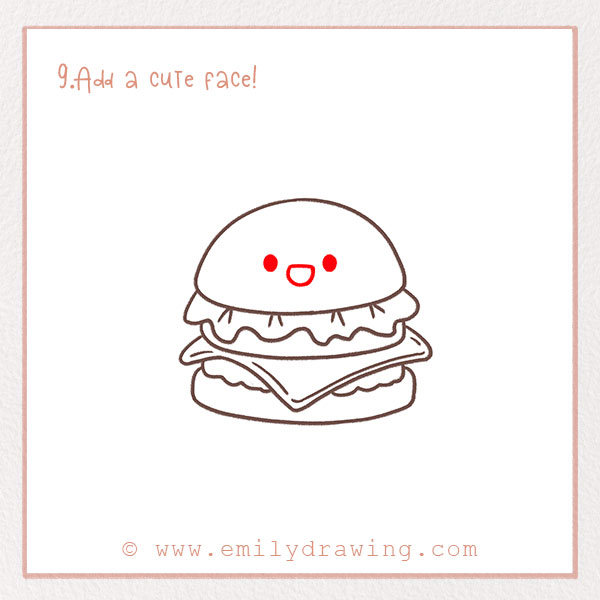
Let’s add a cute little face to our hamburger. After all, we love giving our drawings a fun personality! Draw two dots for eyes, about an inch apart. Next, draw a semi-circle centered beneath the eyes for a big smiling mouth.
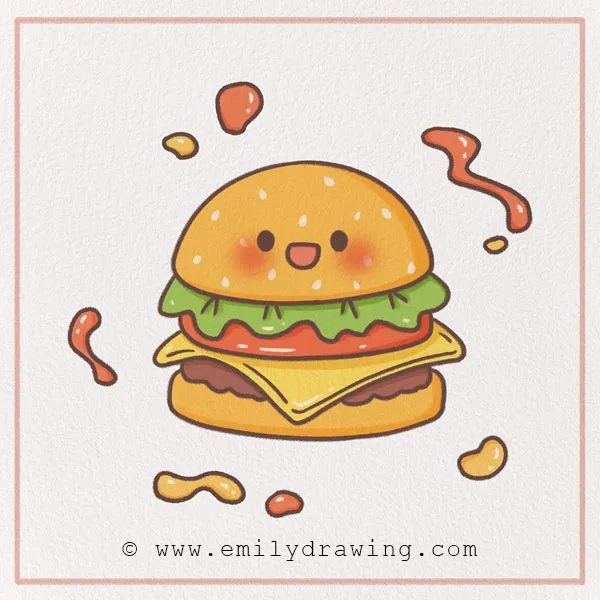
Step 10 – Color in your creation!
Finally, let’s color in our hamburger sketch — this tutorial brings your burger to life with vibrant colors! If you want to be realistic, find some greens, reds, and oranges for the toppings. Or just have fun with it! Fill in the background while you’re at it.
There you go! You’re all done. Are you hungry yet? We are! We love drawing with you for these tutorials and hopefully you learn some new facts and drawing techniques. If you had a good time, share it with friends who you think would enjoy it, too!
Thanks for drawing with us, as always. We have many more food tutorials, as well as people and animals as well. These are all nicely categorized on our site so you can easily find what you’re looking for! And, if you don’t see what you want, you can always leave us a comment.
Once you’ve finished your hamburger, complete the meal with How to Draw French Fries or How to Draw a Popcorn.
Pin it now, Draw later!
Get the FREE Printable Drawing Guide