Hi and welcome to our plane drawing tutorial — a fun and easy step-by-step art guide! Are you ready for our awesome drawing project? In just 10 steps, you’ll learn how to sketch a plane like a pro!
Airplanes have been around for around a century. Commercial flying began in 1914, but the first airplane was flown in the USA ten years earlier in 1904 by the Wright Brothers in North Carolina, USA. Airplanes are very interesting vehicles—did you know that they can hit the ground running at 170 miles per hour?
If you’ve ever ridden on an airplane, you’ll know that it is a fun adventure. Whether you like flying or not, it is still an interesting experience to have! With around 100,000 airplane flights taking off and landing all across the world, airplane travel is a huge economy and an important means of travel for many people across the globe.
Let’s get started with our airplane drawing for kids — it’s fun and easy! Happy drawing!
If you enjoy drawing vehicles, you might also like How to Draw a Car or How to Draw a Robot.
Materials:
- a piece of paper
- a pencil for the guiding lines and sketching
- an eraser
- a black sharpie or a pen for the outlines
- markers or colored pencils for coloring
- our printable drawing guide (Join my Email List below to get this Tutorial)
Here are my RECOMMENDED Art Supplies!
- Crayola Coloring Set (140 Pieces – Mega Value!)
- 24 Colored Crayon Set
- A4 Printer Paper
- Crayola Coloring Pencils
- HP Home Printer with Instant Ink!
Time needed:
12 minutes.
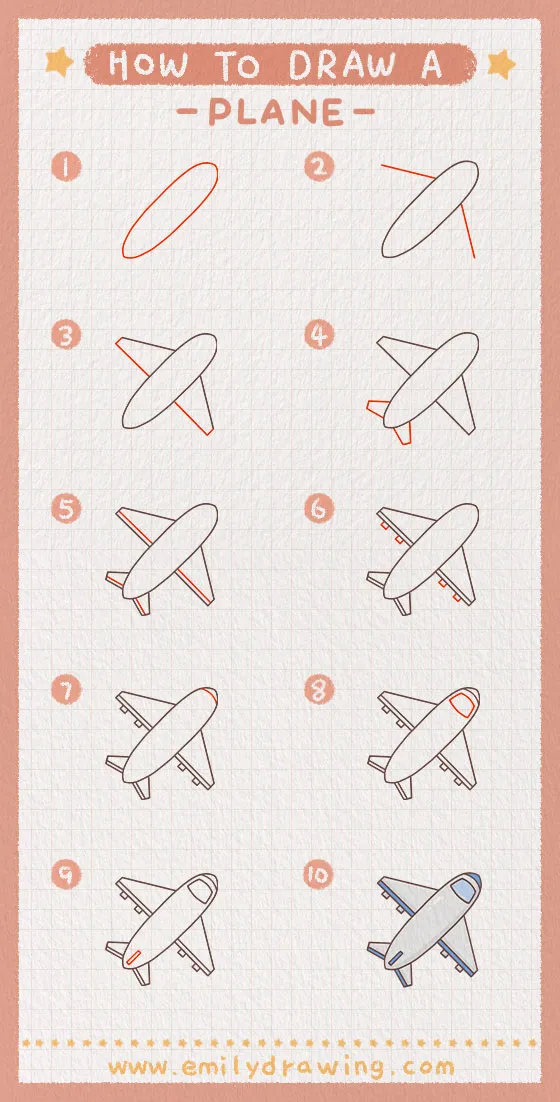
How to Draw a Plane — Let’s get started!
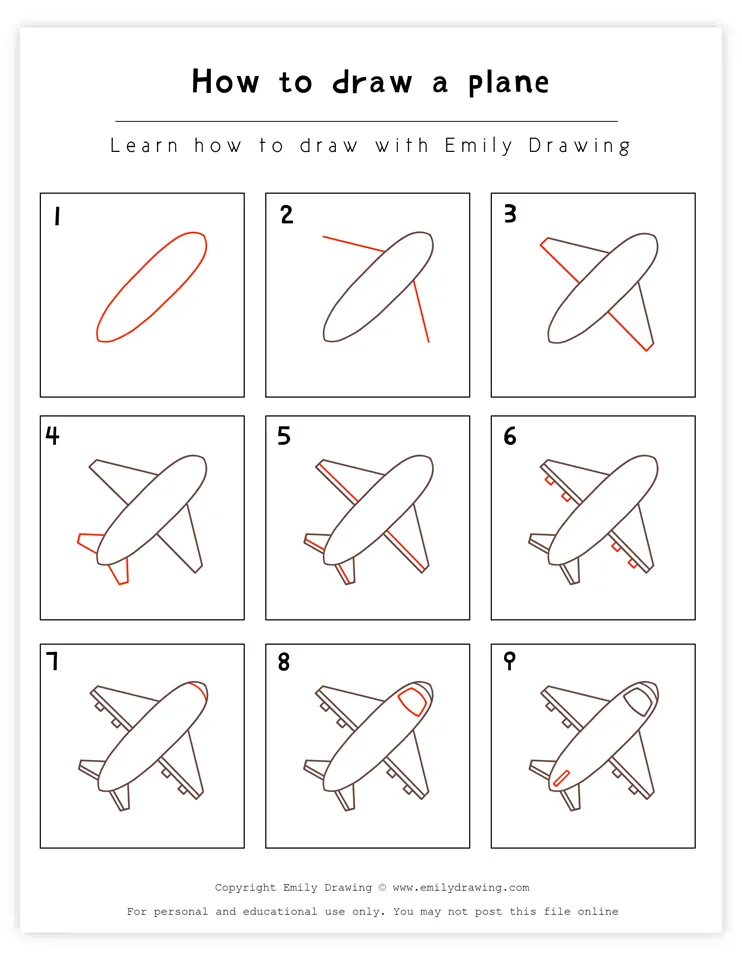
Step 1 – Draw the body of the plane.

Many planes can accommodate several hundreds of passengers in the main cabin, which is the long section of an airplane where all the seats are.
Let’s draw the cabin right now. To hold so many passengers, it needs to be pretty big! Draw the cabin by making a long oval placed diagonally on the page. It should take up nearly all of the page. Check out the photo!
Step 2 – Start drawing the wings.
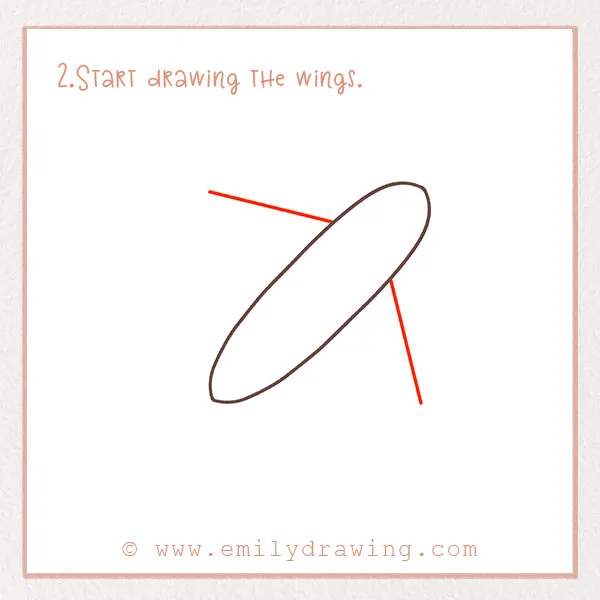
Next, let’s draw the wings! The wings of the airplane provide the lift for it to glide in the air, so they are of course very important parts for the plane.
To make them, just draw two diagonal lines extending out and downwards from either side of the cabin.
Good job!
Step 3 – Finish the wings.
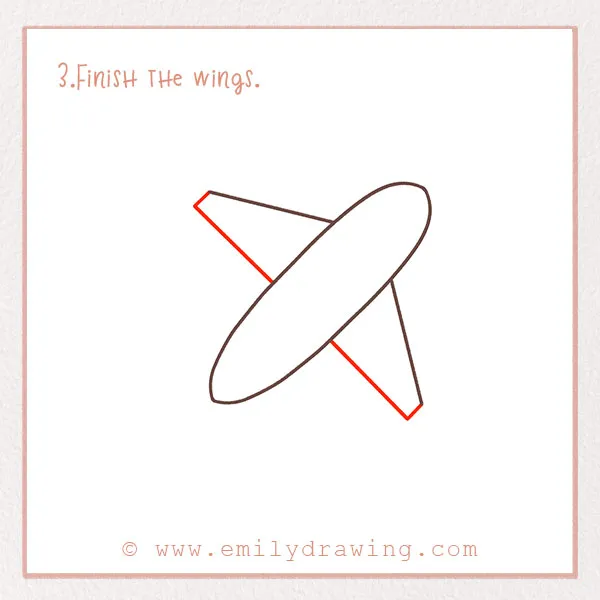
Have you ever seen an airplane in the sky? If so, you probably know what the wings look like!
In this step, we will finish drawing the wings of our airplane. From the lines you drew in Step 2, add very short lines at a sharp angle.
Next, connect these short lines back to the cabin. You should have a rough triangle shape for each of the wings.
For tutorials involving structured and symmetrical shapes, try How to Draw a Star or How to Draw a Christmas Tree.
Step 4 – Add the back wings.
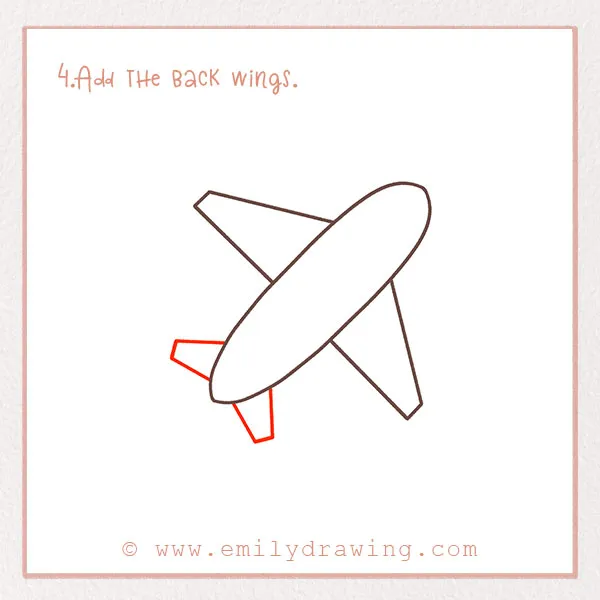
The wings at the end of the aircraft help with elevation. They are much smaller than the main wings but are still super important!
To draw these, make a much smaller version of the main wings on each side of the cabin. They should be placed at the bottom left, near the end of the cabin. Good job!
Step 5 – Add detail to the wings.
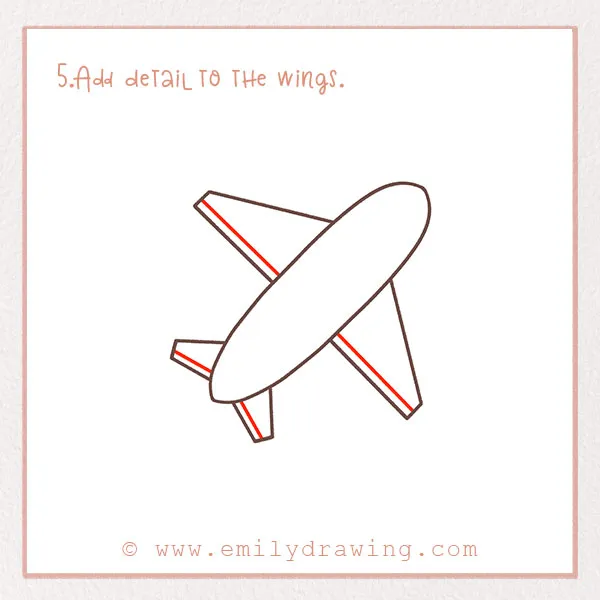
This is a quick and easy step. Simply add a stripe to the back of all the wings!
If you enjoy adding detailed elements, consider exploring How to Draw a Diamond or How to Draw a Crown.
Step 6 – Add the airplane jets!
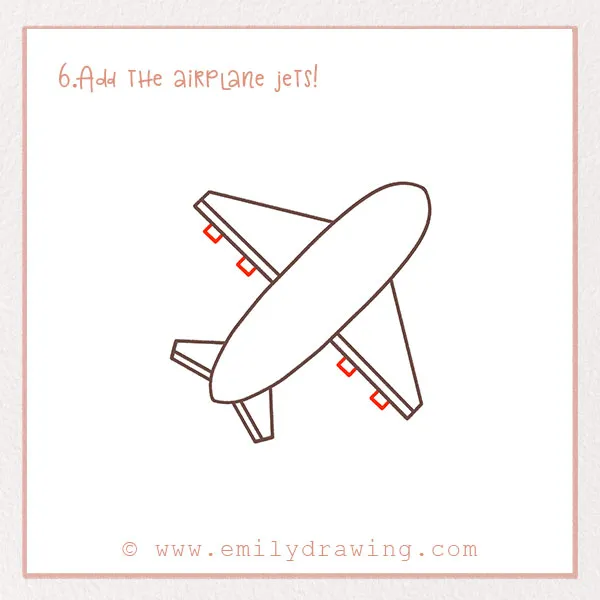
Of course, for our airplane to be able to fly thousands of miles, it needs several jets. On each of the main wings, add two small rectangles for the jets. Although they look small in this drawing, they are absolutely massive in real life!
Step 7 – Add detail to the plane’s nose.
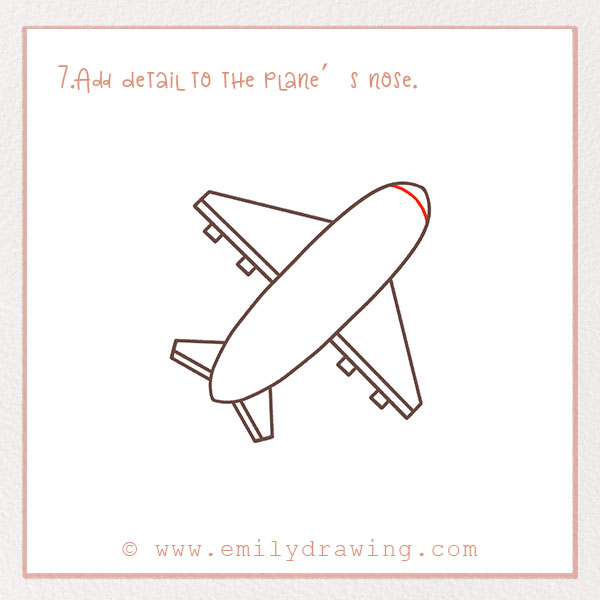
Let’s move up to the front of the plane, near the cockpit, where pilots sit to steer the plane. Can you imagine being a pilot?
To designate the cockpit area, draw a short curved line at the nose of the plane. Check out the photo!
Step 8 – Continue adding detail to the plane.

Next, add the front window of the plane. Right behind the line you just drew, add a rounded trapezoid outline for the window. This is where pilots look out at the sky ahead of them.
Step 9 – Add the plane’s rudder.
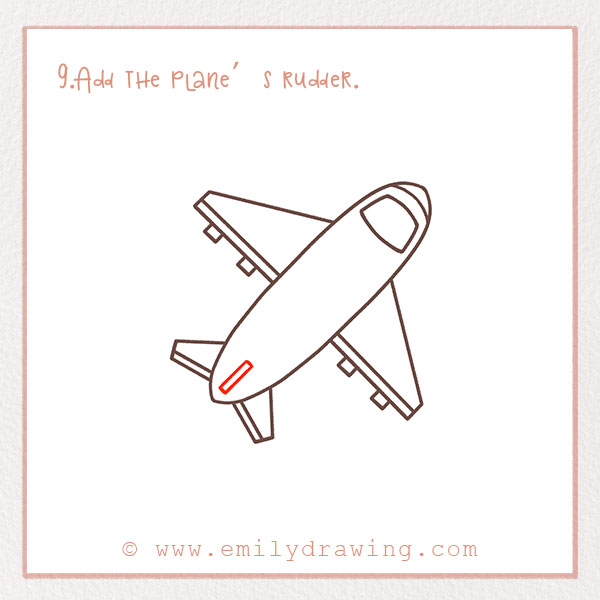
Lastly, let’s add one more important mechanism for the plane: the rudder. This again helps with steering and stability, not unlike a dorsal fin on a shark.
Near the bottom of the cabin, draw a short and narrow rectangle. Since we are drawing the airplane from above, the rudder just looks like a rectangle. In reality, however, it is very tall!
Step 10 – Color in your airplane drawing!
Lastly, embrace your creativity by coloring in your drawing however you want. We always love this step because this is what makes all drawings turn out differently. Have fun with it!
You’re all done. Awesome job! Thanks for following along with us. We hope you enjoyed this project, because we sure did!
At Emily Drawing, we have so many more tutorials for you, ranging from plants and animals to famous pop culture icons like Spongebob. Our tutorials follow the same format as this one, so if you enjoyed this, be sure to check them out!
After completing your plane, try your hand at How to Draw a Rocket or How to Draw a Starfish.
Pin it now, Draw later!
Get the FREE Printable Drawing Guide