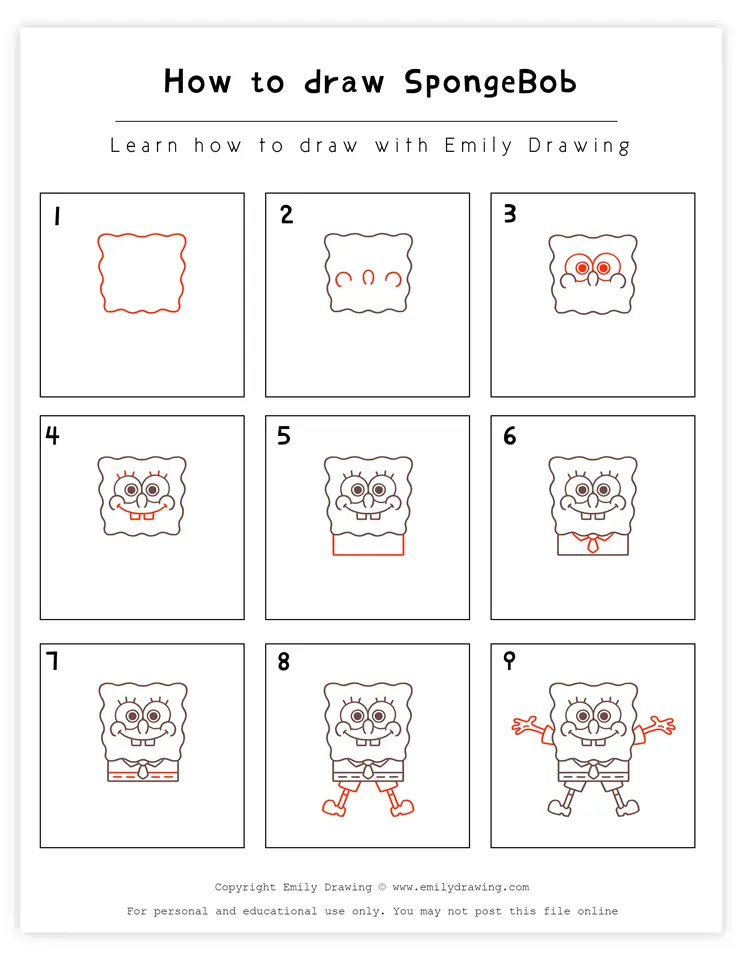
Hi! Welcome to another fun and simple drawing tutorial: How to Draw Spongebob! In ten steps, we will learn how to start drawing Spongebob Squarepants, one of the most iconic cartoon characters ever!
Spongebob is a cute sponge who lives in the cute underwater town of Bikini Bottom. Known as super optimistic, silly, and childlike, Spongebob has captured the hearts of kids and adults alike across the globe. In fact, Spongebob’s creator Stephen Hillenburg actually studied both marine science and art in college! Not surprising, right?
If you’ve ever watched Spongebob Squarepants, you’ll know that he works as a fry cook at the Krusty Krab, making hamburgers for the residents of Bikini Bottom. The creator himself actually worked as a fry cook when he was younger, and he even drew inspiration from his boss!
There are so many fascinating facts about Spongebob Squarepants, but let’s get started on our tutorial. We’ll learn more about Spongebob as well as some awesome techniques to help you learn to draw cartoons!
Find a nice spot, choose your favorite drawing materials, and enjoy this easy drawing for kids!
If you enjoy drawing popular characters, you might also love How to Draw Hello Kitty or How to Draw Princess Peach.
Materials:
- a piece of paper
- a pencil for the guiding lines and sketching
- an eraser
- a black sharpie or a pen for the outlines
- markers or colored pencils for coloring
- our printable drawing guide (Join my Email List below to get this Tutorial)
Here are my RECOMMENDED Art Supplies!
- Crayola Coloring Set (140 Pieces – Mega Value!)
- 24 Colored Crayon Set
- A4 Printer Paper
- Crayola Coloring Pencils
- HP Home Printer with Instant Ink!
Time needed:
12 minutes.
How to Draw SpongeBob — Let’s get started!
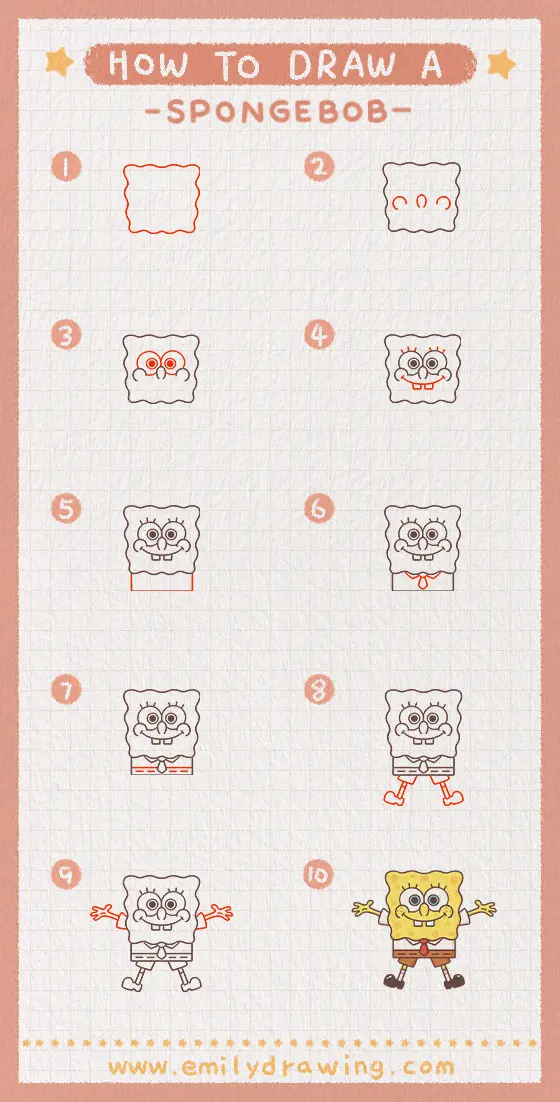
Step 1 – Draw Spongebob’s outline.
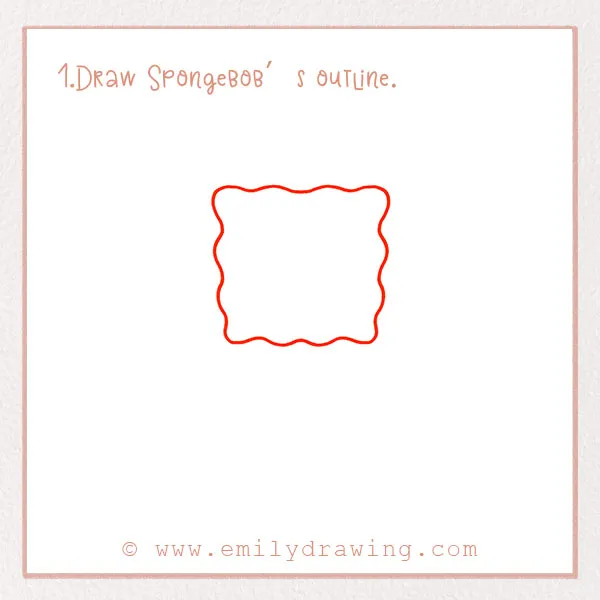
Spongebob is, of course, a sponge. Let’s start off this step-by-step Spongebob drawing tutorial by sketching his square outline.
Near the middle of the page, draw a large square but make the lines a bit wavy! Check out the photo.
Step 2 – Start drawing his facial features.
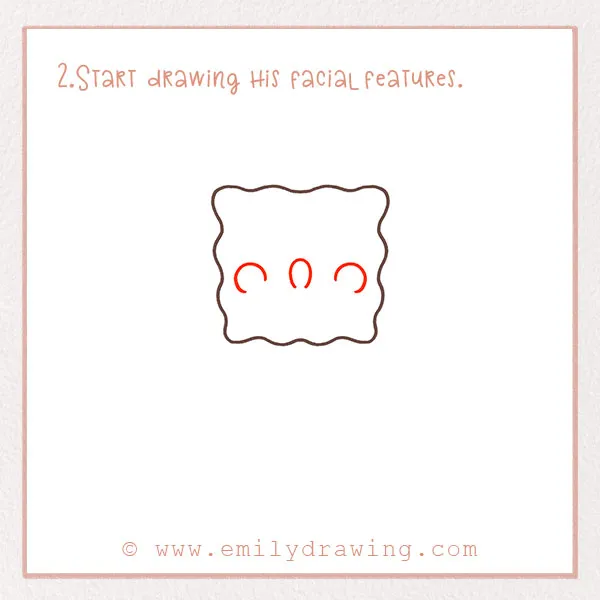
Next, we are going to start drawing his face. Spongebob’s features are very distinctive, including his big smile and chubby cheeks.
In the middle of the square, draw a small semicircle. This is a long nose. Next, on either side of the nose, draw two more slightly rounder and tilted semicircles for his cheeks. Refer to the photo!
Step 3 – Draw Spongebob’s eyes!
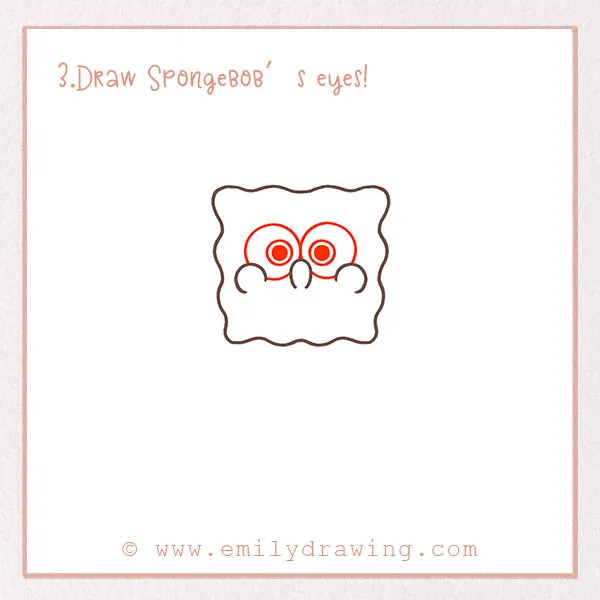
Spongebob’s eyes are very big, round, and expressive. Let’s add them now.
Draw two circles next to each other, just above the nose. They should just barely touch each other.
In each eye, draw two smaller circles. Lastly, draw two more circles and color them in for his pupils! Good job.
For more tutorials involving structured shapes, try How to Draw a Robot or How to Draw a Birthday Cake.
Step 4 – Finish drawing Spongebob’s face!
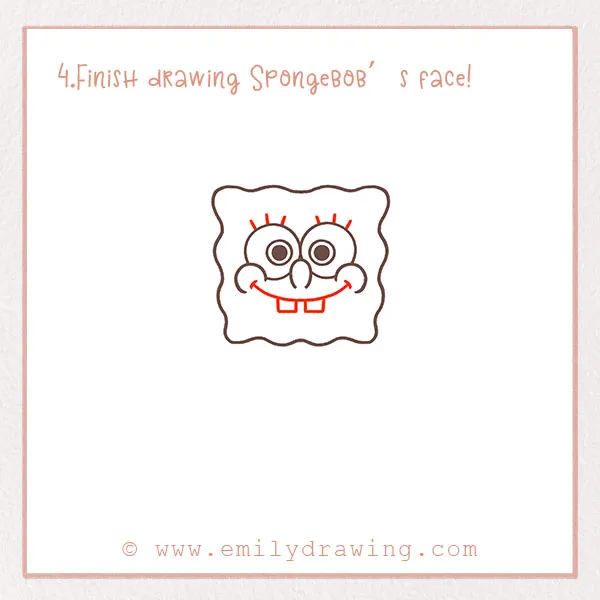
Let’s finish drawing his face.
Draw three short lines above each eye for eyelashes. Next, in between his cheeks from Step 2, draw a big curved line for a smile (Spongebob is always happy)! Lastly, draw two small rectangles for his front teeth.
Awesome!
Step 5 – Draw Spongebob’s outfit.
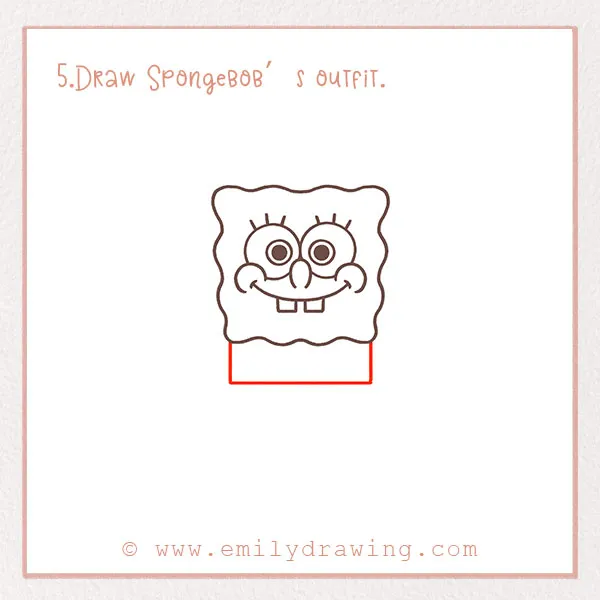
Let’s move on from the face and draw the rest of Spongebob!
Below the initial square, draw a long and narrow rectangle. This forms his shirt and pants. We’ll add more detail to them in the next step!
If you enjoy drawing detailed facial features, consider How to Draw a Bunny or How to Draw a Panda.
Step 6 – Add detail to his clothes.
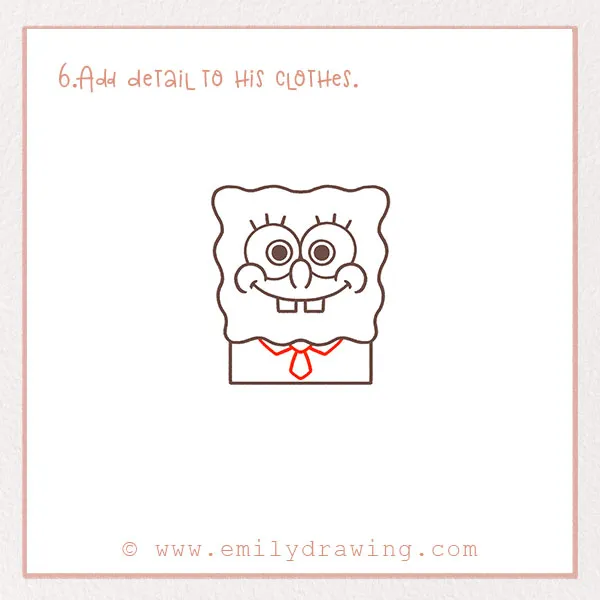
Spongebob always wears the same outfit—a white shirt, brown pants, and a red tie.
So, let’s draw all that now! Check out the photo for this step. Start by drawing two small triangles for the collar. Then, draw a small shape for the knot of the tie. Lastly, draw a slightly bigger diamond shape for the tie! It should reach the bottom of the rectangle.
Good job!
Step 7 – Draw more detail to his outfit.
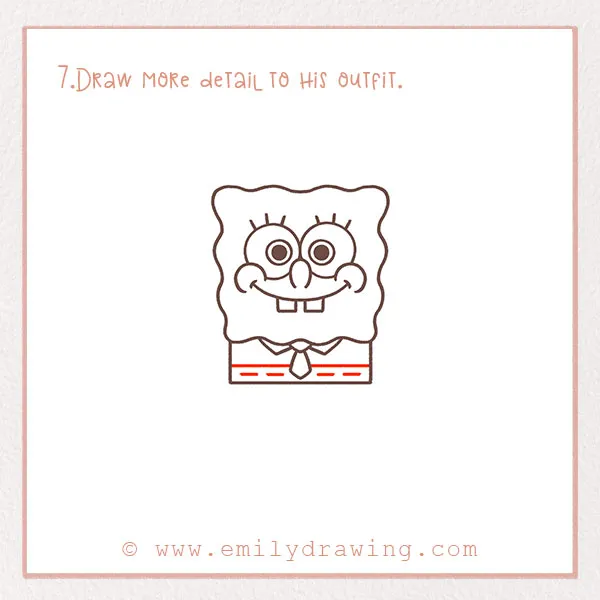
Below the tie, draw a horizontal line. This separates his shirt from his pants. Below that line, draw four short horizontal lines next to each other. These represent the stitches on his pants.
Step 8 – Finish drawing his pants.
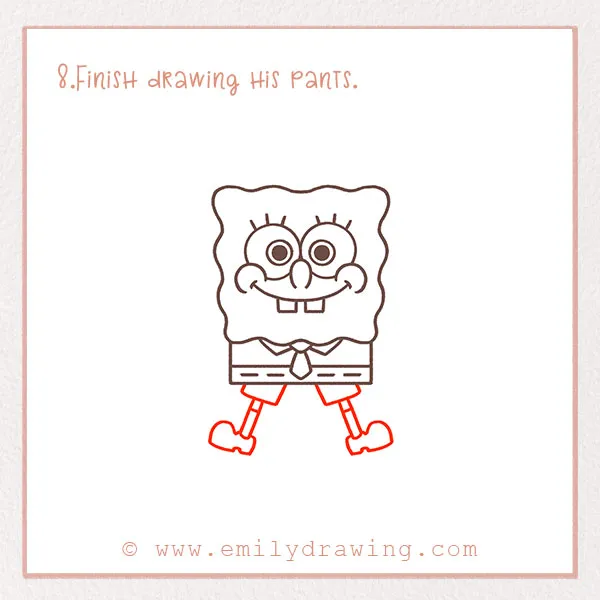
To draw the legs of the pants, draw two slanted rectangles below the rectangle you drew in Step 5. They should only be about an inch long.
Next, of course Spongebob needs to have legs! Beneath the two small rectangles you just drew, draw two more long, skinny slanted lines for legs. Draw a few lines for sock marks. Lastly, draw his shoes! Refer to the photo.
Step 9 – Add Spongebob’s arms!
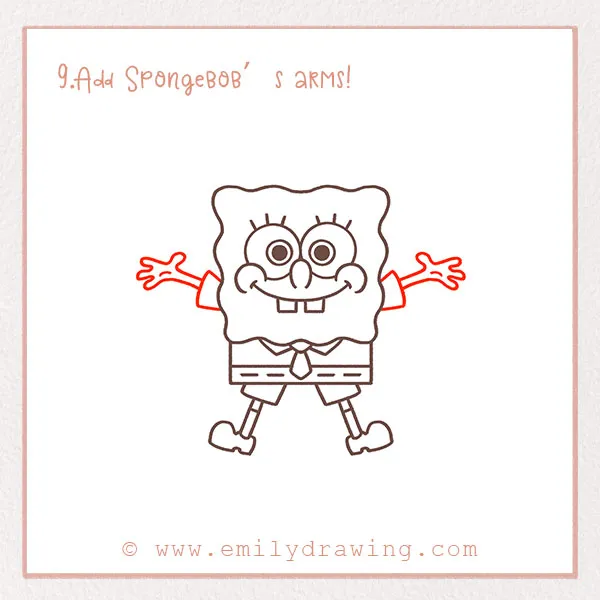
They should be going up because it looks like he is cheering! Remember, Spongebob is always full of energy and positivity.
Good job! You’re almost done! Just one more super fun step.
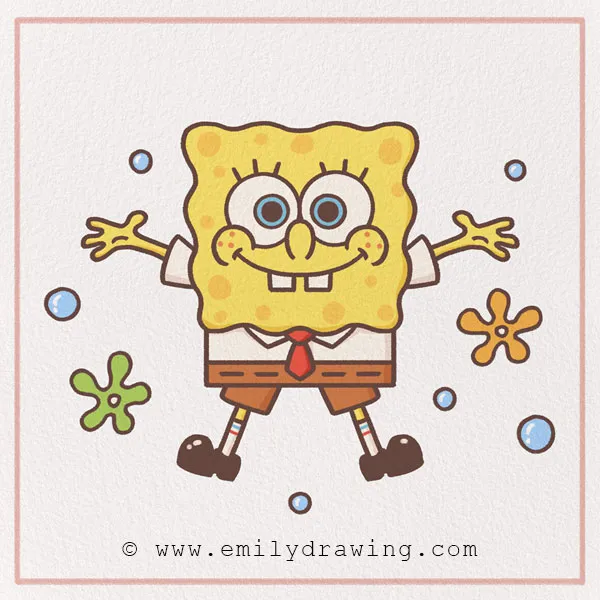
Step 10 – Color your Spongebob masterpiece!
Spongebob is famously a bright yellow sponge and always wears the same colors. However, you can always exercise your creative freedom and color his outfit however you want!
Make sure to fill out the background, too! He lives in the sea, so maybe you could even add some bubbles or fish around him. Have fun with it!
You’re all done! Thanks for following along with our tutorial.
After completing SpongeBob, expand your skills with How to Draw a My Little Pony or How to Draw an Angel.
If you want to draw some more iconic figures in pop culture, make sure to check out our My Little Pony and Hello Kitty drawing tutorials! Like this one, they are simple and fun.
Pin it now, Draw later!
Get the FREE Printable Drawing Guide