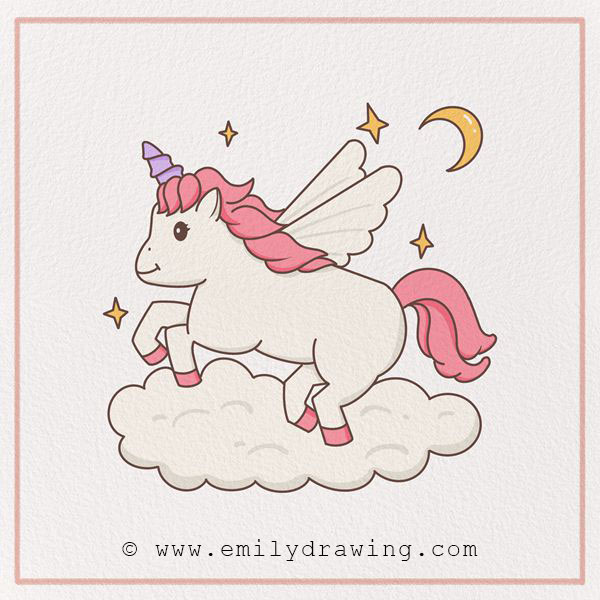
Hello and welcome to the 10-step tutorial for drawing a unicorn. There is something so beautiful about mythical creatures and almost every child dreams of having one for themselves. Dragons, mermaids and unicorns are just to name a few, but today we are focusing on learning how to draw a unicorn!
This step-by-step guide is easy to follow along with for anyone, and soon enough you’ll have your own beautiful unicorn to hang up on the wall and daydream about. Each of the following steps include both a drawing example and written instructions.
Materials:
- a piece of paper
- a pencil for the guiding lines and sketching
- an eraser
- a black sharpie or a pen for the outlines
- markers or colored pencils for coloring
- our printable drawing guide (Join my Email List below to get this Tutorial)
Here are my RECOMMENDED Art Supplies!
- Crayola Coloring Set (140 Pieces – Mega Value!)
- 24 Colored Crayon Set
- A4 Printer Paper
- Crayola Coloring Pencils
- HP Home Printer with Instant Ink!
Time needed:
15 minutes.
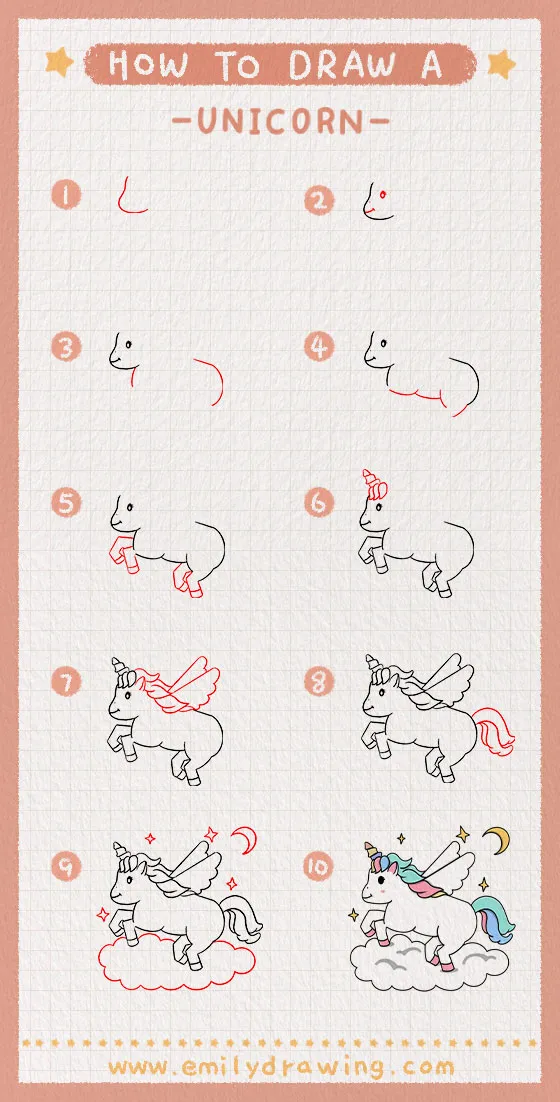
How to Draw a Unicorn— Let’s get started!
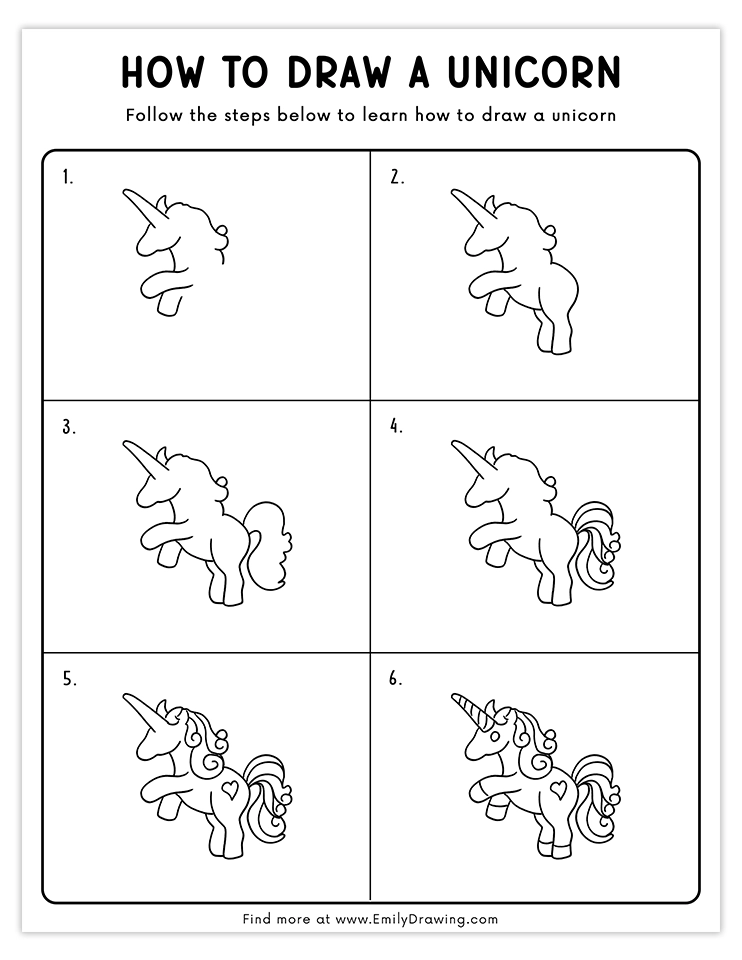
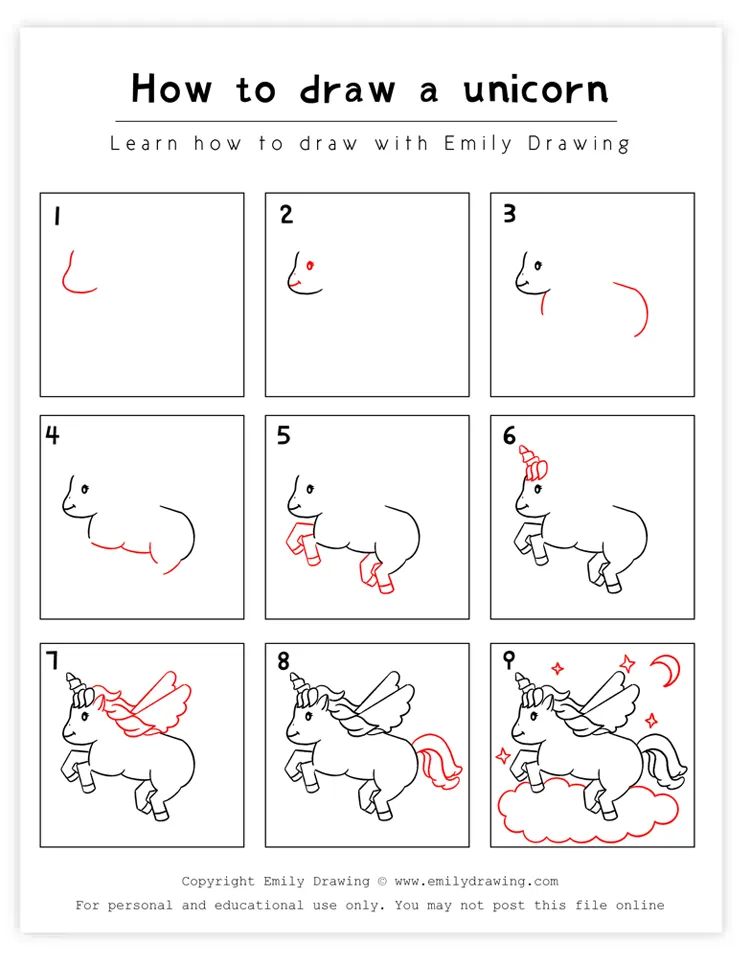
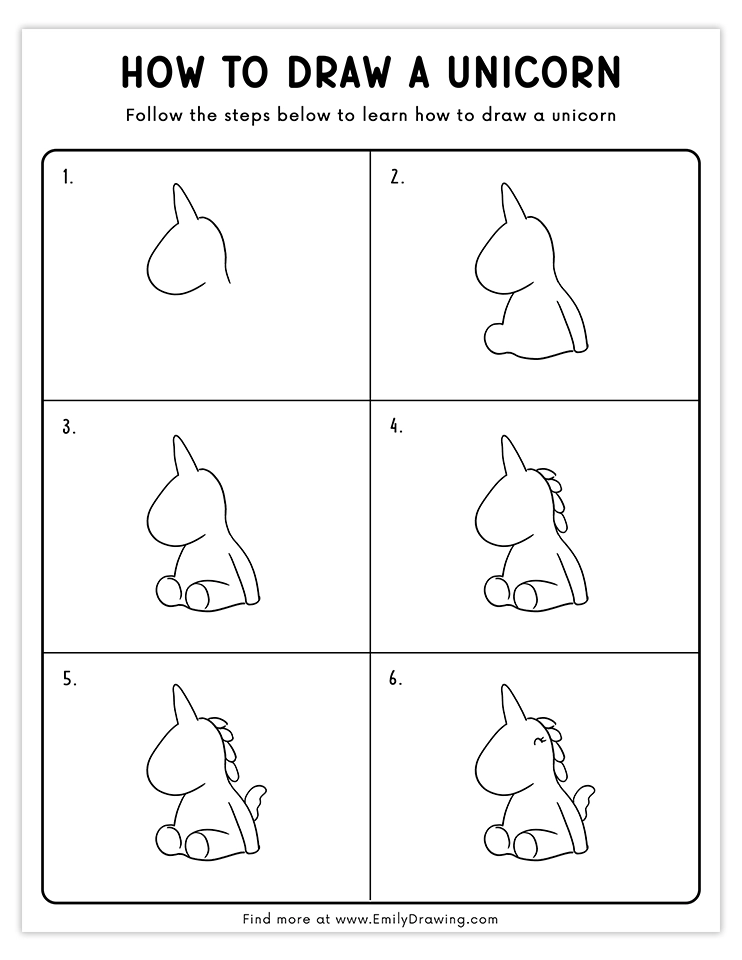
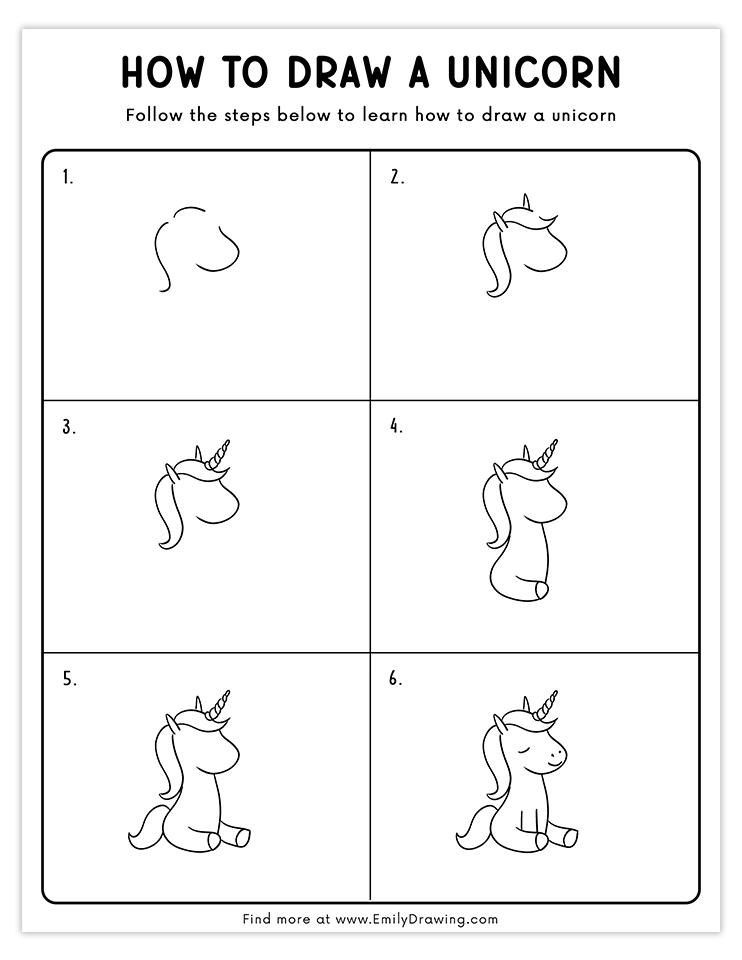
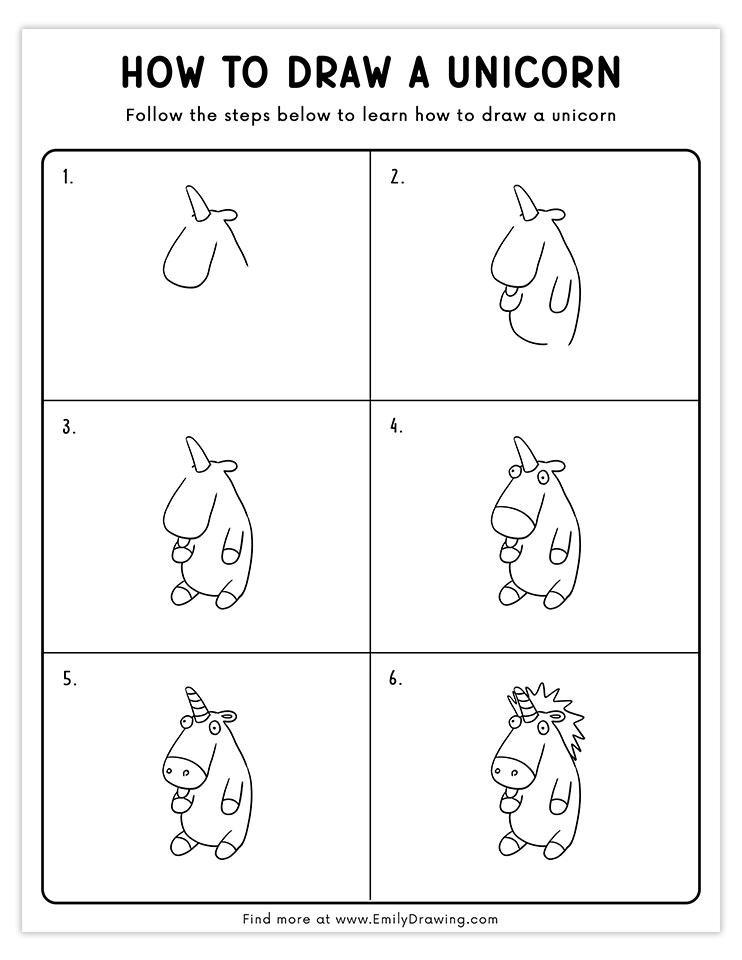
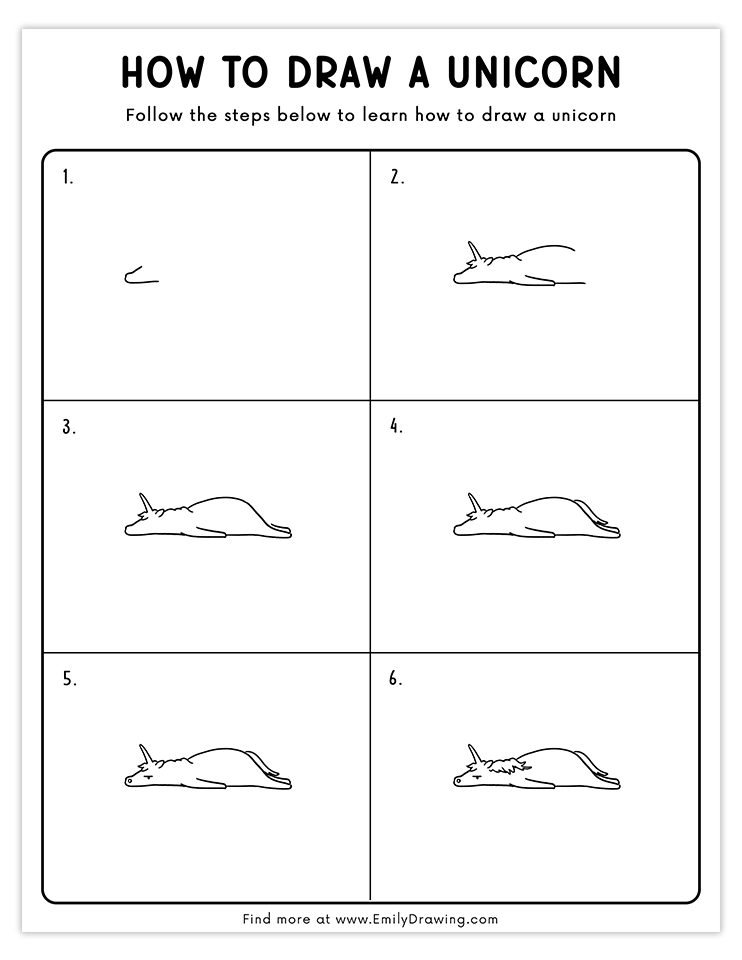
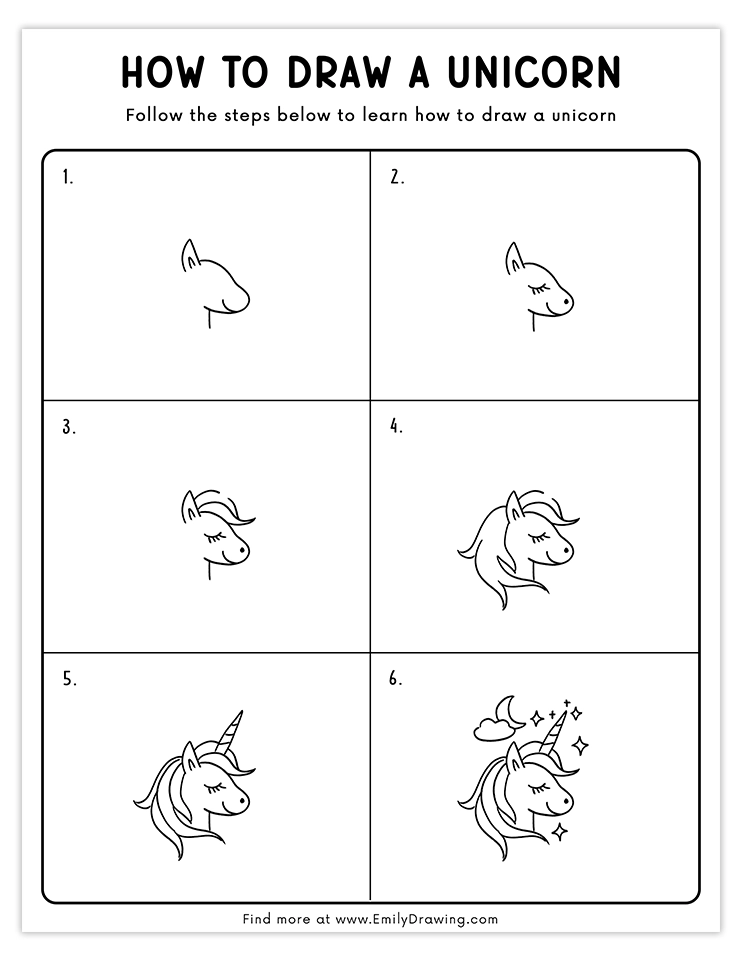
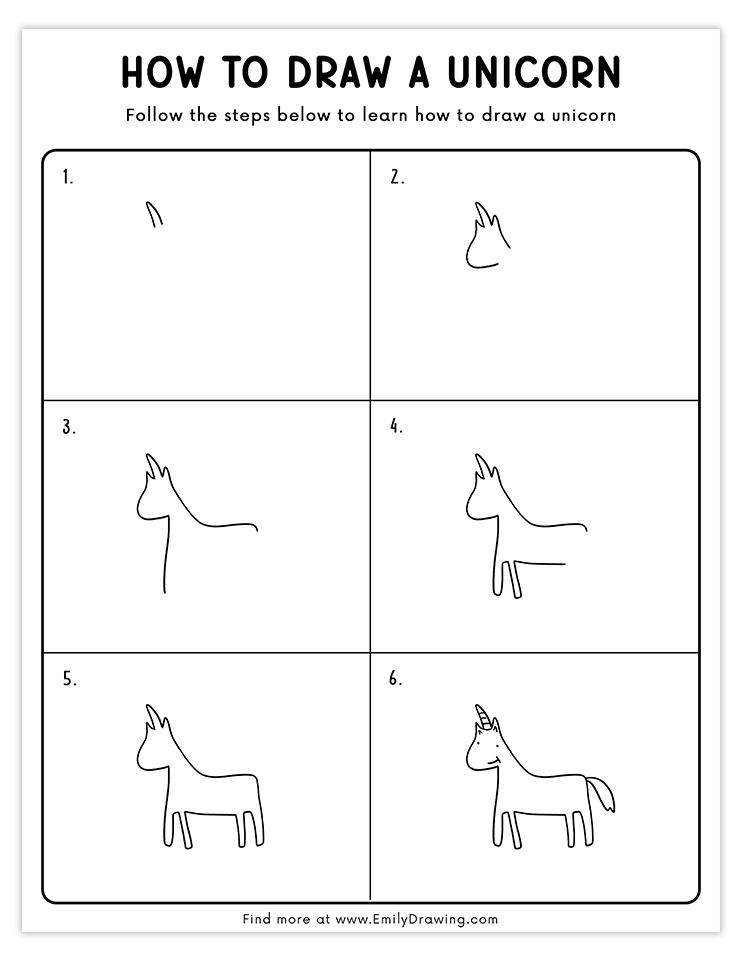
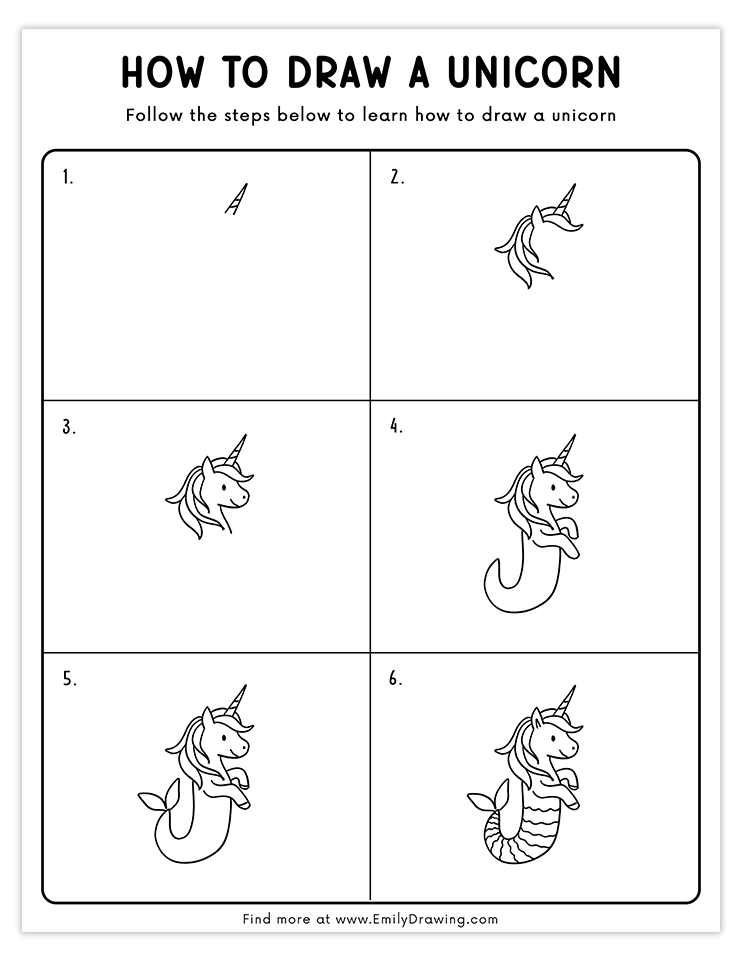
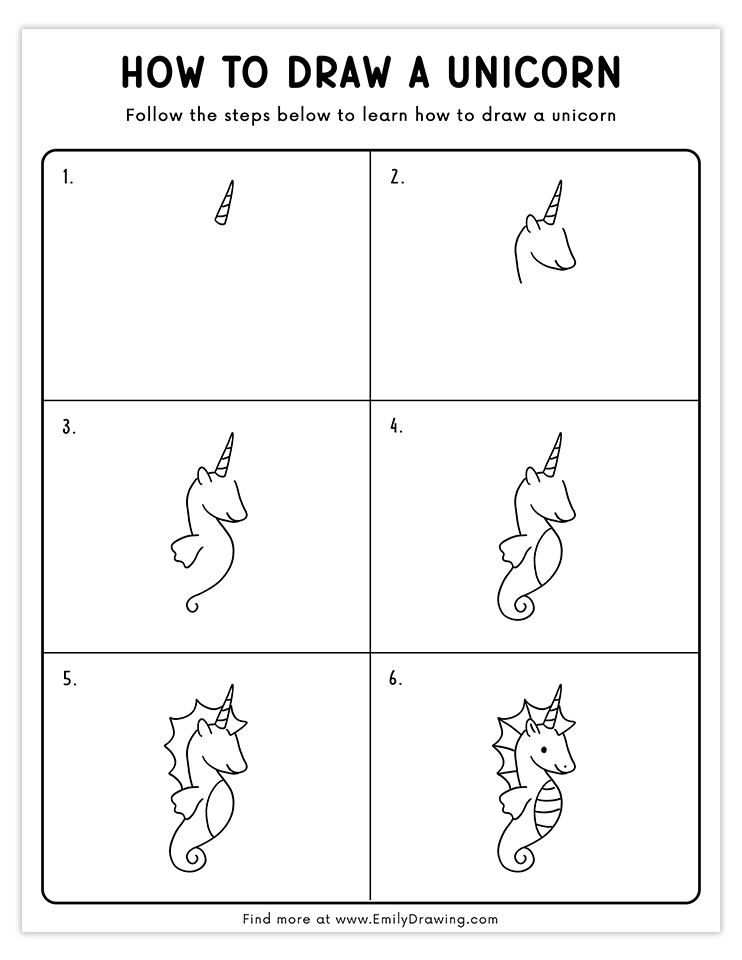
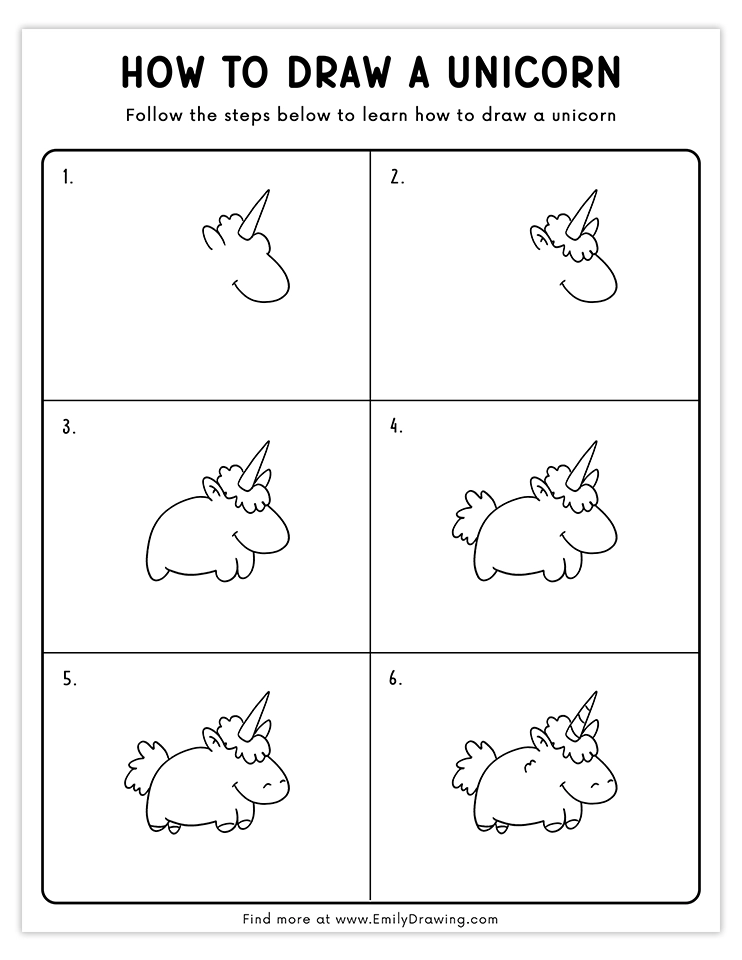
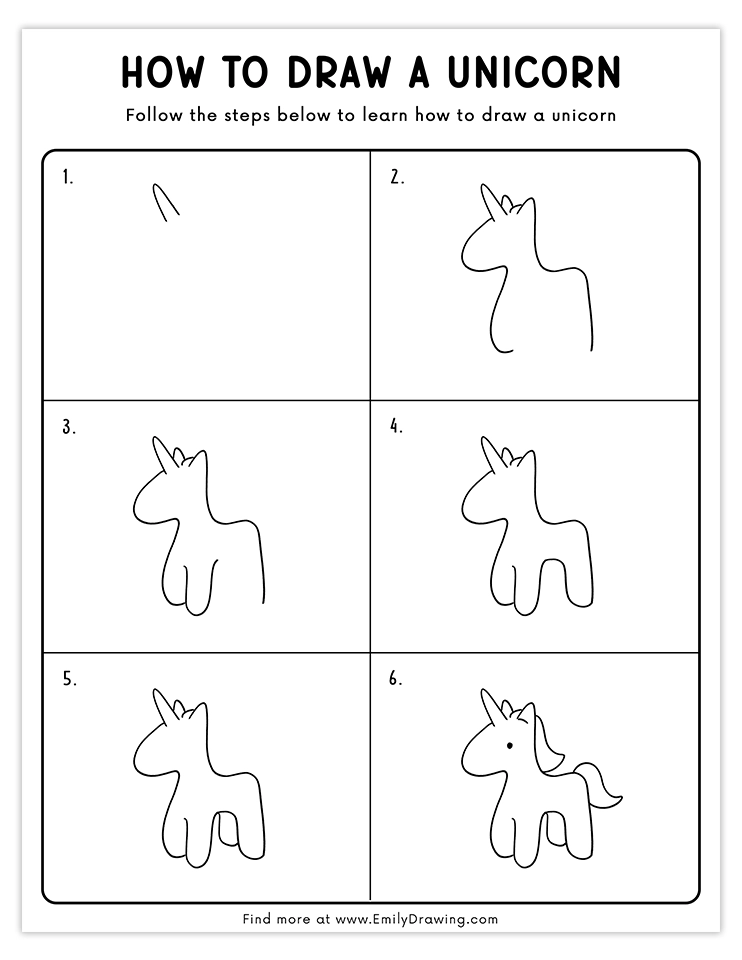
Step 1 – Draw the head of the unicorn.
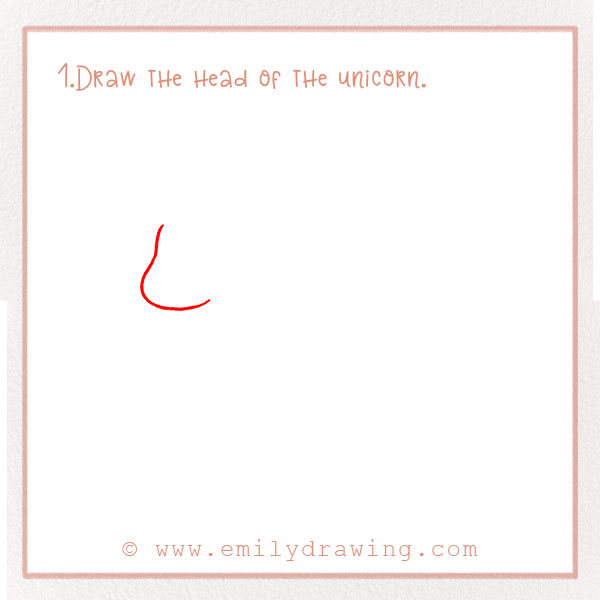
In this drawing, the unicorn will be facing the left. Begin by drawing a small curve, followed by a larger one, almost in the shape of a “C.” Refer to the image above.
Step 2 – Add the face details.
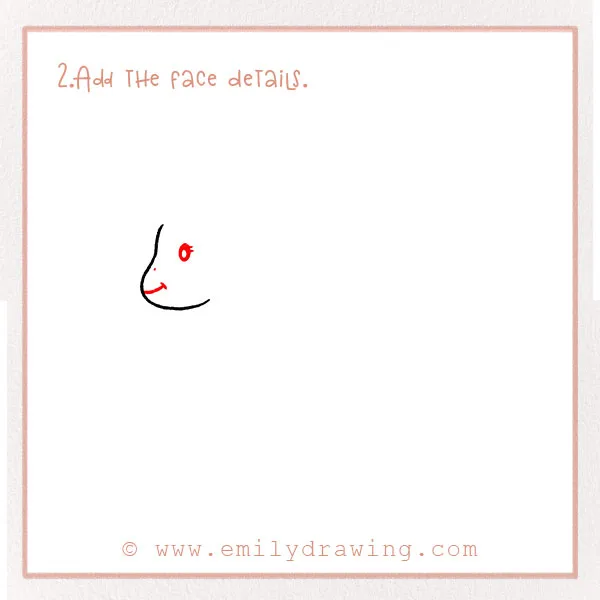
Start by adding an eye, a small dot for the nose in the center of the face, and then a curved line for the mouth. It should look like the unicorn is smiling at you from the side.
Step 3 – Start the outline for the body.
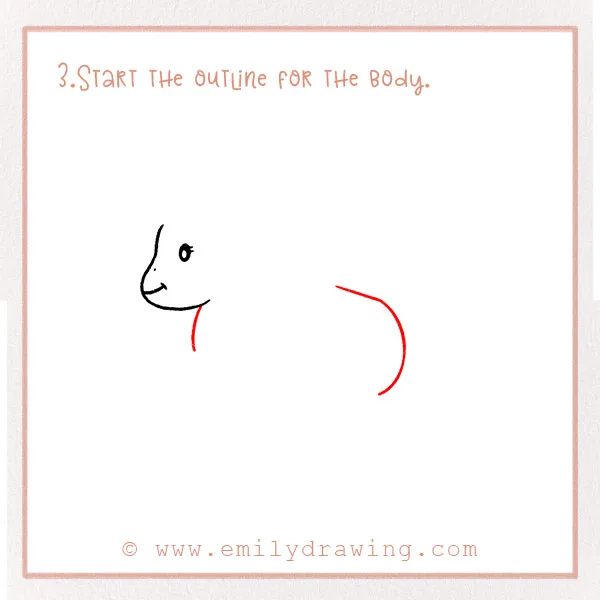
Following the example, start by drawing a small curve under the face, starting at the base of where the neck would be. Then, leave several inches of space on the paper and draw a curve (almost shaped like the top of a question mark) that will be the tail end of the unicorn. The top of the curve should be in line with where the head and neck meet at the front of the body. Use the photo for reference.
Step 4 – Draw the bottom of the body.
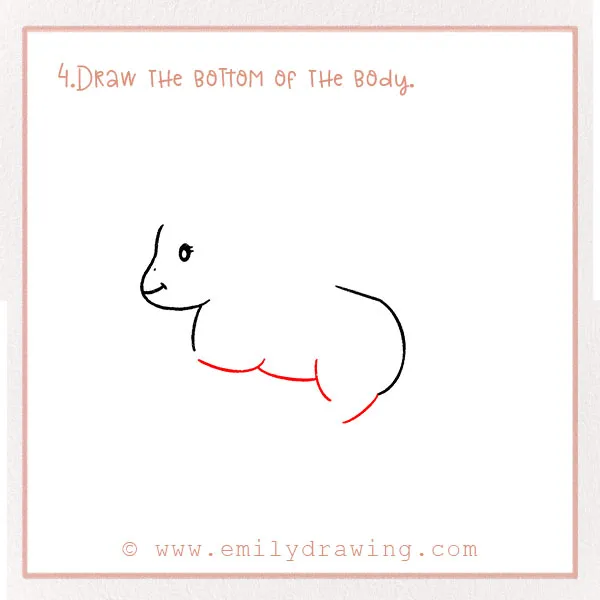
Starting from the left, leaving a small gap between the bottom of the neck and where you put the pencil down, draw three small curves, like shown in the example. Neither end of the three curves should be connected on either end yet. After that, from the tail end of the unicorn on the right, extend the drawing with one more slightly curved line. This is where a leg will come from.
Step 5 – Add some legs on the unicorn.
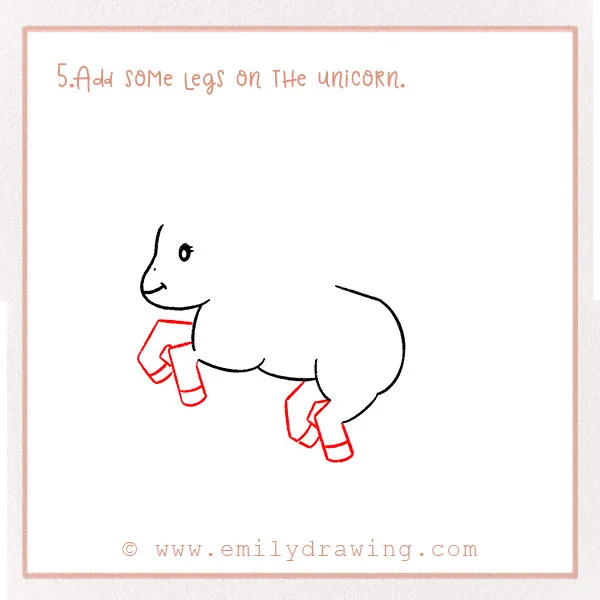
Begin by drawing the front legs, starting with the back leg, and then add the other leg in front of it. Make sure to attach them to the rest of the unicorn body. Draw the two back legs the same, with connecting lines to the body as shown in the reference drawing. Don’t forget to add the hooves!
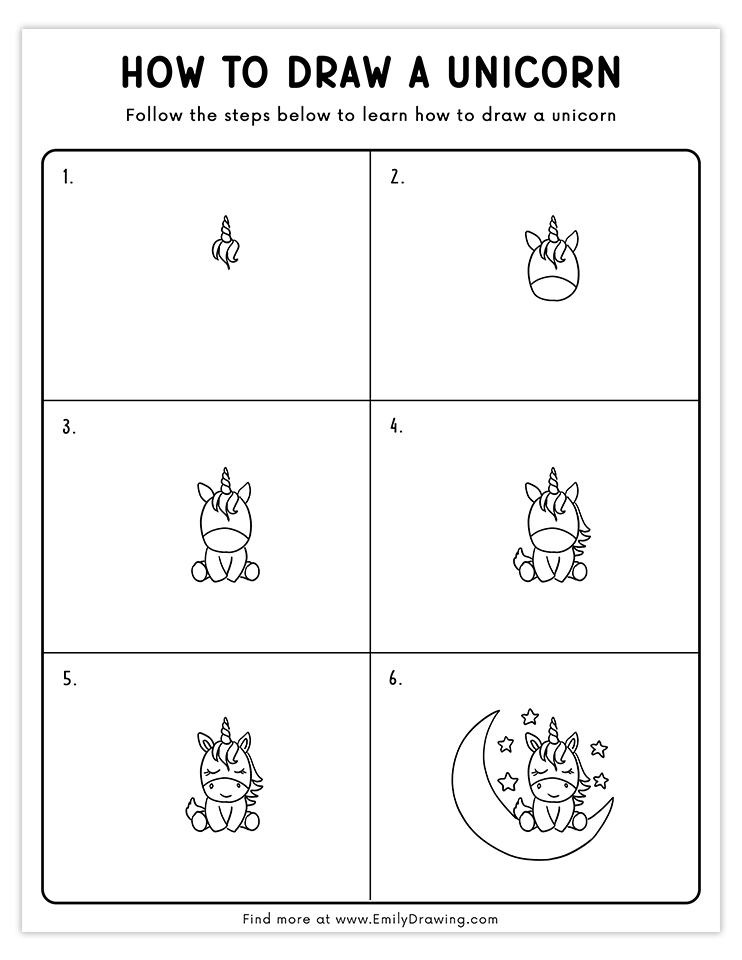
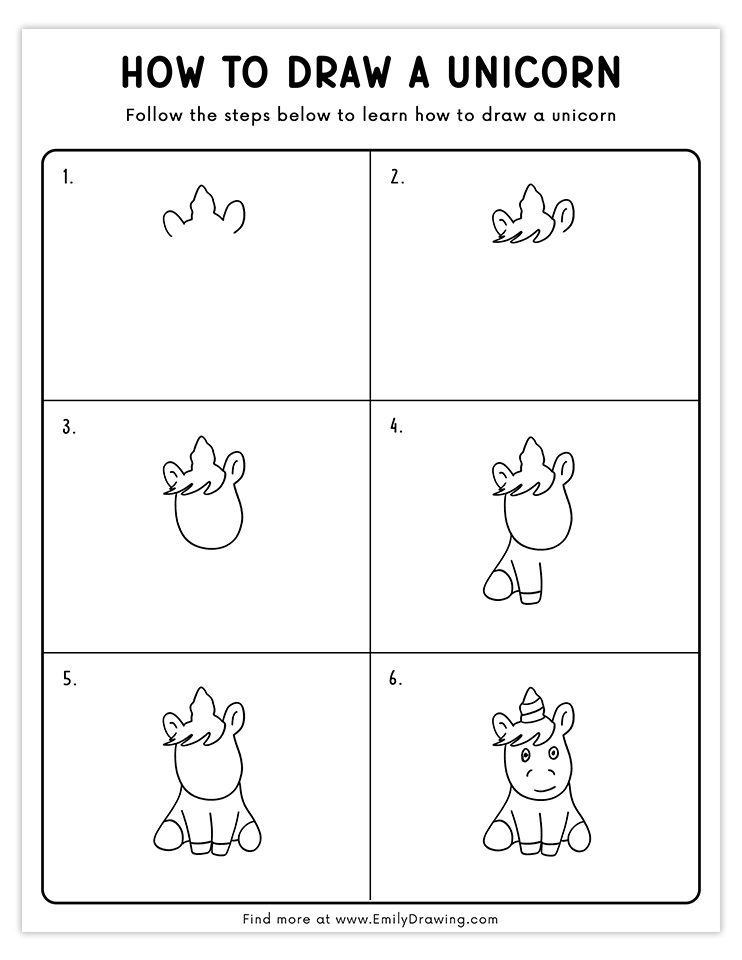
Step 6 – Let’s give the unicorn a horn.
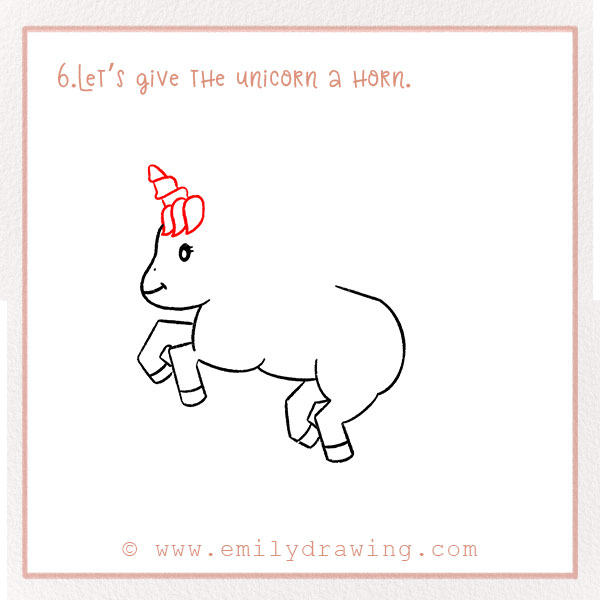
Before drawing the horn, draw three upside-down tear-drop shapes, as shown in the reference. These will be the base of the mane. Extending out from the second tear-drop shape, start drawing the horn. Draw one slanted line facing the left, and then add another so it looks like a cone. Then, you can add in details to the horn by drawing two lines, as shown.
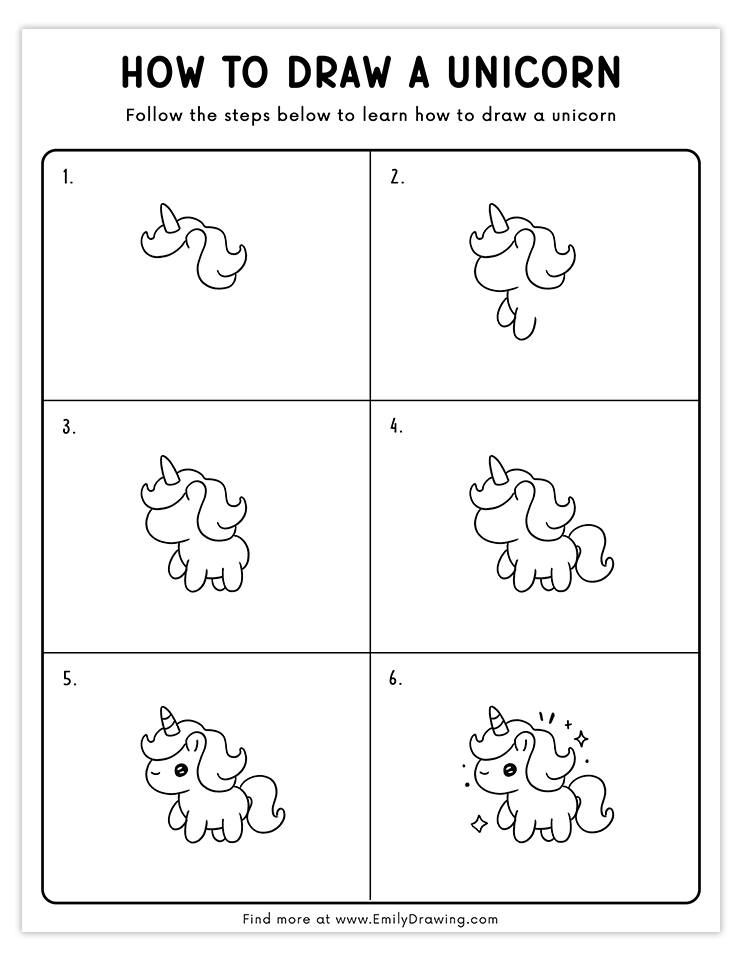
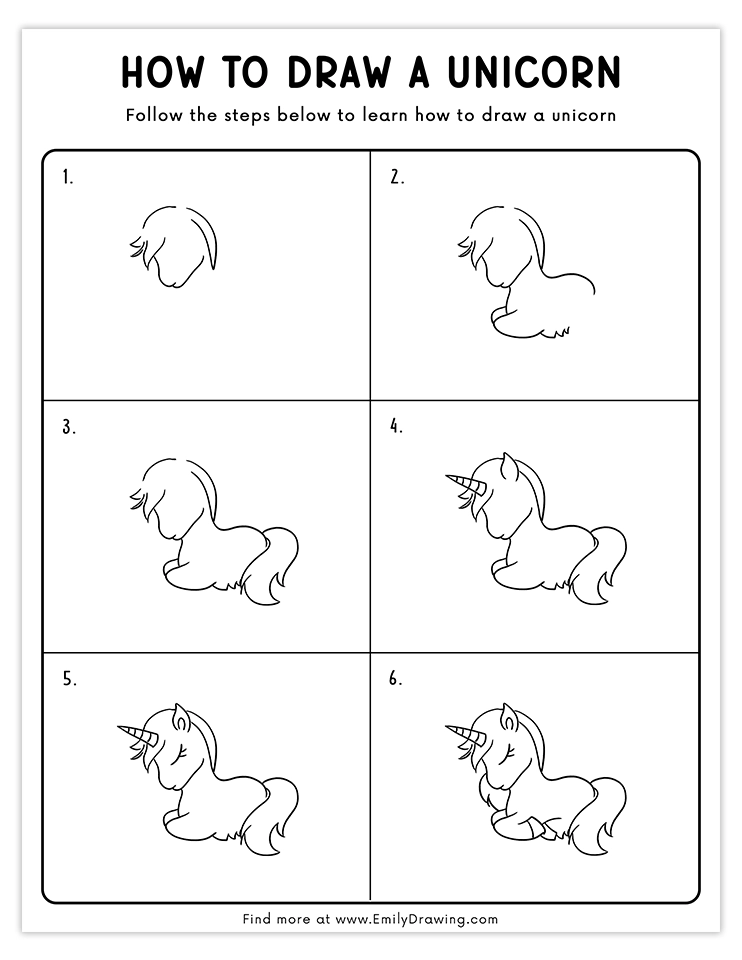
Step 7 – Add the wings and remaining mane details.
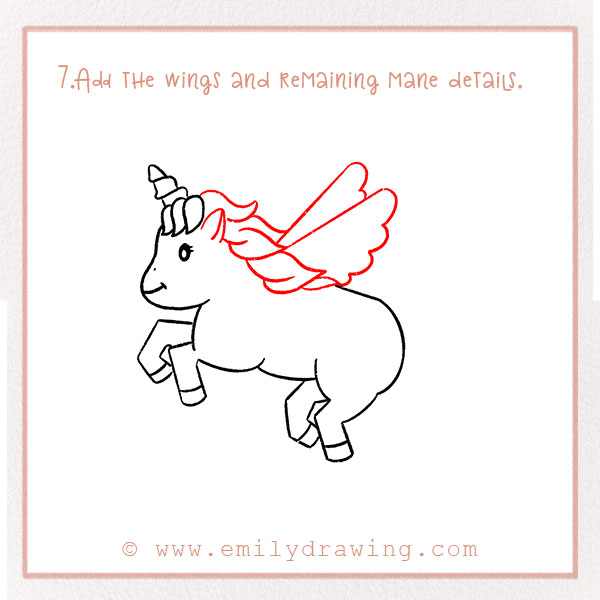
We want our unicorn to fly, right? The essential part of flying is having the wings to do so! Beginning with the front wing, draw a diagonal line in the opposite direction from the head, and connect it to the unicorn with a scalloped bottom. This gives the illusion that the wings are moving. The back wing will only show partially in the drawing, so draw the top part sticking out from the front wing, like in the reference photo. After drawing the wings, complete the unicorn’s mane around the wings, drawing hair-like lines as shown.
Step 8 – Time to give the unicorn a tail!
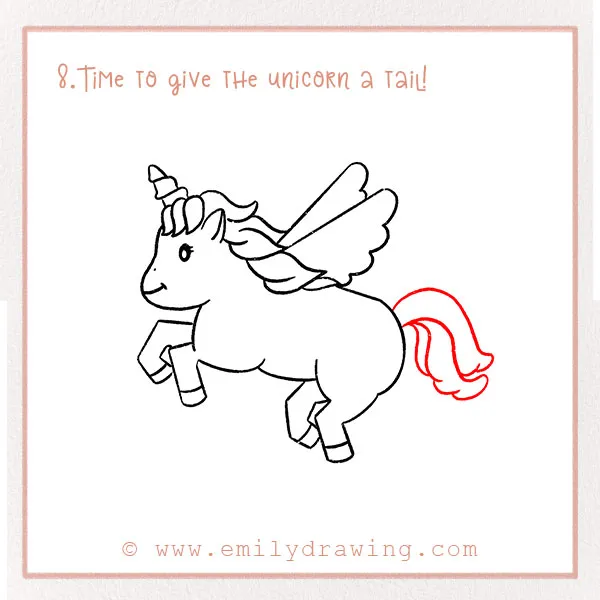
Starting from the right end of the body, draw a downward curve, and connect it with another line. To give the effect of a fuller looking tail, draw two other curves extending from the body. Refer to the guide.
Step 9 – Add the nighttime sky details.
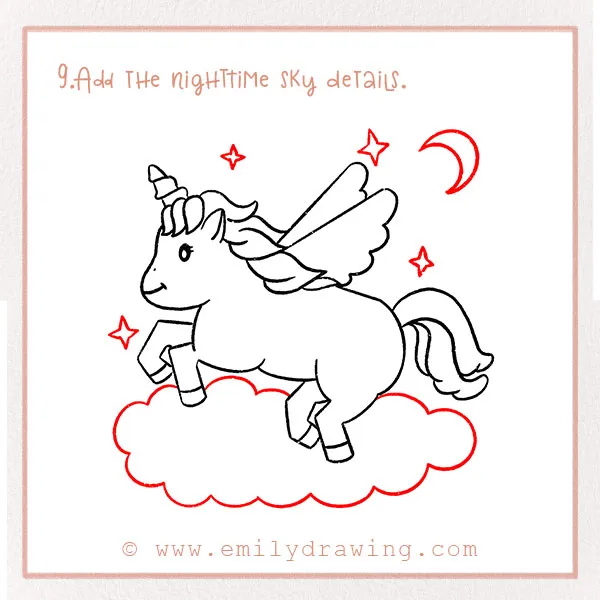
Give the unicorn the background of the sky at night by adding a crescent moon and several stars around the unicorn. Draw a fluffy cloud under the bottom of the unicorn’s body so that it looks like it’s floating!
Step 10 – Color in your drawing!
Use any colors you want, and color in your new unicorn drawing!
That’s it! We hope you enjoyed following along with us to make your unicorn creation! Thank you for using our tutorial to make your drawing come to life! We hope you cherish your new friend as much as we do!
Looking for more magical drawing adventures? Check out our tutorials on how to draw a fairy and how to draw a mermaid to expand your artistic skills
If you enjoyed our unicorn drawing tutorial, please share it with friends and leave a comment on how your drawing turned out. Feel free to browse the other tutorials that we have on the site as well!
Pin it now, Draw later!
Get the FREE Printable Drawing Guide
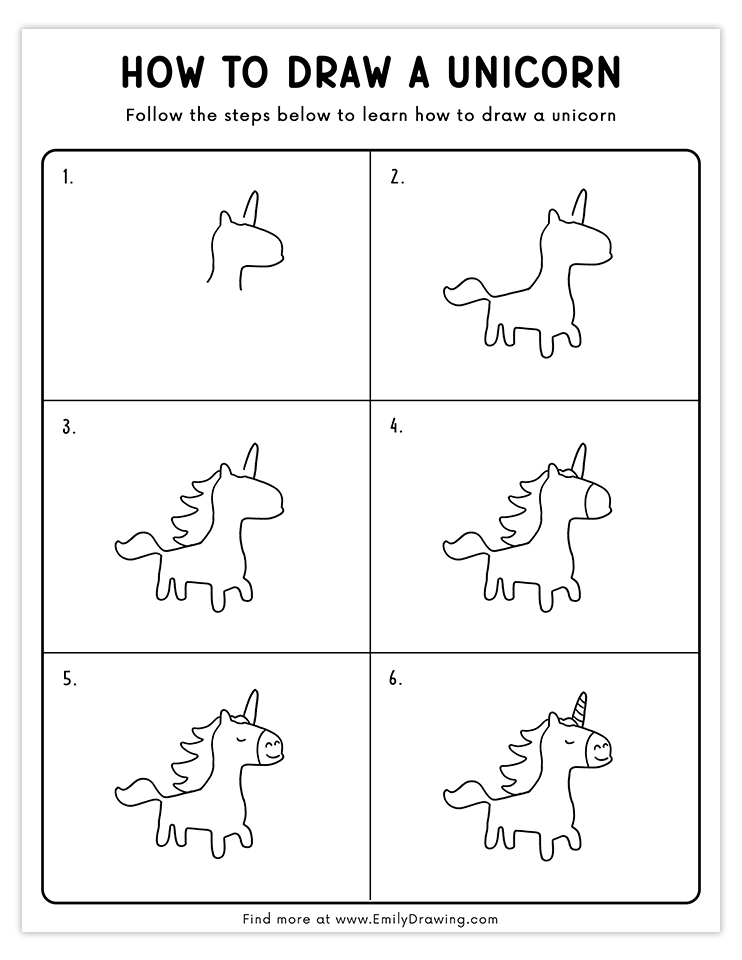
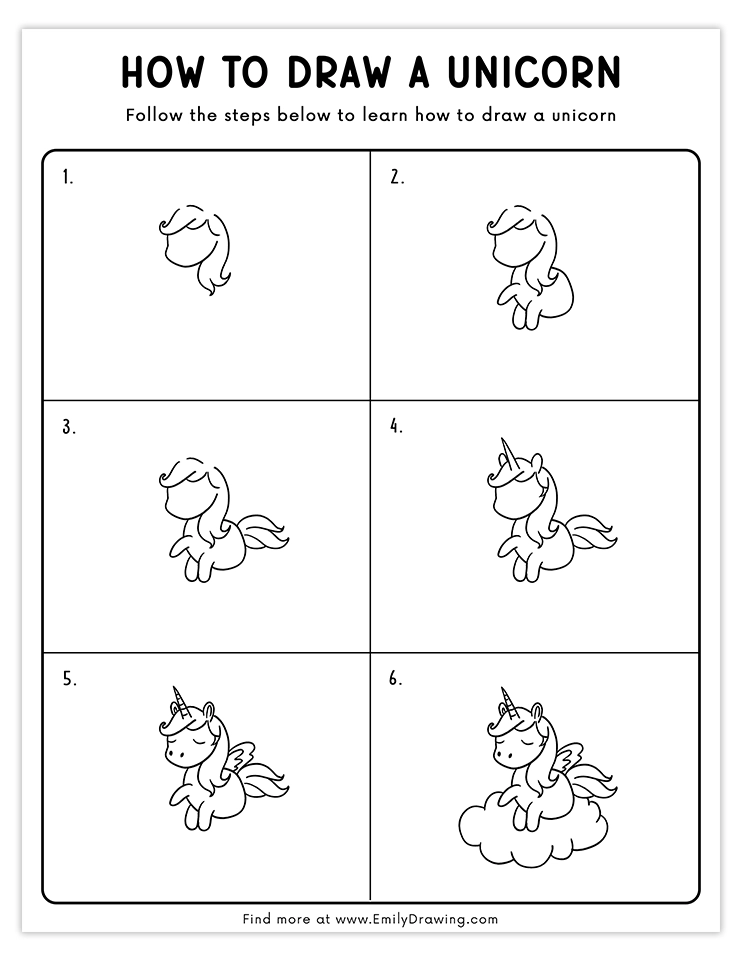
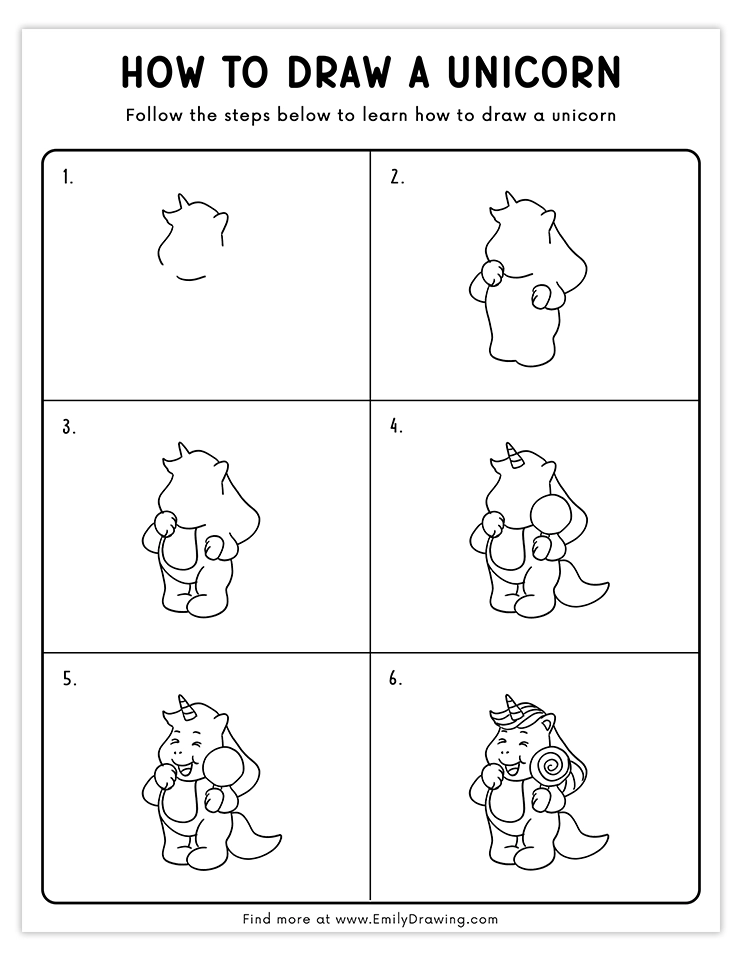
FREE Download Printable Unicorn Drawings Tutorials
Free Printable Unicorn Directed Drawing with PDF files for download and printing
1. Learn to draw a unicorn
2. Unicorn drawing tutorial
3. Steps to draw a unicorn
4. How to sketch a unicorn
5. Easy unicorn drawing guide
6. Drawing a magical unicorn
7. Unicorn art tutorial
8. Simple unicorn sketch ideas
9. How to draw a unicorn step by step for beginners
10. Easy cartoon unicorn drawing for kids
11. Detailed guide to drawing a realistic unicorn
12. How to draw a unicorn with wings
13. Unicorn doodle tutorial for beginners
14. Unicorn art step-by-step
15. How to create unicorn artwork
16. Drawing a fantasy unicorn
17. Sketching a mythical unicorn
18. Cute unicorn drawing ideas
19. Creative unicorn sketch concepts