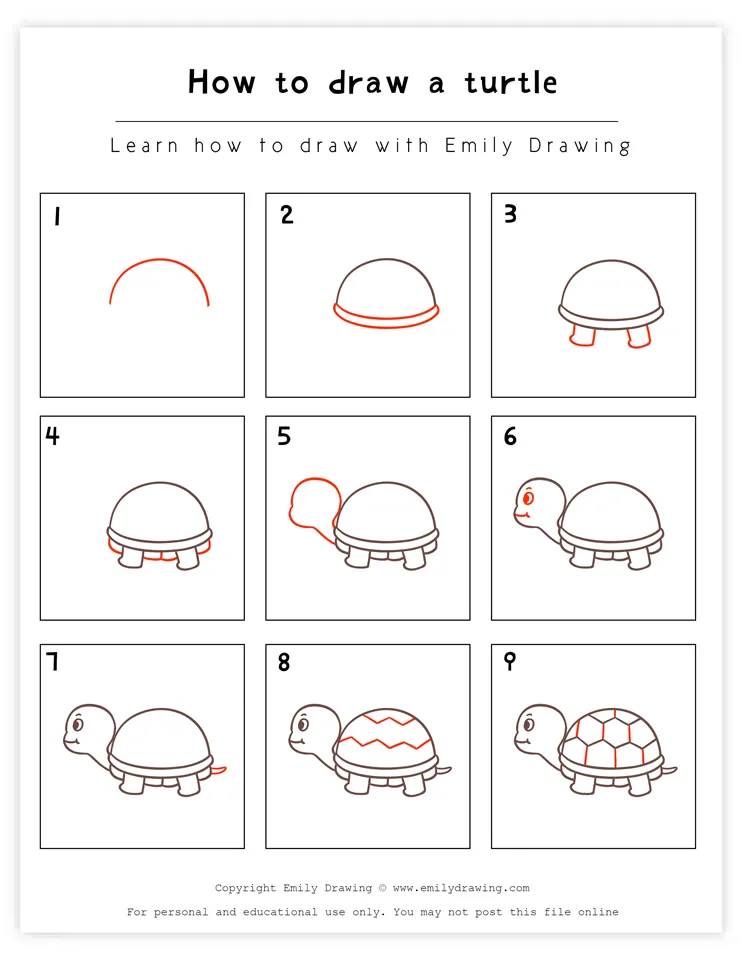
Hello! Welcome to another fun, easy-to-follow, easy turtle drawing tutorial on our site! Today, we are going to learn how to draw a turtle with this fun turtle drawing tutorial in just ten simple steps.
Turtles are fascinating animals and are classified as reptiles, just like lizards and snakes. They are known to be slow-moving, calm, and serene animals that swim and spend time in the sun. They actually have to lay, or “bask,” in the sun to regulate their body temperature properly. So, they all need water and sun no matter where they live around the world!
They are some of the oldest species of reptiles, and some turtles can even live to be over 100 years old!
So, are you ready to draw your own turtle? Collect some drawing materials, and let’s go!
Materials:
- a piece of paper
- a pencil for the guiding lines and sketching
- an eraser
- a black sharpie or a pen for the outlines
- markers or colored pencils for coloring
- our printable drawing guide (Join my Email List below to get this Tutorial)
Here are my RECOMMENDED Art Supplies!
- Crayola Coloring Set (140 Pieces – Mega Value!)
- 24 Colored Crayon Set
- A4 Printer Paper
- Crayola Coloring Pencils
- HP Home Printer with Instant Ink!
Time needed:
12 minutes.
How to Draw a turtle — Let’s get started!
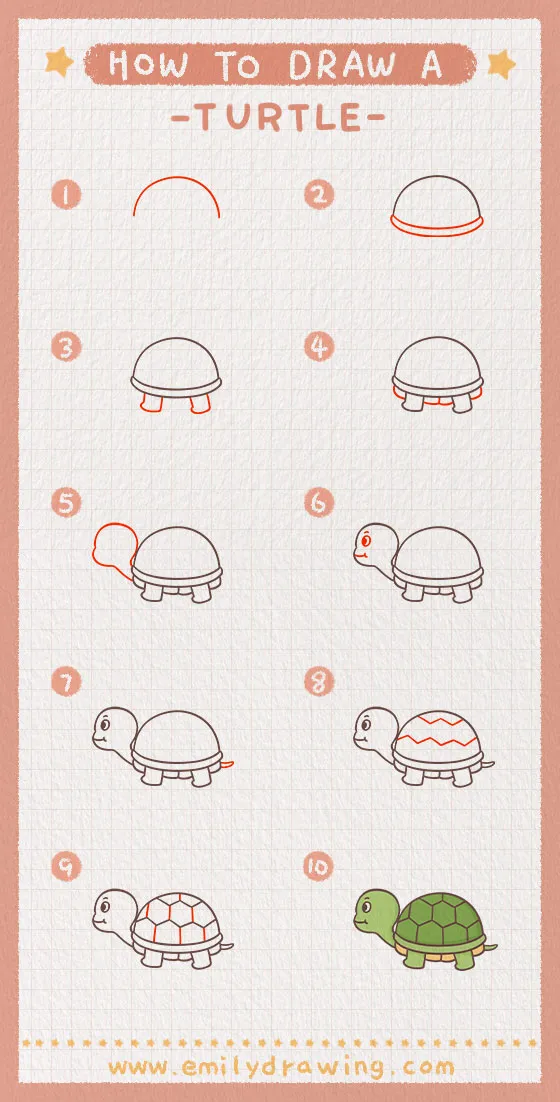
Step 1 – Draw the turtle’s shell.
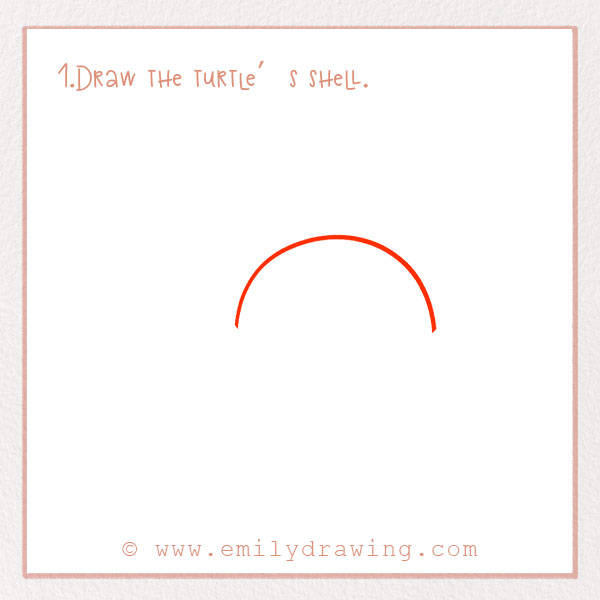
Let’s start with perhaps the most prominent feature: the shell!
About halfway up the page draw a large curve. Put it closer to the right side of the page, because we are going to draw the turtle’s head on the left. It should resemble the shape of a rainbow.
Step 2 – Draw the bottom of the shell.
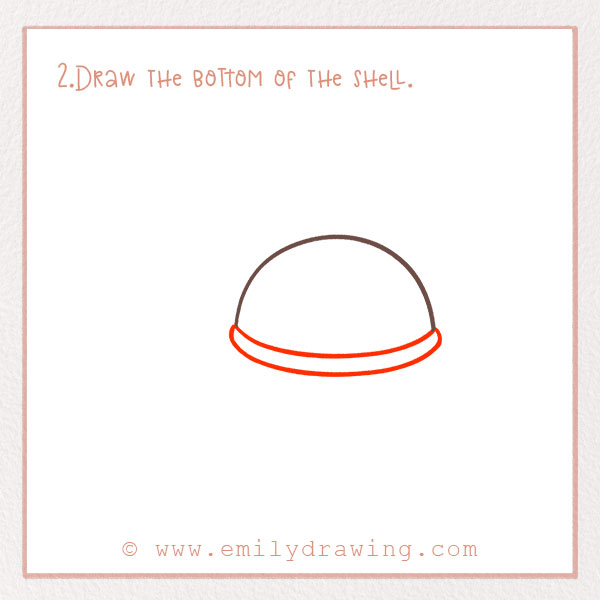
Connect the ends of the curve from Step 1 with another one at the bottom.
It’ll be like a semi-circle, but the bottom line should be slightly curved. Then, draw another one right beneath it. Check out the photo!
Step 3 – Add the legs!
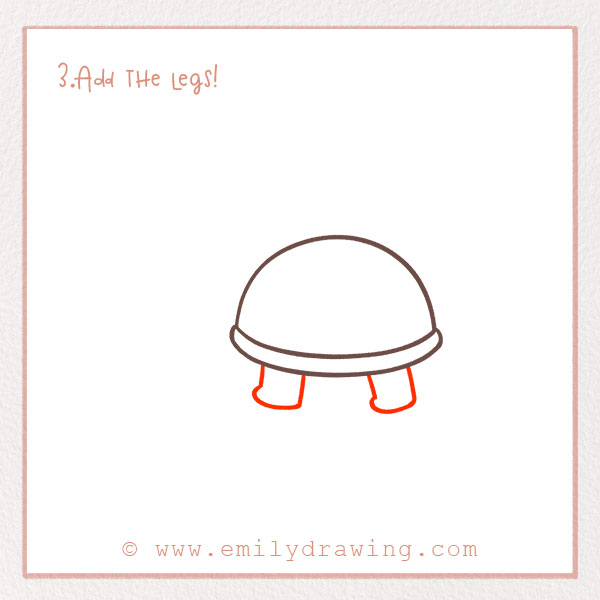
Turtles can swim, but they can also walk. Below the shell, let’s add two short legs. A few inches apart, draw two rounded rectangles extending down from the shell. On the left side of the rectangles, draw a little bump to show toes in the direction it’s walking.
Now our turtle can move both on land and in the sea!
For more animal drawing guides, check out How to Draw a Snake and How to Draw an Alligator.
Step 4 – Draw more detail on the shell.
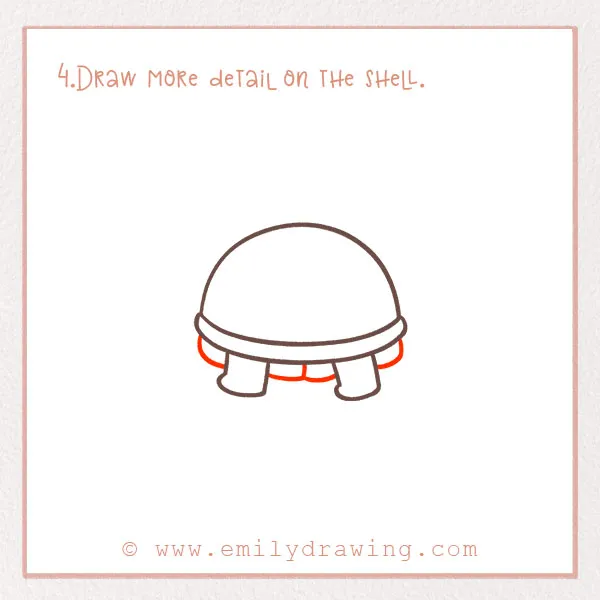
Let’s draw some details to the shell. Underneath the bottom rim from Step 2, draw four rounded, skinny, and horizontal rectangles. Refer to the photo!
It’s starting to look more like a turtle shell now.
Step 5 – Add the turtle’s head!
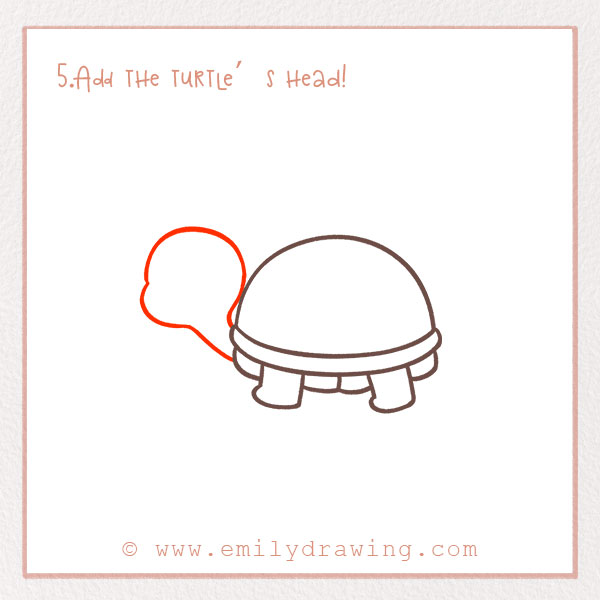
We’ve got to add the turtle’s head, of course. On the left side of the shell, draw a line extending out for its neck and then form a circle. Bring it back towards the shell. Check out the photo to see what we mean.
Step 6 – Fill in the turtle’s face.
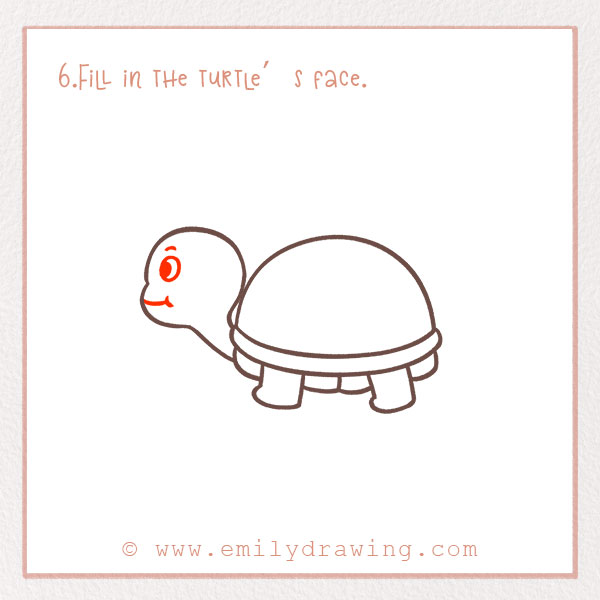
Let’s draw some details to the turtle’s face! First, add a mouth. We want our turtle to be happy and friendly, so make it smile! Then, add a small line at the end of the mouth.
Fun fact: did you know that researchers believe turtles can see better underwater than above water? So, let’s continue by adding one eye.
We can only see one eye since we are drawing it from the side (also called the profile). Above the mouth, draw an oval, and fill in the left half to make it look like it’s going forward.
Step 7 – Add the tail!
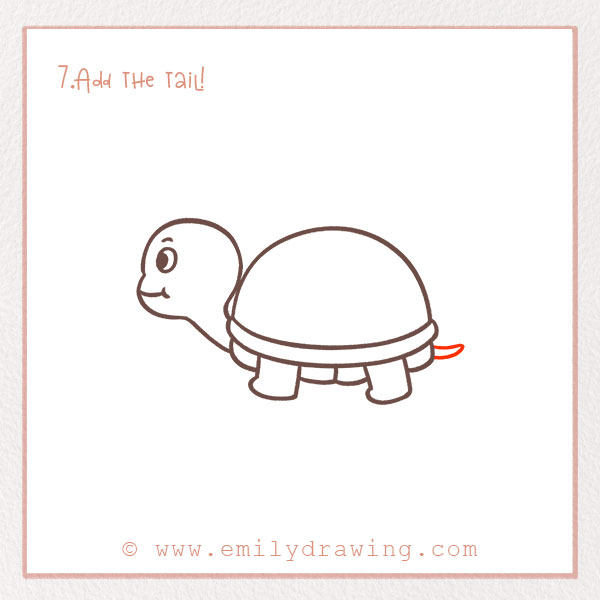
On the lower-right side of the turtle’s shell, draw two slightly curved short lines which come together into a point. This is the turtle’s tail.
Good job!
Step 8 – Start drawing the shell’s pattern.
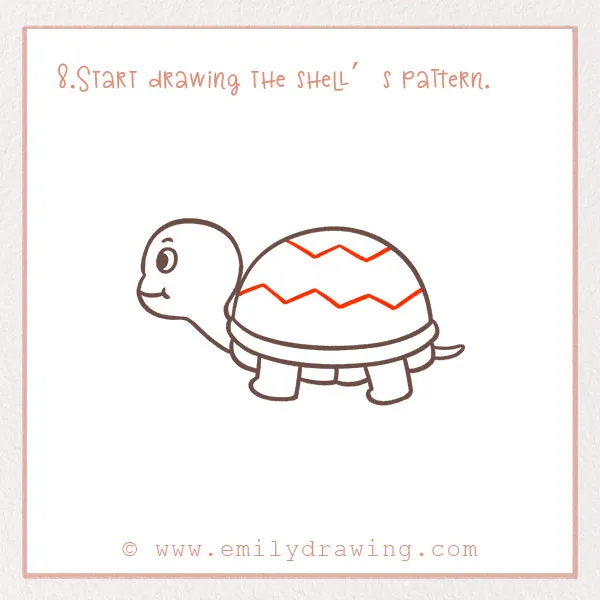
They have a unique geometric pattern on them. Sometimes, these patterns can help identify what kind of turtle it is.
So, let’s add some detail to the shell. In your turtle sketch, draw two zig-zag lines going horizontally across the shell. They don’t have to be perfectly even.
Step 9 – Finish the shell’s pattern.
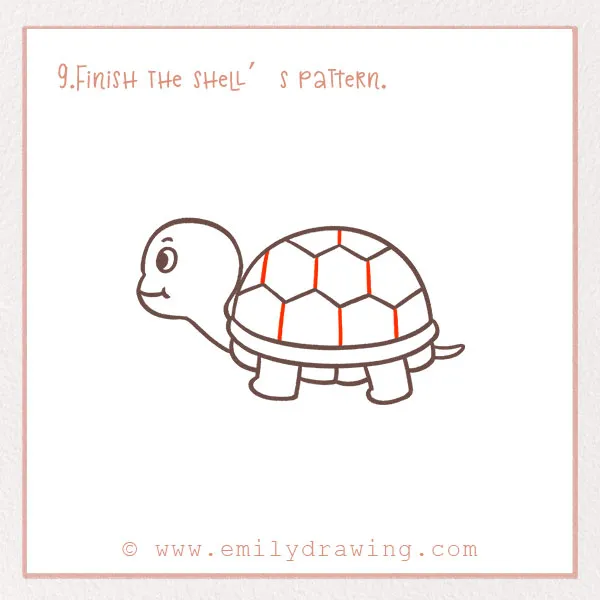
Finally, the last step to finishing drawing the turtle itself is to complete the shell pattern. At each of the points of the zig-zag lines, draw horizontal lines going downwards. Refer to the photo for this step!
The shell should appear to have a pattern made up of a bunch of pentagons now.
Step 10 – Color in your creation!
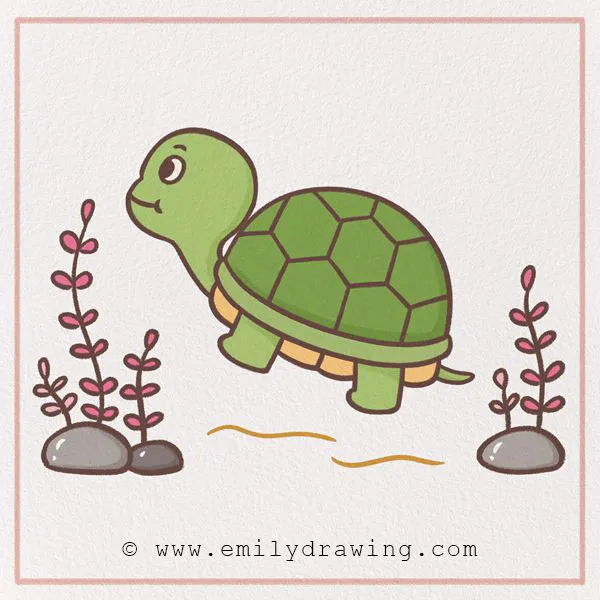
It is time to add some style to your new friend. Turtles can be brown, green, tan and have different markings. Pick some colors and have fun.
All done? We hope you loved this step-by-step drawing tutorial….thanks for following along with us.
Give your new turtle friend a name! If you liked this animal-themed drawing tutorial, browse the other ones on this site. We have a dog, a cat, a caterpillar, a horse, and more! If you have an idea for one, let us know in the comments and you might find it on the site soon!
If you’re interested in drawing more animals, you might also enjoy our tutorials on How to Draw a Penguin and How to Draw a Sloth.
Pin it now, Draw later!
Get the FREE Printable Drawing Guide