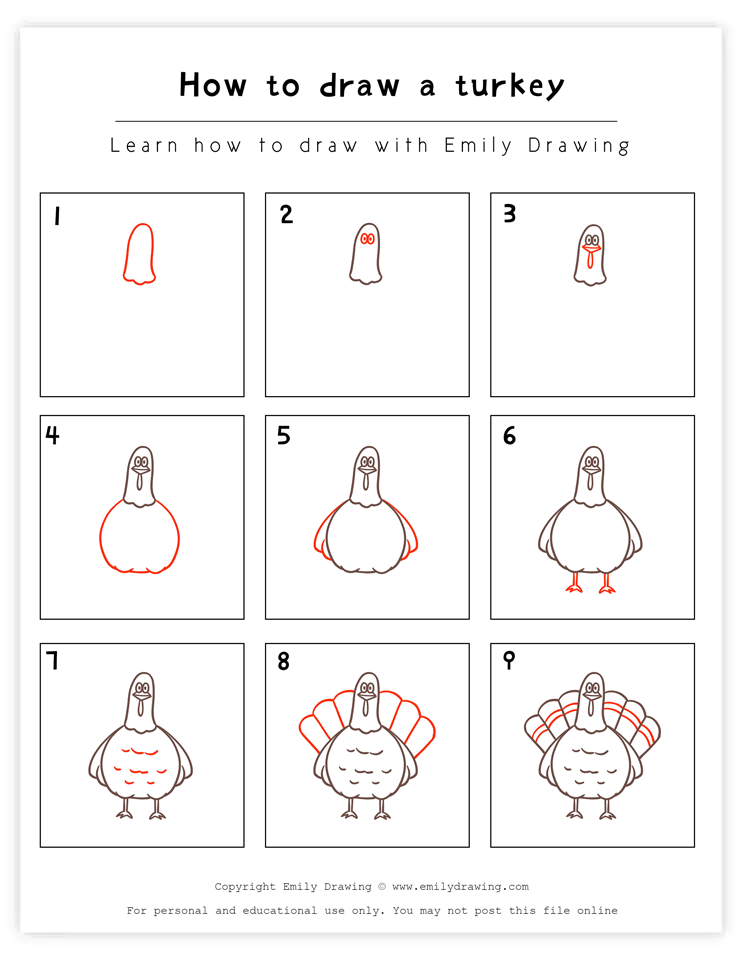
Welcome to our drawing tutorial for today: How to Draw a Turkey! Follow along with us in this step-by-step turkey drawing guide to create your own festive bird.
Native to North America, the turkey is a kind of bird. However, they are much larger than many birds! It’s amazing how diverse birds are, from the unique owl to the massive turkey.
Often associated with the American holiday of Thanksgiving, turkeys are a popular subject for Thanksgiving drawing projects that you might see on many decorations during the autumn season around the world. Turkeys can be wild or domesticated, and this can affect their behavior. Some turkeys even change colors!
You might have heard people refer to them as “gobblers” because of the sound male turkeys make sometimes.
So, find some drawing materials, and let’s get started on this tutorial! Ready?
Materials:
- a piece of paper
- a pencil for the guiding lines and sketching
- an eraser
- a black sharpie or a pen for the outlines
- markers or colored pencils for coloring
- our printable drawing guide (Join my Email List below to get this Tutorial)
Here are my RECOMMENDED Art Supplies!
- Crayola Coloring Set (140 Pieces – Mega Value!)
- 24 Colored Crayon Set
- A4 Printer Paper
- Crayola Coloring Pencils
- HP Home Printer with Instant Ink!
Time needed:
15 minutes.
How to Draw a turkey — Let’s get started!
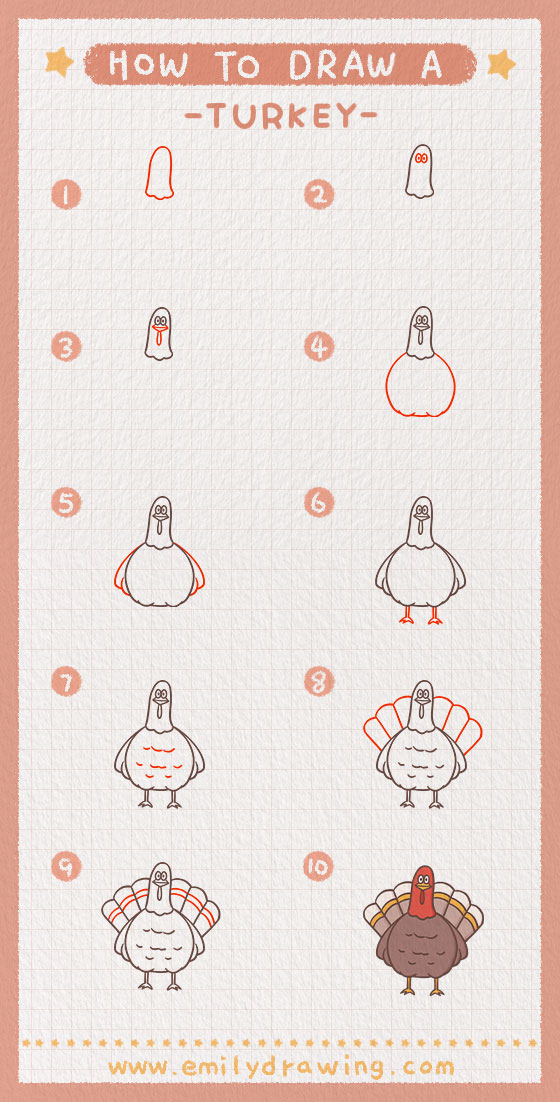
Step 1 – Draw the turkey’s head.
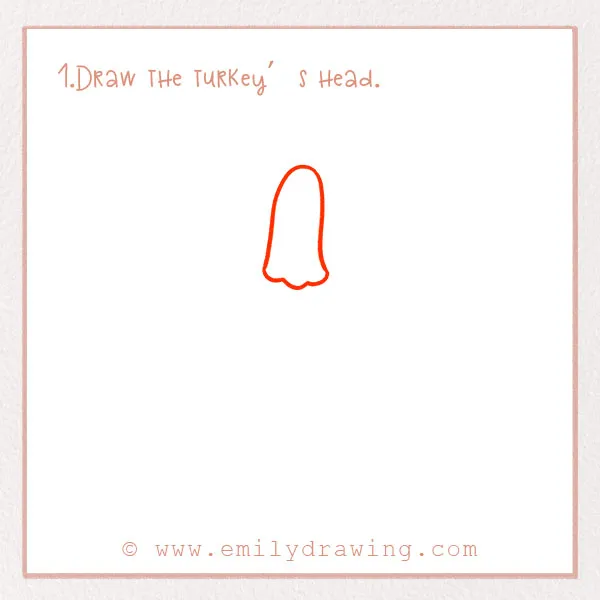
Let’s start by drawing the head of the turkey.
Draw a long skinny curve near the top of the page, kind of like an upside-down U. Connect it at the bottom with a wavy line. Look at the photo for reference.
Step 2 – Add the eyes!
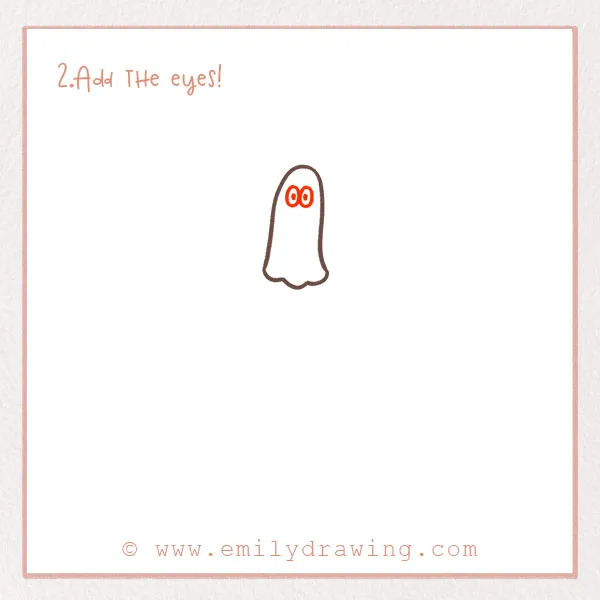
Turkeys have excellent vision. Let’s add the eyes now!
Draw two small ovals right next to each other near the top of the head. Then, draw a tiny dot inside each eye to represent the pupil.
Step 3 – Add the rest of the face.
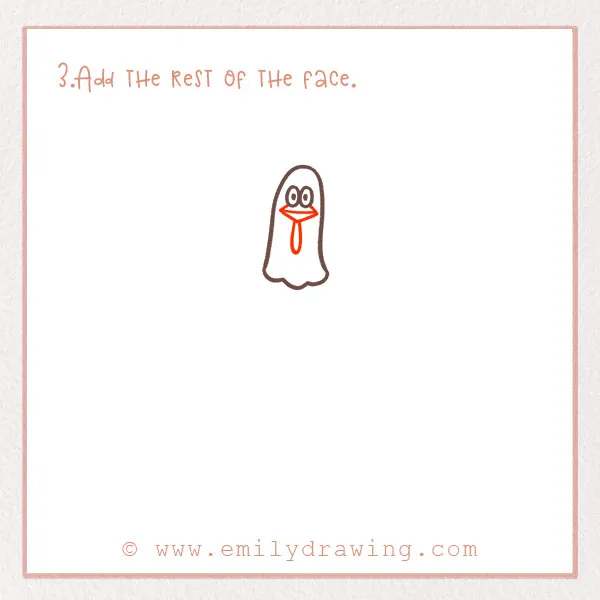
Let’s finish drawing the face. One of the unique parts of turkeys is the feature that hangs from their face—we actually have a word for this. Scientists call it a snood. However, we don’t know what its exact function is!
So, let’s draw the beak and the snood. Underneath the eyes, draw a skinny upside-down triangle to form the beak. Then, draw a skinny teardrop shape below the beak to create the snood. It should go about halfway down the turkey’s head.
We’re all done with the head and face of the turkey. Good job!
Step 4 – Draw the turkey’s body.
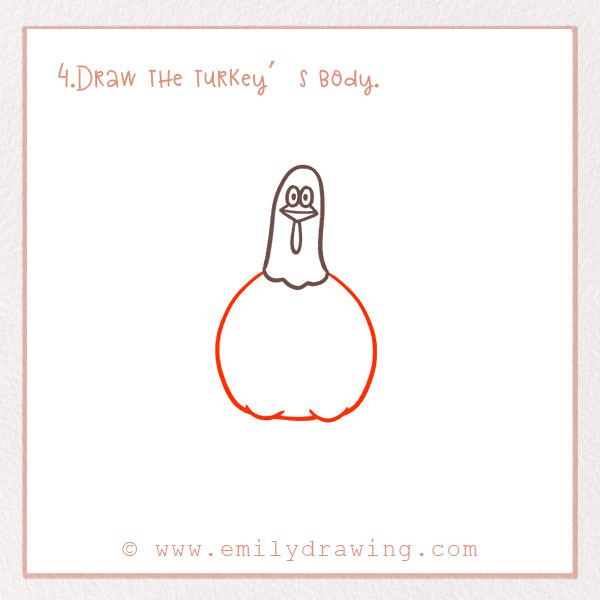
Let’s add the rest of the body. Draw a large round shape beneath the head.
On the bottom of the shape, make the line a little squiggly to show texture. Refer to the photo.
Step 5 – Add the turkey’s wings!
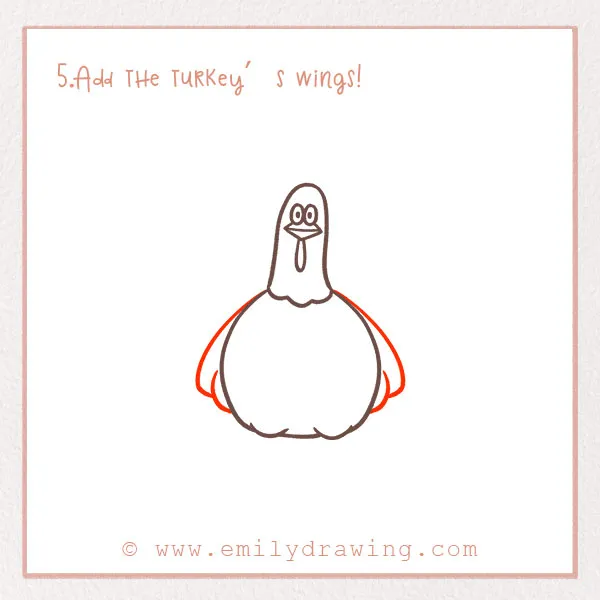
Turkeys have wings, but interestingly only certain turkeys can fly. Some wild turkeys can even fly up to 60 miles per hour! So, we need to add some wings.
On either side of the body, draw two curved lines. Add a curved line in the middle to represent feathers. Look at the photo to see what we mean!
For more bird drawing guides, check out How to Draw a Bird
Step 6 – Draw the turkey’s legs.
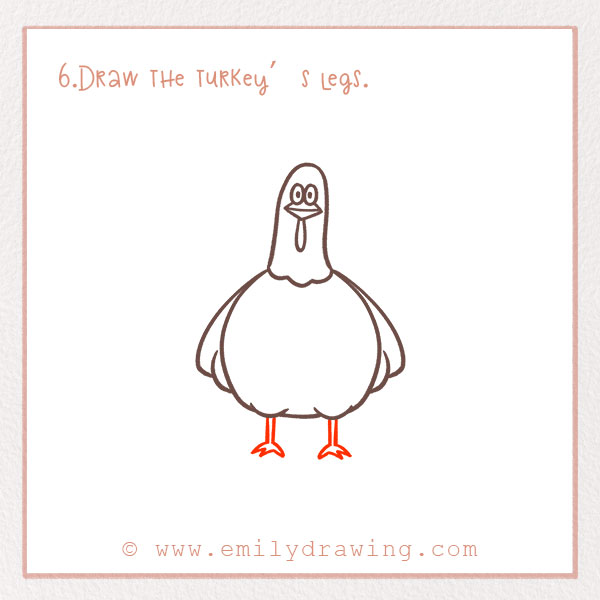
Turkeys can walk and fly—we already drew the wings, so we’ve got to add some legs now! For each leg, draw two lines close together. Then, add the turkey’s toes by adding three points to each foot.
We’re nearly done with the shape of the turkey!
Step 7 – Add detail to the turkey’s body.
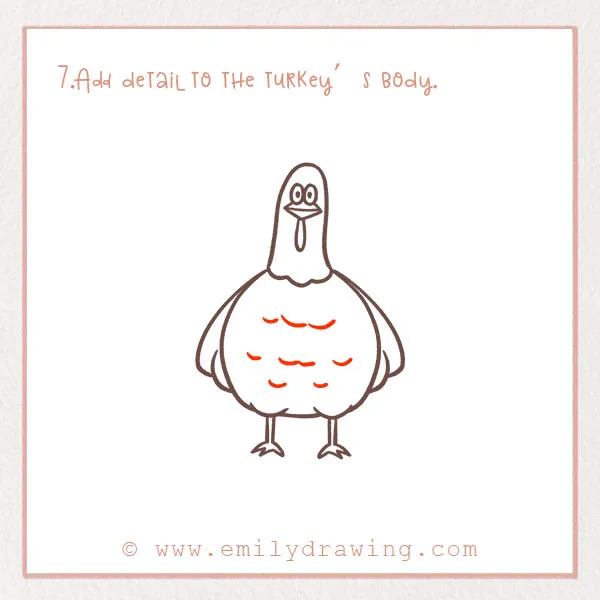
Let’s add some feathers to the body—we need to create some texture to indicate feathers. Draw a bunch of small curved lines. They don’t need to be all the same. Having them each be a little different just adds visual variety.
Step 8 – Add the back feathers!
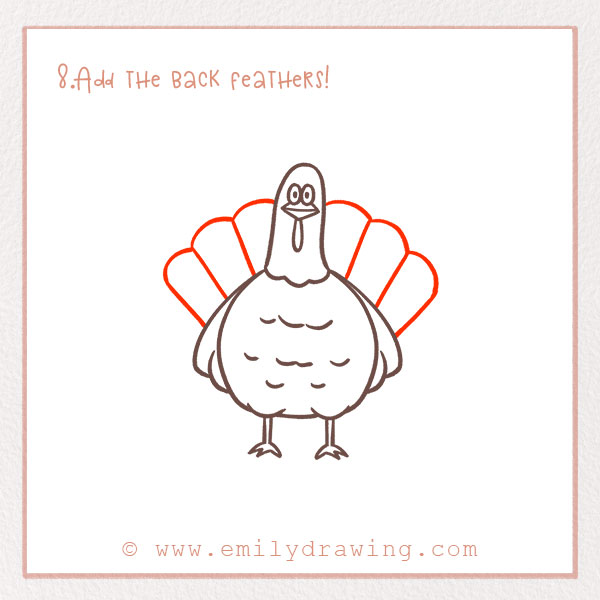
Turkeys have huge back feathers! Some of them can be up to 18 inches long. Let’s finish the face right now.
You’re going to draw three rounded rectangles on both sides of the head. They should each be a few inches long. Each rectangle represents one feather—there should be six total.
Step 9 – Add more details to the back feathers.
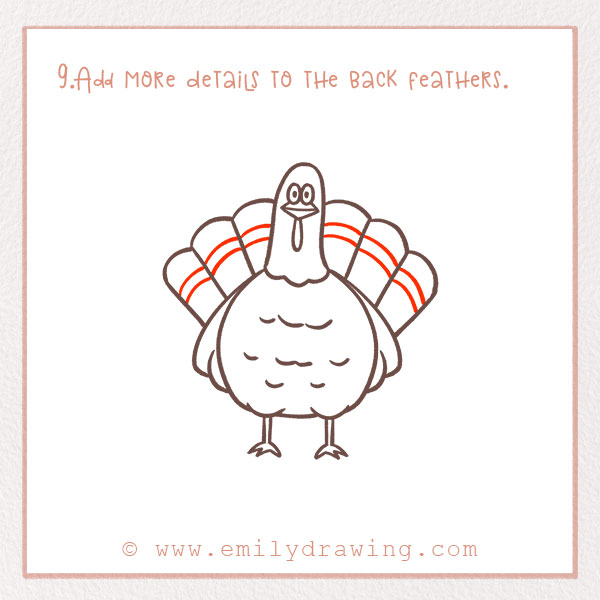
Let’s finish drawing the back feathers. Draw two horizontal curved lines in each feather, about halfway up. This should make the feathers look like they have stripes. Almost done!
Step 10 – Color in your creation!
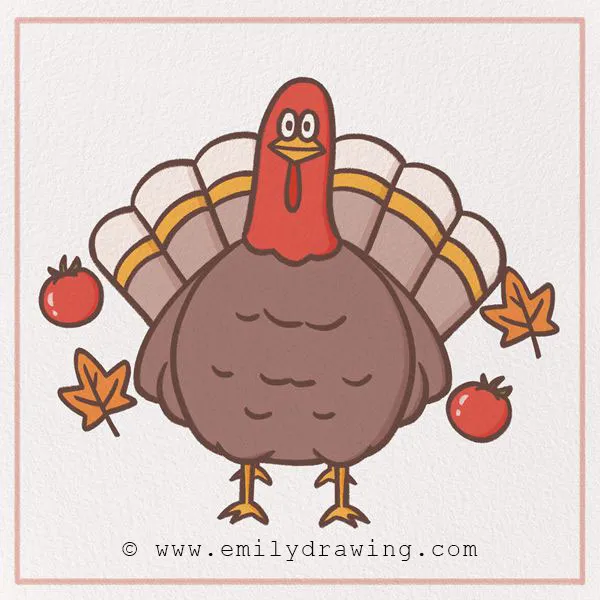
Last but not least, let’s add some color to the turkey. Turkeys can have lots of colors. Find some drawing materials and finish off your masterpiece! Give your turkey a name, too!
Now that you’ve drawn your turkey, you might enjoy our turkey coloring page or the Fall Coloring Page to add more seasonal art to add more seasonal art to your collection.
Voila, you’ve drawn a turkey! Good job. Did you enjoy this tutorial? Let us know in the comments! We hope you learned some new drawing skills as well as a few facts about this cool animal!
If you had fun on this animal-themed tutorial, we have lots more—click on the “animal” tab on our website to discover more, like a dog, cat, and horse. We have a wide range to pick from. We also have a lot of plant tutorials.
If you’re interested in drawing more birds, you might also enjoy our tutorials on How to Draw an Owl and How to Draw a Flamingo.
Pin it now, Draw later!
Get the FREE Printable Drawing Guide