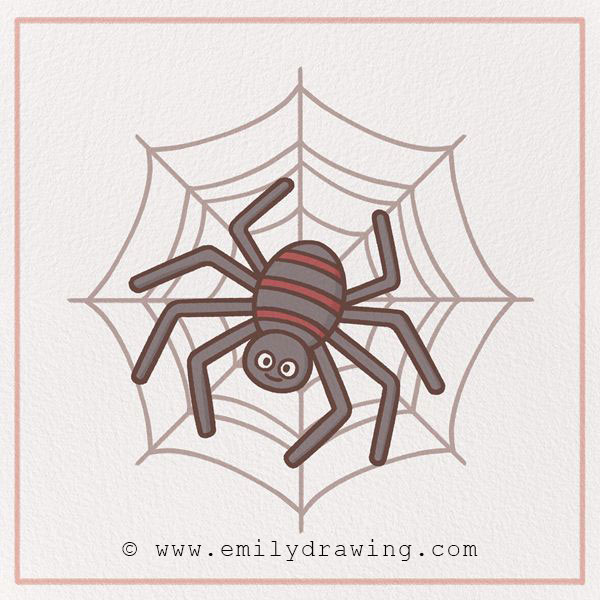
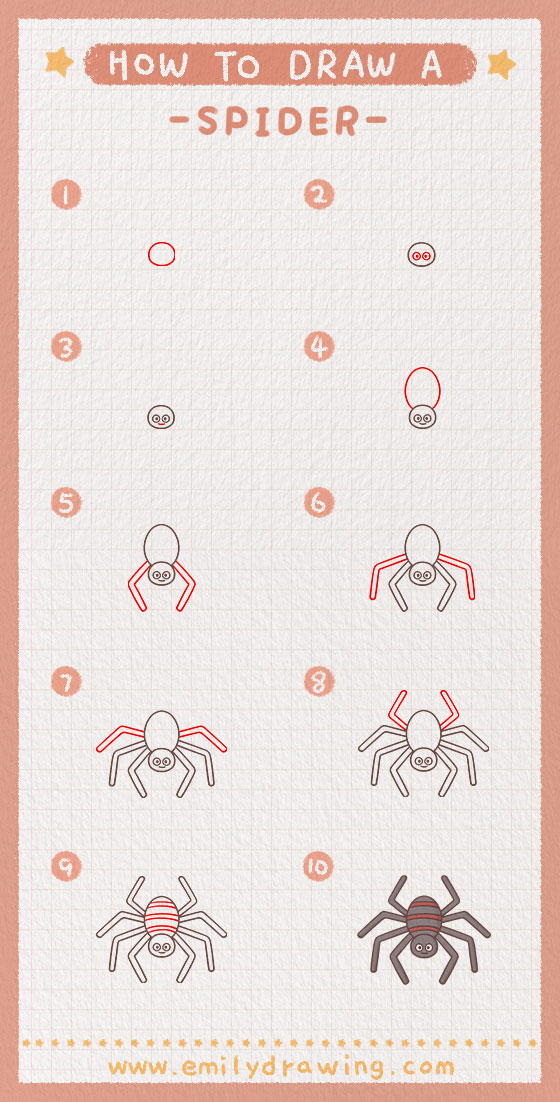
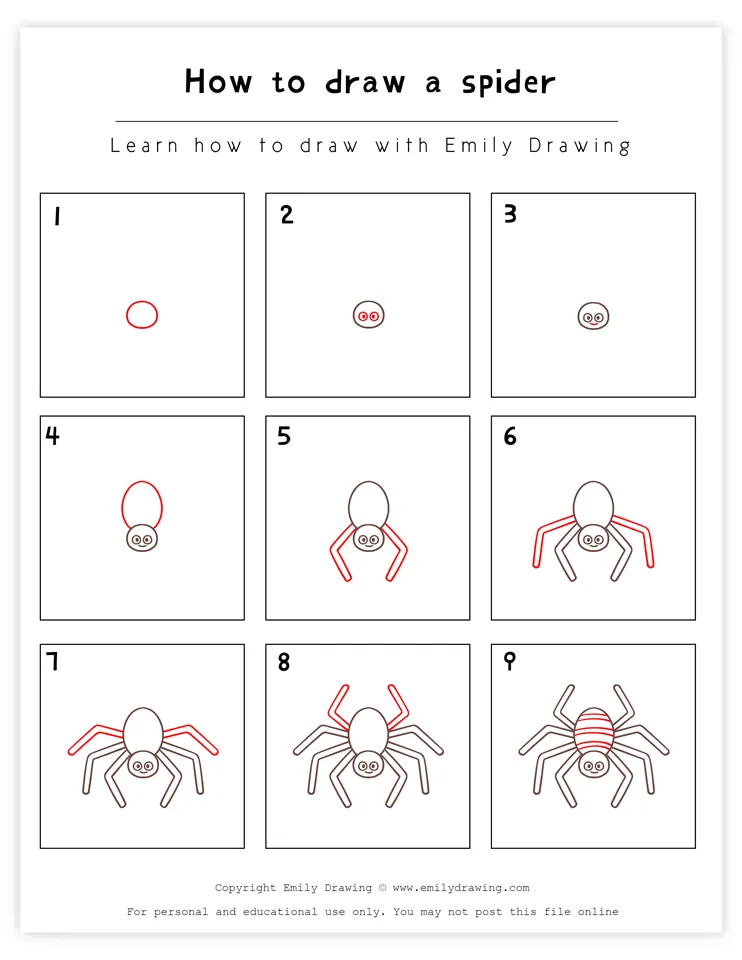
Hello and welcome! You’ve found our easy-to-follow and fun ten-step drawing tutorial on how to draw a spider and create your own adorable spider illustration!
How do you feel about spiders? Some people find them a little scary, but when you learn a bit more about them, you might find these little creatures fascinating. And, most spiders are not actually harmful to humans.
Perhaps one of the coolest things about spiders is that all 40,000 species of them are known to produce silk. One spider can even make seven different kinds which serve different purposes, like catching prey or making a web. And, of course, humans have used this silk for many centuries to create beautiful fabrics used for a wide variety of things. Fun fact: did you know that, on average, it takes spiders about an hour to spin a web?
So, let’s make our own little friendly spider right now. Gather some drawing materials and let’s go. Have fun!
Materials:
- a piece of paper
- a pencil for the guiding lines and sketching
- an eraser
- a black sharpie or a pen for the outlines
- markers or colored pencils for coloring
- our printable drawing guide (Join my Email List below to get this Tutorial)
Here are my RECOMMENDED Art Supplies!
- Crayola Coloring Set (140 Pieces – Mega Value!)
- 24 Colored Crayon Set
- A4 Printer Paper
- Crayola Coloring Pencils
- HP Home Printer with Instant Ink!
Time needed:
14 minutes.
How to Draw a Spider — Let’s get started!
Step 1 – Draw the head of the spider.
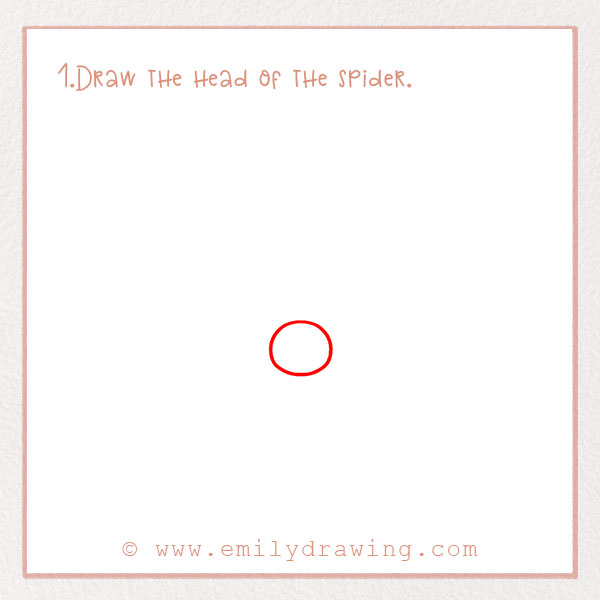
About two-thirds of the way down the page, draw a small circle just a few inches wide. This will be the spider’s head.
Step 2 – Add the eyes of the spider.
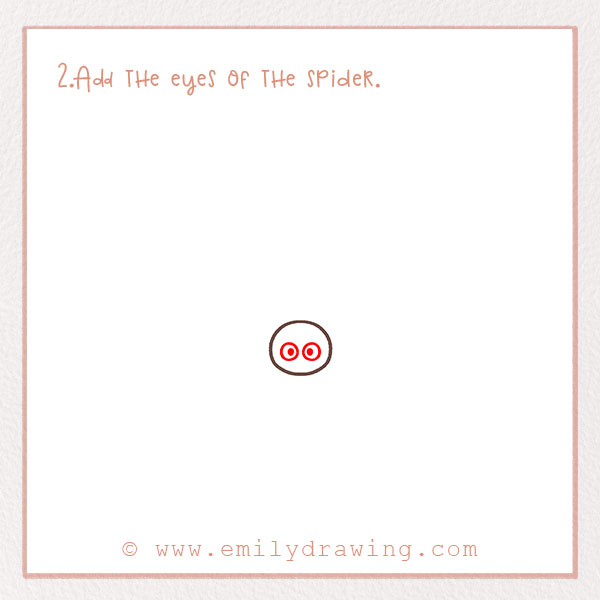
Did you know that most spiders are nearsighted? They generally don’t have super great eyesight. Let’s add the eyes of our spider now.
Inside the head, draw two small circles for the eyes. Then, draw two smaller circles for the pupils. They should look like little googly eyes!
For more practice with rounded forms, consider How to Draw a Ladybug or How to Draw a Turtle.
Step 3 – Add a little smile!
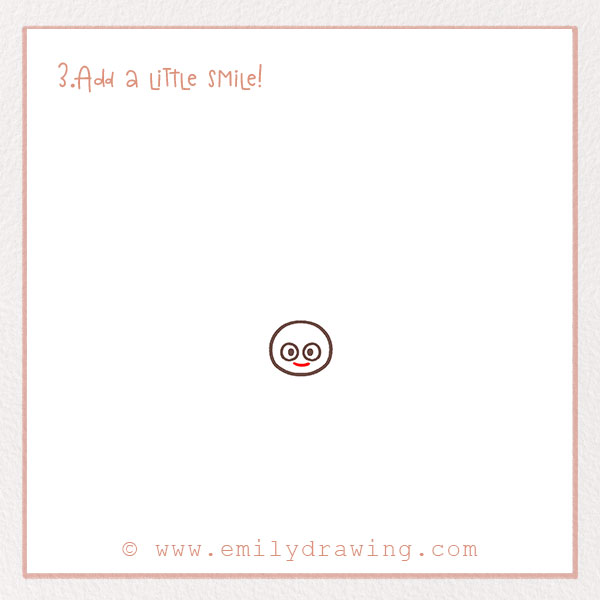
We want our spider to be friendly, of course! We need to add a smile to the spider’s face! Underneath the eyes, draw a little curve forming a happy smile.
Good job!! We are all done with the face of the spider.
Step 4 – Draw the body of the spider.
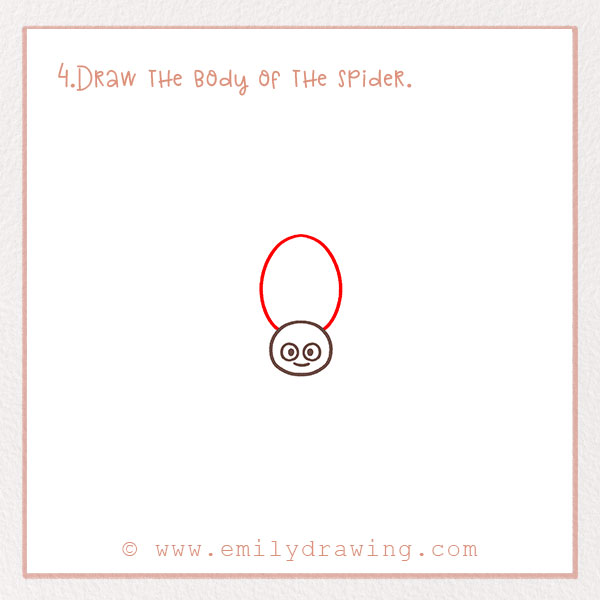
Above the head, draw a large oval. Let’s draw the main part of the spider’s body, a key feature of arachnid anatomy. This is also called an abdomen. It should be about three times the side of the head.
To add perspective, make the body a little cut off by the head.
For tutorials that involve detailed line work, check out How to Draw a Butterfly or How to Draw a Snake.
Step 5 – Draw the two front legs.
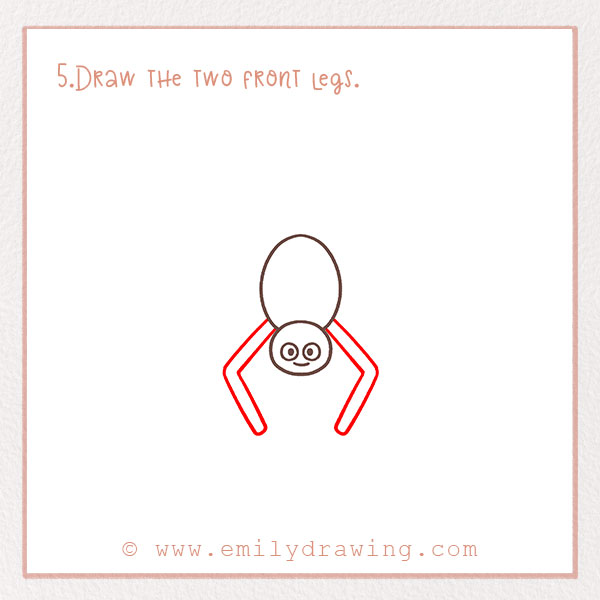
Spiders famously have eight legs. This is just one reason why a spider is classified as an arachnid rather than an insect, which generally have six legs. The legs of spiders serve various functions, including moving, jumping, and catching food.
Check out the photo for what the legs are going to look like.
Draw two bent lines that start at each side of the head. We want it to be a closed shape, so close to the lines by bringing them back around. These legs should be pointing downwards.
Step 6 – Draw two more legs.
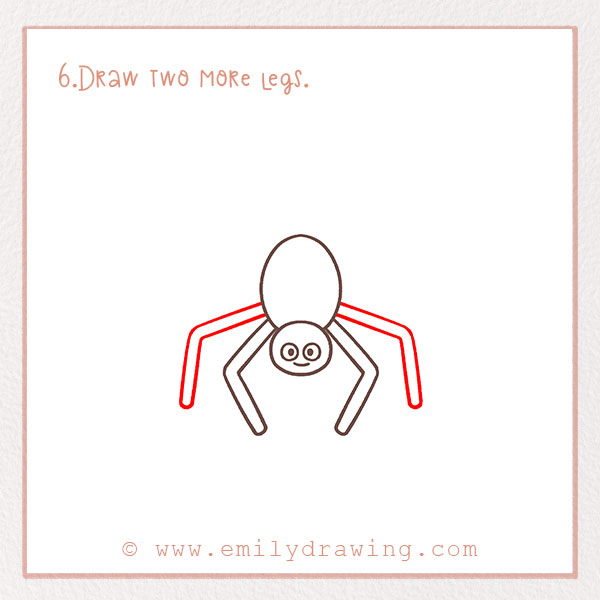
We’re going to have a few steps here that are a bit similar, because we have to draw eight legs! We’re going to draw two at a time.
Above each of the first two legs, draw two more legs. They should extend a bit further out. Again, they should look completely symmetrical.
Step 7 – Continue drawing the legs.
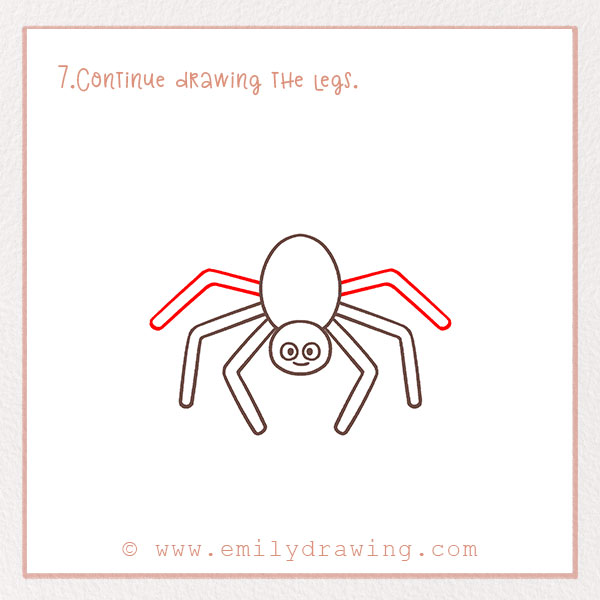
Let’s draw two more legs! Add two more bent lines about halfway up the body. Make the bend in each leg a little more subtle. Again, make sure to close off the shape to add some dimension.
Step 8 – Draw the last two legs!
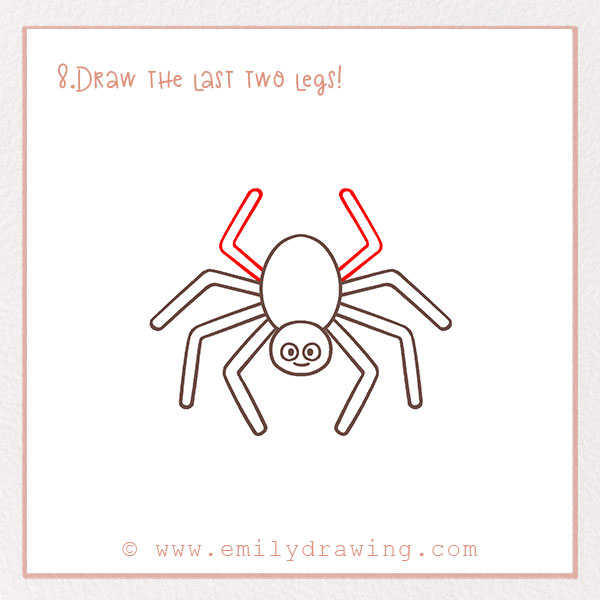
Let’s finish drawing the legs. Draw two more bent lines. This time, make them point upwards. Make them a little bit shorter, too. Check out the photo.
So, the spider should still be completely symmetrical.
Step 9 – Add more detail to the abdomen.
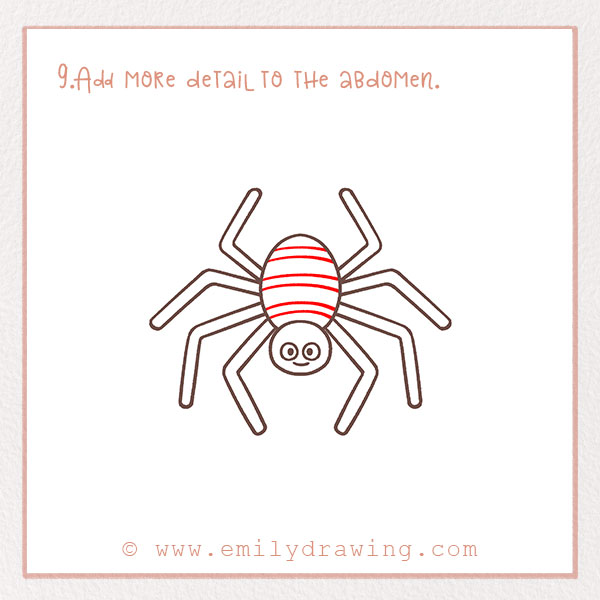
We’re nearly done. Let’s add a bit more detail to the body. Draw six skinny stripes inside the abdomen! They should curve a little bit to make the body appear round.
Good job!
Step 10 – Color in your brand-new gem!
We might think of spiders as usually being black, but they can be different colors, too. Find some colors to fill in your masterpiece. Color in the background, too.
You’re all done with your step-by-step spider drawing—great job! Good job!
We hope you had fun following this tutorial and exploring the world of drawing creepy crawlies like spiders. Next time you see one in person, remember how cool these tiny arachnids are! Some people think they are just creepy, but just like snakes, they are actually very cool.
Share your masterpiece with friends in person or online using the social icons on this page.
If you enjoy spooky or themed drawings, you might also like How to Draw a Halloween Pumpkin or How to Draw a Halloween Ghost.
Pin it now, Draw later!
Get the FREE Printable Drawing Guide


It was easier than I thought
how do you draw the web