Hello and welcome to another fun step-by-step drawing project on our site. Today, we are going to learn how to draw a caterpillar with this fun caterpillar drawing tutorial—perfect for beginners!
Maybe you’ve seen one or not, but there’s a lot to learn about them! For example, in some places, caterpillars are rumored to indicate how cold winter will be. If you see a caterpillar with an extra furry coat before upcoming winter months, consider grabbing a coat because that means you might have an extra cold season!
For such a small creature, caterpillars have interesting and unique facts about them. For example, even though they don’t look like it, they actually have six pairs of eyes! And, did you know that caterpillars don’t have teeth? Of course, they eventually turn into a moth or butterfly.
Perhaps the most wild fact in caterpillar anatomy is that these tiny creatures have about 4,000 muscles….for perspective, the human being has only 629!
Interesting right? Are you ready to get started? Grab some art materials and follow this easy caterpillar sketch tutorial. Happy drawing!
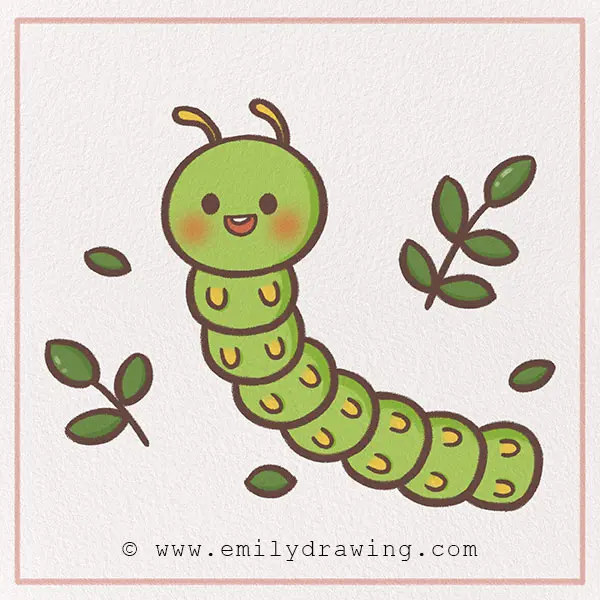
Materials:
- a piece of paper
- a pencil for the guiding lines and sketching
- an eraser
- a black sharpie or a pen for the outlines
- markers or colored pencils for coloring
- our printable drawing guide (Join my Email List below to get this Tutorial)
Here are my RECOMMENDED Art Supplies!
- Crayola Coloring Set (140 Pieces – Mega Value!)
- 24 Colored Crayon Set
- A4 Printer Paper
- Crayola Coloring Pencils
- HP Home Printer with Instant Ink!
Time needed:
12 minutes.
How to Draw a Caterpillar — Let’s get started!
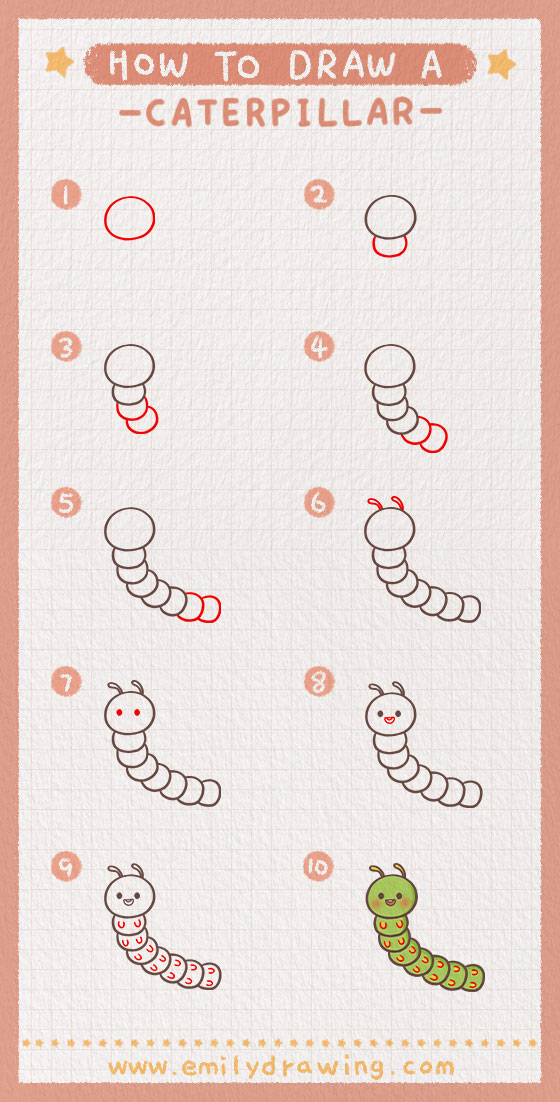
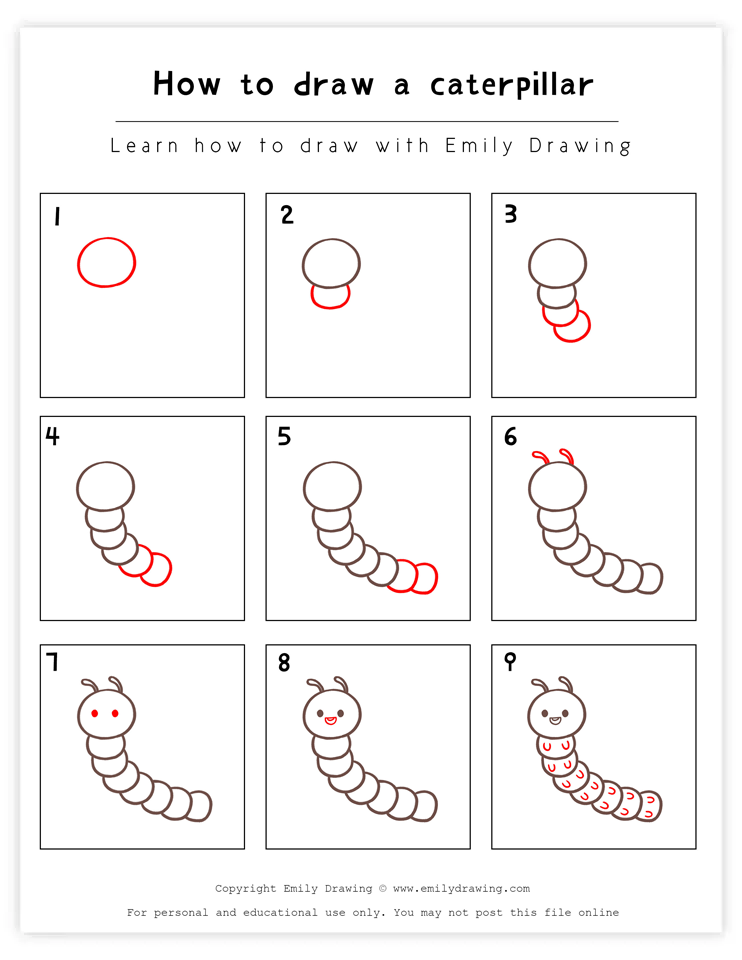
Step 1 – Draw a circle.
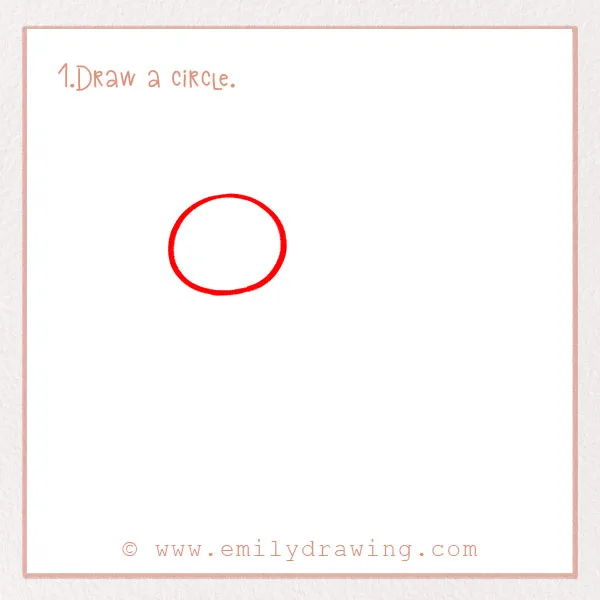
On the upper-left corner of the page, draw a circle. This is going to be the caterpillar’s head!
Leave plenty of room for the rest of the drawing.
Step 2 – Begin to form the caterpillar’s body.
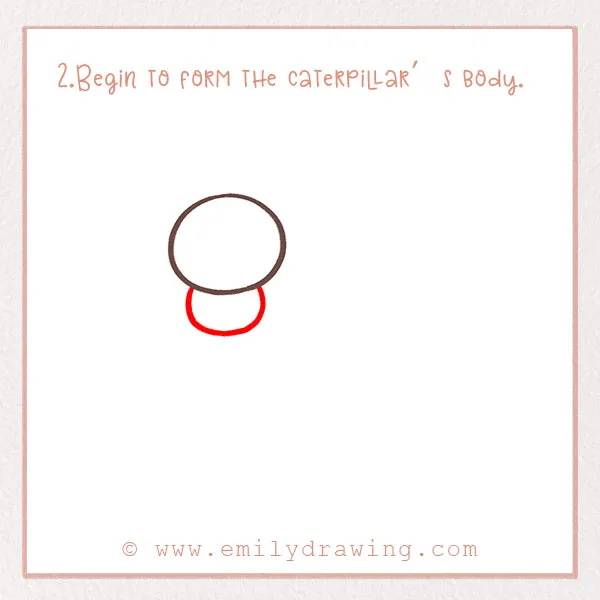
Caterpillars have a lot of close-together limbs. Throughout this drawing tutorial, we are going to slowly form the shape of the caterpillar’s body.
So, let’s add another circle below the circle from Step 1. It should be slightly cut off from the first one to show depth. Refer to the photo!
Step 3 – Add more to the caterpillar’s body.
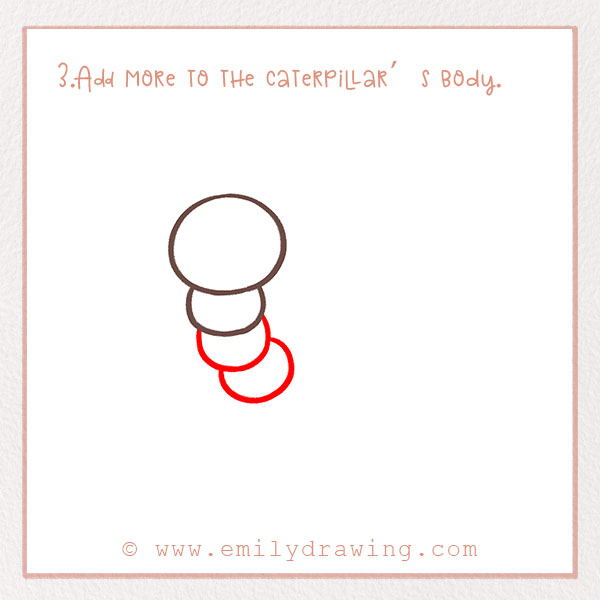
Add two more circular shapes to the caterpillar’s body. They should each be similar to the shape from Step 2. Draw them so that the body goes slightly to the right.
The caterpillar’s body should be about halfway down the page now. Refer to the photo for the shape!
Step 4 – Add (more) to the caterpillar’s body!
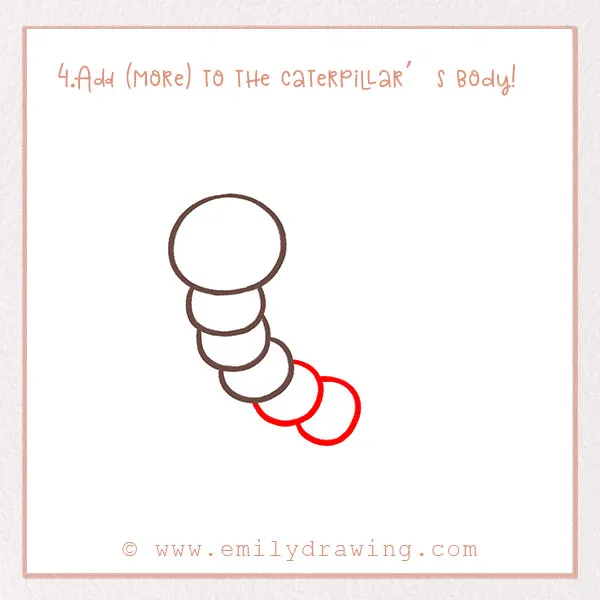
We’re going to keep adding to the caterpillar’s body—after all, it has to be able to crawl!
Similar to Step 3, add two more circular segments to the body. Continue drawing them to the right.
Step 5 – Complete the caterpillar’s form!
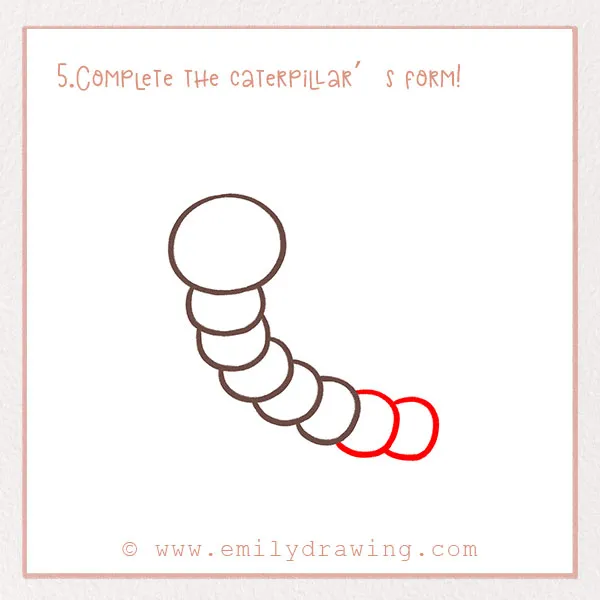
We’re finally going to finish the shape of the caterpillar’s body! Draw two more circular segments, still going to the right. The end of the body should be in the bottom right corner of the page. Refer to the image.
Step 6 – Add the caterpillar’s antennae!
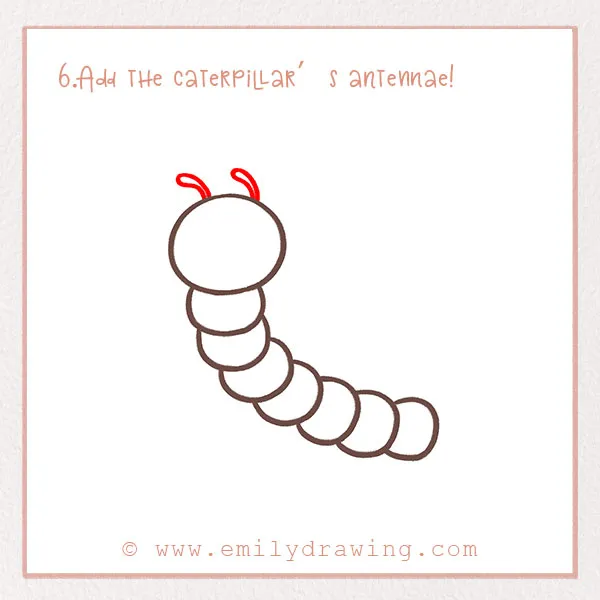
Caterpillars use their antennae to sense things like food, so they are really important! We have to add some to our caterpillar now.
On the top of its head (the very first circle you drew in Step 1) add two curved lines. Close the shapes. They should point to the left.
For more insect drawing guides, check out How to Draw a Bee.
Step 7 – Add the caterpillar’s eyes!
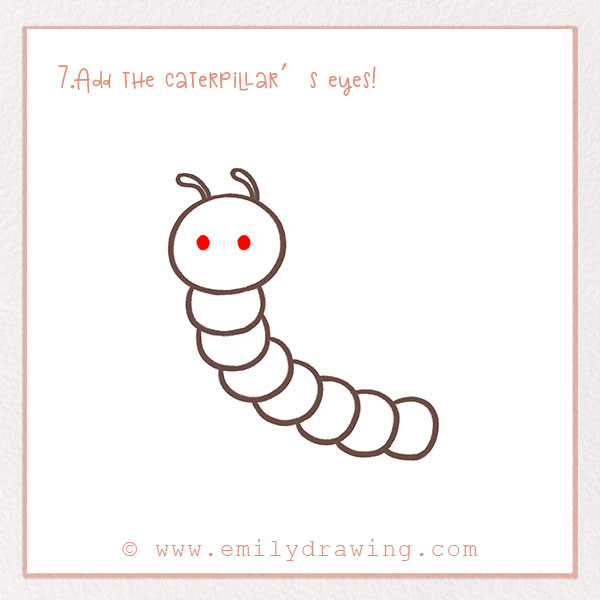
Draw two eyes on the head! Draw two small dots in the middle of the caterpillar’s head.
Step 8 – Add its mouth.
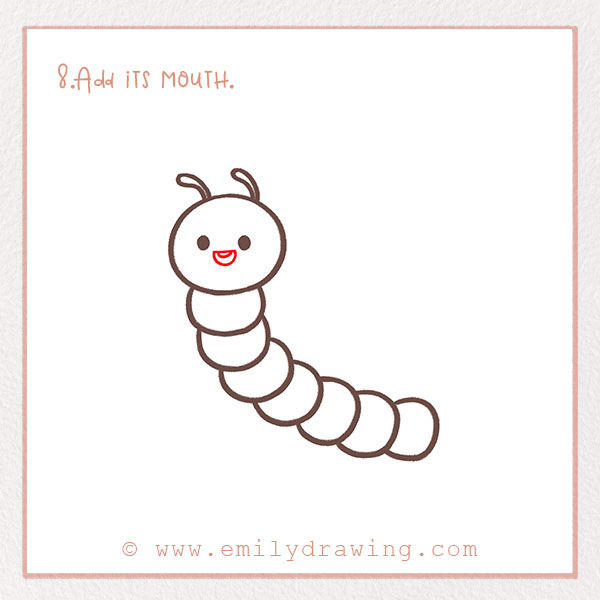
Caterpillars are herbivores, meaning they only eat plants such as leaves, seeds, and even flowers sometimes. We need to add a mouth to our caterpillar!
So, centered below the eyes, add a mouth to our caterpillar! Draw the bottom half of a semicircle. Add another smaller curved line inside the mouth—look at the photo to see what we mean!
Step 9 – Add all the caterpillar’s legs!
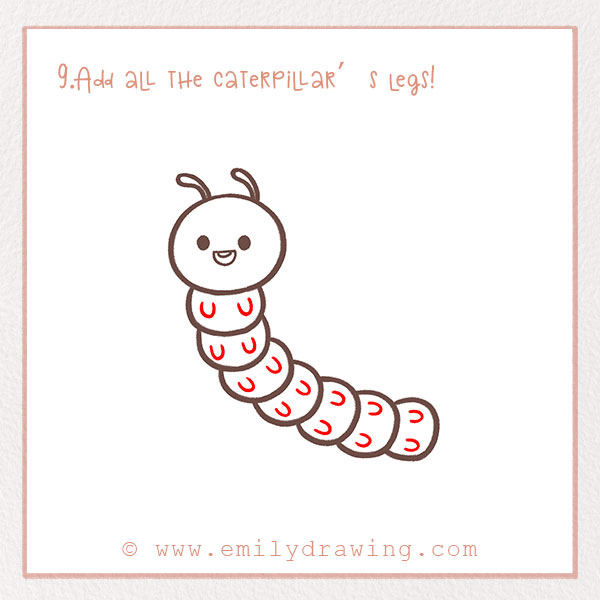
Caterpillars are interesting with their unique flexibility that let them crawl everywhere—they go on trees, the ground, and plants. Let’s add the caterpillar’s legs now!
On every single segment that makes up the body, add a pair of curved lines—almost like semicircles, but left open. They should be evenly spaced throughout the legs. Check out the image to see what we mean!
Now our caterpillar can crawl!
Step 10 – Color in your drawing.

Last but certainly not least, add some vibrant colors to your creation! Use greens, oranges, yellows, and reds. Fill in the background too! Have fun with it!
All done? Good job! We hope you had a fun time following along with our step-by-step tutorial for how to draw a caterpillar. Share your masterpiece with friends and family, and share this tutorial with them so they can make their own drawing!
Do you have another idea for a tutorial you’d like to see as you learn to draw insects? Let us know in the comments below! And if you enjoyed this format for learning how to draw, browse the rest of our site for more fun tutorials.
If you’re interested in drawing more insects, you might also enjoy our tutorials on How to Draw a Butterfly and How to Draw a Ladybug.
Pin it now, Draw later!
