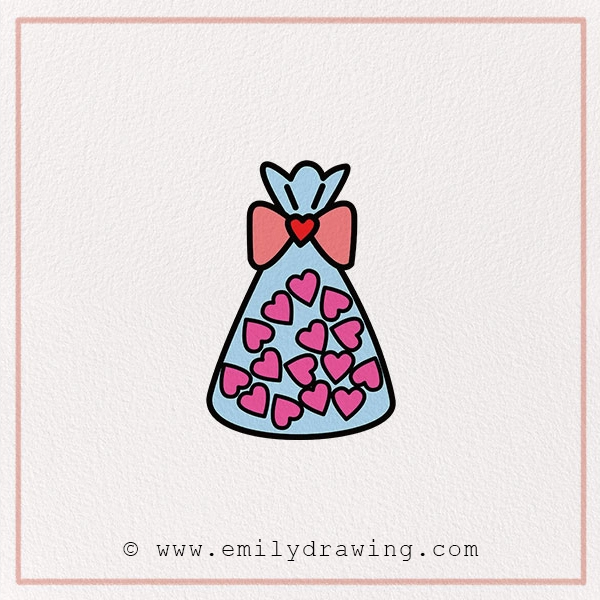
💘 Love is in the air—and what better way to celebrate Valentine’s Day than by drawing something adorably sweet?
In this fun, step-by-step tutorial, you’ll learn how to draw a cute Valentine’s Day candy bag—perfect for anyone who loves cute candy illustrations!
All you need is a pencil, paper, and your favorite coloring tools. Ready to create something that looks good enough to eat?
Fun Fact: Over 36 million heart-shaped candy boxes are sold every year for Valentine’s Day. That’s enough to stretch from the North Pole to the South Pole… twice!
Let’s get started and create a Valentine candy drawing full of charm and color!
We’ll break this into 9 easy steps—making it the perfect easy Valentine drawing for beginners and young artists!
Materials:
- a piece of paper
- a pencil for the guiding lines and sketching
- an eraser
- a black sharpie or a pen for the outlines
- markers or colored pencils for coloring
- our printable drawing guide (Join my Email List below to get this Tutorial)
Here are my RECOMMENDED Art Supplies!
- Crayola Coloring Set (140 Pieces – Mega Value!)
- 24 Colored Crayon Set
- A4 Printer Paper
- Crayola Coloring Pencils
- HP Home Printer with Instant Ink!
Time needed:
15 minutes.
How to Draw a St. Patrick’s Day Gift — Let’s get started!
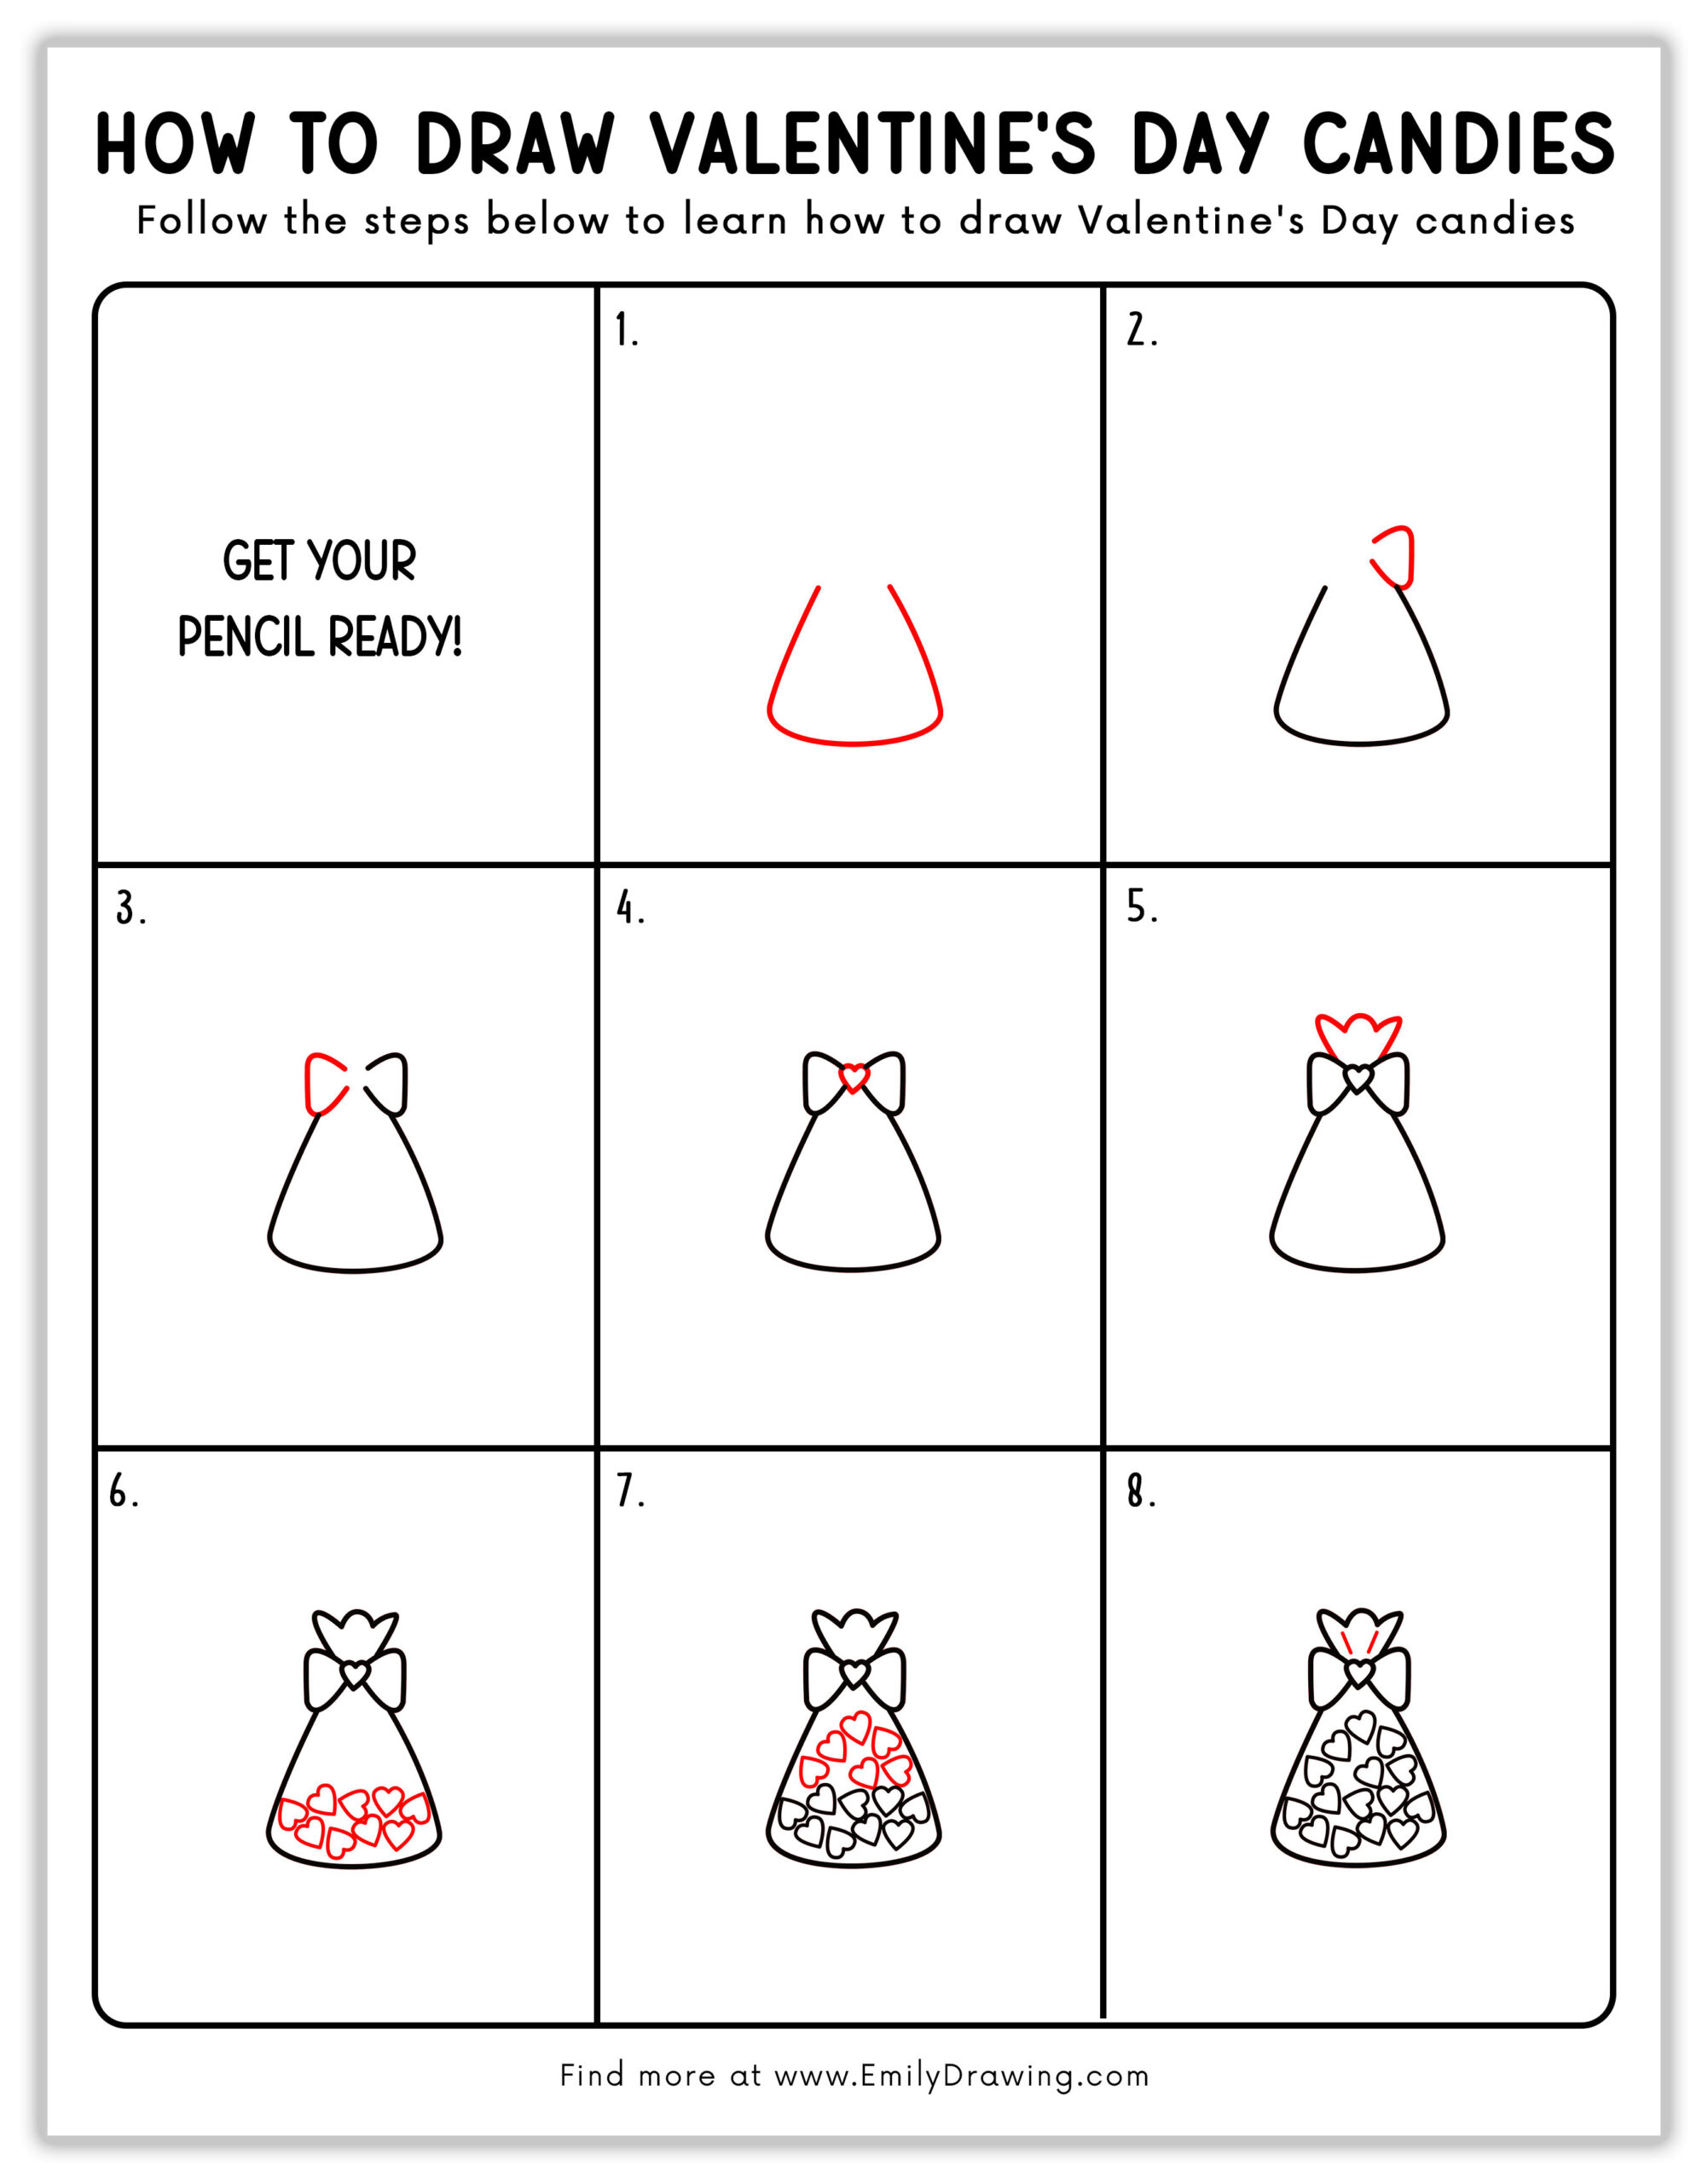
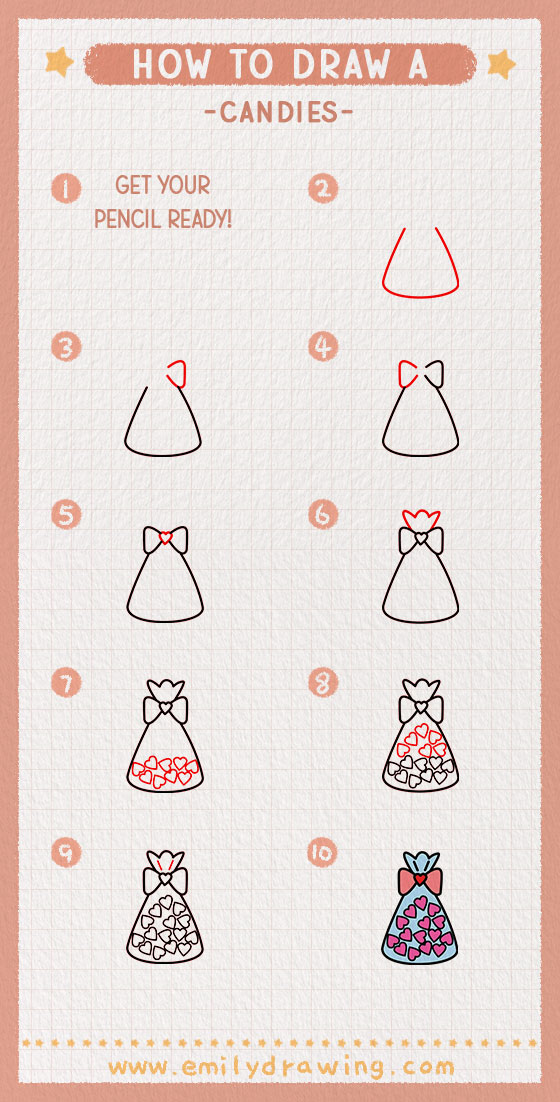
Step 1 – Draw the Bottom of the Bag.
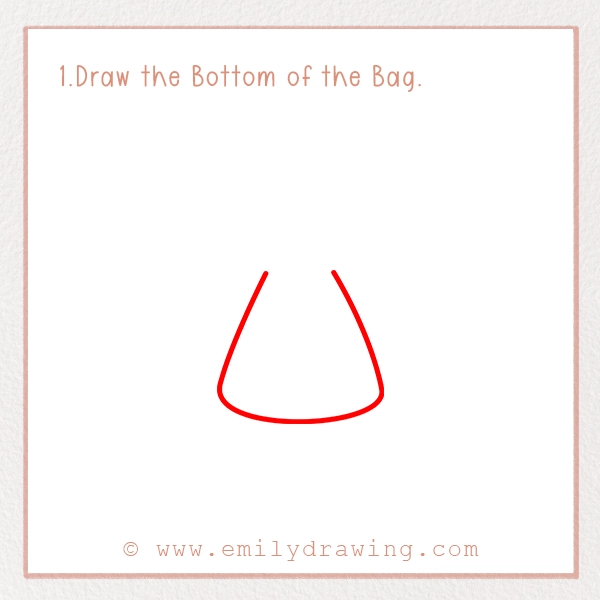
Start by drawing an upside-down triangle with soft edges and a rounded bottom. Think of it like the shape of a party bag or dress.
This forms the base of your candy bag.
Tip: Sketch lightly so you can erase if you need to tweak your shape later.
Step 2 – Add the Side of the Bow.
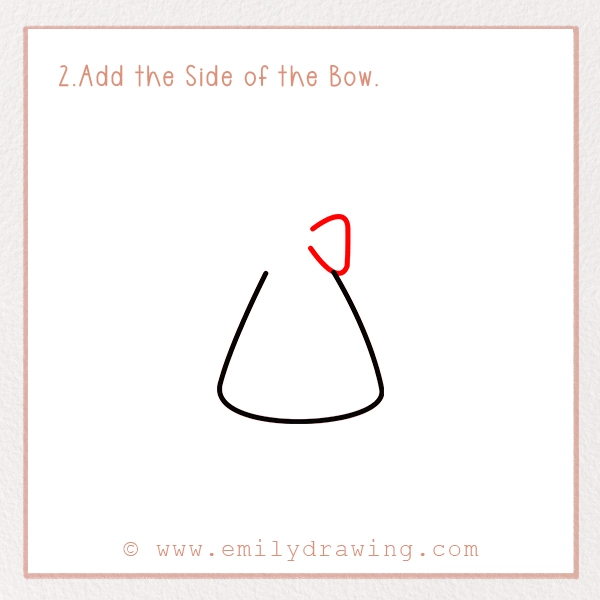
On the upper-right corner of the bag, draw a small, rounded triangle. This will be one half of the bow tying the candy bag shut.
Fun Fact: Bows have been used to decorate gifts for hundreds of years—especially for special occasions like Valentine’s Day!
Step 3 – Complete the Bow.
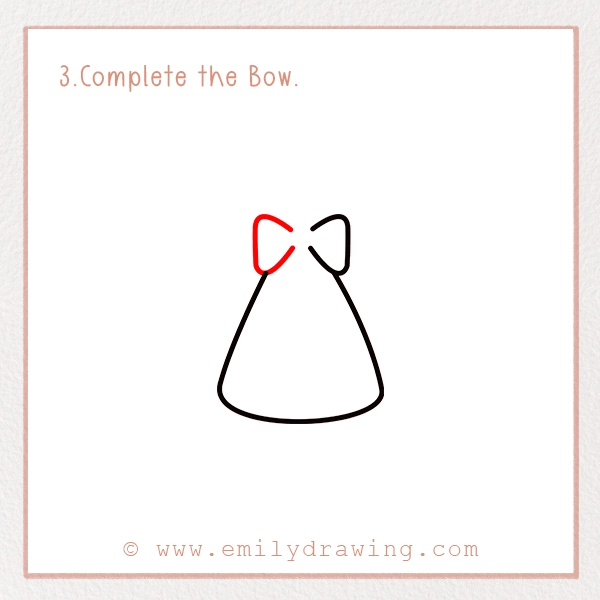
Now draw a matching shape on the upper-left side to create the other half of the bow.
In the middle, add a small circle, square, or heart to be the knot.
Pro Tip: Make your bow big and fluffy for extra cuteness!
Step 4 – Add a Heart in the Center.
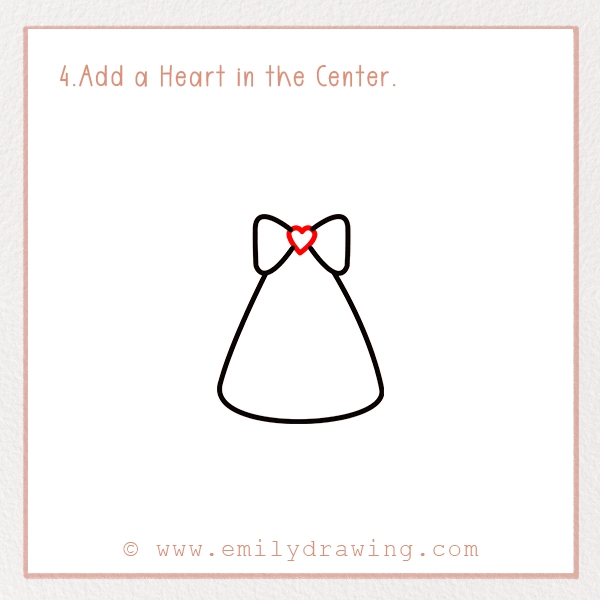
Inside the bow knot, draw a small heart. This sweet detail makes the whole bag feel even more festive and full of love.
It doesn’t need to be perfect—a little wobble makes it extra charming!
Step 5 – Draw the Top of the Bag.
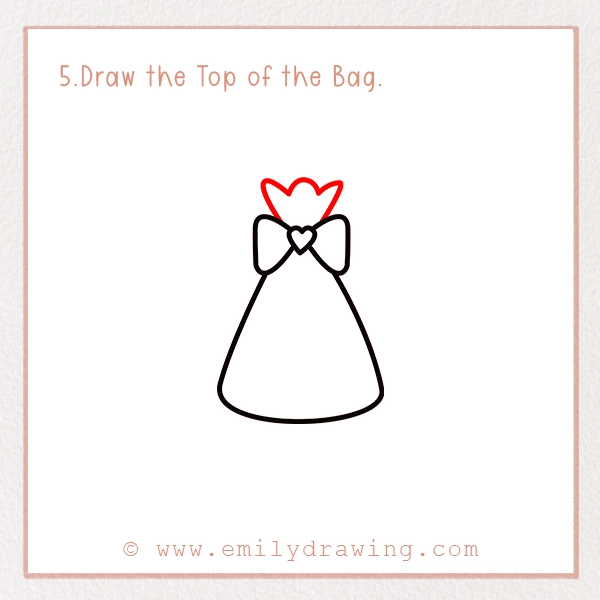
Above the bow, draw two floppy, curved shapes that stretch upward like bunny ears.
These are the gathered top parts of the bag tied by the ribbon.
Drawing Tip: Make the edges curvy for a soft, cloth-like look.
Step 6 – Draw Some Heart Candies.
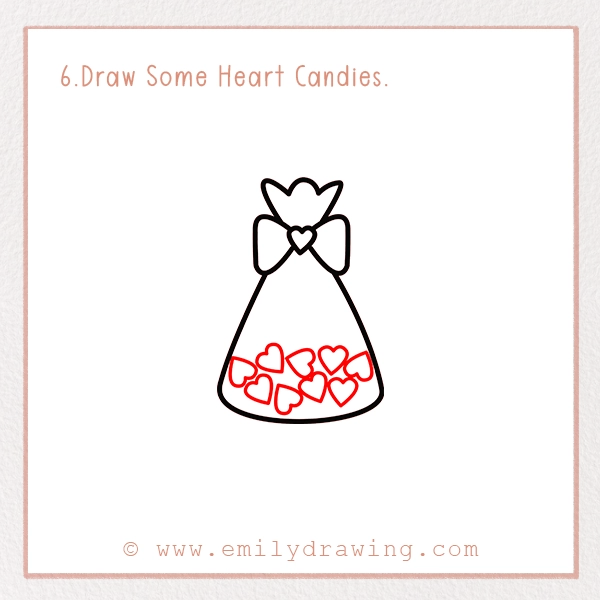
Inside the bag area, start drawing heart shapes to represent the candies. Vary the sizes—big, small, tilted—so it looks like a full, jumbled pile.
Fun Fact: The first conversation heart candy was made over 150 years ago—and some were as big as cookies!
Step 7 – Add More Heart Candies.
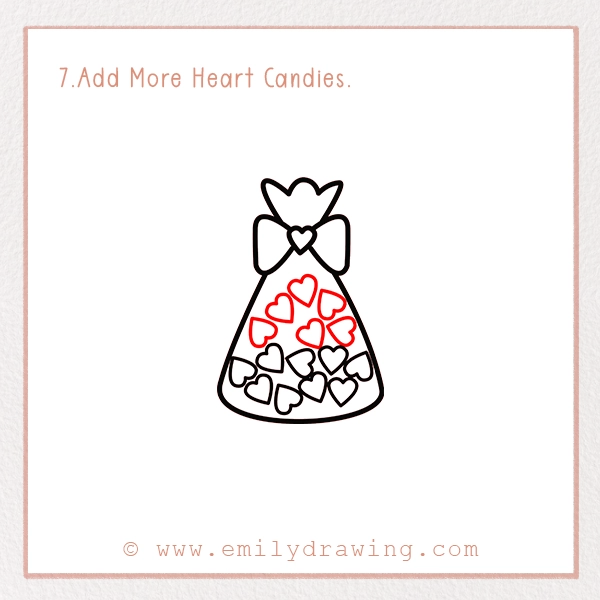
Fill in the bag with even more hearts! Layer some of them and place them at different angles to make the bag look completely stuffed with love.
Pro Tip: To draw a quick heart, make a soft “V” with two round bumps on top.
Step 8 – Add Details to the Bow.
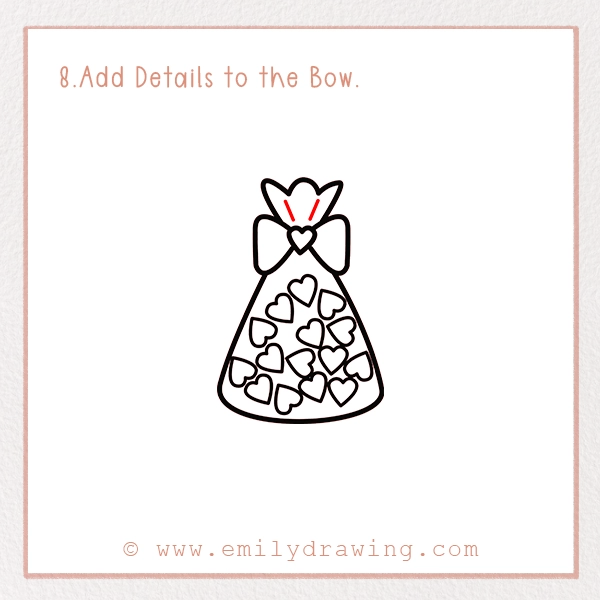
Add two short lines coming down from the top of each bow loop. These little details make the bow look tight and tied neatly.
Tiny touches like this make your drawing look polished and real!
Step 9 – Color Your Drawing!
Time to bring your drawing to life with color!
Try this fun color combo:
- Bag: Light blue or lavender
- Hearts: Pink, red, purple, and white
- Bow: Soft pink or golden yellow
- Center Heart: Bright red for a pop
Want to mix it up? Try rainbow hearts, glitter pens, stickers, or even metallic markers for sparkle.
Pin it now, Draw later!
Fun Facts About Valentine Candies
- Here are some sweet facts to impress your friends:
- The first conversation hearts were created in 1866—and some included messages like “Fax Me”!
- Over 8 billion candy hearts are made each year!
- Candy hearts used to be the size of a cookie. Now they fit right in your hand!
Tips & Tricks for Better Drawing
- Practice makes progress! Here are some extra tips to level up your art:
- Sketch first, outline later. Start light with pencil, then outline with marker or pen.
- Practice heart shapes on another paper first. It helps build confidence!
- Look at real candy for inspiration—then maybe have a sweet treat too!
- Add a background like a Valentine’s table, floating hearts, or another bag next to it.
- Be bold with color. Valentine’s Day is all about bright, fun, and festive energy!
🎉 You did it! You just drew an adorable, heart-filled Valentine’s candy bag—complete with a cute bow and tons of colorful treats.
Whether you hang it on your wall, give it as a Valentine, or just show it off to your family, you should be proud of your art! You can also pair it with a sweet message using our love letter drawing tutorial.
Let’s See Your Masterpiece!
We’d LOVE to see your drawing! Ask a grown-up to post it on social media and tag it with #EmilyDrawing. Your art could inspire others to join the fun too!
Want more Valentine’s Day fun? Try our other tutorials like drawing a cute Valentine’s love letter:
- How to Draw a Valentine Cupcake
- How to Draw a Love Letter
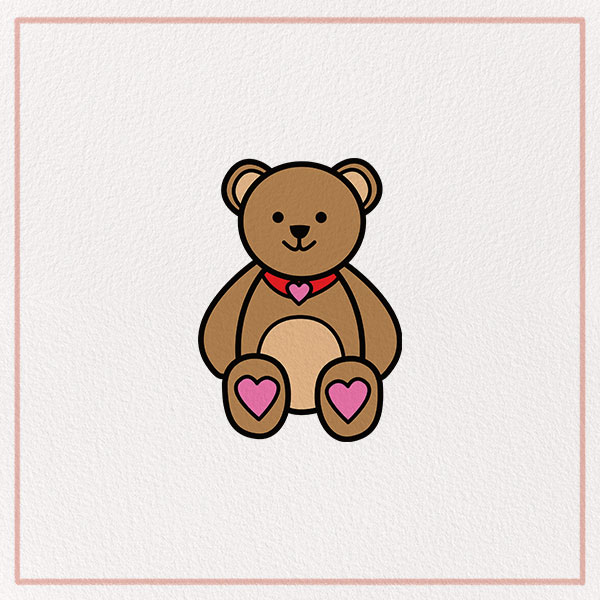
- How to Draw a Teddy Bear Holding a Heart
Keep drawing, keep smiling, and keep sharing your love through creativity—maybe even with a heart-hugging teddy bear.
Happy Valentine’s Day, sweet artist! 🍬💘🎨
Get the FREE Printable Drawing Guide