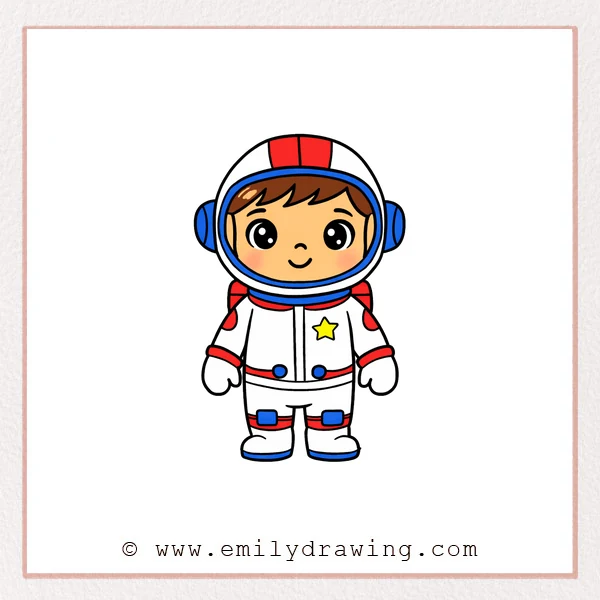
This easy drawing tutorial shows how to draw an astronaut with simple shapes and clean lines. Follow the step by step drawing guide slowly, and you will build a cute astronaut drawing for beginners. Take your time, and let each line stay soft until you are ready.
What You Will Need
- Pencil
- Eraser
- Black marker or fineliner
- Paper
- Coloring tools (colored pencils, crayons, or markers)
Here are my RECOMMENDED Art Supplies!
- Crayola Coloring Set (140 Pieces – Mega Value!)
- 24 Colored Crayon Set
- A4 Printer Paper
- Crayola Coloring Pencils
- HP Home Printer with Instant Ink!
Time needed:
15 minutes.
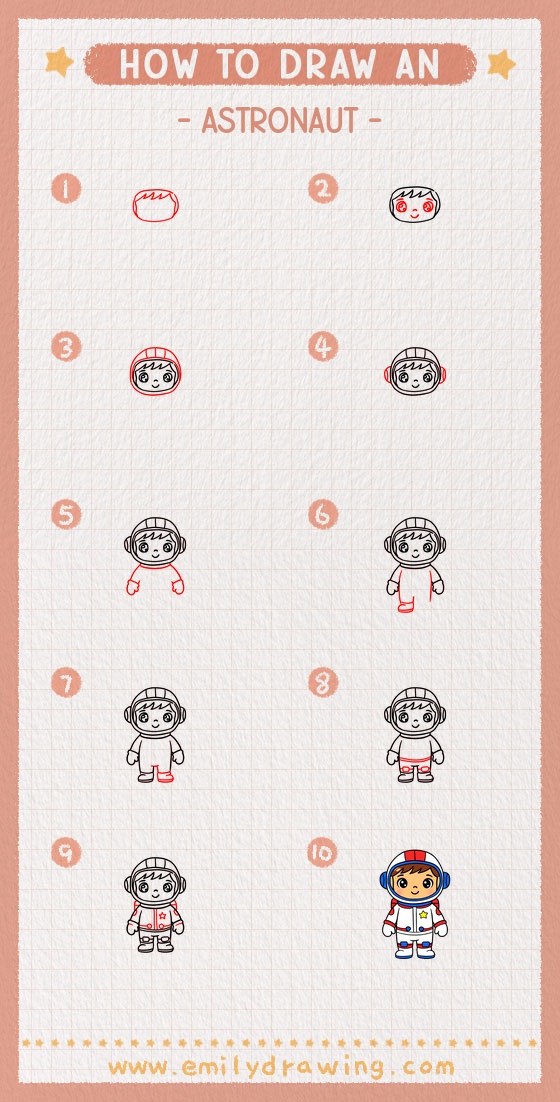
Step-by-Step Drawing Guide
Step 1: Face Shape and Bangs
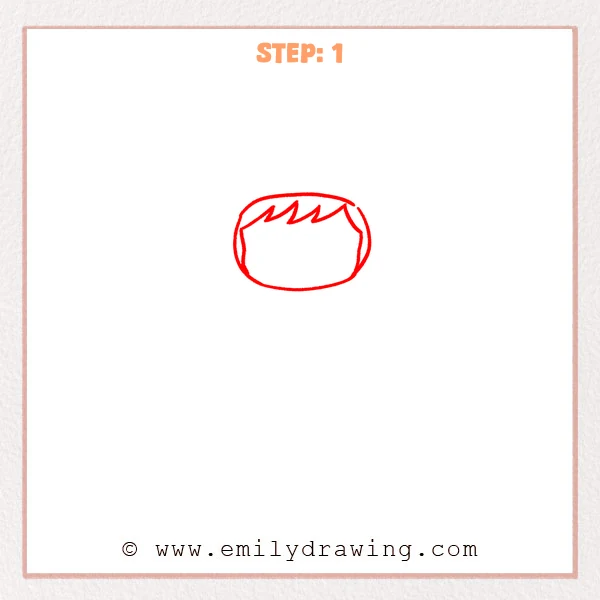
Start with a rounded face shape, making the chin slightly flat. Add a simple zigzag fringe across the top, and curve the sides inward for cheeks.
Pro Tip: Use only a few hair points so the face stays simple and cute.
Step 2: Big Eyes and a Gentle Smile
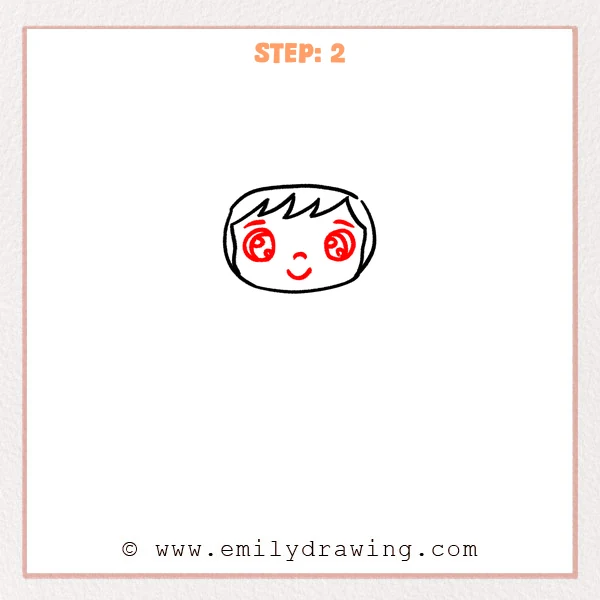
Place two large eyes in the center of the face, leaving small highlight spaces inside. Add a tiny nose and a curved smile to keep the astronaut friendly.
Pro Tip: Keep both eyes level so the expression feels calm and balanced.
Step 3: Helmet Visor and Outer Rim
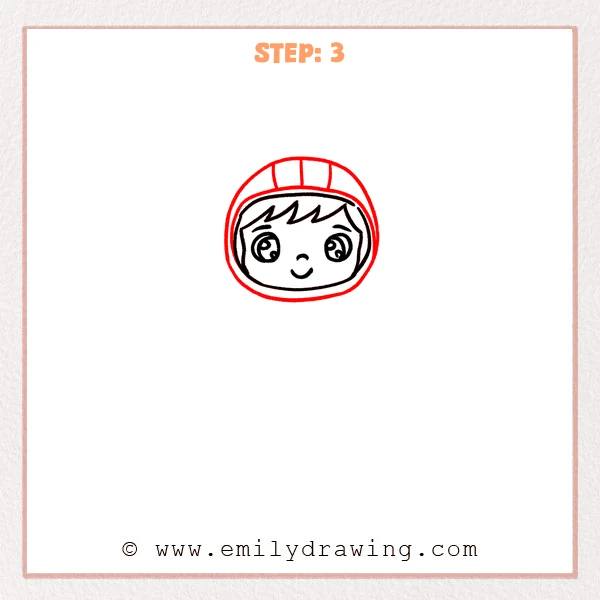
Wrap the face with a rounded-rectangle visor shape, like a clear window. Add a thicker ring around it to create the helmet rim and depth.
Pro Tip: Keep the rim spacing even all the way around the visor.
Step 4: Helmet Dome and Ear Pods
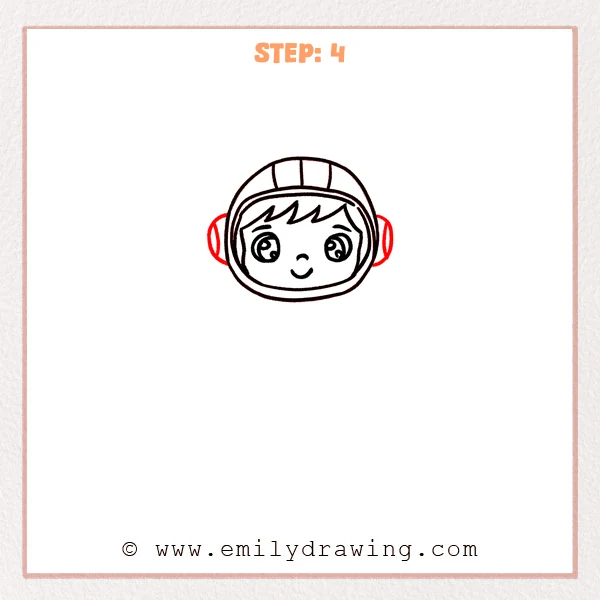
Draw a rounded dome above the visor, and add a few simple panel lines on top. Sketch one round ear pod on each side of the helmet.
Pro Tip: Match the ear pod sizes so the helmet looks symmetrical.
Step 5: Suit Torso and Gloves
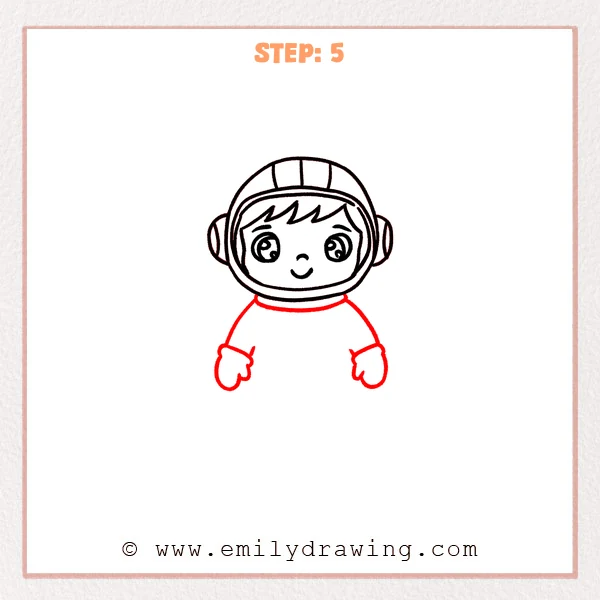
Start the suit under the helmet with a wide torso that gently flares downward. Add short arms on both sides and rounded mitt-style gloves.
Pro Tip: Make the gloves slightly oversized to show thick space gear.
Step 6: One Leg and One Boot
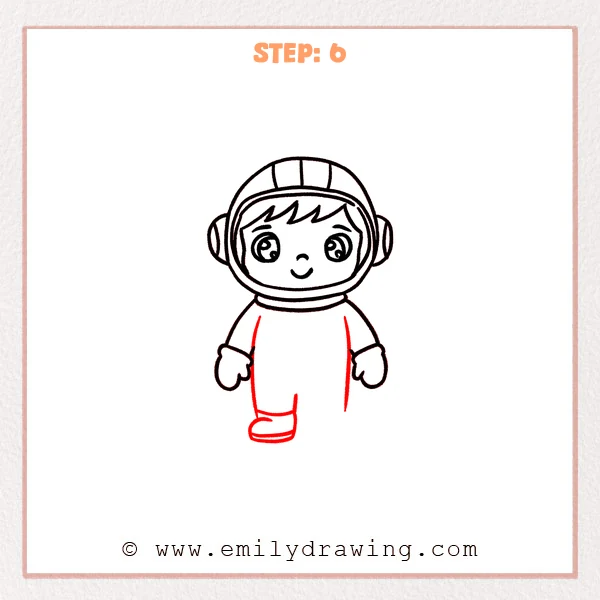
Draw one short leg under the suit and mark the cuff with a curved line. Add a chunky boot with a rounded toe and a flatter sole.
Pro Tip: Flatten the boot sole a bit so the astronaut looks like it can stand.
Step 7: Second Leg and Matching Boot
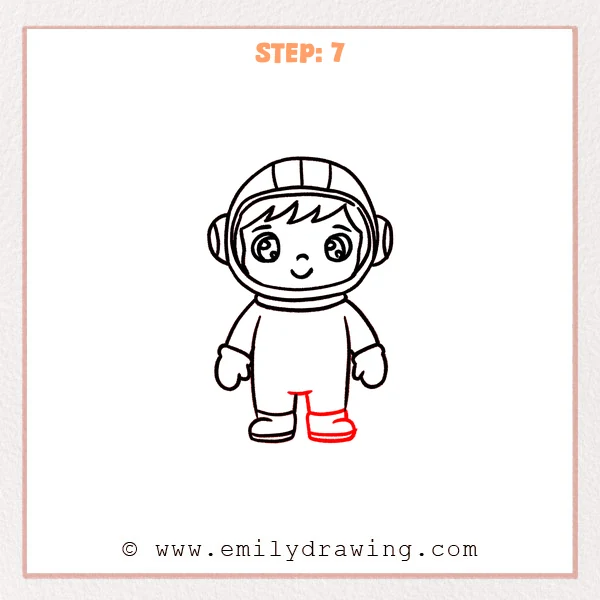
Add the second leg with a small gap between the legs for a stable stance. Draw the other boot and include a simple sole line on each shoe.
Pro Tip: Keep both boots the same height so the legs look even.
Step 8: Belt and Leg Pockets
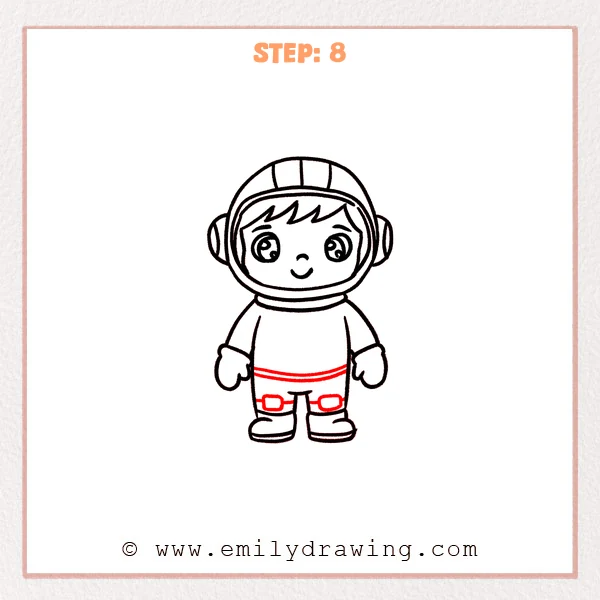
Draw a band around the waist to suggest a belt or suit seam. Add two small rectangular pockets on the legs and outline them neatly.
Pro Tip: Leave a little space around each pocket to keep the suit clean.
Step 9: Jacket Details, Badge, and Backpack
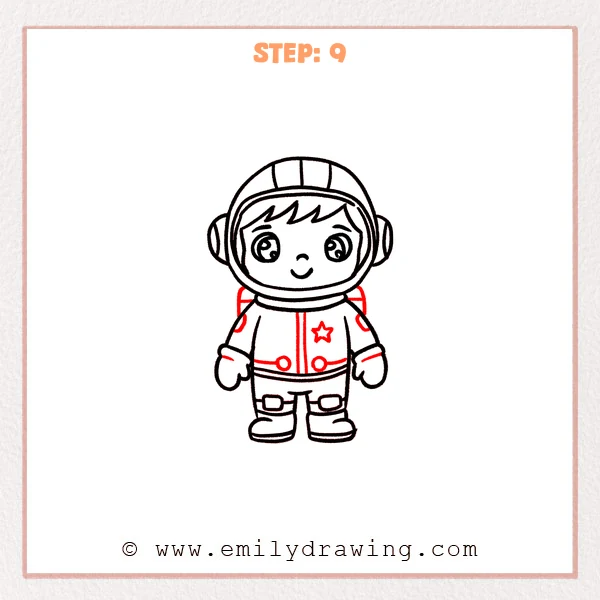
Add a center seam like a zipper, then place two small round buttons on the jacket area. Draw a small star badge on the chest and sketch a backpack shape behind the shoulders, then darken the main outline.
Pro Tip: Slow down when thickening the outline so your lines stay smooth.
Step 10: Color in your drawing!
Fun Facts
- Astronauts wear pressurized suits so they can work safely in space.
- Helmets include a visor to help protect eyes from bright sunlight.
- Space boots are bulky because they are made for insulation and safety.
Pin it now, Draw later!
You now have a complete astronaut drawing, built from a face, helmet, suit, and boots. For coloring, try a white or light gray suit with blue accents, and shade the underside of the helmet rim for depth. A common beginner mistake is making the helmet rim uneven, so check the spacing before you ink it. Keep practicing this how to draw an astronaut step by step lesson, and try drawing another astronaut pose next.
Get the FREE Printable Drawing Guide
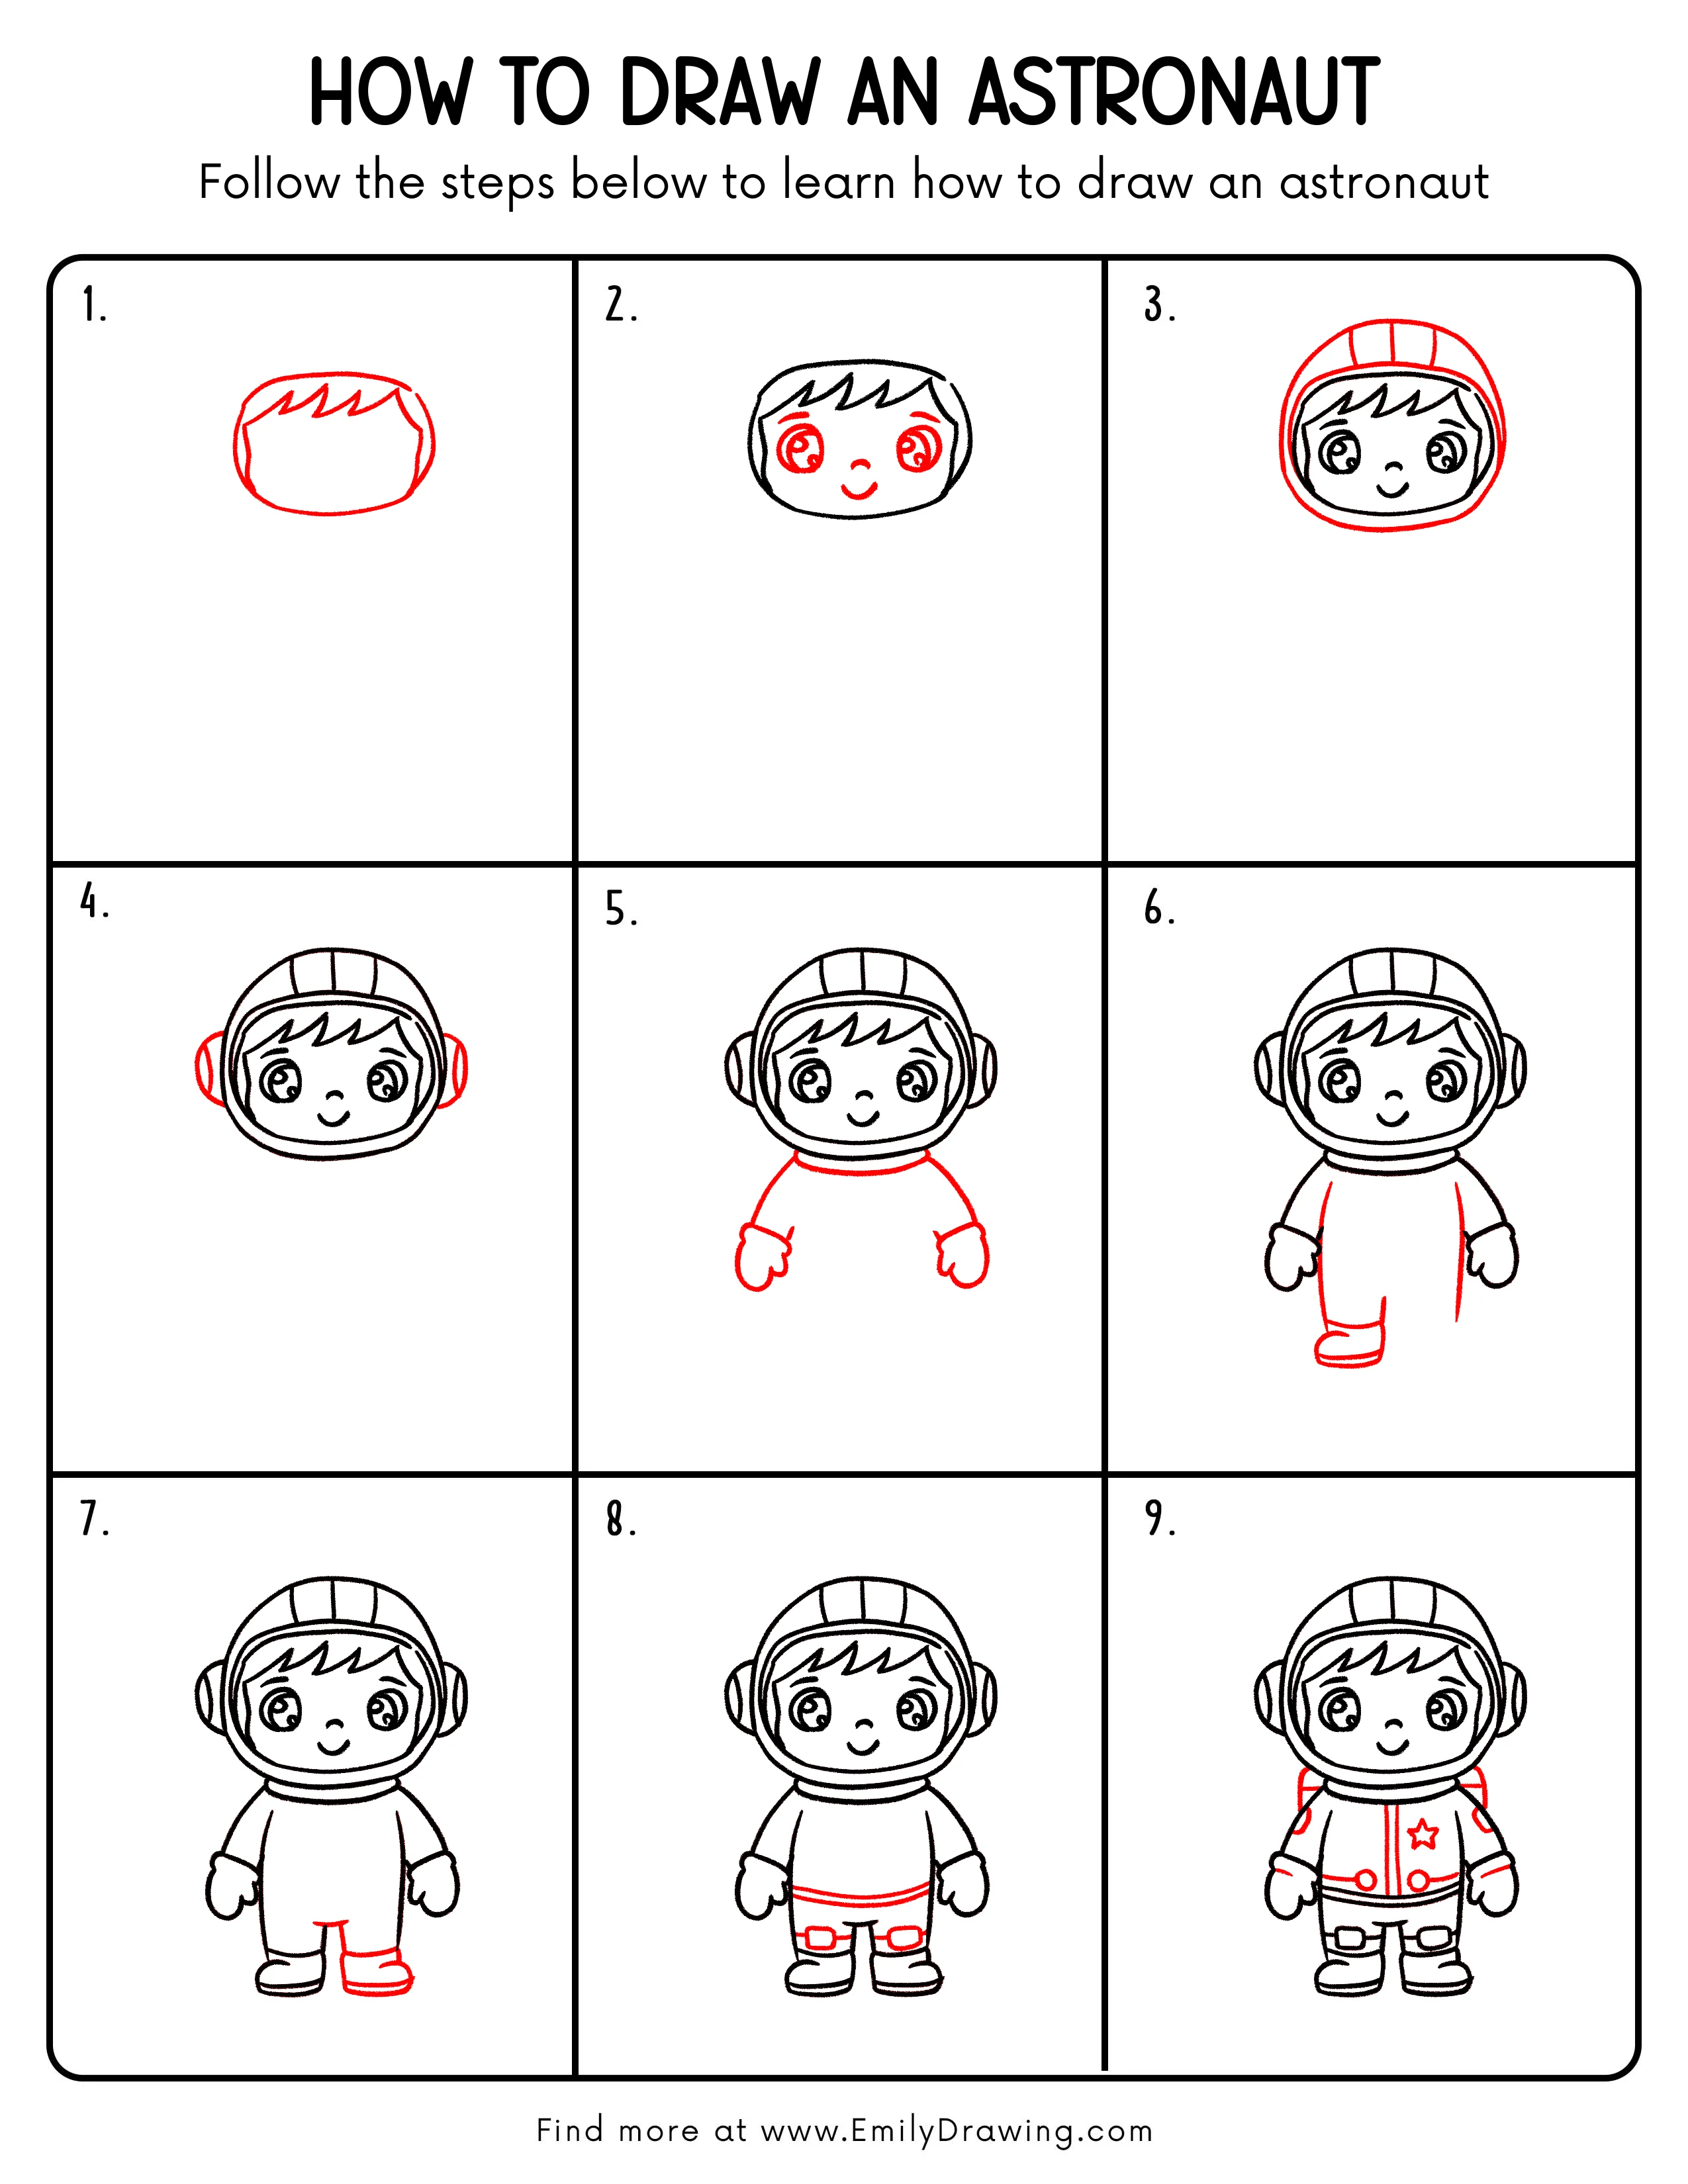
FREE Download Printable Astronaut Drawing Tutorial
Frequently Asked Questions
How do I center the astronaut on the page?
Start the face near the upper middle, then leave room below for the boots.
How can I make the helmet look more 3D?
Thicken the outer rim evenly and add a small shadow under the visor edge.
What if my boots look different sizes?
Compare the soles and toe curves, then adjust the smaller boot with gentle lines.