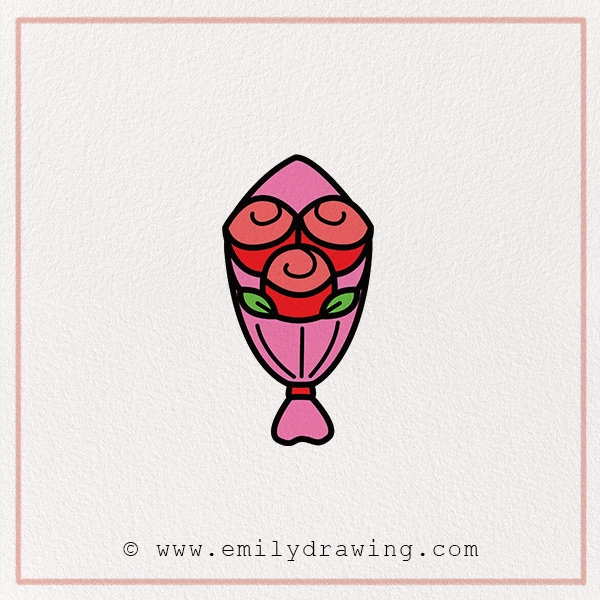
Ready to spread some love with your pencil? In this fun and easy art tutorial, you’ll learn how to draw a beautiful Valentine rose bouquet in just 8 simple steps!
Whether you’re making a card, creating a holiday poster, or just having a fun family art day, This easy Valentine drawing for kids and adults alike is perfect for artists of all ages.
Did You Know?
Roses have been symbols of love for thousands of years, and Valentine’s Day is celebrated in over 150 countries around the world!
Let’s get started and make a beautiful Valentine bouquet illustration full of charm and love!
Let’s break it down into easy steps. And if you’re new to rose drawings, our Valentine Rose tutorial is a great place to start before diving into the full bouquet.
Materials:
- a piece of paper
- a pencil for the guiding lines and sketching
- an eraser
- a black sharpie or a pen for the outlines
- markers or colored pencils for coloring
- our printable drawing guide (Join my Email List below to get this Tutorial)
Here are my RECOMMENDED Art Supplies!
- Crayola Coloring Set (140 Pieces – Mega Value!)
- 24 Colored Crayon Set
- A4 Printer Paper
- Crayola Coloring Pencils
- HP Home Printer with Instant Ink!
Time needed:
15 minutes.
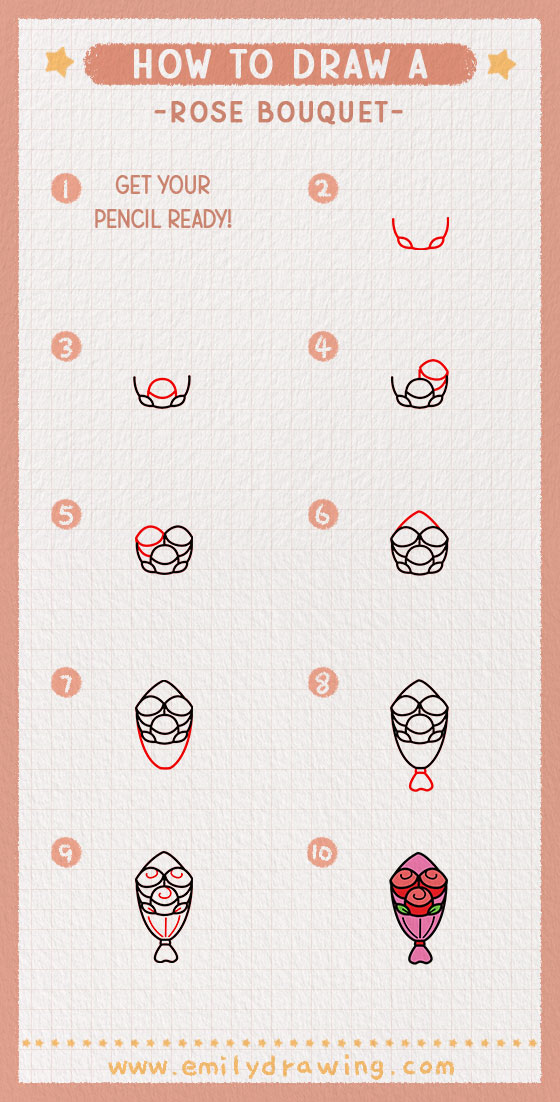
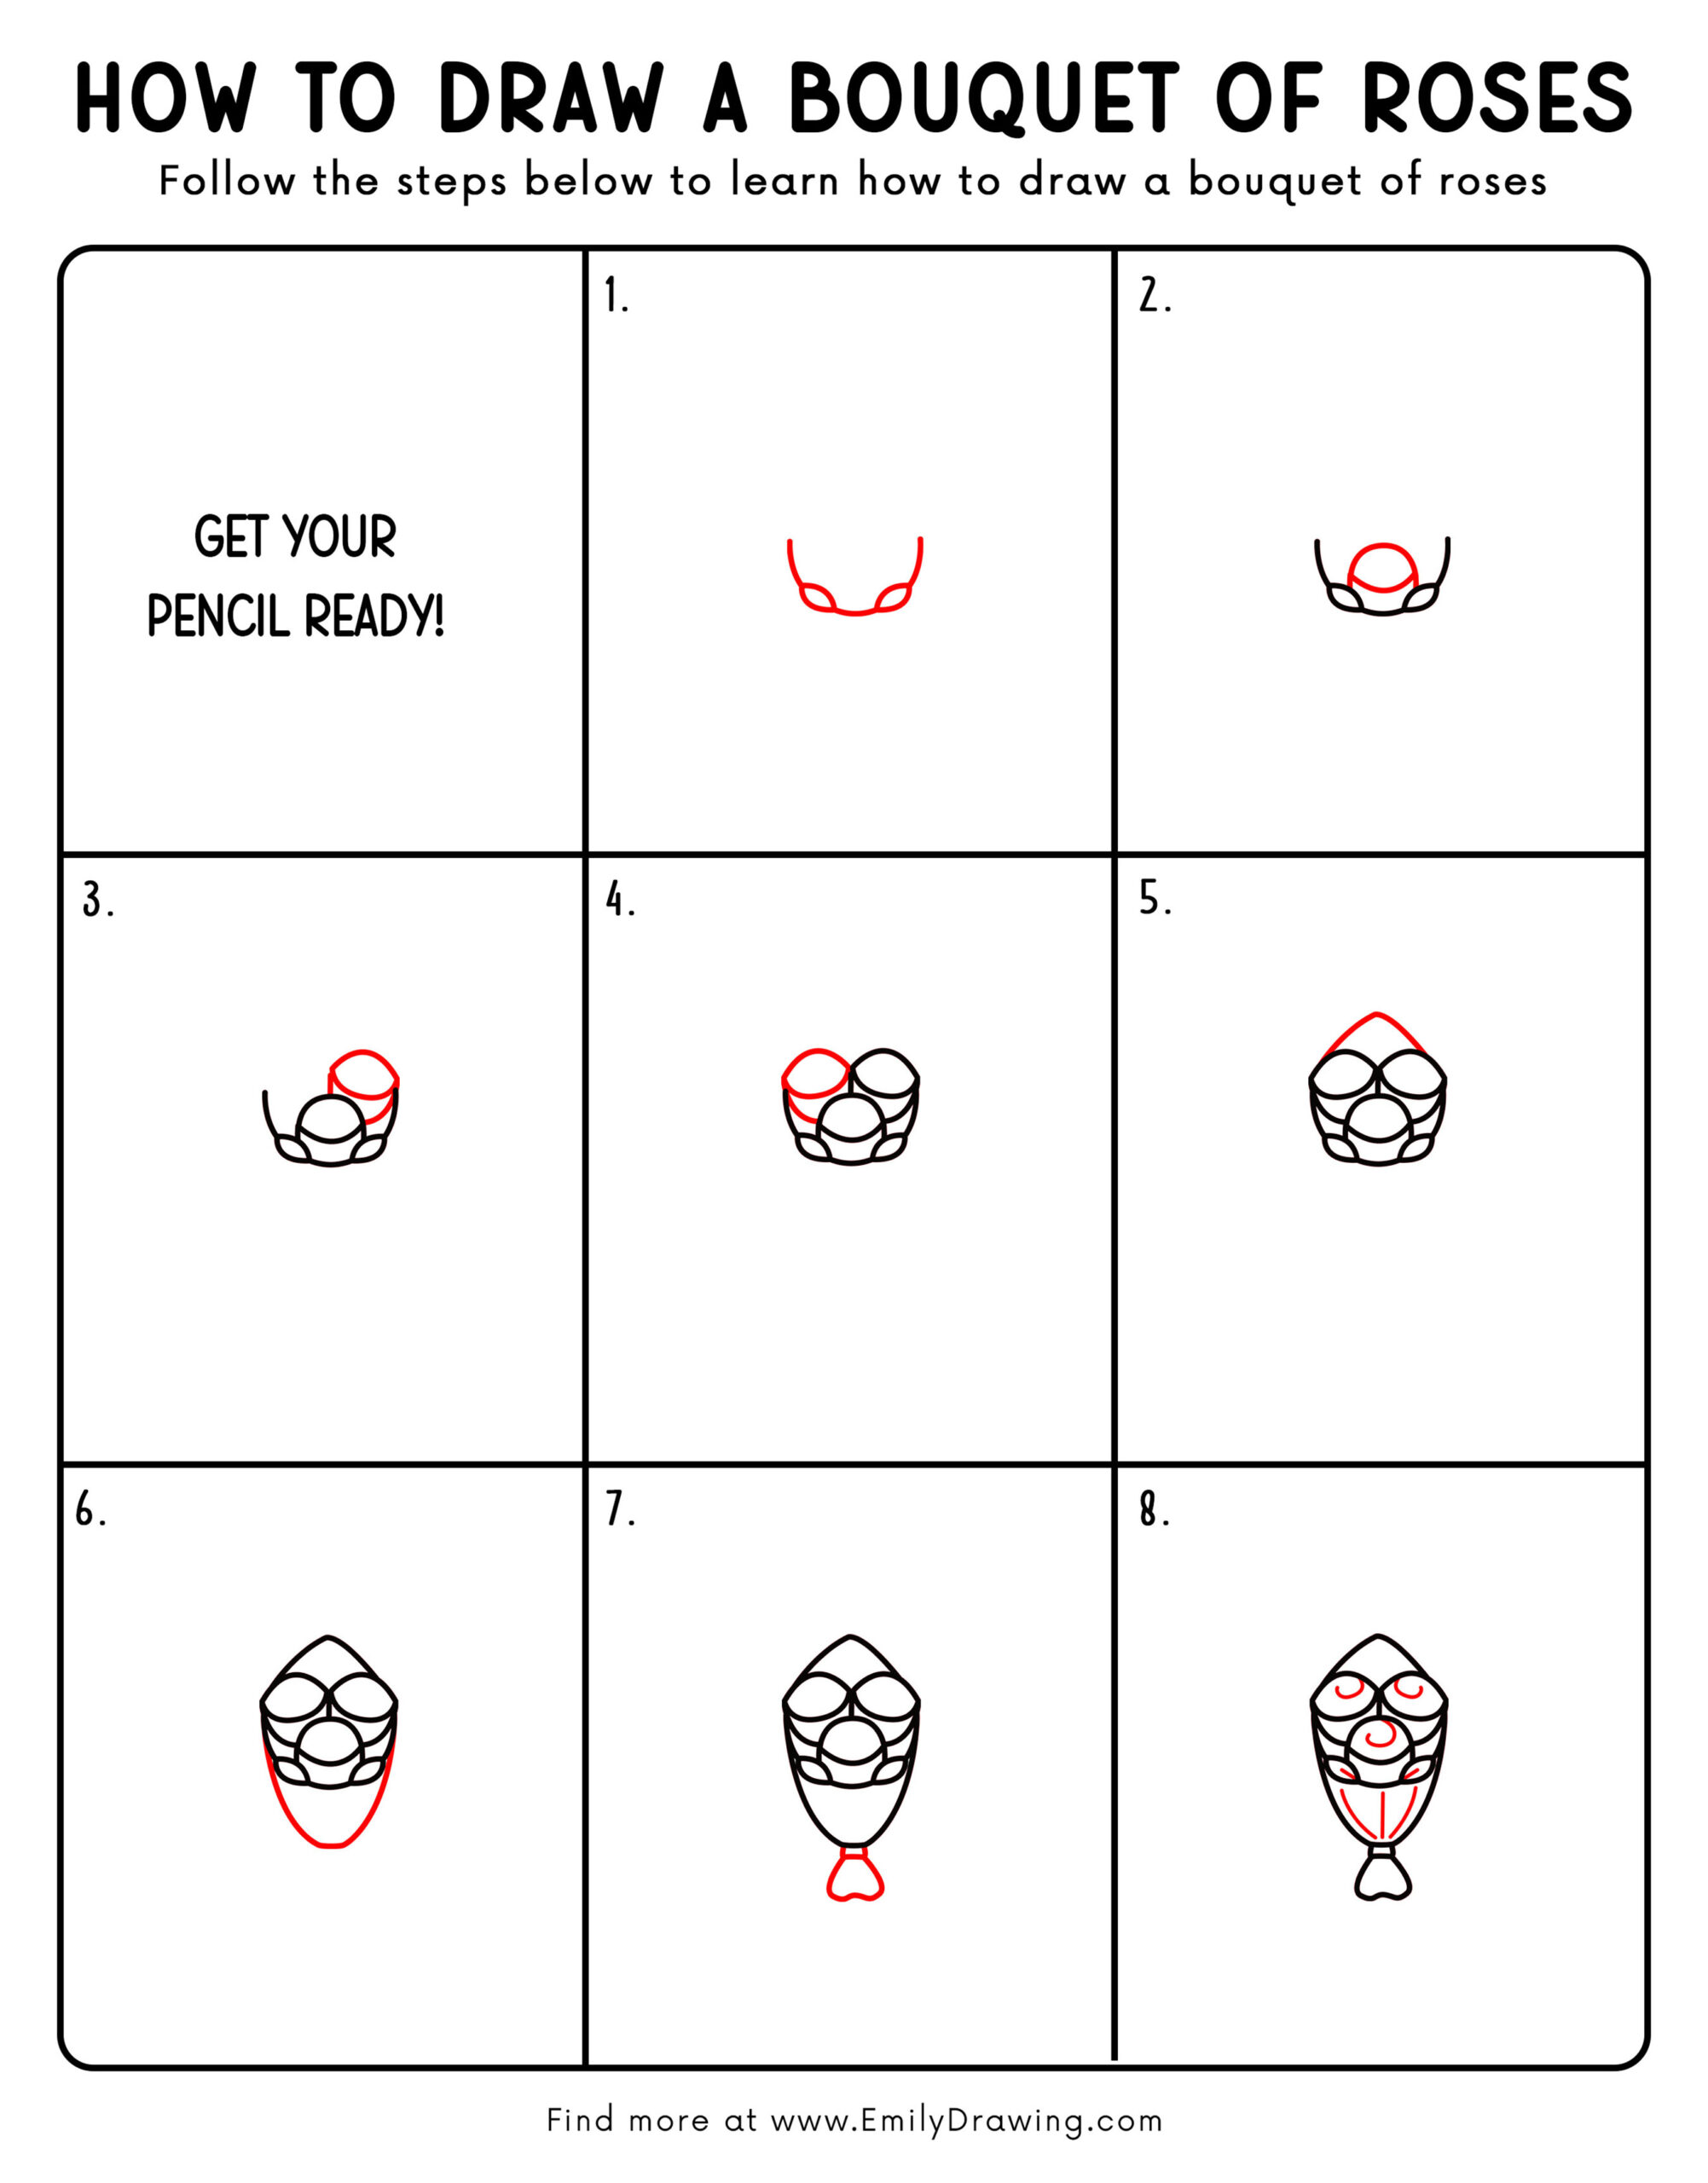
How to Draw a Valentine Rose Bouquet — Let’s get started!
Step 1 – Draw the Bottom Petals of the Top Roses.
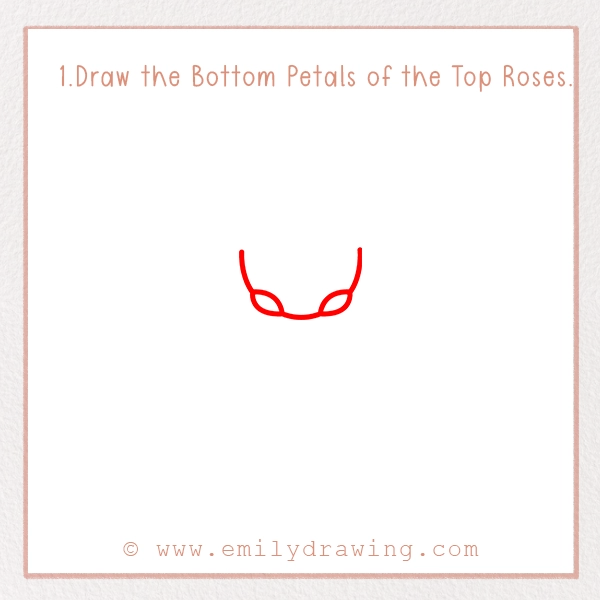
Start in the middle of your paper.
Draw a small curved “cup” shape — this is the bottom of your first rose.
Then, add two or three gentle bumps on each side of that curve to create a layered petal look.
Think of it like a little flower starting to open!
Step 2 – Add the Outer Petals.
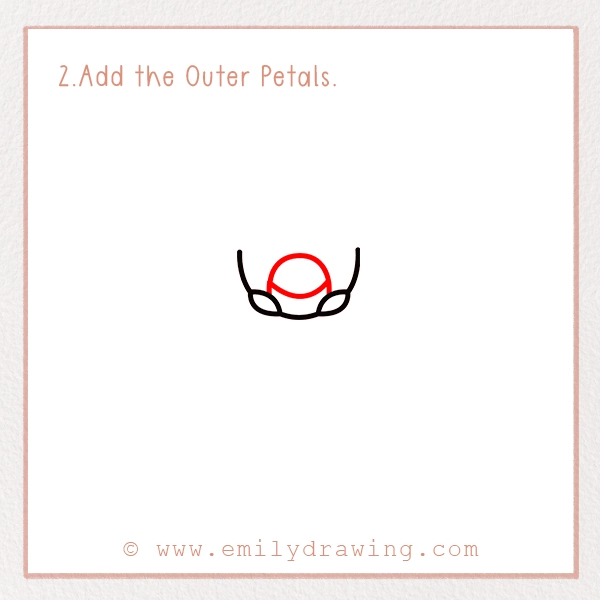
Now draw two big, curved lines going up from the sides of your first rose base. These should hug around the smaller petals like big rose arms.
These give your rose that full, blossomed shape!
No need for perfect lines—roses love to be wiggly and natural!
Step 3 – Draw the Second Rose (Right Side).
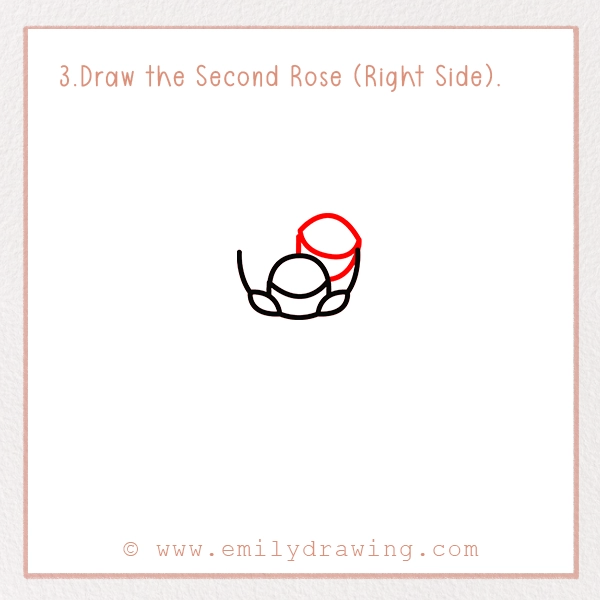
On the right side of your first rose, draw a small oval.
Add curved lines spiraling outward from the center to create layered petals.
Think of a cinnamon roll or a lollipop swirl—that’s how rose petals curl!
Step 4 – Draw the Third Rose (Left Side).
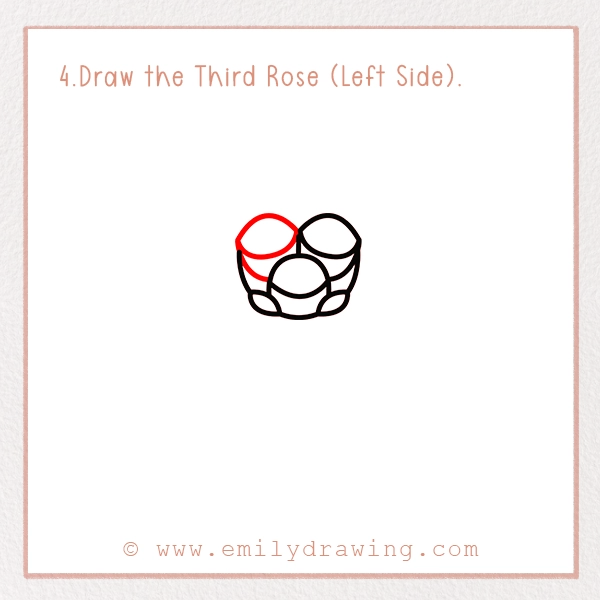
Repeat Step 3 on the left side to make another rose.
It’s okay if it overlaps a bit. Roses in a bouquet love to snuggle up close!
Now your bouquet has three beautiful roses—so pretty already!
Step 5 – Add the Wrapping Top.
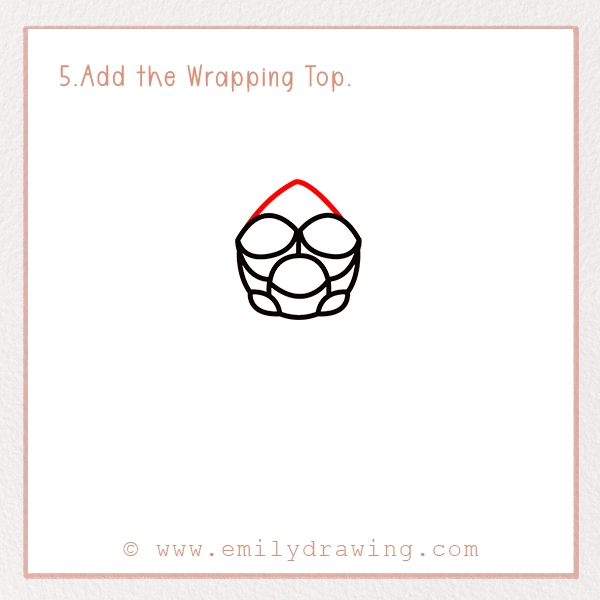
Draw a pointed oval shape around your bouquet—like a cone with the top cut off.
This is the top of your romantic flower bouquet drawing—it should surround the flowers like a cozy sleeve!
You can add heart designs or patterns on it later!
Step 6 – Draw the Bottom of the Wrapping.

Underneath the top cone, draw a wide curved shape to finish the bouquet wrap.
It should look like a big bowl holding the flower stems inside.
Now your bouquet is starting to look 3D and full!
Step 7 – Add the Tie at the Bottom.
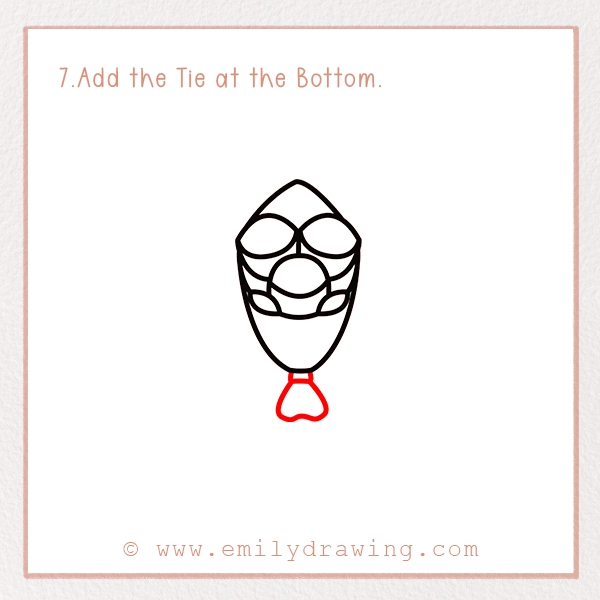
Draw a small rectangle at the base of the bouquet—this is the bow’s knot.
Then add two loops on each side like butterfly wings, and maybe some ribbon ends hanging down for extra flair.
Your bouquet is officially gift-ready!
Step 8 – Add the Final Details.
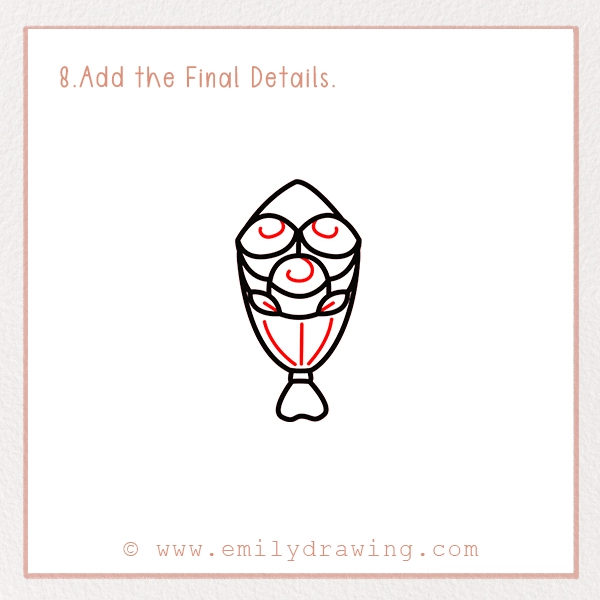
Inside each rose, add a swirl or spiral to show how the petals curl inward.
Around the roses, draw a few pointy leaves peeking out. Just use oval shapes with little lines down the center.
On the wrapping, add fold lines to make it look creased and real!
Details make your drawing come to life!
Step 9 – Color Your Drawing!
Now it’s time to turn your drawing into a colorful bouquet of joy! Use any colors you like—or try these ideas:
Color Ideas:
- Roses: Red, pink, white, or a mix
- Leaves: Greens, with yellow highlights
- Wrapping: Soft pink, cream, or even rainbow
- Bow: Red, purple, or sparkly gold!
Use crayons, colored pencils, or markers—and don’t be afraid to mix colors for shading!
Pin it now, Draw later!
Fun Rose Facts While You Color
- Roses are ancient! They’ve existed for over 35 million years.
- 250 million roses are grown every year just for Valentine’s Day!
- Bouquets come in heart shapes, jars, boxes—even balloons! And for an extra Valentine vibe, why not add a hand-drawn love letter beside your bouquet?
Tips and Tricks for Awesome Drawing
- Start Light: Sketch softly with a pencil first—you can darken later.
- Rotate Your Paper: If something feels tricky to draw, turn your paper. Artists do this all the time!
- Be Color-Creative: Add purple, orange, or even blue roses if you want a fun twist!
- Add a Tag: Draw a little note hanging from the bouquet with “I ❤️ U” or “Happy Valentine’s!”
Woohoo! You did it!
You just drew a beautiful Valentine rose bouquet—from blooming petals to the swirly center and even a bow to wrap it all up. If you want to practice drawing a single rose first, check out our step-by-step Valentine Rose tutorial too!
Your bouquet is now ready to gift, display, or just enjoy!
Take a photo and share it using #EmilyDrawing on social media. You might inspire other young artists to join in the fun!
Want more ideas? Try drawing a love letter with wings to go with your bouquet—it’s a perfect Valentine pair!
- A Valentine’s cupcake
- A love letter with wings
- A teddy bear holding a heart
Keep Drawing, Keep Blooming
Thank you for drawing with us today! Whether you’re a beginner or a budding artist, you’ve created something special. Just remember: every line you draw helps your creativity grow!
Happy Valentine’s Day, and Happy Drawing!
Get the FREE Printable Drawing Guide
FREE Download Printable Valentine Rose Bouquet Drawings Tutorials