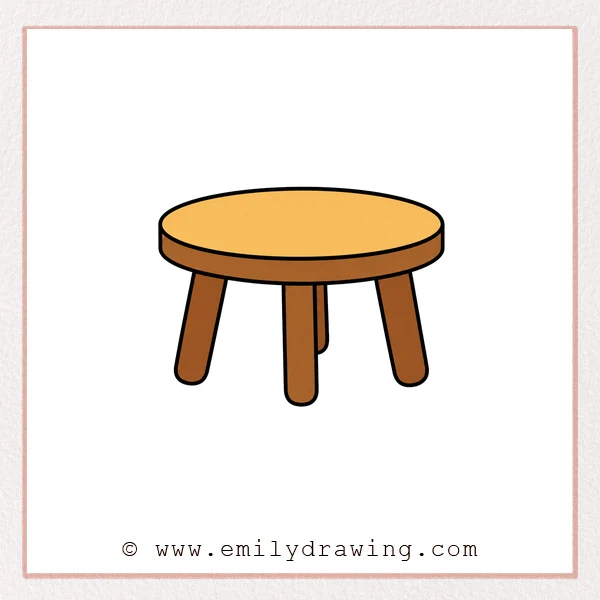
Learning how to draw table can be simple and enjoyable for beginners. This step by step drawing guide uses basic ovals, curves, and rounded lines. Take your time with each part, and keep your pencil marks light at first.
What You Will Need
- Pencil
- Eraser
- Drawing paper
- Black marker or pen
- Coloring tools, if you want to add color
Here are my RECOMMENDED Art Supplies!
- Crayola Coloring Set (140 Pieces – Mega Value!)
- 24 Colored Crayon Set
- A4 Printer Paper
- Crayola Coloring Pencils
- HP Home Printer with Instant Ink!
Time needed:
30 minutes.
Step-by-Step Drawing Guide
Step 1: Draw the Basic Tabletop Shape
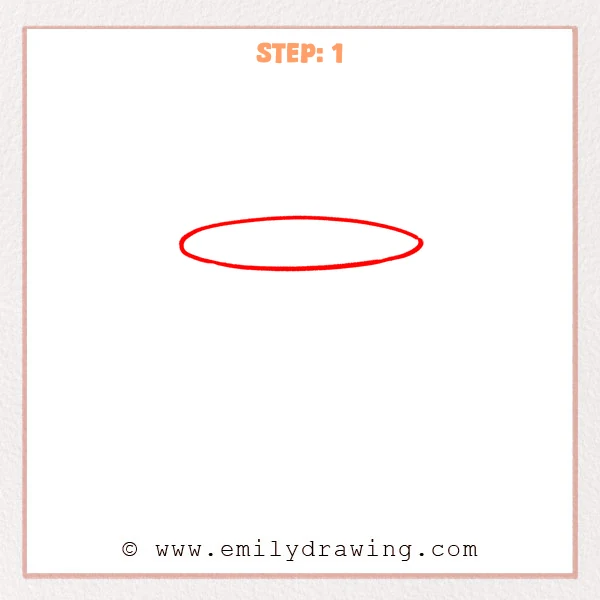
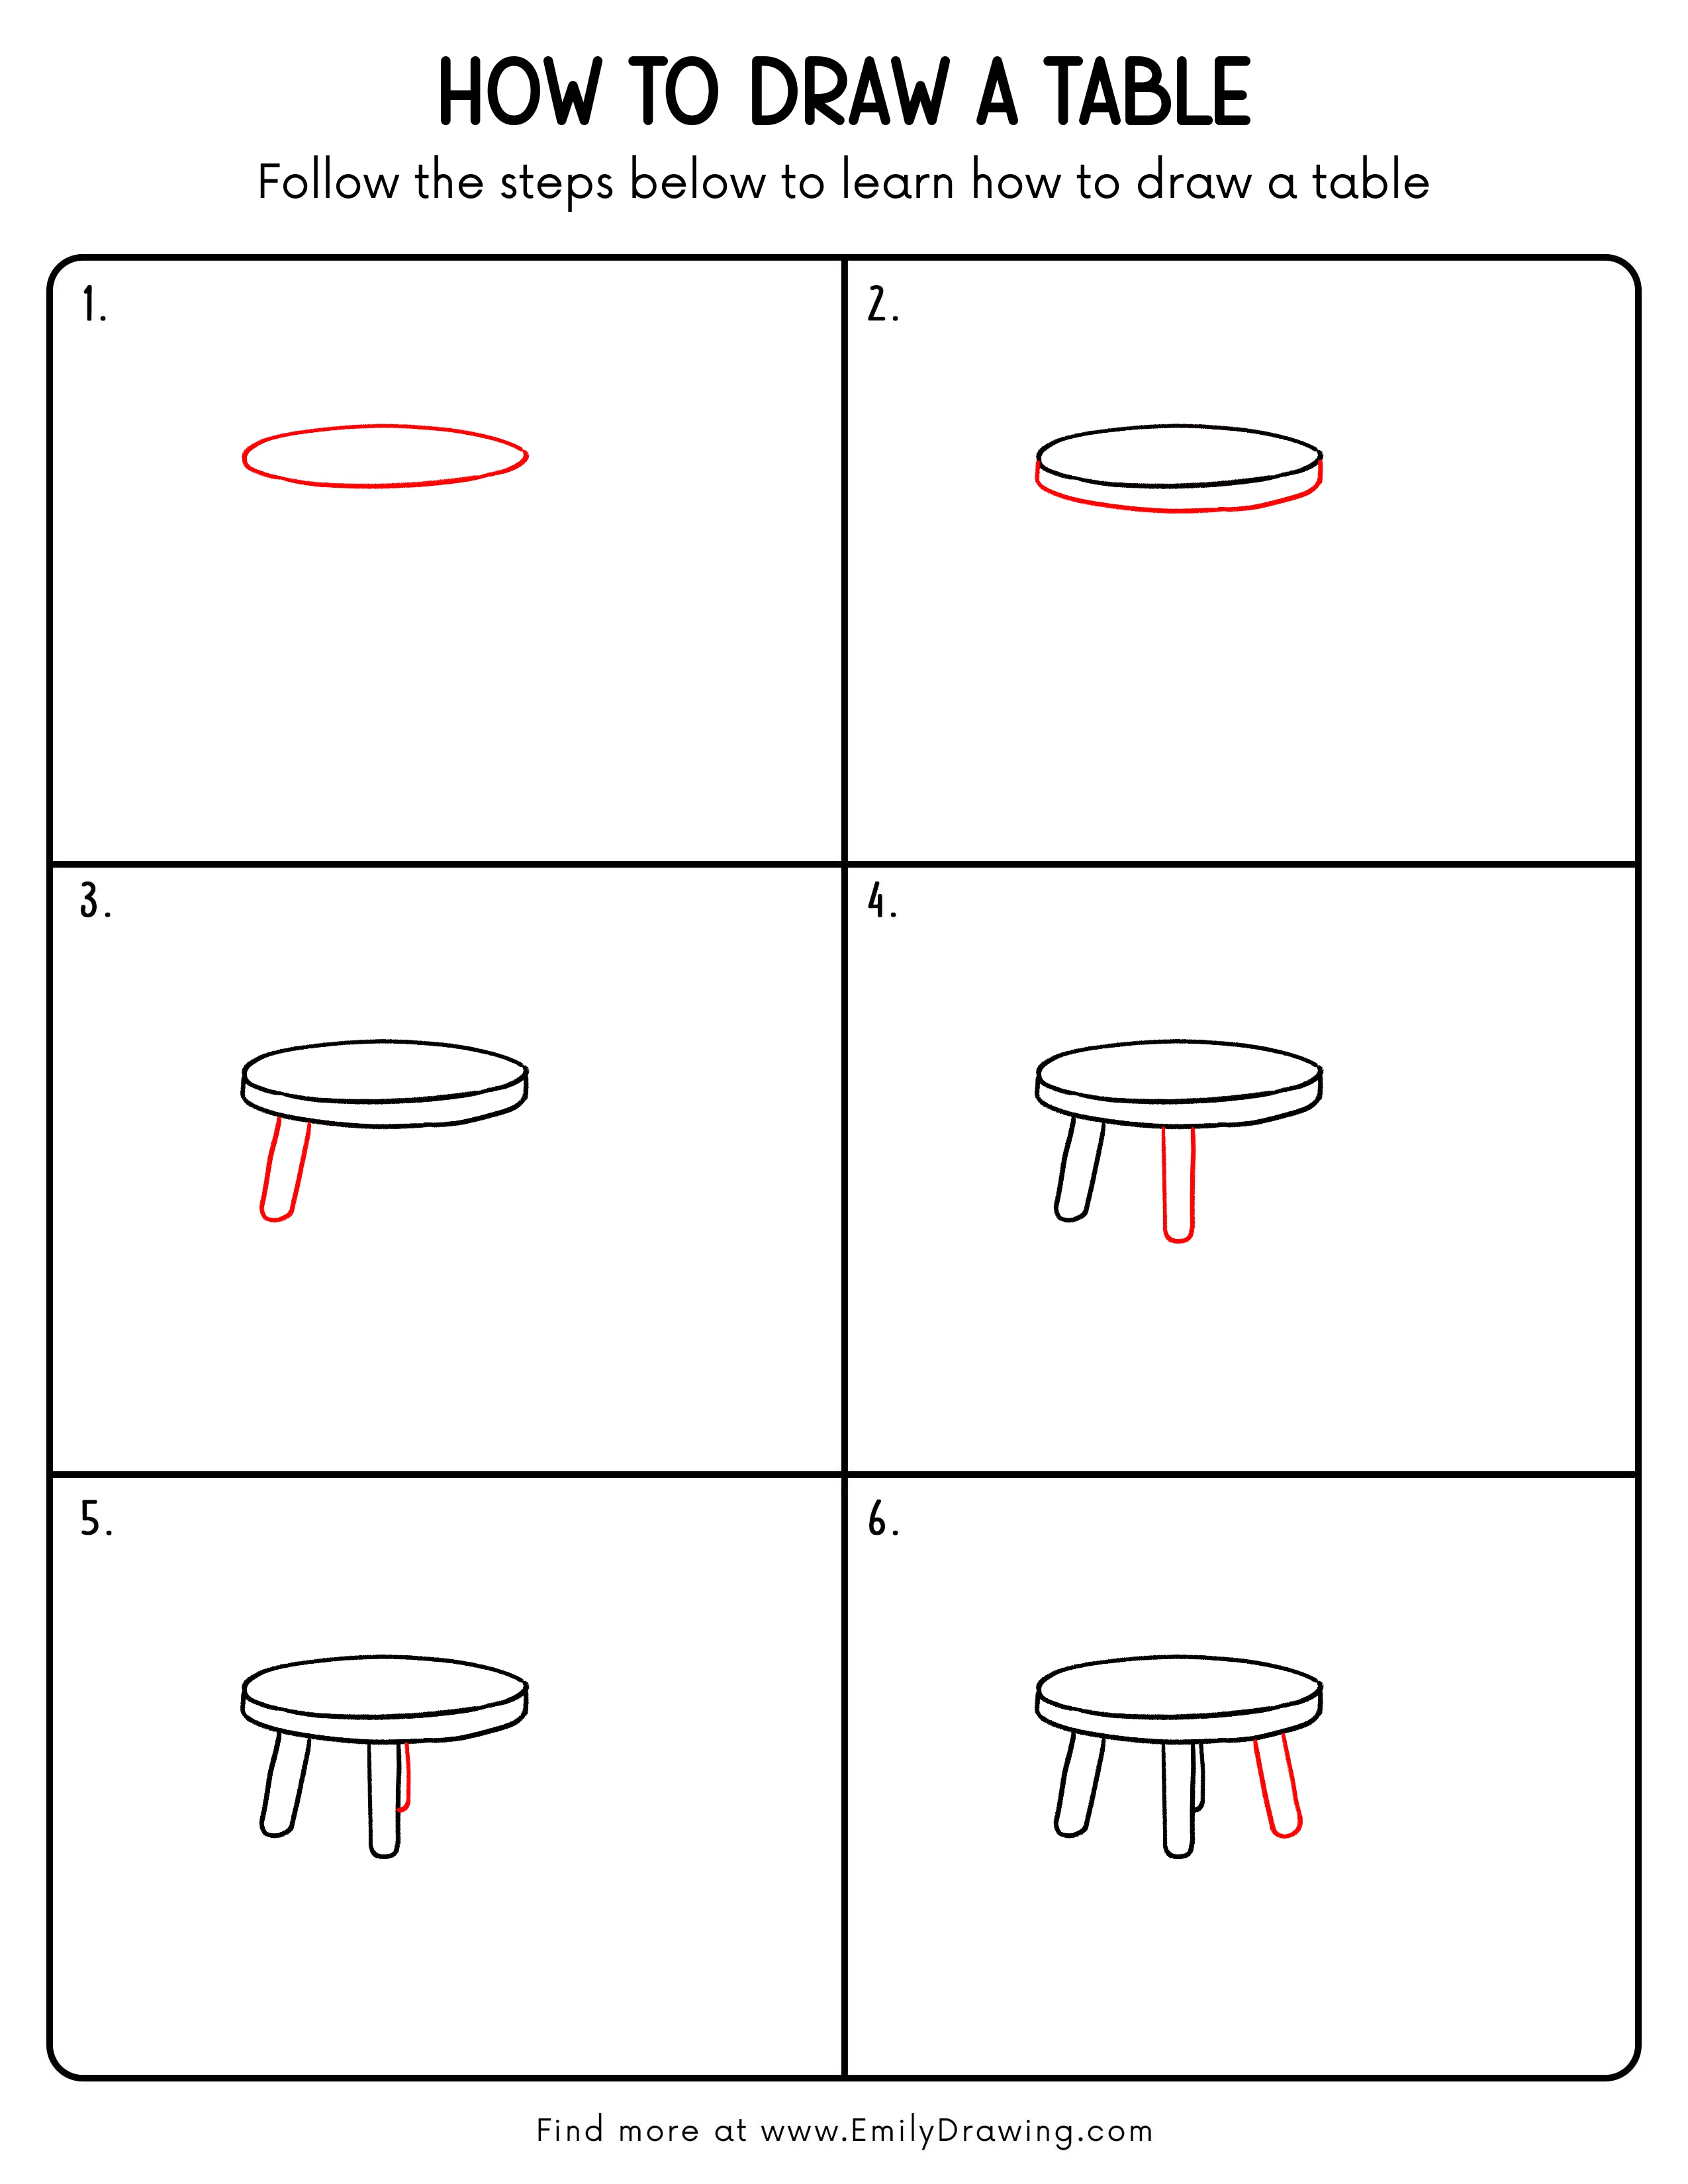
Start with a long horizontal oval for the table’s tabletop. Keep both ends rounded, and make the shape feel steady and balanced.
Pro Tip: Draw the oval lightly first, then darken it once the width looks right.
Step 2: Add Thickness to the Tabletop
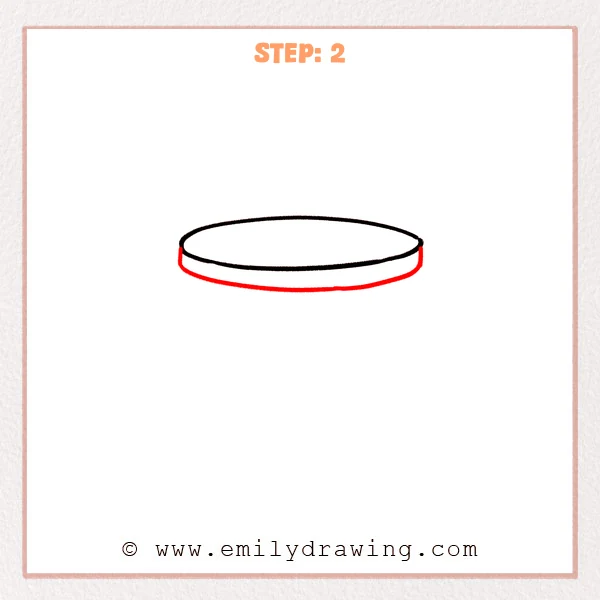
Draw short vertical lines down from both sides of the oval. Connect them with a downward curved line to form the lower edge of the round tabletop.
Pro Tip: Place the lower curve slightly below the oval so the tabletop looks thick.
Step 3: Draw the First Table Leg
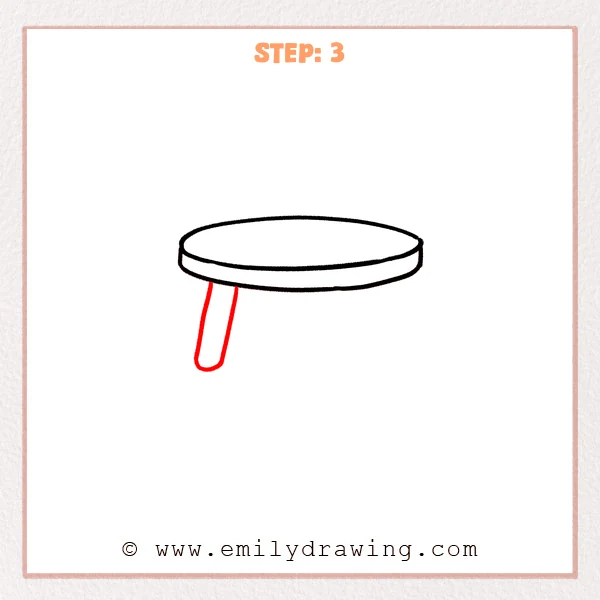
Under the left side of the tabletop, draw two long slightly slanted lines for the first table leg. Connect the bottom with a rounded curve so the leg feels smooth and sturdy.
Pro Tip: Let the leg slant outward a little so the table looks more stable.
Step 4: Add the Middle Table Leg
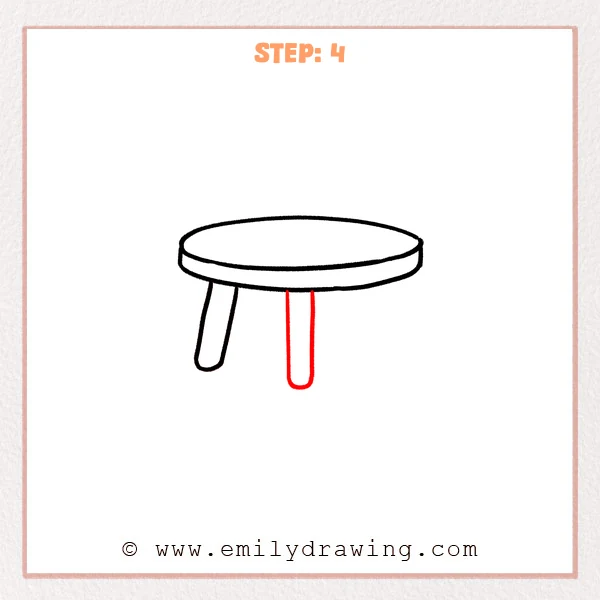
Add a second table leg under the middle of the tabletop. Draw two long vertical lines downward, then connect the bottom with a rounded curve.
Pro Tip: Keep the middle leg more vertical than the left leg to show front support.
Step 5: Draw the Back Right Table Leg
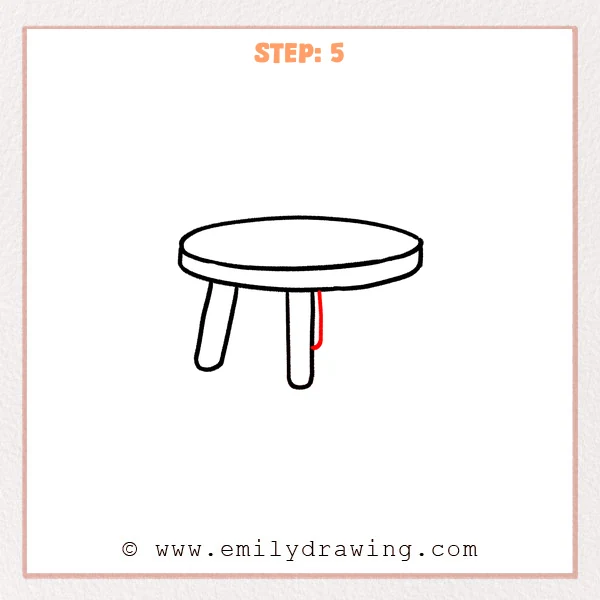
Add a shorter back leg to the right of the middle leg. Let it drop straight down from the tabletop, then close the bottom with a small curve.
Pro Tip: Make the back leg shorter to show that it is partly hidden by the front leg.
Step 6: Add the Right Table Leg
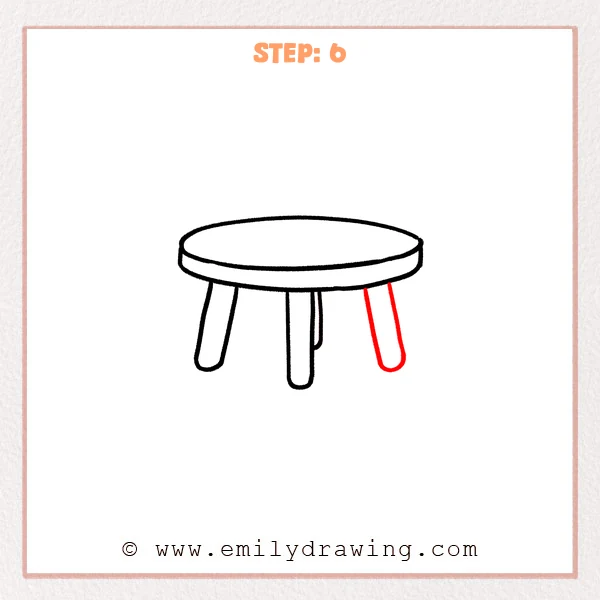
Draw a new leg under the right side of the tabletop, slanting it slightly outward. Connect the bottom with a rounded curve so it matches the other table legs.
Pro Tip: Match the right leg’s slant with the left leg so the table looks balanced.
Step 7: Color in your drawing!
Fun Facts
- Round tables are often used to make seating feel more open and friendly.
- A tabletop looks more realistic when it has visible thickness.
- Slightly angled legs can make a table drawing feel stronger and more stable.
Pin it now, Draw later!
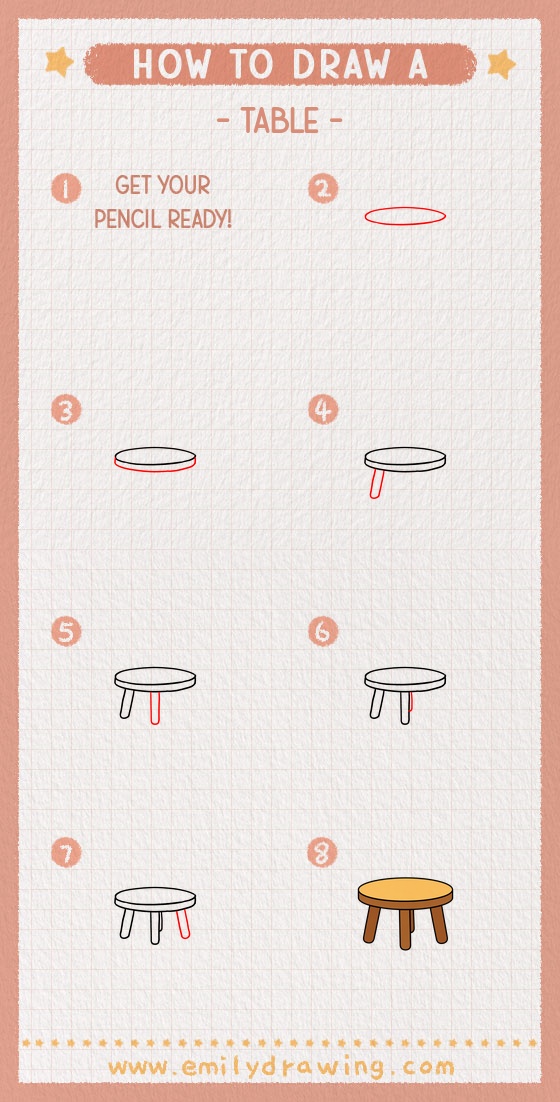
Now you have completed an easy drawing tutorial for a simple round table. You built the drawing step by step, starting with an oval and adding thickness, legs, and balance. Trace the final lines neatly, erase extra sketch marks, and color the table in your favorite wood tone.
Keep practicing this drawing for beginners, and try changing the tabletop size or leg style next time.
Get the FREE Printable Drawing Guide
FREE Download Printable Table Drawing Tutorial
Frequently Asked Questions
Is this table drawing good for beginners?
Yes, this step by step drawing uses simple shapes and clear lines. It is a friendly drawing for beginners.
How can I make the table look more realistic?
Add gentle shading under the tabletop and around the legs. You can also make the lower curve darker to show thickness.
Can I color the table after drawing it?
Yes, you can color it with brown, tan, gray, or any color you like. Keep the shading soft so the rounded shapes stay clear.